Cleaning and Care to Stop Console Trim Loose From Returning
To stop console trim from returning loose, start by diagnosing the mounting area for gaps, damaged clips, or loose screws. Clean the trim and mounting surface with a microfiber cloth and mild soap, ensuring they’re dry before reattachment. Choose a flexible adhesive that suits the trim material, apply a thin bead, and seat the piece with steady pressure. Recheck fasteners and seal edges; maintain weekly inspections to prevent recurrence. If issues persist, more insights await you.
Diagnosing Why Console Trim Loosens

Common causes for console trim loosening include inadequate fastening, worn clips, or adhesive failure. You’ll want a precise diagnostic approach so you can restore confidence in your console’s integrity. Start by inspecting the attachment points: verify screws or clips are present, properly seated, and not stripped. Check the mounting surface for paint chips, deformation, or residue that could prevent a solid bond. Assess the trim materials for compatibility with the mounting substrate; mismatched materials or aging can compromise grip and flexibility. Examine surrounding heat exposure and sun fading, which can embrittle plastics and adhesives over time. If you see gaps, note their width and location to guide selective reseating or replacement. Consider design intent within console design: whether the trim was engineered for modular removal or permanent fit. Document findings, then determine whether a simple reclip, adhesive reapplication, or trim material replacement is needed to restore secure fit and aesthetic continuity.
Tools and Materials You’ll Need
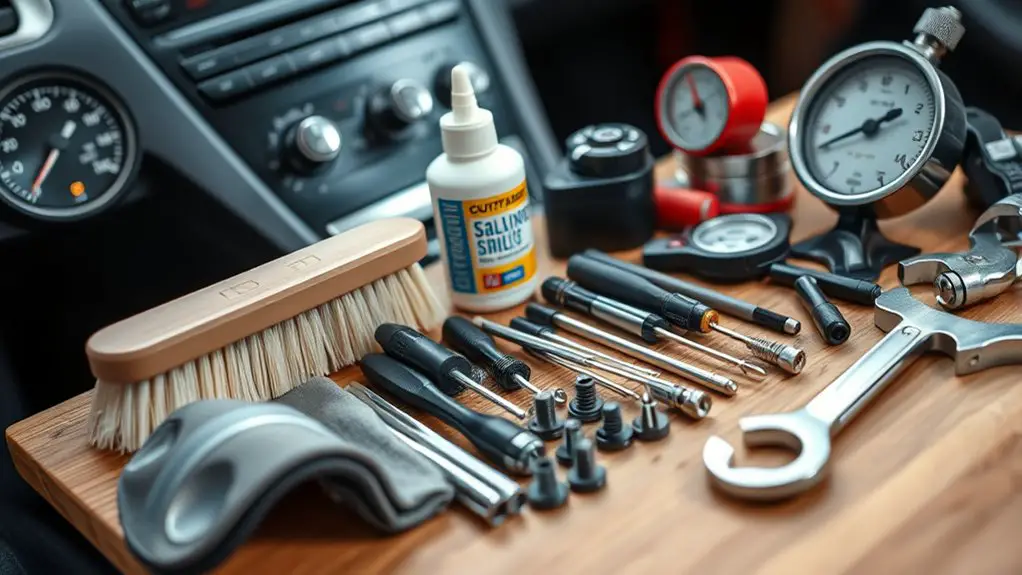
You’ll need a clean toolkit of essentials for both cleaning and care. Start with gentle cleaning tools and appropriate materials that won’t scratch or degrade trim, then add items that help protect their finish over time. This section outlines the exact tools for cleaning and materials for care to keep your console trim looking its best.
Tools for Cleaning
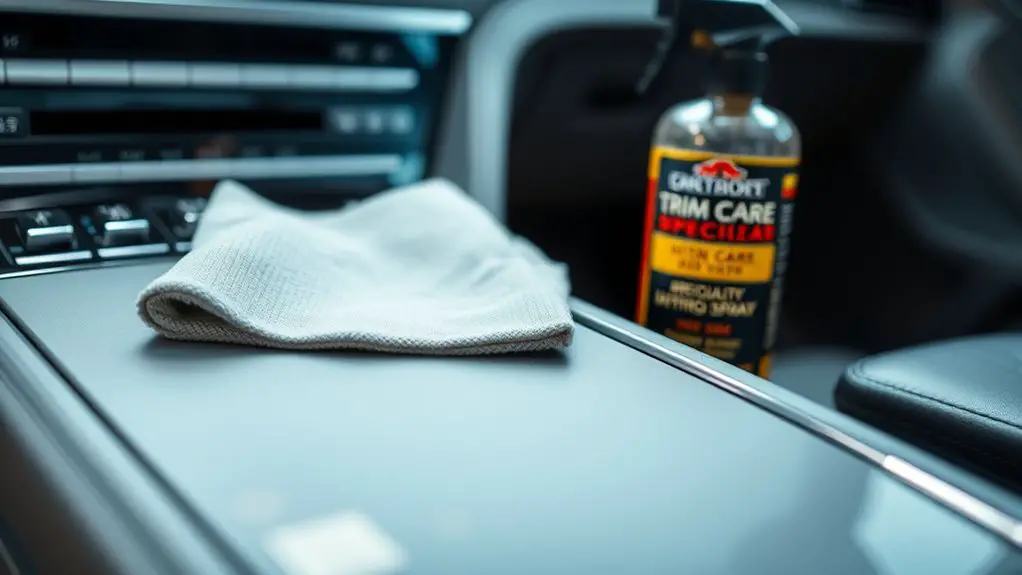
To clean console trim effectively, gather a few essential tools and materials: a microfiber cloth, mild dish soap, distilled water, a soft-bristle brush or foam brush, cotton swabs, and a small spray bottle.
You’ll use precise cleaning techniques and smart tool selection to minimize residue and abrasion. Start with a damp microfiber wipe, then a gentle soap solution, and finish with dry patting. For tight areas, switch to cotton swabs. Avoid harsh cleaners; control moisture to prevent seepage.
| Tool | Purpose | Notes |
|---|---|---|
| Microfiber | Wipe and lift oils | Lint-free, soft |
| Brush | Agitate grime | Soft-bristle preferred |
| Cleaner | Dilution/Use | Result |
| Mild soap + water | Lightly soaped wipe | Even finish |
| Spray bottle | Mist for precision | Keeps moisture controlled |
Materials for Care
You’ll want a concise, practical kit ready before you start: microfiber cloths, a mild dish soap, distilled water, a soft-bristle brush or foam brush, cotton swabs, and a small spray bottle. With the right materials, you can execute clean, controlled care without drama. Choose reliable items that won’t streak or scratch. Remember: your goal is lasting shine and stability, not shortcuts.
- brushed microfiber towels for wipe-downs
- mild soap and distilled water mix for gentle cleanse
- soft brush and cotton swabs for tight spots and seams
Using these cleaning products, you’ll apply care techniques with steady, deliberate motions. This approach minimizes residue and preserves texture. Your freedom lies in repeatable steps, not guesswork, ensuring the trim stays firmly in place and looking renewed.
Inspecting the Mounting Surface
You’ll start by inspecting the mounting surface for secure attachment and any looseness. Look for wear signs, such as scratches, grooves, or softened edges that could affect fit. Address issues promptly with clean contact, proper fasteners, and, if needed, surface refinishing before proceeding.
Mounting Surface Check
Before you begin mounting, inspect the surface thoroughly for flaws, debris, or damage that could compromise stability.
A precise, methodical approach keeps your trim secure and free from future tweaks. Focus on two core checks: mounting surface types and adhesive compatibility.
- Confirm the mounting surface types you’ll attach to are clean, dry, and flat, with no flexible edges that could lift.
- Verify adhesive compatibility with the surface material and trim finish, testing a small area first.
- Ascertain surrounding components won’t shift or create leverage that loosens mounting over time.
If anything feels uncertain, pause and re-clean, re-dry, and re-check alignment before proceeding. This disciplined routine preserves freedom from repeat adjustments and supports lasting, confident mounting.
Surface Wear Signs
Even when surfaces look fine at a glance, inspect for wear patterns that could signal mounting issues: peeled coatings, gouges, or softened edges where adhesive may not hold, and any flat spots or waviness that could tilt the trim. You’ll assess the mounting surface with a steady hand, documenting evidence of surface scratches, chips, or discoloration. Look for aesthetic damage that undermines grip, then test adhesion by gentle pressure along seams and corners. Note raised edges or misaligned planes that suggest shifting substrate or improper seating. If you find any irregularity, flag it, measure deviations, and plan corrective steps before reattachment. Prioritize secure contact, clean surfaces, and compatible adhesive choices to preserve freedom from future looseness.
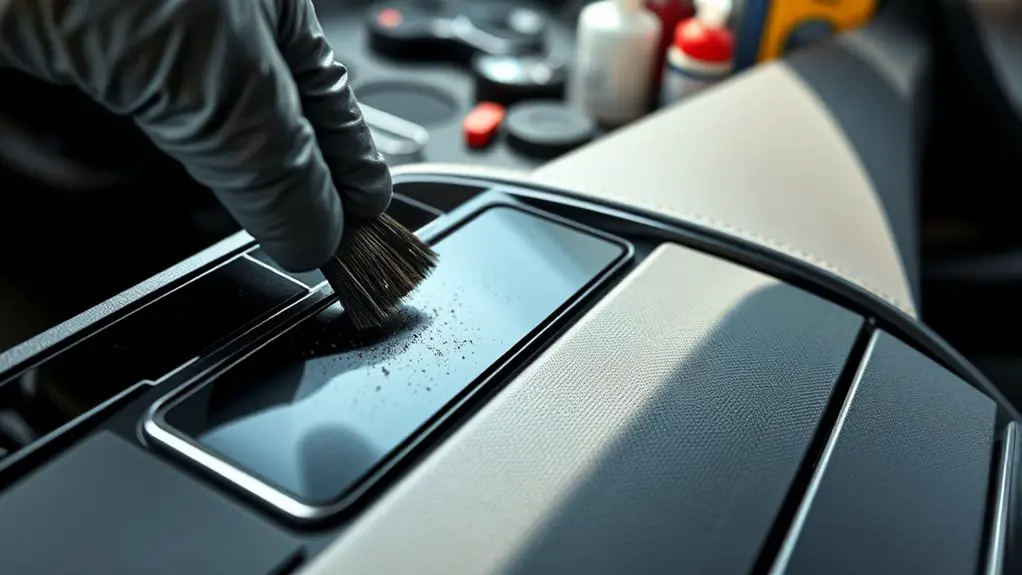
Cleaning the Trim and Surrounding Area
To clean the trim and surrounding area effectively, start by removing loose dust with a microfiber cloth, then wipe down surfaces using a mild, non-abrasive cleaner appropriate for the material. You’ll protect trim materials and surrounding surfaces while maintaining a fresh look. Move deliberately, avoiding excess moisture that could seep into seams.
1) Step-by-step wipe-down: go along edges with small, controlled motions, then circle back to pick up any residue.
2) Targeted treatment: apply cleaner only to a cloth, not directly to the trim, to prevent oversaturation.
3) Final polish: buff with a dry microfiber to restore shine and reduce streaks.
This approach is precise and solutions-oriented, designed for readers who value freedom and efficiency. By following these steps, you maintain appearance and longevity without harsh methods. Remember to keep movements steady, use appropriate products, and monitor for any material-specific reactions on trim materials and surrounding surfaces.
Reattaching: Choosing the Right Adhesive
Reattaching the trim starts with selecting the right adhesive for the material and location. You evaluate surface compatibility, cure time, and environmental resistance before you commit. Begin by identifying adhesive types that suit your trim’s substrate—plastic, vinyl, metal, or composite—then match them to expected temperature shifts and exposure. For flexible edges, consider a flexible bonding technique that tolerates movement without cracking. If you’re reattaching a rigid piece, an adhesive with high shear strength and clean curing is preferred, paired with a precise clamp or light weight during cure. Follow manufacturer recommendations for surface preparation: clean, dry, and roughen slightly if needed to improve grip. Apply a thin, even bead, then seat the trim with controlled pressure to avoid gaps. Reassess after curing to guarantee full contact along the seam. Document the adhesive types you tested and the bonding techniques that delivered reliable hold for future reference.
Preventing Residue and Mildew Build-Up
Preventing residue and mildew build-up starts with a clean, proactive routine. You’ll reduce long-term damage by staying ahead of moisture and grime, using simple, repeatable steps that empower you to maintain freedom of form and function.
1) Mildew prevention: wipe down surfaces with a mild, non-abrasive cleaner after each use, then dry thoroughly. This stops moisture from lingering.
2) Residue removal: target common buildup with a gentle microfiber cloth and a diluted detergent solution, focusing on crevices and joints where residue collects.
3) Maintenance cadence: schedule a rapid weekly check to rewipe, dry, and inspect seals. If you spot residual staining, repeat the cleaning, then re-evaluate fit and alignment to prevent reoccurrence.
Apply consistent pressure, avoid harsh solvents, and never neglect hidden areas. By following these practices, you’ll preserve aesthetics and function while enjoying the freedom of a clean, reliable console trim. Mildew prevention and residue removal work hand in hand to keep your setup pristine.
Securing Loose Hardware and Fasteners
If you notice any looseness in screws or brackets, address it immediately by verifying each fastener’s tightness and replacing any stripped or damaged parts. You’ll inspect all mounting points, then tighten with the correct driver style and torque. Use the right fastener types to match material and load, avoiding over-tightening that strains the trim. For damaged hardware options, swap in components designed for vibration resistance and corrosion protection. Maintain a routine check, test the fit, and re-tighten after cleaning sessions. Keep hardware organized by size and type so replacements are quick and precise.
| Column 1 | Column 2 | Column 3 |
|---|---|---|
| fastener types | hardware options | torque guidance |
| hex screws | stainless pins | light duty torque |
| Phillips screws | nylon spacers | medium load torque |
| button heads | brass inserts | high load precautions |
| locking washers | corrosion resistant | final securement |
Finishing Touches for a Smooth Look
You’ll start with smooth application techniques to guarantee an even finish across the trim. Apply a finishing seal in thin, uniform coats and allow proper curing between passes for durability. This sets the stage for a seamless, long-lasting look that resists chips and scuffs.
Smooth Application Tips
Achieving a smooth finish starts with proper preparation and technique, so start by aligning your surface and tools, then work in controlled, even passes to minimize streaks. You’ll achieve consistency by choosing appropriate pressure and steady motion, avoiding overloading the applicator and guarding against air pockets. Focus on speed control and edge shifts to maintain uniform coverage without gaps.
- Smooth application techniques: apply in small, parallel passes, keeping a consistent angle and deposition rate for a seamless result.
- Adhesive application methods: use color-matched or transparent products, ensuring even spread and avoiding squeeze-out onto surrounding surfaces.
- Finishing feedback: once set, inspect for thin, uniform film; rework any high or low spots with light, deliberate strokes.
This approach honors freedom with precision, delivering reliable, clean outcomes.
Finishing Seal Best
A finishing seal ties the look together by locking in the smooth surface you’ve created and preventing future micro-scratches. You’ll choose finishing techniques that suit your material and environment, then apply with controlled, even strokes. Start with a clean, dust-free workspace, and test a small area first. If you’re using a sealant option, work in thin layers, allowing each pass to cure before the next. Maintain tension on the applicator to minimize lines, and wipe any excess immediately to avoid streaks. Prioritize compatibility with your trim’s finish to prevent hazing. Document your process so future maintenance stays consistent. The goal is durable protection without rigidity, enabling easy future refinements while preserving a smooth, high‑quality appearance.
Maintenance Habits to Extend Longevity
Maintaining console trim isn’t about big changes; it’s about steady, repeatable habits. You’ll protect longevity by adopting a focused maintenance routine and applying preventative measures that address wear before it shows.
Maintaining console trim hinges on steady, repeatable habits that prevent wear before it shows.
1) Inspect weekly: check seams, clips, and surfaces for looseness. Tighten or reseat components as needed, avoiding over-tightening to prevent cracks.
2) Clean with purpose: use a microfiber cloth and a mild cleaner, wipe in the direction of grain, then dry. Debris removal prevents abrasion and binding.
3) Schedule micro-tactors: set a monthly reminder to recheck alignment, reseal edges if you use protective films, and refresh moisture barriers to prevent deterioration.
This approach keeps your confidence high and your trim stable. You’ll feel freedom through predictable outcomes, not shortcuts. The maintenance routine becomes an empowerment tool, turning care into a proactive habit rather than reactive fixups. Preventative measures and routine discipline guarantee lasting performance without compromising usability or aesthetics.
When to Seek Professional Help
Sometimes issues show up despite good habits, so you should seek professional help when you notice persistent misalignment, unusual gaps, or coatings peeling beyond simple fixes. You know when to consult by recognizing symptoms that resist DIY solutions, like uneven trim tension, recurring creaks, or finish delamination. Expert advice helps prevent further damage and preserves value.
Below is a quick picture of when to seek help, to keep you moving with confidence:
| Symptom | Risk If Ignored | Recommended Action |
|---|---|---|
| Misalignment persists | Structural damage risk | Consult a pro |
| Gaps remain after adjustments | Water intrusion risk | Seek expert advice |
| Coatings peel beyond simple fixes | Finish failure risk | Schedule professional service |
Frequently Asked Questions
What Causes Trim to Loosen After Cosmetic Repairs?
Ever wondered why trim loosens after cosmetic repairs? It’s usually due to imperfect adhesive selection or flawed repair techniques. You’ll prevent recurrence by choosing the right adhesive for your materials and surface prep, then applying consistent, proper clamping and cure times. Guarantee even pressure, clean bonding areas, and verify compatibility with paints or gels. This disciplined approach gives you durable, confident results and the freedom to enjoy your project without rework.
Can Heat Damage Affect Adhesive Performance Over Time?
Yes, heat damage can affect adhesive performance over time. You’ll want to limit heat exposure to keep adhesive longevity intact. Start by avoiding high‑temperature environments, direct sun, and prolonged engine heat. Use interior barriers, like shielding or UV films, and choose adhesives rated for elevated temps. If you detect softening or slips, reapply with a high-temp, automotive-grade adhesive. Regular inspection helps you maintain adhesion, ensuring your console trim stays secure and confident.
Is There a Difference Between Indoor and Outdoor Trim Adhesives?
Yes, there’s a difference. Indoor adhesives are formulated for controlled temps and lower moisture, while outdoor adhesives endure sun, rain, and temperature swings. You’ll want indoor adhesives for indoor trim and outdoor adhesives for exterior surfaces. Start with surface prep, then choose a product rated for your environment. For freedom-minded results, test a small area first and compare performance over a week, noting adhesion strength and weather exposure.
How Do I Prevent Mold Growth Under the Trim?
You can prevent mold growth under the trim by improving moisture control and performing proactive trim maintenance. Start with a thorough cleaning, then seal gaps and install proper drainage to avoid water buildup. Use a mold-prevention spray on the substrate, and guarantee regular checks for leaks. Maintain ventilation and keep humidity low. Schedule routine inspections, dry any damp spots promptly, and re-seal periodically. This mold prevention approach supports durable trim maintenance with freedom and confidence.
Are There Specialized Tools for Recessed or Hard-To-Reach Mounts?
Specialized tools exist for recessed or hard-to-reach mounts, including stiff-bristle brushes, telescoping inspection mirrors, and flexible-angle drivers. You’ll use trim installation techniques that leverage tight access, and adhesive application methods tailored to confined spaces. Start with a secure, clean surface, then employ thin, controlled beads and slow, guided presses. Angle tools as needed, work steadily, and verify alignment before final cure. This approach gives you precise control, durability, and freedom in tight installations.