Diagnosing Black Smoke From Exhaust: What the EGR Cooler Symptoms Mean
If you’re diagnosing black exhaust smoke, start by ruling out fuel and turbo faults, then check the EGR system. A failing EGR cooler can raise intake temps or let coolant contaminate exhaust, triggering soot and white/blue smoke under boost. Look for coolant leaks, rising under-hood temps, or white steam from the tailpipe, plus damp residue around the EGR area. Perform a pressure test and use a diagnostic smoke test to confirm leaks and flow. More specifics follow.
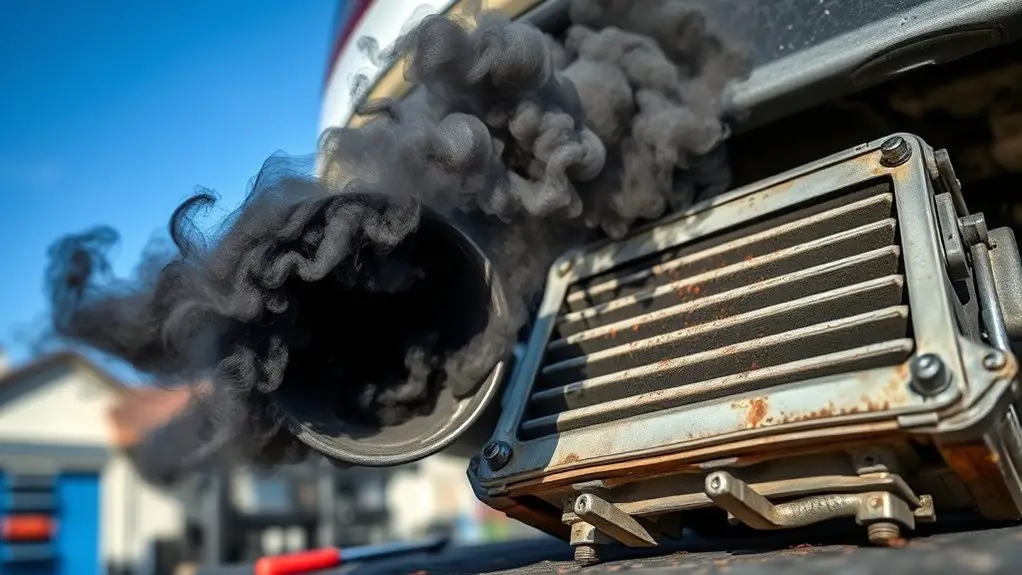
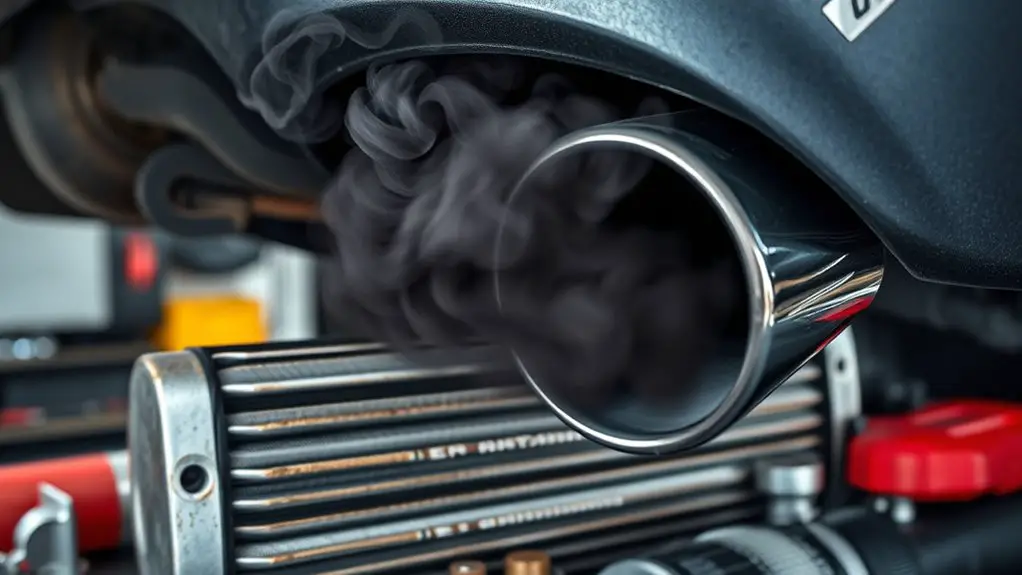
Understanding Black Smoke and Its Causes
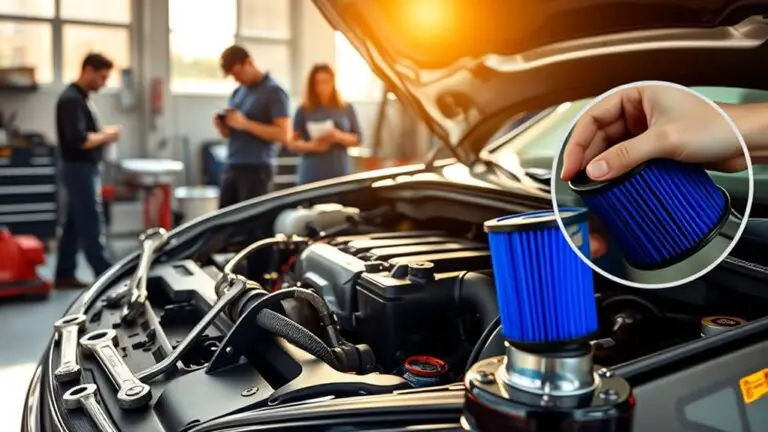
Black smoke is a diagnostic signal indicating incomplete combustion or improper fuel/air balance. You’ll diagnose by tracing exhaust causes to engine subsystems, not guessing. In practice, you’ll check fuel delivery: restricted or leaking injectors, low fuel pressure, or incorrect injector timing can flood cylinders and burn incompletely. Air delivery matters too: clogged air filters, intake leaks, orMass airflow sensor faults disrupt mixture, producing dark plumes. Combustion quality hinges on compression; misfires or worn rings let unburned fuel pass, creating visible exhaust. Contaminants like oil entering the combustion chamber produce bluish-black smoke, signaling valve seals or piston rings wear. Exhaust aftertreatment can mask or reveal causes; a clogged catalytic converter or excessive backpressure shifts combustion dynamics, magnifying soot. You’ll correlate exhaust observations with live data: fuel trims, misfire codes, EGR flow, and sensor health. Correcting black smoke requires restoring accurate fuel/air balance, sealing leaks, and ensuring clean, efficient combustion.
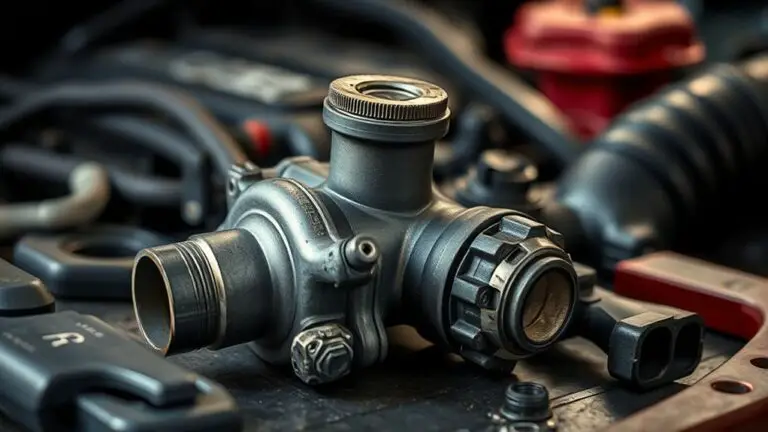
What the EGR Cooler Does in Your Engine
The EGR cooler primarily lowers exhaust gas temperatures before recirculation back into the intake, reducing NOx formation and preventing combustion chamber heat from triggering knock or preignition. In this section, you’ll parse its role with exacting clarity: the EGR function centers on transferring heat away from exhaust gases prior to reintroduction, lowering intake charge temperature and stabilizing combustion. You’ll note how the cooler’s efficiency governs charge density, residual oxygen, and flame speed, shaping apparent exhaust plume and soot tendencies. Its material integrity—baffle condition, cooling circuit flow, and condenser seal—directly affects EGR flow rates and backpressure balance. You’ll assess not only whether the system reduces temperatures but also how it preserves turbocharger and intercooler performance by mitigating thermal wash. EGR importance emerges in diagnostic terms: when cooling is impaired, you observe elevated intake temps, altered fuel trims, and potential black smoke under boost. Remember, precise EGR behavior informs intent and limits misdiagnosis during inspection.
Signs of a Failing EGR Cooler

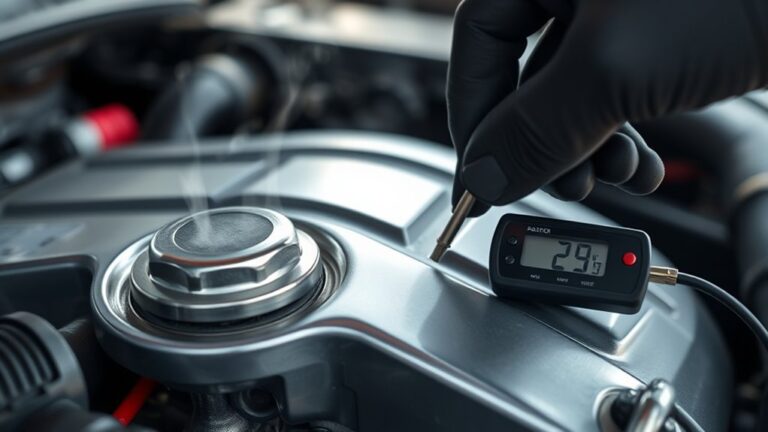
A failing EGR cooler typically reveals itself through a set of observable symptoms tied to heat transfer degradation and coolant management. You’ll notice diminished cooling efficiency under load, with exhaust-driven heat creeping into the intake path and nearby systems. EGR malfunction signs include rising under-hood temperatures and intermittent turbocharger lag as heat soak alters charge density. Look for coolant leakage indicators near the EGR cooler housing: dampness on surrounding components, white or greenish residue, and a drop in reservoir level without external leaks. You may also observe white smoke or steam from the tailpipe during deceleration, signaling coolant intrusion into the exhaust stream. Engine misfire or rough idle can accompany the condition when excessive cooling interruption skews air-fuel balance. Pressure test the cooling circuit and inspect the heater core connections for seepage. If you detect these signs, prioritize diagnostic confirmation and plan for targeted repair rather than speculative component replacement. EGR malfunction signs point to a heat-management fault that warrants timely intervention.
Differentiating EGR Cooler Issues From Other Problems
Differentiating EGR cooler issues from other problems hinges on isolating heat-transfer symptoms from electrical, fueling, and turbo/air-path anomalies; start by confirming coolant behavior and exhaust-to-intake heat signaling before attributing causes. You’ll verify whether coolant loss, bubbling, or steady temperature rise aligns with EGR-cooling failure, not a leaking radiator or heater core. Next, assess exhaust-system signatures: check for white or sweet-smelling vapor, persistent smoke, and pressure shifts that don’t match ignition timing or fueling faults. If heat transfer is inconsistent with ignition or fuel delivery, pivot toward the EGR cooler or associated passages, rather than turbo or intercooler faults. Look for localized heat where the exhaust system interfaces with the EGR circuit, noting corrosion or clog symptoms that impair cooling flow. Rule out electrical faults by isolating sensor and actuator behavior from mechanical heat signaling. Informed differentiation relies on correlating coolant dynamics with exhaust-system heat transfer, avoiding premature conclusions.
Common Inspection Steps for the EGR Cooler
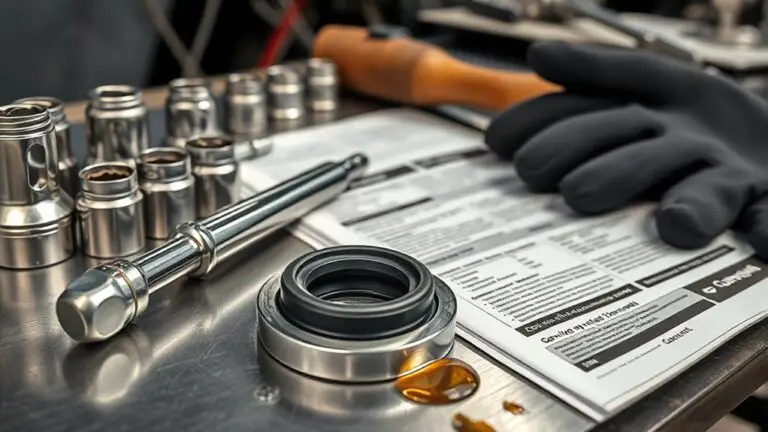
Common inspection steps for the EGR cooler focus on validating cooling integrity and tracing heat-transfer signals. You’ll verify cooler housing seals, gasket integrity, and evidence of coolant leakage into the intake or exhaust paths. Inspect coolant passages for corrosion, plugging, or flow restriction, and check for crusted deposits at the inlet and outlet ports. Use a diagnostic approach to compare coolant temperature differentials across the unit, looking for abnormal gradients that imply reduced heat transfer capacity. Inspect EGR cooler core for cracks, delamination, or flow channel deformation using bore scopes or borescope-assisted visualization where available. Validate proper EGR valve positioning and actuator response to guarantee consistent pressure and flow through the cooler. Document observations with clear measurements, noting owner-reported symptoms, service history, and any prior EGR maintenance tips. This procedure supports a concise EGR system overview, guiding targeted repairs while preserving performance and reliability.
How to Safely Pressure Test the EGR System
You’ll perform a controlled pressure test of the EGR system to confirm integrity, using the specified test port and calibrated gauge to monitor steady pressure changes. Follow strict safety steps, verify engine off and cool, and clamp or seal lines to prevent leakage while applying the test medium. Expect leakage symptoms like drop in pressure, uneven readings, or audible hiss, and correlate these indicators with EGR valve, passages, and seals to guide further diagnostic actions.
Pressure Test Steps
To safely pressure test the EGR system, start by inspecting the components and confirming the engine is cool and the battery disconnected, then attach a suitable test tool and pressurize the system within the manufacturer’s specified range. You’ll use a trusted pressure gauge to monitor instantaneous readings and compare them to baseline values for your model. Seal all connections, verify vacuum lines and solenoid integrity, and disable auxiliary circuits as required by the service manual. Incrementally pressurize, noting any drop-offs, oscillations, or spiking pressure that indicates leaks or gasket failure. Document test window, tool type, and exact pressure. If readings stay within spec, proceed to functional verification; if not, isolate the fault via leak check, manifold seals, and EGR passage integrity before re-testing. Maintain safety, confirm tool calibration, and respect manufacturer limits.
EGR System Safety
EGR system safety starts with respecting pressure test limits and the integrity of all connections. You approach testing with a controlled mindset, confirming tool calibration, and secure mounting before any engagement. Follow manufacturer specifications for test pressure, dwell time, and relief criteria, noting allowable variance. Inspect gaskets, hoses, and clamps for signs of wear, cracking, or softness; replace as needed to prevent leaks during pressurization. Use proper PPE and work in a ventilated area to manage exhaust-derived atmospheres. When applying pressure, monitor gauges for stable readings and immediate drops that signal seals or passages compromised. Document results with precise measurements, correlate any abnormal fluctuation to potential EGR system faults, and implement safety measures to mitigate accidental release or injury. Maintain awareness, procedural discipline, and measured action throughout the process.
Diagnosing Leakage Symptoms
When diagnosing leakage symptoms, begin with a controlled pressure test to identify exact leak paths and rate. You’ll isolate the EGR system interface, seal all connectors, and apply precise vacuum or pressure increments to the intake and exhaust ports. Use calibrated gauges, transparent lines, and a diagnostic smoke generator to visualize escape routes without guesswork. Record baseline readings, then compare to manufacturer tolerances to distinguish minor seepage from active leakage. Focus on leakage detection through flanges, gaskets, valve seats, and cooler connections, noting any reverse flow indications. Observe any fluctuating pressure drops under load, and verify with a second test after disassembly. Document findings, specify required repairs, and retest to confirm restored integrity of the EGR system. PMID: none
Interpreting Diagnostic Clues: Bubbles, Smell, and Smoke Color
Bubbles point to leaks in the cooling or intake systems, so you’ll want to trace bubbles to the exact seal, hose, or gasket with a calibrated test method. Smell clues help identify unburned fuel, coolant, or oil ingress, guiding you to the likely source and corrective action. Smoke color signals burn conditions and contaminant type, allowing you to prioritize inspection of combustion, fuel delivery, and exhaust components for precise remediation.
Bubbles Indicate Leaks
In the cooling system, bubbles in the radiator or reservoir frequently signal a leak or abnormal pressure allowing exhaust gases to enter the cooling circuit; diagnosing the source requires tracking bubble timing, location, and associated symptoms. You’ll confirm bubbles formation by observing cycle onset, steady vs intermittent rise, and whether bubbles synchronize with engine RPM or cooling fan activity. Leaks may originate at head gasket, cracked cylinder head, intake/exhaust manifold interfaces, or a compromised radiator core; chase the path with leak detection fluids, compressed air, or chemical test kits. Record fluid color changes, loss rate, and pressure drop, then cross-check with exhaust smoke tint and odor. Precise correlation guides repairs, minimizes collateral damage, and restores reliable performance.
Smell Clues Messages
Smell can be a diagnostic compass, narrowing the range of faults beyond what bubbles reveal. You’ll use smell identification and odor analysis to triangulate symptoms, distinguishing coolant, fuel, and oil signs from exhaust exhausts. You detect volatility, intensity, and temporal patterns to map faults to EGR cooler behavior and related air-path issues. Precision comes from correlating odor with operating state, load, and temperature, avoiding guesswork. You’ll document changes during dyno runs or road tests, ensuring repeatability and traceability. Focus stays on credible cues that narrow fault trees without overinterpretation. Maintain a disciplined, data-driven mindset, honoring both mechanic skill and freedom to troubleshoot.
- Odor intensity, duration, and onset timing guide fault narrowing
- Distinguish coolant vs. fuel/oil smells through cross-checks with bubbles
- Record odor analysis alongside performance data for traceable conclusions
Smoke Color Significance
Color of exhaust smoke can indicate the underlying fault and its location in the emission path, with certain hues correlating to lubricant, coolant, or combustion issues. You assess smoke color to infer smoke origin and guide diagnostic steps. Black smoke typically signals rich combustion or excess fuel delivery, or turbocharger/air intake restriction, yielding high smoke density early in acceleration. Bluish tint points to oil burning, often from valve seals, piston rings, or turbo seals, increasing smoke density under load. Gray smoke sits between, suggesting incomplete combustion or oil vapor issues. White or gray-white indicates coolant intrusion or high moisture content, with lower smoke density but persistent visibility concern. Quantify color shifts, compare to recent service, and correlate with EGR cooler symptoms for targeted tests.
Potential Repairs and Replacement Options
Potential repairs and replacement options depend on the root causes identified during diagnosis, including fuel delivery faults, ignition misfires, exhaust system restrictions, and incorrect air-fuel mixture. You’ll target the specific failure mode with precision, avoiding guesswork and focusing on measurable parameters. EGR cooler replacement and EGR system repair are central paths when cooler leakage or valve sticking is implicated, but other fixes may be required to restore balance and exhaust flow. Work proceeds with controlled diagnostics, verifying fuel trims, compression, and injector spray patterns before committing to component replacement. Replacement decisions should consider reliability, heat exposure, and compatibility with the existing exhaust plumbing. After any repair, conduct a focused smoke test and data-logging to confirm restoration of proper EGR flow and absence of recirculation faults. Precision tooling, correct torque, and verified gasket seating are non-negotiable for long-term integrity and performance.
- EGR cooler replacement steps and verification
- EGR system repair methodologies and test protocols
- Post-repair confirmation and performance validation
Preventive Maintenance to Avoid EGR Cooler Failures
Regular preventive maintenance reduces EGR cooler failure risk by targeting the common root causes before symptoms appear: coolant leaks, excessive soot buildup, and thermal cycling wear. You’ll implement a disciplined schedule that prioritizes monitoring coolant integrity, checking hoses, clamps, and the reservoir for traces of seepage. Inspect the EGR cold-side heat exchanger for pinholes or corrosion, and verify that coolant temperature and pressure remain within specification. With precise diagnostics, you’ll track soot loading trends and address elevated ash content before plugging passages. Routine engine oil analysis helps flag accelerated contamination that accompanies EGR issues. Adhere to manufacturer intervals for EGR maintenance tips, including gasket replacement and wiring harness inspection to prevent miscommunication with the control module. When contamination is suspected, perform measured EGR system cleaning using approved cleaners and procedures, avoiding aggressive solvents that could damage coatings. This proactive stance sustains flow, reduces buildup, and preserves cooling efficiency, extending EGR service life.
Frequently Asked Questions
Can Black Smoke Indicate Issues Beyond the EGR Cooler?
Black smoke can signal issues beyond the EGR cooler. If you’re seeing it, you’re chasing a symptom tree that hints at engine performance problems, fuel quality, or improper air-fuel mixing. You should inspect turbo charge airflow, injectors, and exhaust leaks, and verify fuel and oil conditions. Don’t ignore boost leaks, injector timing, or glow of unburnt fuel. You’ll diagnose with precision, testing sensors, and tuning until engine performance stabilizes.
How Long Does an EGR Cooler Replacement Typically Take?
A typical EGR cooler replacement takes about 2–4 hours, depending on engine layout and access obstacles. You’ll want to account for extended labor if components like intake manifolds or charge pipes are in the way. Consider EGR cooler lifespan uncertainty and plan for additional time if cooling system drainage or gasket reseats are required. Replacement costs factor in parts, labor, and possible ancillary repairs; get a detailed diagnostic before committing.
Will Diesel Particulate Filters Affect Black Smoke Readings?
Diesel particulate filters do affect black smoke readings. When a DPF is functioning and regenerating properly, it reduces diesel emissions and black smoke; a clogged or failed filter skews readings upward. You’ll want precise filter maintenance to maintain accurate diagnostics. If readings still rise after cleanings, inspect turbo, EGR, and injection timing. Coincidence note: you notice smoother performance as readings normalize, like fate nudging you toward necessary maintenance—keep records, test, verify.
Are There Quick DIY Tests for EGR Cooler Leaks?
Yes—there are quick DIY checks for EGR cooler leaks. You can perform a smoke test, inspect for coolant loss, and feel for dampness around the cooler using a proper leak-detection spray. For EGR testing, wrap a soapy area and watch for bubbles under pressure, and monitor intake vacuum. If you suspect a leak, avoid risky runs; perform controlled tests and call for professional diag if symptoms persist.
Can Driving Habits Cause Temporary EGR Cooler Symptoms?
Yes, driving patterns can trigger temporary EGR cooler symptoms. Heavy loads, frequent short trips, and sustained high RPMs elevate exhaust gas recirculation and cooling demand, sometimes causing transient leaks or deposits that mimic real faults. You’ll notice richer exhaust emissions and occasional reseating of the EGR path as temps normalize. For diagnostic precision, correlate symptoms with boost, timing, and sensor readings, then recheck after a cool-down to confirm persistence.