DIY: Safely Jump-Starting and Diagnosing Battery Corrosion
To safely jump-start and diagnose battery corrosion, start by inspecting terminals for damage and looseness, and gather insulated jumper cables and basic tools. Park the donor car, turn off engines, and wear PPE. Connect red clamps to positive terminals, then black to the donor and a solid ground on the recipient. After starting, test voltage with a multimeter; look for swelling, leaks, or heavy corrosion. Clean terminals with baking soda paste, protect with dielectric grease, and monitor performance for signs you may need professional help next.
Step-by-Step Jump-Starting Setup
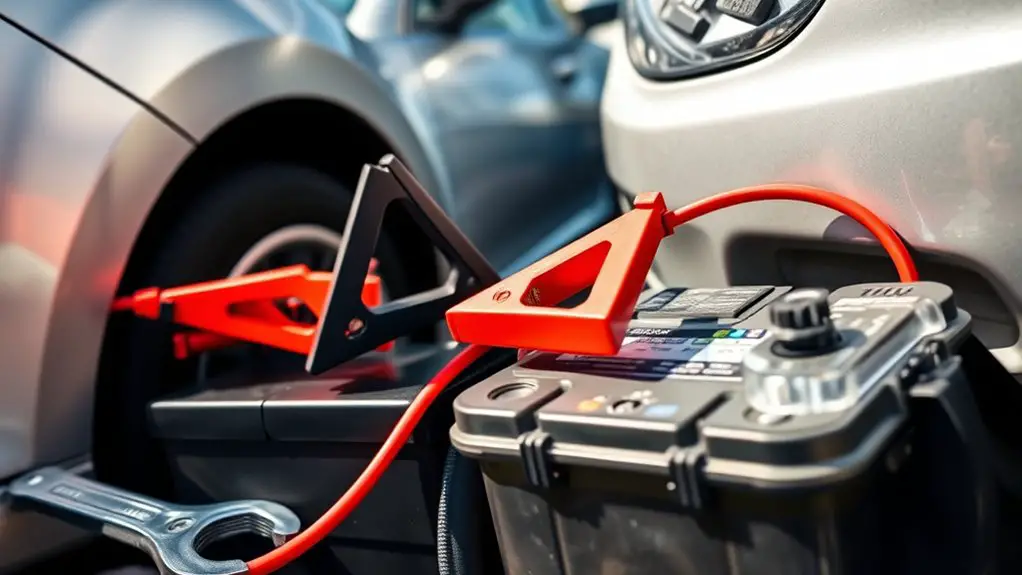
When preparing to jump-start a vehicle, begin by inspecting both battery terminals and cables for corrosion, damage, or loose connections. You’ll outline a clear setup: guarantee donor vehicle is on, gear in park, parking brakes engaged, and engines off. Gather cables with insulated clamps, keeping them free of oil and dirt. Attach the red clamp to the donor’s positive terminal, then the other red clamp to the recipient’s positive terminal. Next, connect a black clamp to the donor’s negative terminal, and finally ground the remaining black clamp to a solid, unpainted metal surface away from the battery. Verify solid contact and no stray clamps. Start the donor engine and idle briefly, then attempt a smooth restart of the recipient. If it won’t start, wait a minute and retry. Throughout this process, maintain battery safety, avoid sparks near the battery, and disconnect in reverse order. Follow jump starting techniques precisely to minimize risk and maximize charge transfer for reliable results.
Safety Precautions Before You Begin

Before you proceed, don your PPE and verify it’s intact, then prep any tools you’ll need. Always disconnect power first to prevent sparks, and work in a well-ventilated area with a fire-safe plan. Keep fire safety in mind: have a charged extinguisher within reach and avoid ignition sources near the battery.
PPE and PPE Prep
PPE is essential before you tackle battery work, and the right gear protects you from sparks, fumes, and corrosive exposure. Before you begin, inspect your protective gear for wear, and replace damaged elements. Put on safety equipment in a clean, organized space to minimize distractions and delays. Wear ANSI-rated gloves and splash goggles to shield skin and eyes, plus a face shield if you’re handling open terminals. Use a long-sleeve, non-abrasive shirt and durable pants, plus a lab apron or chest protector for added coverage. Confirm footwear seals out chemicals and provides solid traction. Keep a spill kit and a fire extinguisher within reach. Label pockets for tools, wipes, and spare batteries to maintain steady, deliberate steps. Safety equipment readiness reinforces disciplined, freedom-focused work.
Disconnect Power First
If you’re working with batteries, you should start by disconnecting the power source to prevent sparks and accidental short circuits. This step is foundational for battery safety and sets the tone for careful work. Follow clear disconnect methods to minimize risk and preserve system integrity.
- Identify the main power switch or negative terminal disconnect.
- Use insulated tools and keep hands dry during the process.
- Remove power before inspecting corrosion or connections.
- Restore power only after rechecking all secure, clean connections.
Ventilation and Fire Safety
Ventilation and fire safety are essential before you start because proper airflow reduces gas buildup and helps heat dispersion; make sure the work area has adequate ventilation and a clear path to fresh air. You’ll assess the space for lingering fumes and establish a continuous, unobstructed flow of air. Before connecting any tools, locate a fire extinguisher placement within easy reach and verify it’s rated for chemical or electrical fires; confirm its inspection tag is current. Identify ventilation methods such as open doors, windows, or vents that promote cross-ventilation without causing drafts that interfere with connections. Keep sparks, flames, and metal tools away from the battery area. Maintain a clean, organized bench and have a plan to retreat calmly if alarms trigger.
Tools and Supplies You Might Need
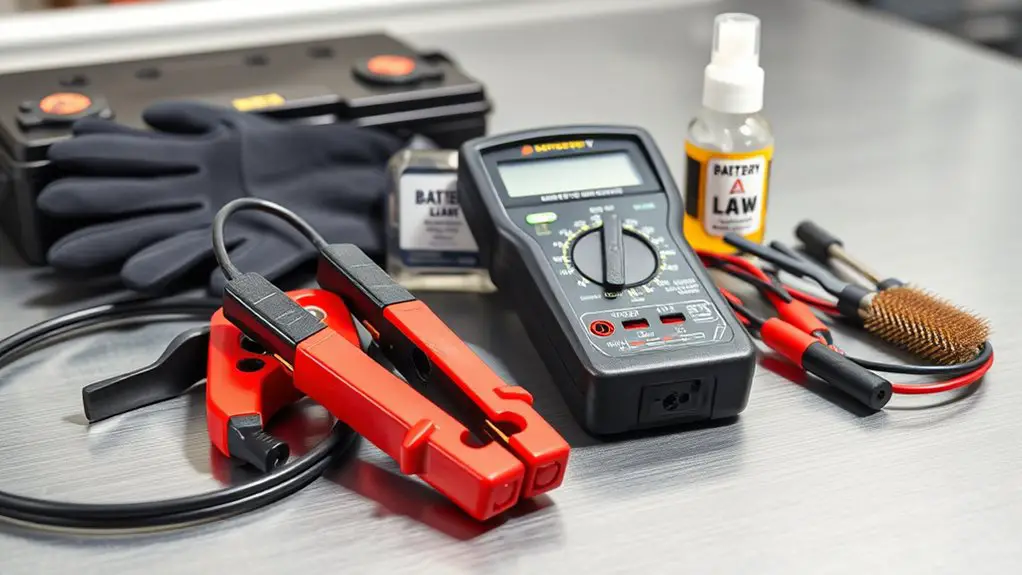
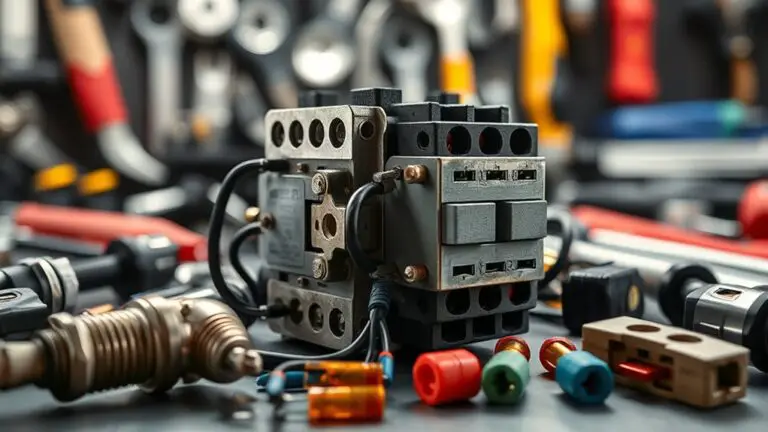
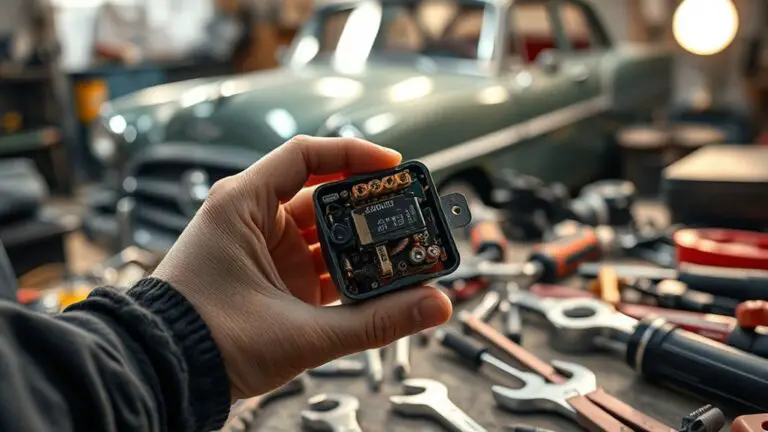
Here are the tools and supplies you’ll likely need: a set of basic hand tools (wrench, pliers, screwdrivers), a battery terminal cleaner or wire brush, fresh terminal protectant or grease, baking soda and water for corrosion neutralization, a small brush for applying cleaning solution, safety gloves and eye protection, a multimeter to check voltage, a work-insulated mat or towel, and optional but helpful items like a battery jumper cable set and a flashlight with spare batteries.
- Use the hand tools to loosen and reconnect terminals with care.
- Apply the terminal cleaner, scrub any buildup, then rinse with a damp cloth.
- Neutralize residue with baking soda solution, then dry thoroughly.
- Protect terminals with fresh grease and confirm proper voltage with the multimeter.
These steps support battery maintenance and corrosion prevention while keeping workflow calm and controlled.
Identifying Battery Status and Signs of Damage
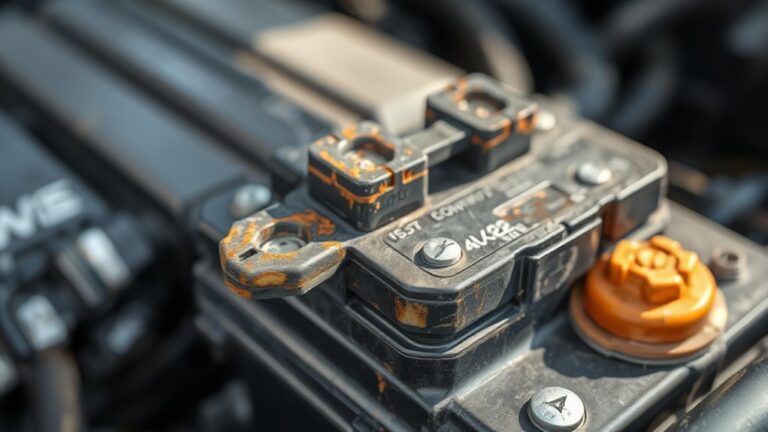
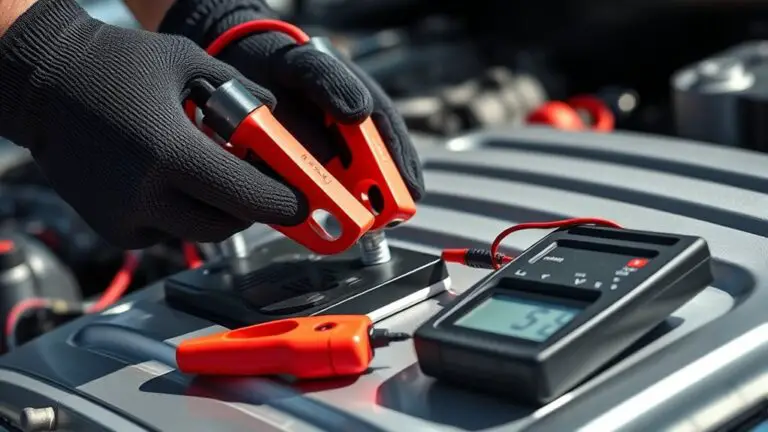
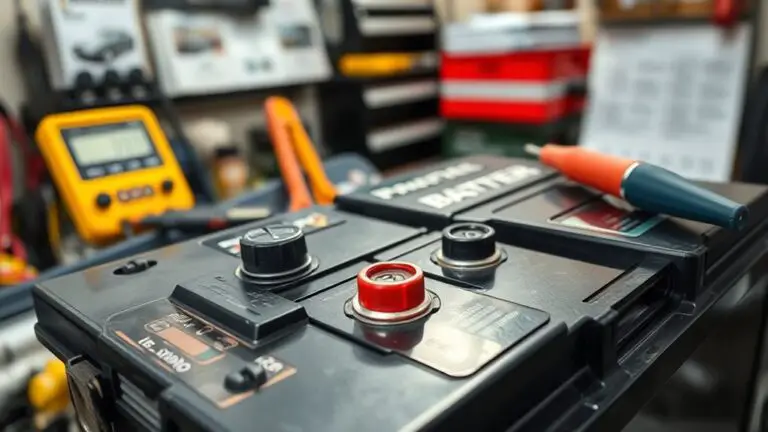
With the basics of cleaning and protecting terminals behind you, you’ll want to assess the battery’s current status and look for clear signs of damage. Begin with a visual check: glaze, bulges, leaks, or corrosion indicators around posts, clamps, or cables. Note any swelling, crackling casing, or a sour odor, which can signal internal failure. Use a multimeter to confirm voltage: a healthy 12-volt battery typically reads 12.6 volts or higher when rested; under 12.4 volts suggests discharge or aging. If you see frequent drops, inspect alternator performance separately. Check terminals for tightness and intact insulation; looseness can mimic charging issues. Corrosion indicators often present as white, blue-green, or brown crust. Record readings and conditions, then decide on action: clean and reseal if minor; replace if you detect leakage, bulging, or persistent low voltage. Maintain a log for ongoing battery maintenance to avoid repeat problems.
Safely Connecting Cables to the Battery
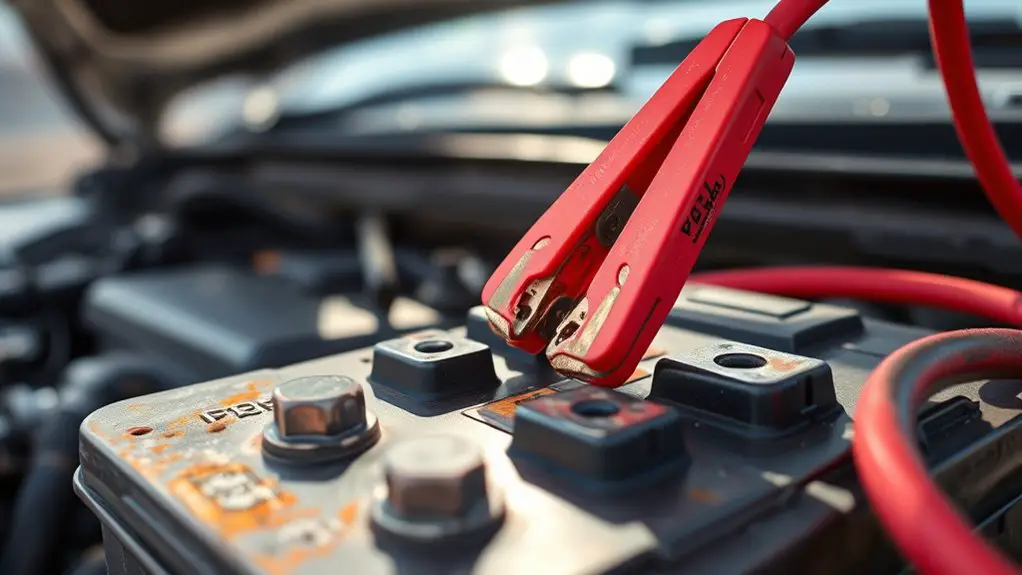
When you connect the cables, place clamps only on clean, bare metal or designated jumper points to guarantee a solid grip. Remember positive vs negative—attach the red clamp to the positive terminal and the black clamp to a grounded metal surface away from the battery to avoid sparks. Keep ground reference low and clear, minimize movement, and inspect for proper contact before starting the jump.
Safe Clamp Placement
Securely connect the clamps by orienting the positive lead to the vehicle’s positive terminal and the negative lead to a solid, unpainted metal surface away from the battery. Then verify clamp color coding matches your system: red for positive, black for negative, and ascertain terminals are clean. Your next steps are deliberate and efficient:
- Attach the positive clamp to the battery terminal first, avoiding contact with any metal surfaces.
- Connect the negative clamp to a clean, grounded metal surface away from the battery.
- Confirm solid contact with all clamps and minimal hairline resistance before proceeding.
- Recheck the arrangement for correct clamp placement and secure connections.
This approach preserves safety, reduces sparks, and supports reliable jump-start outcomes.
Positive Vs Negative
To start safely, connect the positive clamp to the battery’s positive terminal first, then attach the negative clamp to a clean, grounded metal surface away from the battery. In this Positive Vs Negative step, you’re mapping roles clearly: the positive terminal receives power from the jumper source, while the negative terminal completes the circuit through grounding. Maintain a steady, deliberate pace: prevent contact between clamps, avoid touching metal parts, and keep tools dry. Confirm clamps are secure and free of corrosion before connection. If you must reposition, disconnect in reverse order, then reattach. Note that the order matters for a controlled, safe start. With focus, you minimize sparks and misfires, preserving equipment and your momentum toward diagnosis and freedom to proceed.
Grounding and Avoid Sparks
Grounding the cables correctly minimizes sparks and protects you from shocks. You’ll connect in a deliberate order to avoid stray currents, keeping your hands steady and your focus sharp. This is battery grounding done right, with a clear path for electricity and no guesswork for spark prevention.
- Prep with gloves and goggles, inspect cables for damage, and clear the work area.
- Attach the positive clamp to the donor battery terminal only, then secure the negative clamp to a solid chassis ground away from the battery.
- Double-check clamps are tight and corrosion-free before initiating any connections.
- Remove clamps in reverse order after the engine runs, ensuring no metal contacts during disassembly.
Starting the Car and Aftercare
Once the jump-start connections are in place, start the car immediately and monitor it for a few minutes to confirm the alternator is charging the battery. Keep the engine at a moderate idle and observe the voltmeter or dashboard indicator for steady charging, avoiding rapid fluctuations. If lights or gauges dim briefly and then stabilize, you’re likely in a healthy charging cycle. Disconnect any auxiliary loads only after the engine shows a stable charge, to prevent sudden voltage drops. Once running, drive long enough to replenish the battery’s core capacity, preferably 15–30 minutes at highway or steady-speed conditions. Aftercare focuses on minimizing corrosion risk: wipe terminals with a damp cloth, recheck terminal tightness, and apply a thin layer of terminal protector if available. Note any recurring dull cranking or slow engine response, which may signal underlying issues. Regular, disciplined car maintenance supports battery longevity and sustained freedom in your travels.
Diagnosing Battery Corrosion and Its Causes
Corrosion on your battery usually stems from a chemical buildup at the terminals, often caused by leaks, poor connections, or alternating exposure to moisture and heat. To diagnose it, inspect for white, blue, or greenish crust and test for loose or corroded terminals, weak connections, or swollen batteries. Understanding these causes helps you identify when cleaning, tightening, or professional service is needed to prevent starting issues.
Causes of Corrosion
Corrosion around a battery typically stems from a combination of chemical reactions and environmental factors that create a buildup on terminals and connectors. You’ll notice it when you see white, blue, or greenish crust, which signals electrolyte leakage, poor connections, or overcharging. Understanding causes helps you act decisively rather than reactively.
- Electrolyte leakage from damaged seals or vent caps
- Overcharging or undercharging that destabilizes chemical balance
- Poorly tightened clamps that trap moisture and dirt
- Exposure to moisture, salt, or corrosive spills speeding oxidation
Use this knowledge for corrosion prevention and battery maintenance: clean surfaces, inspect terminals, apply a light protective coating, and test regularly. Stay proactive to keep starting power reliable.
Diagnosing Battery Buildup
Diagnosing battery buildup starts with a clear, methodical check of the terminals and surrounding components. You’ll inspect for white, blue, or green crust and looseness, then confirm cable connections are clean and tight. Next, you assess the alternator belt, fuses, and mounts for signs of electrolyte leakage or heat marks. Use corrosion detection methods like a quick rubbing test and a multimeter to gauge voltage drop across terminals. Record findings, then clean if buildup exists with a non-abrasive brush and baking soda solution. Maintain safety gear and ventilation throughout. Battery maintenance tips focus on prevention: keep terminals dry, inspect regularly, and replace worn cables promptly.
| Step | Action |
|---|---|
| 1 | Inspect terminals |
| 2 | Check surrounding parts |
| 3 | Test voltage drop |
| 4 | Clean and document |
Cleaning and Preventing Corrosion Properly
If you’re cleaning and preventing corrosion, start by disconnecting the battery and removing the negative terminal to minimize sparks. Then, assess the terminals for corrosion buildup and work calmly through a controlled routine.
- Clean with a baking soda paste (1:1) and a non-metal brush, rinse with water, and dry thoroughly to stop ongoing corrosion.
- Inspect cables and clamps for cracks or looseness; replace or tighten as needed for solid connections.
- Apply a thin layer of dielectric grease or terminal protector to prevent moisture ingress and future buildup.
- Implement regular battery maintenance: clean quarterly, inspect posts, and measure voltage to catch issues early.
This approach emphasizes simple, repeatable steps that support corrosion prevention while preserving freedom to troubleshoot. Avoid shortcuts; document changes and routes to professional help only if symptoms worsen or temperatures spike.
When to Seek Professional Help
Recognize when professional help is warranted: if you notice persistent, worsening corrosion despite routine cleaning, or if the battery system shows signs like swelling, leaks, or an acrid, buzzing smell, don’t delay seeking expert assessment. When you reach this point, a professional diagnosis becomes crucial to prevent safety risks and further damage. You’ll want to document symptoms clearly, note timing, and avoid attempting complex disassembly yourself. Warning signs include unusual heat, rapid discharge, or cables that feel brittle or corroded beyond simple cleanups. A technician uses proper PPE, checks electrolyte levels where applicable, tests voltage under load, and inspects the alternator and charging circuitry for faults. If you’re unsure about the severity or the corrosion affects multiple connections, opt for a professional diagnosis rather than DIY troubleshooting. This guarantees accurate assessment, prevents dangerous surprises, and preserves system integrity, aligning with your desire for safe, informed autonomy.
Post-Jump Test and Battery Health Checks
After you’ve completed the jump start, you should immediately verify the engine cranks smoothly and note any lingering signs of weakness, such as slow cranking or hesitation. Then, conduct a concise battery health check to confirm reliability and prevent recurrences.
- Check battery terminals for corrosion and tightness; clean as needed with a brush and baking soda solution.
- Measure voltage with the engine off and after a brief idle; aim for 12.6+ volts off, 13.7–14.7 volts when running.
- Inspect cables, grounds, and the alternator belt for wear; replace worn parts to sustain performance.
- Log findings and apply battery longevity tips and corrosion prevention methods, scheduling professional service if indicators exceed safe ranges.
Across these steps, stay precise and purposeful, ensuring clarity without overthinking. This approach preserves freedom by empowering you to act confidently, with a focus on durability and fault avoidance.
Frequently Asked Questions
Can Jump-Starting Fix a Dead Battery Permanently?
Jump-starting won’t fix a dead battery permanently. It’s a temporary nudge, like a spark that buys you time. You’ll face jump start myths if you rely on it long term. If the battery’s life is waning, replacement is the true solution, preserving battery lifespan. You should test alternator health and cables, then plan proactive maintenance. Stay precise, methodical, and free in your approach: don’t chase quick fixes, chase lasting reliability.
How Long Can a Car Run on a Jump-Start Before Damage Occurs?
A jump start duration should be kept short; you shouldn’t run the engine on a jump for more than 15 to 30 minutes at a time. Prolonged idling risks alternator overuse and heat buildup, which can harm battery lifespan. If you must drive, get to a charger or service port ASAP. Afterward, test the battery and charging system, and replace weak cells. Maintain safe gaps, and don’t rely on this as a long-term fix.
Can You Jump-Start a Car With a Reddit/Diy Charger?
Yes, you can, but proceed with caution. A reddit charger isn’t a substitute for proper jump-start gear, and DIY methods carry risk. If you attempt it, guarantee correct polarity, no sparks, and steady monitoring. Don’t rely on it for long-term charging; it’s best for a quick nudge, not a full-rescue. Use it only as a temporary aid, then switch to a verified jumper pack or a proper charger. Safety first, then test.
Will Bumper-To-Bumper or Frequent Jumps Harm Alternator Life?
Yes—bumper-to-bumper traffic and frequent jumps can accelerate alternator wear. If you rely on short, repeated jumps, you may stress the alternator more than steady use. Track jump start frequency and limit it; use a proper charger when possible. Keep electrical loads balanced, inspect cables, and guarantee the battery isn’t marginal. You’ll protect alternator wear by reducing unnecessary jumps and addressing the root battery issue promptly.
Are There Hidden Signs of Battery Corrosion Beyond Visuals?
Yes, there are hidden signs beyond looks. You’ll notice sluggish starts, dim lights, and a rising voltage drain when the battery isn’t delivering. Check for electrolyte leakage and terminal rust, which warn of deeper corrosion. You should perform a precise load test, inspect terminal connections, and measure current draw with everything off. If symptoms persist, replace the battery and clean terminals to restore reliability. Stay proactive, document findings, and guarantee safe handling.