DIY Minor Paint Repairs to Cover Wind Noise at Speed
To cut wind noise at speed, start by inspecting door and window seals for gaps, tears, or compression loss, especially at weather interfaces. Clean the affected area with a mild detergent, then prep tiny scratches and chips: lightly sand (400–800 grit), fill with appropriate putty or sealant, and apply a compatible clear layer. Seal trim edges with fresh tape, then buff a smooth finish. Finish with wax protection and regular maintenance to extend durability; more tips await if you keep exploring.
Assessing Common Wind Noise Points on a Vehicle
Wind noise typically originates at common door, window, and seal interfaces, so start by inspecting these points for gaps, misalignment, or worn weatherstripping. You’ll perform a concise, stepwise vehicle assessment to locate noise sources without removing paint or finishing. Begin at the front doors, then the rear doors, and finally the hatch or trunk area. Check weatherstrips for compression loss, tears, and glazing. Verify hinge gaps and rubber seals meet the body evenly at all weather interfaces. Listen at highway speed with both windows up and down to isolate wind paths. Inspect door frames for misaligned latches or mispositioned molding that can create shear wind. Examine window regulators for sticking or improper sealing. Document findings with brief notes and photos, noting perceptual changes as speed rises. Prioritize fixes that restore airtight interfaces, then re-test to confirm reduced wind noise and a cleaner vehicle assessment.
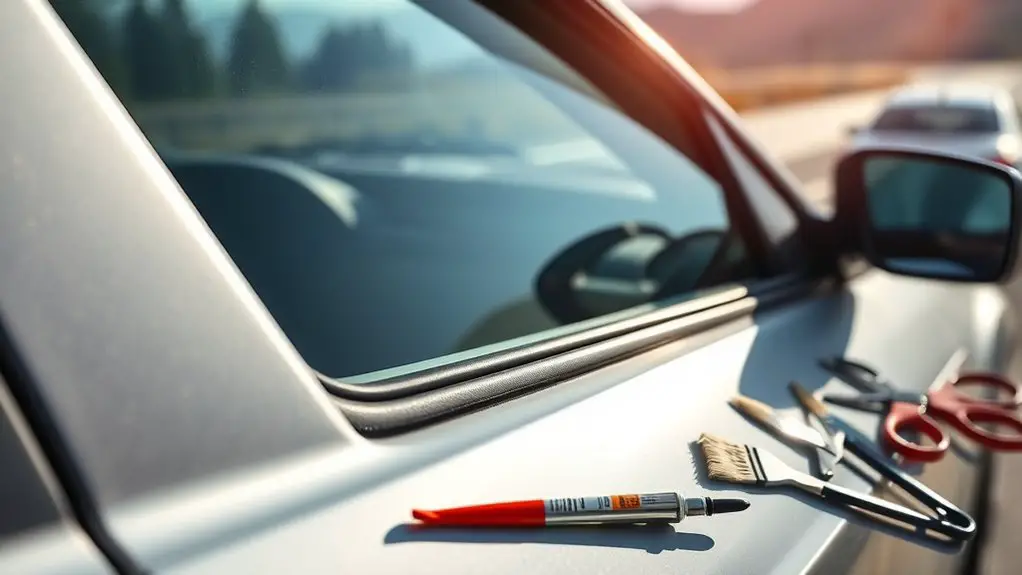
Tools and Materials for Quick Paint Repairs
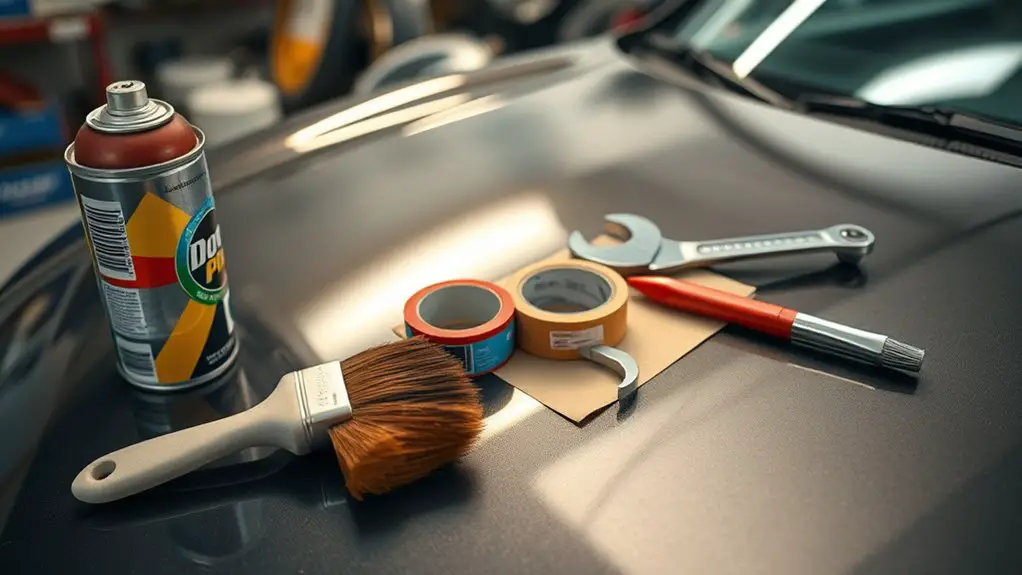
Tools and materials for quick paint repairs are your first line of defense against minor blemishes; assemble a concise kit that covers surface prep, patching, color matching, and finish. You’ll prioritize reliability, portability, and predictable results. Choose paint types suitable for automotive use: basecoat, clearcoat, and compatible primers in a small, organized case. Include sanding sheets (grit 400–800), microfiber cloths, masking tape, alcohol wipe, putty or surface filler for minor dings, and a plastic scraper for patching. For patching, add spot putty and a non-sag filler for thin needs, plus a small applicator knife. Color matching requires a color guide or swatches aligned to your vehicle’s code, plus a mixing cup and stirring stick. Finishing demands a compatible clearcoat, thin-tip brush or spray-compatible nozzle, tack cloth, and a respirator. Mastery lies in repeatable repair techniques: prep, fill, prime, color, and clear, with controlled application and curing.
Cleaning and Prepping the Affected Area
Begin with a thorough surface cleaning to remove dust, oils, and residues, using a mild detergent solution and a damp cloth. Remove contaminants with appropriate methods for the material, then rinse and air-dry until the area is completely dry. Inspect the spot for uniform texture and moisture, repeating cleaning or drying as needed before proceeding.
Surface Cleaning Steps
Before any repair, you must clean the affected area to remove dust, loose debris, and surface contaminants. You’ll perform surface cleaning steps with a precise, repeatable method to guarantee adhesion and paint finish quality. Start by visually inspecting the surface for defects, then wipe lightly with a tack cloth to capture stray particles. Create a controlled workflow: apply appropriate cleaning solutions, then rinse or wipe off with a lint-free cloth, avoiding saturating the surface. Dry thoroughly before further preparation. Use minimal moisture to prevent corrosion or swelling of substrates. Document temperatures and dwell times if needed. Maintain a clean workspace to prevent recontamination. This surface preparation phase focuses on enabling reliable coating adhesion, not removing deep contaminants. Proceed only after the area remains dry and dust-free.
Contaminant Removal Methods
Contaminant removal methods build on clean-surface discipline by selecting targeted cleaning steps that remove residual particles, oils, and surface films without damaging substrates. You identify contaminant types first, then choose removal techniques that match their chemistry and adhesion. Begin with a dry wipe to lift loose debris, followed by a compatible solvent or aqueous cleaner verified for your substrate. Use minimal dwell time and avoid overheating or over-wetting. For oils, employ solvent swipes with fresh, lint-free wipes; for particulates, consider mechanical agitation or gentle abrasion only where substrates tolerate it. Rinse or neutralize residues as needed, then inspect under good lighting. Document areas treated and ascertain compatibility of cleaners with primers and paints to prevent adhesion failures later. Maintain a clean workflow to prevent recontamination.
Drying and Inspecting Area
After cleaning, make sure the area is dry, visually inspect for remaining moisture, and confirm the surface is ready for prep. You’ll use controlled drying techniques to prevent flash rust or residue, then verify with steady inspection tips to ascertain a uniform backdrop for patching and paint. This stage is about reliability, not haste; document any persistent damp spots and recheck after a brief interval.
- Apply consistent airflow and gentle heat if needed, avoiding overheating.
- Reassess corners and recessed areas for hidden moisture pockets.
- Wipe with a dry, lint-free cloth to confirm surface dryness.
- Mark readiness with a light tack test before final prep.
Light Scratches: Flat-Fill and Feather Technique
Light scratches can be corrected with a flat-fill and feather approach. You begin by cleaning the area to remove dust and grease, ensuring the surface is dry. Next, apply a thin, flat layer of paint filler, using a controlled, broad motion. The goal is to level the scratch without creating high spots. Allow the filler to cure per manufacturer instructions, then inspect for uniformity. If a defined edge remains, perform a feathering process by gently blending the blending zone outward with light passes. Keep pressure even and use a slightly damp pad or fine abrasive to smooth any raised edges. Reapply a second thin pass if the scratch persists, focusing on maintaining a flat surface with no ridges. Finally, wipe away residue and test by passing a clean cloth over the repaired area at speed, listening for wind-induced changes. This method emphasizes precision, minimal material, and clean visual integration with surrounding paint.
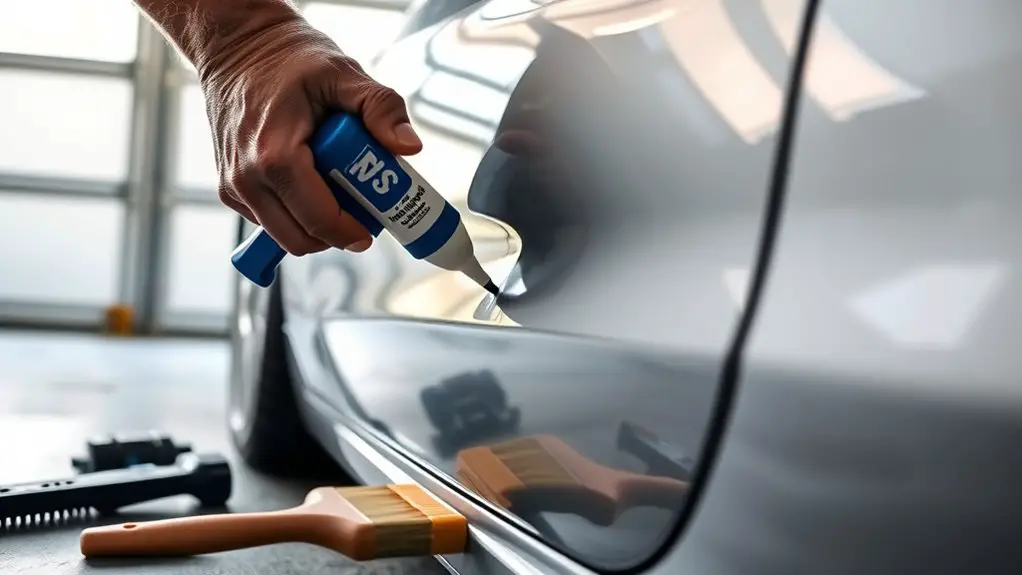
Sealing Tiny Chips With Sealant or Clear Coat
Sealing tiny chips with sealant or clear coat is a quick follow-up step after leveling the area, aimed at creating a durable, transparent seal that prevents moisture intrusion and restores the surface’s gloss.
1) Prepare the chip: clean, dry, and dust-free; remove any loose edges to guarantee a flat bonding surface.
2) Apply sealant: use a small syringe or pin-point applicator; dispense a minimal bead and spread evenly with a micro-brush.
3) Brush or cap with clear coat: choose a compatible clear coat; build a thin, uniform layer over the sealant to match surrounding gloss.
4) Cure and inspect: allow full cure time per product data; inspect for pinholes, re-coat if needed, and buff lightly to blend edges.
Tip: avoid excessive material that can puddle or streak. Sealant application should be precise, and the final layer must cure before exposure to wind and speed.
Creating a Passive Wind-Flow Boost With Tape and Trim
To start, position tape for precise alignment along the trim to optimize airflow paths. Guarantee consistent edge seals by pressing the trim edge firmly so gaps don’t disrupt the wind-flow boost. Verify the alignment and edge integrity before moving to coating steps.
Tape Alignment Tricks
Tape alignment is critical for maximizing passive airflow with minimal drag. You’ll tune how tape interacts with paint edges and trim, using crisp, repeatable steps that yield measurable gains in wind-flow efficiency.
1) Choose tape types with low tack and clean release; test two options on a sacrificial panel to compare drag impact.
2) Align methods: start at the leading edge, lay tape flush, and press from center outward to avoid creases.
3) Use a template or straightedge to verify parallel lines relative to the vehicle’s travel axis; adjust until alignment looks true at speed.
4) Recheck after a brief test run; if flutter appears, reseat the tape with fresh pressure and re-tack any lifted corners for a secure seal.
Trim Edge Sealing
As you move from aligning tape, focus on sealing the trim edge to maintain uninterrupted flow along the vehicle’s surface. You’ll use trim materials compatible with your chosen sealant, keeping edges flush. Apply sealing techniques that create a continuous, low-friction boundary, reducing wind chatter at speed. Verify that the edge profile remains smooth and free of gaps, then recheck tape adherence to prevent moisture intrusion. For best results, trim excess material cleanly and press the edge firmly into place.
| Step | Outcome |
|---|---|
| Inspect edge | Detect gaps |
| Apply sealant | Form continuous line |
| Press edge | Flush contact |
| Cure/settle | Enhanced seal |
| Test wind flow | Confirm improvement |
Sanding and Buffing for Smoother Surfaces
Sanding and buffing smooths rough spots and restores finish evenness by removing imperfections in a controlled sequence. You’ll start with a fine grit to level edges, then move to progressively finer grits to reveal a uniform sheen. Keep light, even pressure and work in consistent, overlapping strokes to avoid low spots. Match your technique to the surface and paint type, and don’t rush the process.
- Identify defects and select sanding techniques that address them without etching the base layer.
- Use a progression of grits (e.g., 400 → 600 → 800) and inspect reflections to gauge smoothness.
3 Shift to a non-marring buffing method with a soft pad and appropriate compound for the final luster.
4. Wipe clean between steps, test for uniform gloss, and avoid introducing new marring.
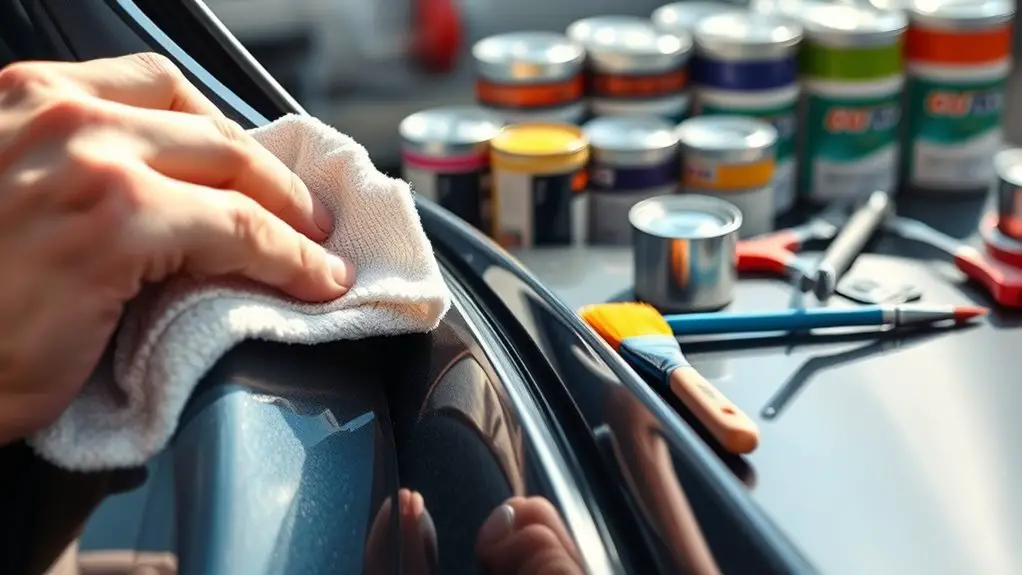
Protecting Repairs: Waxing and UV Shield
Protecting repairs with wax and UV shield is about sealing the restored surface to resist moisture, staining, and sun-induced degradation. You apply a thin, even layer, working from the center outward to avoid gaps. Use waxing techniques that create a uniform film without buildup, then buff to a gloss that hides the repair line but doesn’t attract dust. Reapply as recommended by the product, typically every few months under high sun exposure. UV protection is essential; choose a sealant that blocks UV-A and UV-B and won’t amber with heat. Surface prep remains critical: clean, dry, and lightly deglossed for better adhesion. Maintain color match by using a compatible wax. Do not overwork edges, which can create noticeable halos. Test on an inconspicuous area first. Table below summarizes steps and outcomes.
| Step | Outcome |
|---|---|
| Prep | Clean, dry, deglossed surface |
| Apply | Even film, no buildup |
| Buff | Smooth, controlled sheen |
| Reapply | Periodic UV protection |
What to Expect: Durability and Maintenance Notes
Even with proper shielding, expect the repaired area to differ in durability from surrounding paint, especially under heavy use or harsh conditions; durability hinges on surface prep, product quality, and application consistency. You’ll want clear durability expectations up front, then follow precise maintenance tips to extend life.
1) Inspect regularly: note micro-damage, wear patterns, and color match drift; address early.
2) Clean with mild solvents: use non-abrasive cloths; avoid solvent buildup that could soften edges.
3) Re-apply sealant as needed: follow manufacturer timing for UV and moisture barriers; refresh when gloss fades.
4) Track environmental exposure: wind, rain, salt, and temperature cycles influence longevity; adjust maintenance cadence accordingly.
Maintenance tips emphasize consistency over novelty. Record batch numbers, cure times, and conditions at application; mismatch increases failure risk. If you observe delamination or peeling, slow, cautious touch-ups preserve overall integrity. Durability expectations align with disciplined upkeep, not single-shot fixes. You gain better long‑term results by treating maintenance as part of the repair workflow.
Frequently Asked Questions
Will DIY Fixes Reduce Wind Noise at Highway Speeds Effectively?
Yes, DIY fixes can reduce wind noise, but not dramatically. About 60% of highway noise comes from poorly sealed panels, so you’ll gain modest relief with careful wind noise-focused paint repairs. Start by sealing gaps, sanding rough edges, and applying smooth, buffed coatings. Check door seals and weatherstrips. Use compatible paint to avoid added gaps. Monitor results at speed, re-seal as needed, and document changes for ongoing optimization.
How Long Do Touch-Up Paints Take to Cure Fully?
Touch-up paints typically cure fully in 24 to 72 hours, depending on temperature, humidity, and paint type. You’ll want to maintain a steady climate and avoid handling the area until cure times are met. Check that paint consistency is smooth and free of runs before applying a second coat. Don’t rush—proper cure guarantees adhesion and durability. After curing, evaluate gloss and texture, and plan a light polish if the surface feels tacky or uneven.
Can Tape or Trim Solutions Damage the Paint Finish?
Tape or trim solutions can damage the paint if you aren’t careful. Before you apply anything, check tape adhesion on a hidden area and use low-tack products to minimize peel. Remove promptly to avoid solvent transfer. Handle edges with light pressure; never scrub. If you protect the finish, you’ll preserve paint protection and reduce micro-scratches. You’ll maintain a clean surface ready for curing, warranty, and wind-noise goals without compromising the coat.
Is Color Matching Advisable for Small Repairs on Dark Paints?
Yes, color matching is advisable for small repairs on dark paints. You should focus on color blending techniques to guarantee the repair blends into the surrounding shade. Consider dark paint considerations like underlayers, sheen consistency, and UV exposure. Use precise measurement, test panels, and controlled lighting. You’ll apply thin coats, feather edges, and confirm with a final wipe and polish. If in doubt, consult a professional for long-term durability and seamless appearance.
What Maintenance Intervals Maximize Repair Longevity?
Maintenance intervals that maximize repair longevity depend on exposure and usage; aim for quarterly inspections and semiannual refinishing checks. You should follow maintenance schedules that prioritize adhesion, sealant integrity, and UV protection. Use proper repair techniques: clean, abrade, prime, and bake or cure per product specs, then test for wind noise reduction. Stay disciplined with moisture control and temperature limits, and recoat as soon as you notice micro-cracking or dulling.