Step-By-Step: Fixing a Coolant Lines for Battery Pack Fault Safely
You’ll methodically diagnose and safely fix a battery-pack coolant-line fault by following a structured, step-by-step procedure. Start with safety: PPE on, hazard assessment, and a clear plan. Power down, disconnect harnesses, and locate the line from reservoir to pack. Inspect for leaks, cracks, and worn clamps. Reseal or replace faulty sections, then bleed air and refill coolant with the correct fluid. Perform a pressure test to confirm leak-free operation, and finish with documentation and final checks to guarantee reliability. More details await.
Identifying the Coolant Line Fault in a Battery Pack
Identifying a coolant line fault in a battery pack starts with a careful inspection of the cooling system’s basic indicators. You’ll look for unusual heat patterns, sudden temperature spikes, or evenly distributed warmth that doesn’t align with charging or runtime. Listen for subtle hisses or vibrations suggesting pressure variance, and note any visible leaks or damp areas around hoses and connectors. Check coolant levels and fluid color, comparing them with the manufacturer’s specifications. You should verify pump operation by feeling for steady flow at reachable ports when the system runs, and confirm that seals remain intact without seepage. Inspect clamps, clamps, and hose integrity for cracks, bulges, or looseness that could create a vacuum or pressure fault. Correlate these observations with a diagnostic error code related to coolant line status, and document any anomalies tied to a potential battery malfunction. If inconsistencies appear, mark the area for further testing and controlled confirmation.
Safety Preparations Before Servicing
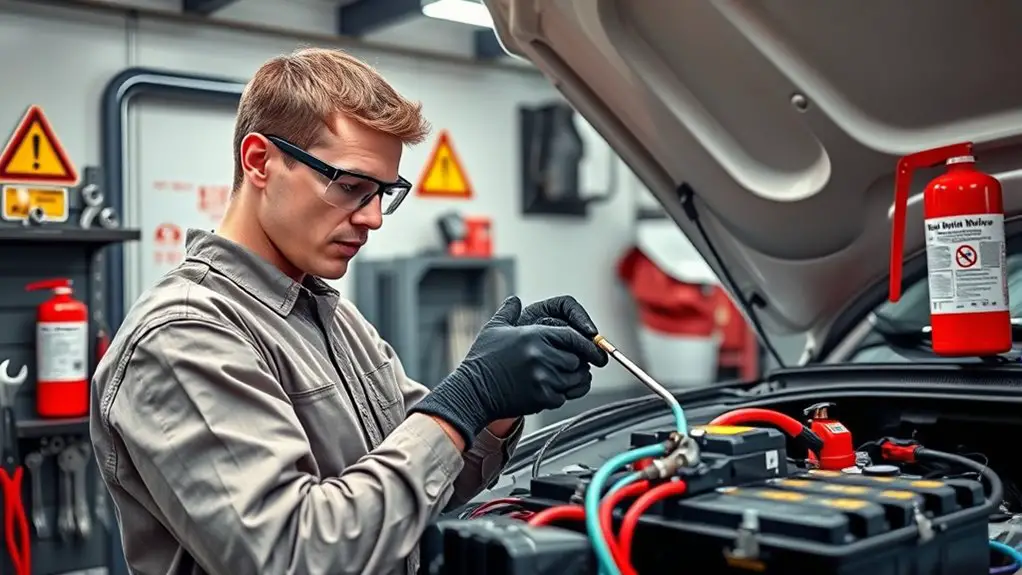
Before you begin, confirm you have the proper PPE and perform a PPE check to verify all items are intact and rated for electrical work. Conduct a hazard assessment to identify risks specific to the battery pack and coolant system, documenting controls before any work starts. Keep the safety plan visible, follow it strictly, and pause if conditions change.
PPE and PPE Check
PPE and PPE check are your first lines of defense before starting work. You equip properly and verify every item before you touch the system. Begin with eye protection to guard against splashes and debris, then use gloves rated for chemical and electrical exposure, and select a flame-resistant layer if warranted by your assessment. Make certain footwear provides traction and protection, and don a hard hat if overhead risks exist. Confirm respirator or breathable protection only if airborne hazards are possible. Inspect each item for wear, fit, and integrity. PPE types and PPE maintenance are essential: check seals, straps, and insulation, replace damaged gear, and document inspections. Keep spare components accessible and follow established donning and doffing sequences to minimize contamination or exposure.
Hazard Assessment Steps
Starting from your PPE checks, you’ll next verify the work area and the system you’re servicing to guarantee a safe path forward. You perform hazard identification to catalog potential dangers before touching coolant lines. Then you conduct risk evaluation to prioritize those hazards by likelihood and consequence, guiding control choices. Document controls clearly and align them with manufacturer guidance and site standards. Maintain a calm, systematic tempo, and anticipate interference, spills, or thermal risk. Use energy isolation, ventilation, and fire precautions as required. The process remains iterative: reassess as work evolves, adjust controls, and confirm residual risk is acceptable.
| Step | Action |
|---|---|
| 1 | Identify hazards |
| 2 | Evaluate risk |
| 3 | Implement controls |
| 4 | Verify residual risk |
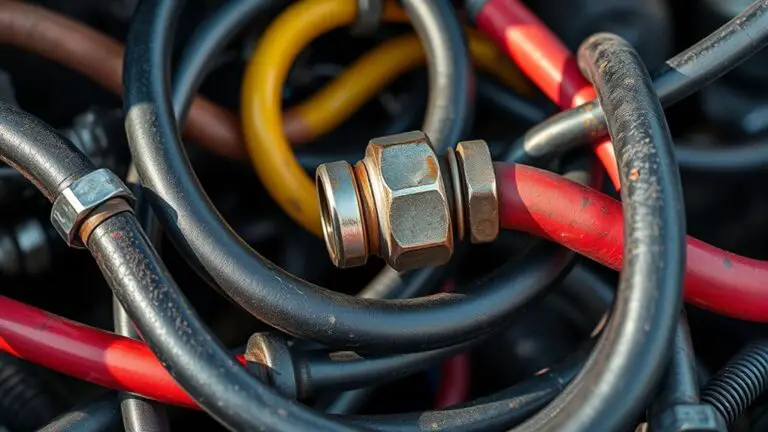
Tools and Materials You’ll Need

To tackle the repair, gather a focused set of tools and materials: a replacement coolant hose and clamps, metric wrenches and pliers, a torque wrench, hose clamps, coolant compatible with the battery pack, funnel, drain pan, rags, and safety gear. You’ll want a clean workspace and a dry surface to prevent contamination. Start with the basics: select the correct hose diameter and clamp style for your system, then verify hose material compatibility with coolant types. Maintain a precise approach: label fittings, note orientation, and document any deviations from stock routing. Keep a calibrated torque wrench handy to avoid overtightening or under-tightening clamps. Have spare hose, clamps, and a leak-prevention sealant approved for automotive applications. Protect yourself with safety glasses and gloves; prepare absorbent rags for spill control. This prep guarantees you have reliable repair tools and the right coolant types on hand, enabling a controlled, confident repair.
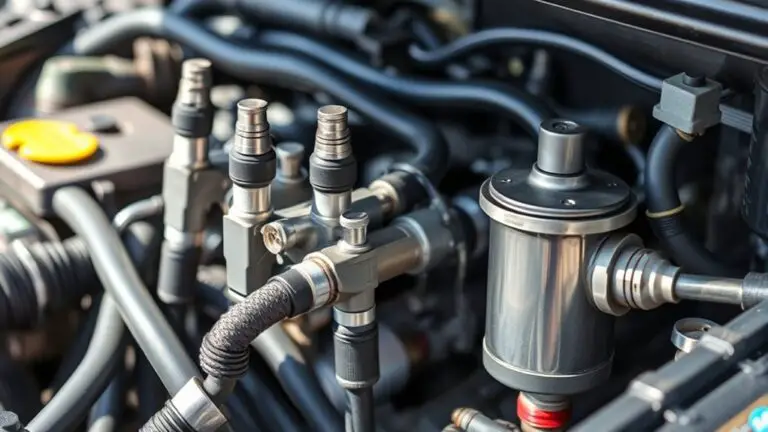
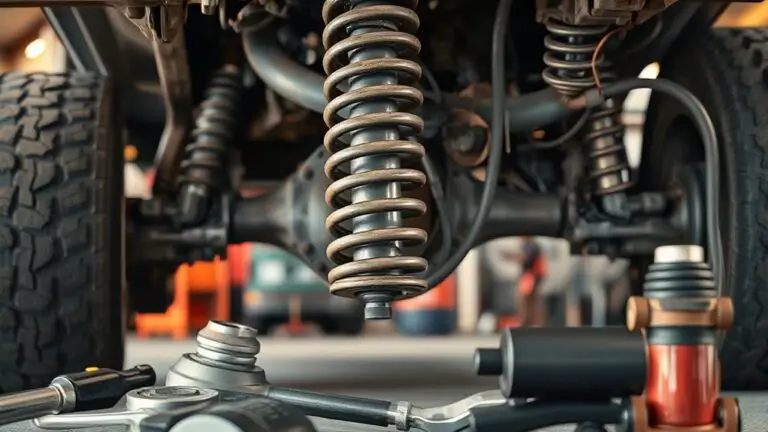
Accessing the Battery Pack and Locating the Line
Access to the battery pack begins with safely isolating the system and gaining a clear view of the routing between components. You’ll confirm the power-off state, disconnect the main harness, and verify no residual energy remains. Next, you’ll access the enclosure per manufacturer guidance, using appropriate PPE and a clean work surface. With the intake and exhaust visible, trace coolant lines from the reservoir to the pack, noting any clamps, brackets, or quick-connects. This is the moment for deliberate line location checks: identify the line carrying coolant toward the battery module and the return path. Document each junction and orientation to prevent misrouting during reassembly. Keep components dry and labeled. Avoid touching exposed circuitry or terminals. As you expose the line, maintain stable footing and a controlled environment. Your goal is a precise map of the cooling loop that supports safe, repeatable service. battery access is established, line location is confirmed, and you’re ready for next steps.
Draining or Bypassing Coolant as Required
If you must drain or bypass coolant during service, proceed only after confirming the system is fully isolated and the battery pack is accessible. You’ll follow a strict sequence to minimize risk. First, identify the coolant types present and confirm compatible handling procedures. For draining, use the designated reservoir and collection tools, ensuring seals remain intact and contamination is prevented. Document the volume removed and label any remaining lines to avoid mixups. When bypassing, select a tested bypass method that preserves pressure balance without compromising safety, and secure all connections before rechecking isolation. Never bypass any safety valve or sensor without manufacturer guidance. Refill with the specified coolant type and verify proper circulation once reconnected. Monitor for leaks, unusual temperatures, or pressure changes during initial startup. Maintain a clean work area and dispose of drained fluid per local regulations. Reassess system readiness before returning to service.
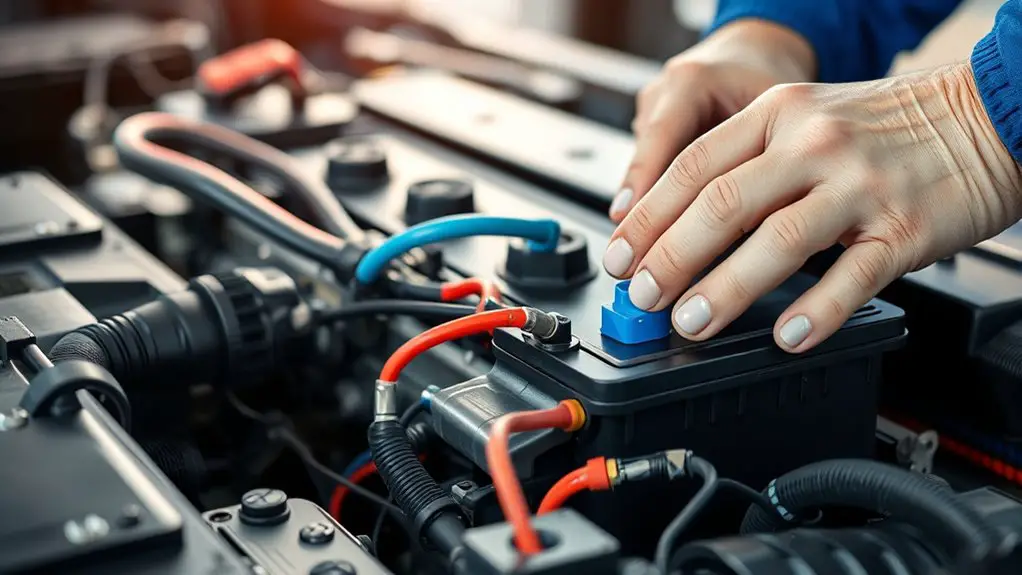
Inspecting the Coolant Line for Damage or Wear
You’ll start by checking the coolant line for obvious damage or wear, focusing on visible cracks, bulges, and leaks. Next, assess line integrity by inspecting connections, clamps, and routing for signs of movement or abrasion. Finally, note any wear patterns or fatigue indicators to guide next steps in repair or replacement.
Inspecting Line Integrity
Inspecting line integrity starts with a systematic check of the coolant hose and connection points for any signs of damage, wear, or leakage. You’ll examine clamps, fittings, and junctions for cracks, bulges, or corrosion, then verify that each coupling is secure without overtightening. Move along the length of each coolant line, noting any hardening, soft spots, or kinks that could restrict flow. Compare hoses to their original specifications when available, focusing on material flexibility and uniform diameter. Use measured inspection techniques: clean visible surfaces, illuminate joints, and palpate for hidden defects. Document findings succinctly, marking items requiring replacement. Maintain a calm, controlled approach, ensuring safety while preserving system integrity. Remember coolant line materials influence performance and longevity, guiding your inspection techniques.
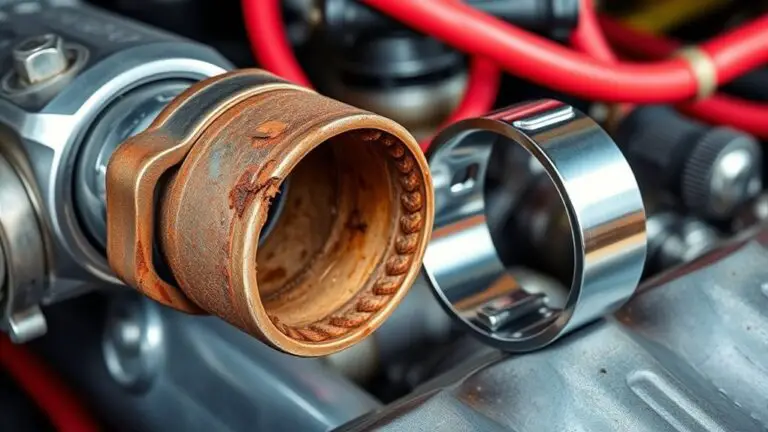
Wear and Tear Signs
Wear and tear signs on coolant lines manifest as subtle clues before leaks or failures appear. You should inspect for changes in color, texture, or consistency along the hose and fittings, noting any chalky residues or film that weren’t there before. Look for slight stiffness or soft spots that indicate material fatigue, and run your finger along bends to detect micro-cracks. Check clamps for looseness or uneven seating, which can precede leaks. Observe cooler or warmer patches that defy ambient temperature, implying flow disruption. Document any coolant degradation indicators, including darkening or milky appearance, and verify lines for line corrosion near joints. If you spot corrosion hints or compromised insulation, tag the component for replacement and schedule a full diagnostic before progressive failure.
Resealing or Replacing the Faulty Section
If the leak is localized to a single seal or gasket, resealing the section is the quickest first step, provided you can access it without disturbing adjacent components. Begin by cleaning the area to reveal the exact seal boundary, then inspect for hairline cracks or deformation. Choose a compatible sealant or gasket material based on temperature, pressure, and chemical exposure in the coolant loop. Apply a conservative bead or place a replacement gasket with even compression, avoiding over-tightening that could damage the mating surfaces. If threads or flanges are involved, use appropriate torque specs and thread sealant rated for automotive coolant systems. Resealing techniques should prioritize cleanliness and uniform contact across the seal interface. If resealing fails or the seal is damaged beyond repair, evaluate replacement options. Replacement options include a complete gasket kit or a pre-assembled section with integrally bonded seals, ensuring compatibility with your battery pack’s coolant routing and mounting configuration. Verify system integrity after reassembly.
Refilling Coolant and Bleeding the System
To start, you’ll bleed the system first to remove air, then refill the coolant properly to maintain seal integrity. Follow air-free filling steps to prevent pockets and guarantee a smooth flow through the lines. You’ll verify no air remains and baseline levels after the refill.
Bleed the System
Bleeding the system involves refilling the coolant and removing any air trapped in the lines so the pack operates at proper temperatures. You approach this step with steady hands and measured steps, avoiding guesswork. Begin by confirming connections are secure, then open the bleed valve to release trapped air in a controlled manner. Monitor reservoir levels as coolant flows, topping up as needed to maintain a continuous fill without air gaps. Use purposeful breathing and calm concentration to prevent spills or pressure surges. When finished, close the valve and recheck for leaks. Document the coolant types used, noting any deviations from spec. Apply bleeding techniques consistently across lines, keeping a precise log for future maintenance. This disciplined approach preserves temperature management and system reliability.
Refill Coolant Properly
After confirming the system is free of air, you’ll refill the coolant to restore full circulation and prepare for another bleed if needed. You proceed methodically, matching the coolant to the system’s specifications and avoiding overfill. Begin by pouring slowly, watching the level rise to the correct mark, then pause to confirm no air pockets remain at the highest point. Re-check the pressurized lines for any signs of leakage as you circulate the fluid. Once steady flow is established, tighten all caps and fittings to factory torque. Consider your maintenance schedules to determine when to refilter or replace coolant as required. Document coolant types used and intervals for future reference, ensuring consistent performance and safer operation of the battery pack.
Air-Free Filling Steps
If air is suspected, start by ensuring the system is still and all outlets are accessible, then open the appropriate vent or bleed point to release any trapped gas while observing the flow. You’ll perform air-free filling by gradually introducing coolant through the primary fill point, monitoring for steady, bubble-free movement. Keep the engine or pump off until you see a calm return and consistent level. Use deliberate, slow pours to avoid splashing and to preserve coolant properties like viscosity and pH balance. After initial fill, close the bleed, restart briefly, and recheck for any remaining air with the system at operating temperature. Document the filling techniques used, reseal all caps, and confirm no leaks while maintaining safe access to the battery pack.
Pressure Test and Leak Verification
During a pressure test, you’ll seal the system, apply the specified pressure, and observe the gauge over the defined interval to verify there are no drops indicating leaks. You’ll record readings at steady intervals, noting any transient spikes. Use the recommended equipment and a compliant fluid, ensuring seals are snug and hoses are secure before pressurizing. Maintain a controlled rate of pressurization to avoid shocking components. If the gauge holds steady, proceed to extended observation, verifying no sudden changes upon temperature variation or vibration. Inspect joints, fittings, and clamps visually after stabilization, and recheck for movement or creep in connections. Document all results clearly, including test pressure, duration, and ambient conditions. If you observe coolant leaks, pause, depressurize safely, and re-evaluate hose routing and fittings. Remember, accurate pressure testing minimizes risk and confirms system integrity without guessing.
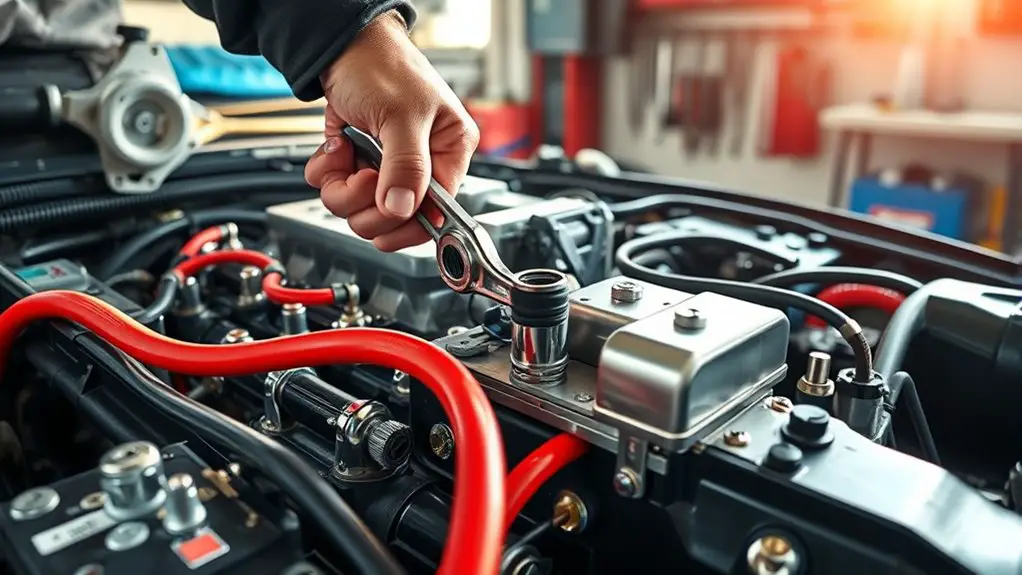
Reassembly, Final System Check, and Documentation
With the system depressurized and components aligned, begin reassembly by reinstalling hoses, clamps, and protective covers exactly as in the teardown sequence, ensuring all fittings are snug and routing matches the original configuration. Next, secure fasteners to specified torque values and verify that brackets, shrouds, and harnesses sit without interference. Reconnect sensors, wiring, and feedback lines, confirming proper polarity and isolation from heat sources. Perform reassembly techniques with deliberate, orderly motions, checking each connection for alignment and absence of cross-threading. Once assembled, restore the cooling circuit and purge any trapped air using the established bleeding procedure, watching for steady flow and consistent pressure.
Proceed to final checks: leak test, thermocouple readings, and system pressure stabilization within the recommended range. Validate no warning codes appear on the control interface. Document every step clearly, including parts, torque specs, test results, and any deviations. Keep the log concise, reproducible, and ready for audit.
Frequently Asked Questions
How Long Does the Whole Repair Typically Take?
Repair work typically takes about 2 to 4 hours, depending on wheel access and leak severity. You’ll inspect coolant types, drain coolant, and replace lines, then test for leaks. Gather repair tools like wrenches, clamps, and a torque wrench, then reassemble carefully. Expect extra time if you need to flush and refill the system. You’ll confirm proper flow, monitor temps, and guarantee no residual pressure remains before powering up again.
Can I Reuse the Original Coolant After Draining?
Yes, you can reuse the original coolant if its quality remains high and it’s free of contaminants. First, inspect coolant quality, looking for color changes, sediment, or odd odors. If it passes, strain it and test for correct polarity and boiling point. If doubtful, recycle coolant properly and replace with fresh coolant. Maintain system cleanliness, use appropriate filters, and follow disposal guidelines. Recycling coolant reduces waste and preserves performance, but never risk reliability.
What Are Common Signs of Post-Repair Leaks?
Common signs of post-repair leaks include steadily dribbling coolant, dampness around fittings, and a dropping coolant level. You should trust leak detection tools to confirm the exact spot, and monitor pressure or flow changes during fluid monitoring. If you notice a drop despite a full reservoir, recheck clamps and seals immediately. Stay precise, document observations, and verify with a second check before resuming operation. Maintain vigilance and safeguard your system’s integrity.
Is Coolant Replacement Required After Every Fix?
“Measure twice, cut once.” No, coolant replacement isn’t required after every fix. After you repair lines, you’ll check for leaks and refill with the appropriate coolant type, then monitor levels during maintenance tips. You should top off only when needed and guarantee proper cooling capacity remains intact. Keep to your coolant types guidelines, verify hoses, and document changes. You’ll stay confident, precise, and free to push forward with steady, proactive upkeep.
Are There Warranty Considerations for DIY Repairs?
Yes, there are warranty considerations for DIY repairs. You may void warranty coverage if the manufacturer disclaims non-authorized work, so you should check your terms first. Keep thorough repair documentation, including photos, part numbers, and dates, to prove care and compatibility. If you proceed, guarantee you note every step and retain receipts. You’ll have better leverage with the dealer or maker by presenting clear, organized records and honest, precise descriptions of the work performed.