How a Clogged AC Receiver/Drier Leads to Defroster Not Working and How to Clean It
A clogged receiver/drier disrupts refrigerant flow and moisture control, which weakens defrost performance and can cause erratic cabin heat. You’ll first verify symptoms like reduced defrost efficacy, fogging, or odd compressor cycling, then check for moisture or debris buildup. Decide between cleaning or replacing based on contamination level and seals. After service, evacuate, recharge to spec, and run tests for proper pressures and vent temperatures. If issues persist, another step-by-step check awaits.
Signs of a Clogged Receiver/Drier Affecting Defrost Power
A clogged receiver/drier can reduce defrost power by restricting refrigerant flow and drying capacity, which weakens the system’s ability to remove moisture and transfer heat to the evaporator. You’ll notice reduced defrost effectiveness, longer cycles, and intermittent icing on the evaporator. Pressure readings may drift from nominal values, indicating flow restriction. Listen for unusual compressor cycling or short cycling, especially during defrost attempts. Defrost terminations may occur late, leaving residual ice that re-freezes quickly after shutdown. You might see erratic climate control performance, with inconsistent cabin heat or cold spots when you expect warmth. Moisture handling declines, so internal condensate won’t clear efficiently, risking increased humidity and fogging. During HVAC maintenance checks, verify receiver/drier condition, looking for visible clogging, discoloration, or swelling. Use a calibrated gauge set to confirm refrigerant flow and pressure ratios. Plan replacement if contamination or desiccant degradation is evident. Maintain climate control integrity through routine inspection and timely service.
Why Moisture and Debris Build Up in the Receiver/Drier

Moisture entry comes from imperfect seals, venting mishaps, or compromised connections, and it bypasses the dryer’s initial filtration. Debris accumulates from contaminants in the system, corrosion byproducts, and degraded desiccant, creating blockages and mixed material. Understanding these origins helps you pinpoint how moisture and debris enter and persist in the receiver/drier.
Moisture Intrusion Origins
Moisture and debris can enter the receiver/drier during servicing, through opened fittings, contaminated tools, or incomplete evacuation, and then collect as the system cycles. In practice, moisture sources arise from improper evac, residual refrigerant, and atmosphere exposure during connection or maintenance. Oils and contaminant carry dissolved moisture, accelerating desiccant saturation and promoting corrosion. Debris can enter via loosened caps, dirty hoses, or tool residues, clinging to internal surfaces as pressure swings occur. To limit intrusion, practice strict containment: purge lines with clean nitrogen, cap all ports during service, and use sealed, dedicated tools. Verify full evacuation before recharge, and document each line’s cleanliness. Focus on intrusion prevention by reducing exposure time, maintaining clean work zones, and replacing questionable components promptly.
Debris Accumulation Causes
Debris accumulates in the receiver/drier when contaminants enter during service and aren’t removed, or when particulate matter isn’t flushed out of the system. You’ll encounter several debris types, including rust particles, sealant remnants, metal shavings, and degraded filter media. These materials trap moisture, create flow resistance, and can clog expansion devices or cause differential pressure spikes. Effective prevention starts with proper service procedures: purge lines, use clean fittings, and replace the receiver/drier with every major refrigerant service. Regular system flushing with approved cleaners minimizes trapped residues. After installation, purge again and pressure-test for leaks. When diagnosing, inspect for discoloration, sediment, or unexpected pressure drops. Cleaning methods should be conservative and compatible with the refrigerant circuit to avoid introducing new contaminants.
How a Restricted Flow Impacts Refrigerant Circulation

When flow is restricted, refrigerant velocity drops, increasing pressure drop and causing uneven cooling. You’ll notice reduced heat transfer efficiency, longer cycling, and possible freezing upstream. In this scenario, refrigerant flow becomes uneven, mass flow rate shifts, and the system’s thermal balance is disrupted. Focus on the impact analysis: quantify pressure loss, temperature delta, and outlet quality to identify where restriction is most influential. Prioritize safe operation, verify filters, and inspect the drier, lines, and expansion device for impedance. Use controlled sweeps and measure superheat and subcooling to map changes across the loop. Document results to guide corrective action and prevent compressor strain. The goal is to restore consistent flow, stabilize pressures, and maintain defroster performance. Expect slower response times and potential uneven cooling until flow is normalized.
| Segment | Condition | Action |
|---|---|---|
| Upstream | Restricted | Assess obstruction |
| Midline | Flow variance | Monitor pressures |
| Downstream | Cooling impact | Verify temps |
| Sensor | Readings | Log data |
| Outcome | Restored flow | Confirm normal operation |
Diagnosing a Drier-Related Defroster Problem: Symptoms to Look For
You’ll notice defroster performance changes when a drier blockage alters flow, so start by linking symptom indicators to possible restriction sites. Look for reduced airflow, inconsistent heat, or front-dash fogging that correlates with pressure readings and system duty cycles. Corroborate findings with drier blockage clues like abnormal sight/feel of the receiver-drier and diagnostic codes to guide next steps.
Symptom Indicators
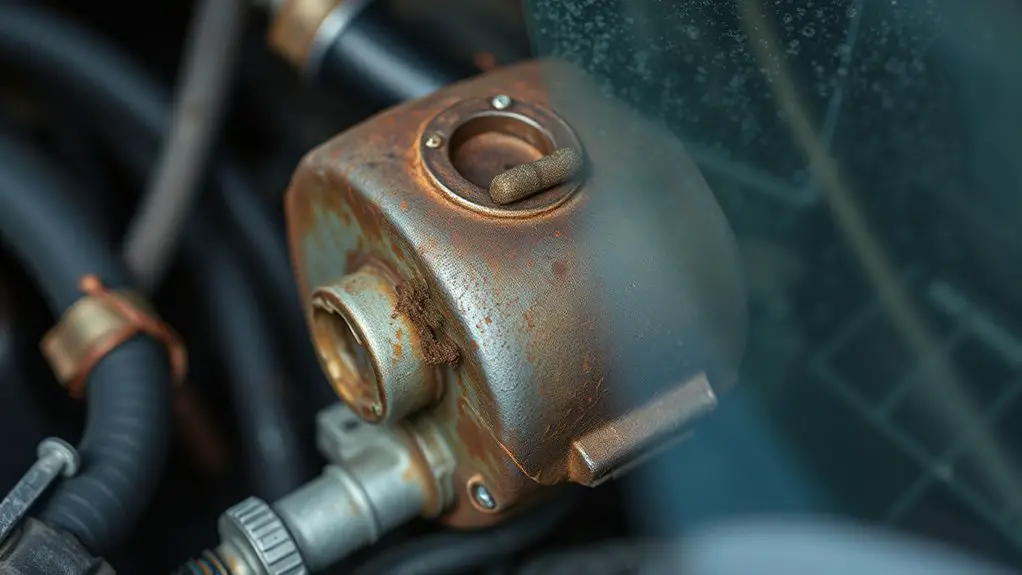
A clogged receiver/drier can trigger multiple, clear defroster symptoms. You’ll notice diminished airflow to the windshield, inconsistent heat, and intermittent fogging that won’t clear with quick fan adjustments. Expect reduced cooling efficiency alongside sporadic AC performance, plus faint or unusual smells from the dashboard area. You may also see the climate control indicator flicker or stay in a failsafe mode during defrost operation. Pressure readings on the low side may appear higher than normal when the system runs through defrost, signaling restricted flow. Look for moisture or ice near the receiver/drier fittings after prolonged defrost use. These clogged symptoms point to AC issues that warrant inspection, filter checks, and, if needed, drier replacement or system purge.
Drier Blockage Clues
Drier blockage clues emerge when the defroster performance deteriorates despite normal climate control settings. You should verify airflow, power, and refrigerant stability first, then inspect the receiver/drier for pressure drops and noise indicators. Look for frost buildup on lines near the evaporator and any unusual hissing sounds during operation. If the dash indicators show erratic readings, perform defroster functionality checks to confirm airflow is unimpeded and the blend door operates correctly. A clogged drier often precedes refrigerant contamination, so consider moisture signs in the sight glass or a sudden pressure surge. Use drier maintenance tips to guide safe inspection and cleaning, avoiding compressor stress. When issues persist, escalate to a full system diagnostic to preserve comfort and system longevity.
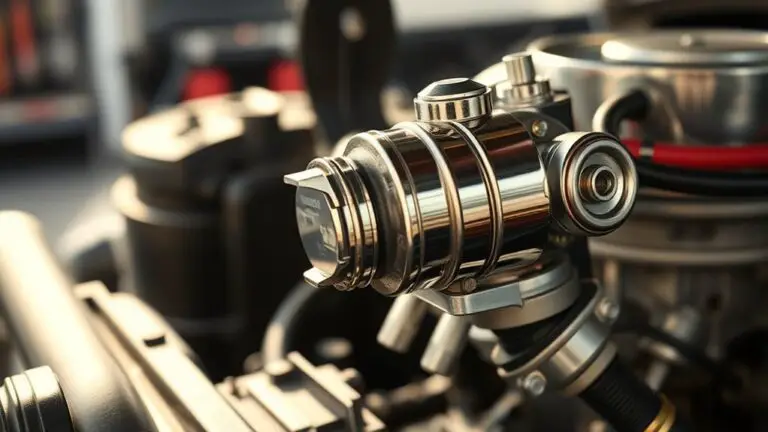
Tools You’ll Need to Inspect or Replace the Receiver/Drier
To inspect or replace the receiver/drier, gather the essential tools: a manifold gauge set, a vacuum pump, a refrigerant recovery machine, appropriate service hoses with quick-disconnect fittings, a set of metric and standard wrenches, a Schrader valve core remover, and safety gear (gloves and eye protection). You’ll use the manifold to verify system pressures and isolate the receiver/drier circuit. The vacuum pump prepares the system for seal integrity and purge. The recovery machine handles any trapped refrigerant legally and safely. Ascertain hoses and fittings are rated for automotive refrigerants and fit snugly to service ports. Keep a clean work area; monitor for oil residue or corrosion that signals contamination. Use the Schrader core remover to swap cores without depressurizing the system. Document readings during receiver/drier inspection and plan replacement steps if clogging or contamination is evident. Tools selected support precise, controlled work for receiver/drier inspection and receiver/drier replacement.
Steps to Safely Access and Inspect the Receiver/Drier
Begin by safely gaining access to the receiver/drier area: disconnect the battery and relieve any stored pressure or voltage in the HVAC lines before removing exterior panels or shields. Once open, locate the receiver/drier housing and verify the engine is off, keys removed, and HVAC controls set to off. Document its orientation and mounting points, then inspect for obvious damage or corrosion along the canister and inlet/outlet fittings. Use safe lifting techniques if the unit is heavy or tight to reach. Apply a flashlight and mirror to verify clearances and confirm plumbing runs aren’t kinked. Check seals and gaskets around the housing for wear or leaks, and note any oxidation on metal surfaces. For inspection techniques, gently wiggle connections to confirm secure fittings without over‑torquing. Reassemble only after confirming access components are intact, then restore power and test the system for normal operation. Maintain safety precautions throughout, and avoid introducing debris into the lines.
Cleaning vs. Replacing the Receiver/Drier: Pros and Cons
If you’re weighing cleaning versus replacing the receiver/drier after inspection, start by evaluating contamination and flow integrity. You’ll weigh preservation of your current system against the certainty of proper function, and decide based on debris level, moisture, and refrigerant compatibility. Cleaning techniques can restore performance when contamination is light and seals are intact, but replacement guarantees ongoing reliability in harsher conditions. Consider flow tests, dirt load, and desiccant condition to judge future failure risk. Replacement costs may be higher upfront, but can prevent repeated service calls and warranty concerns. If contamination is persistent or seals show wear, replacement tends to be the cleaner long-term option. If you prioritize speed and cost control, cleaning can buy time with careful procedure and verification.
| Cleaning path | Replacement path |
|---|---|
| — | — |
| Lower upfront cost | Higher upfront cost |
| Risk of residual contamination | Guaranteed integrity |
Recharging and Testing the Climate Control System After Service
You’ll start with the recharge procedure steps, following the exact refrigerant charge amount and oil type specified for your system. Then, perform the system testing protocols to verify pressures, temps, and function of theDefroster and A/C outlets after service. Document all readings and compare them to the manufacturer’s specs to confirm proper operation and leak-free performance.
Recharge Procedure Steps
After servicing, recharge the climate control system by verifying the correct refrigerant charge and replacing or topping off the receiver/drier as needed, then evacuate and vacuum the system to remove moisture before recharging. You’ll confirm refrigerant types match the vehicle spec, then proceed with a controlled charge. Once charged, test for leaks and verify pressures at normal operating temp. Recheck the system after a short run, ensuring proper cycling and temperature drop. Schedule maintenance schedules to track service intervals and refrigerant life. If any abnormal pressure or temp readings appear, halt and reassess connections before returning to normal operation. Your goal is reliable defrost performance and consistent cabin comfort, with freedom to monitor, adjust, and drive confidently.
| Step | Action | Result |
|---|---|---|
| 1 | Evacuate/vacuum | Moisture-free system |
| 2 | Verify charge | Correct refrigerant amount |
| 3 | Leak check | Seal integrity |
System Testing Protocols
To verify proper system performance after service, perform controlled recharging and thorough testing of the climate control system. You’ll follow testing procedures that confirm pressure, temperature splits, and airflow inside the dash. Begin with a leak check, then recharge to the specified charge with the correct retrofit orographeric target, monitoring gauges and the vacuum hold during service. After recharge, run the compressor in all modes: fresh-air, recirculated, defrost, and max AC, noting pressures, operating currents, and cycle times. Validate temperature differentials at vents and guarantee blend doors respond to control input. Document observations, compare to factory specs, and perform a final system evaluation for consistent performance across ambient conditions. If discrepancies appear, repeat steps, adjust charges, and recheck for ideal, reliable operation.
Preventive Tips to Keep the Receiver/Drier Clear
Regular maintenance reduces moisture and debris buildup in the receiver/drier. To keep the system clear, perform preventive maintenance on a fixed schedule and document results. Begin with a visual check of connections, seals, and obvious contamination, noting any signs of leakage or corrosion. Schedule regular inspections of the receiver/drier’s inlet and outlet lines for kinks or restrictions, and verify correct mounting orientation. Use a calibrated vacuum or pressure gauge to confirm proper sealing and no loss of charge during service windows. Replace the receiver/drier only when specifications call for it, and never bypass the filter or desiccant. Keep filters clean and replace them per the manufacturer’s interval, ensuring adequate airflow. Maintain a clean work area and use proper PPE. Record refrigerant handling, component ages, and observed moisture indicators to guide future preventive maintenance and regular inspections, ensuring prompt action before performance degrades.
Common Pitfalls When Servicing the Receiver/Drier and Defroster
Neglecting proper procedure can turn routine servicing of the receiver/drier and defroster into costly mistakes. You’ll encounter common mistakes that compromise function and safety. Start with correct isolation: depressurize the system, recover refrigerant, and verify ambient conditions before opening any fittings. Don’t spray cleaners directly onto hot components; use approved solvents and follow the manufacturer’s directions. When removing the cap or plug, avoid bending lines or stressing seals. Replacements must match the original port size, material, and rated pressure; using improper hardware invites leaks and failure. Don’t skip the vacuum hold and leak test; residual moisture causes corrosion and reduced drying capacity. During reassembly, torque fittings to spec and retorque after a short run. Document maintenance tips and service intervals for traceability. Finally, test the defroster performance under real conditions; verify airflow, temperature, and symptom resolution. Maintain discipline, stay precise, and prioritize safety over speed.
Frequently Asked Questions
Can a Clogged Dryer Cause Foggy Windows Even When AC Works?
Yes, a clogged dryer can cause foggy windows even if the AC runs. When the receiver/drier is blocked, moisture isn’t properly filtered, boosting humidity and reducing AC performance. You may notice persistent fogging, slower cooling, and strain on the compressor. To fix it, service the dryer, replace if needed, and verify proper refrigerant charge. After replacement, run a diagnostic to confirm reduced humidity and restored window clarity, ensuring peak AC performance.
How Long Does a Replacement Receiver/Drier Typically Last?
A replacement receiver/drier typically lasts 3 to 5 years, depending on climate, usage, and system stress. You’re the keeper of your own efficiency, so track symptoms and plan proactive receiver maintenance. In serviceable systems, replace when you see oil around fittings, excessive moisture, or corrosion. Use a high-quality core and seal kit, and evacuate and recharge after install. This renewal cycle keeps your airflow honest and your cooling freedom intact.
Will I Lose Refrigerant When Replacing the Receiver/Drier?
Yes, you’ll likely lose some refrigerant during replacement of the receiver drier, so expect refrigerant loss as you open the system. You must recover all refrigerant first, then replace the receiver drier, evacuate, and recharge to spec. Use a calibrated scale and follow service procedures. After installation, leak-test the connections and chassis tightness. This keeps the system sealed and helps prevent future defroster or cooling issues due to moisture or contamination.
Does the Defroster Issue Indicate an Unrelated HVAC Fault?
Yes, it can indicate an unrelated HVAC fault, not just a clogged receiver/drier. Start with defroster performance checks: verify vacuum leaks, blend door position, and heater core flow. Then inspect the A/C control module and sensors as part of hvac troubleshooting. If performance remains poor, rule out electrical faults, blower speed issues, and refrigerant-related restrictions. Address any identified faults methodically, documenting observations and corrective actions for reliable defrost functionality.
Is DIY Cleaning Safer Than Hiring a Pro for This Task?
You’ll likely want to DIY, but beware DIY Risks: you can damage seals, void warranties, and misdiagnose the system. Safer route: hire a pro who can verify refrigerant integrity and test for leaks. Professional Benefits include proper recovery, precise cleaning, and compliant disposal. If you insist on DIY, proceed cautiously with eye protection, proper vacuums, and documented steps. You’ll balance autonomy with safety, and you’ll know when to escalate to a licensed technician.