
How Road Hazards Cause Wheel Corrosion and What to Inspect
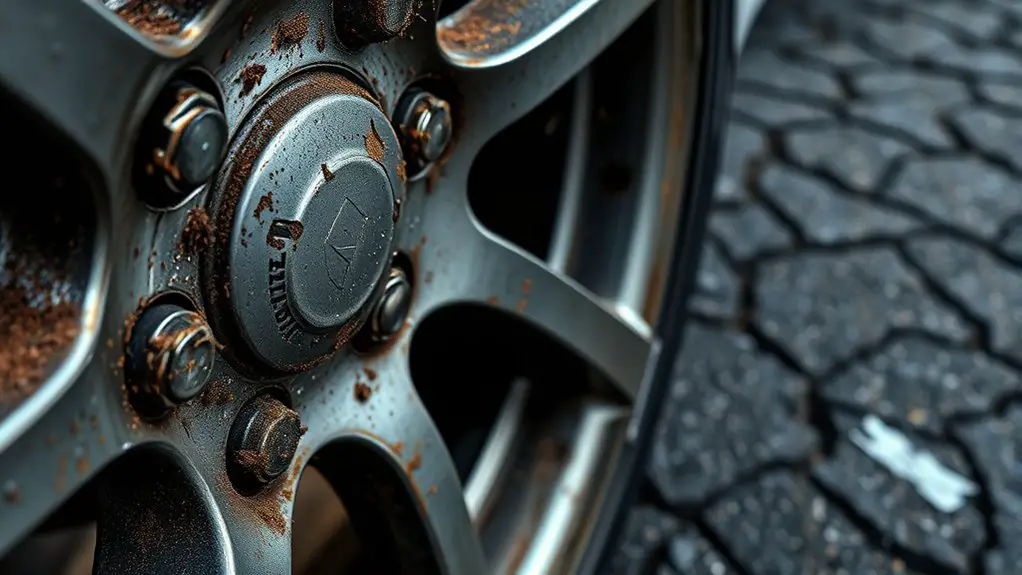
Road hazards wear and corrode wheels by chipping coatings, bending rims, and trapping moisture and salts against metal. You’ll see damage from potholes, scrapes, and debris that expose bare metal and widen microcracks. Salt and chemicals accelerate rust by lowering polarization resistance and disrupting protective films. Brake dust, dirt, and moisture create microenvironments that promote pitting and crevice corrosion. Inspect for pitting, discoloration, edge scaling, and moisture-filled crevices—and you’ll uncover early damage signals, with more specifics ahead.
Types of Road Hazards That Speed Wheel Corrosion
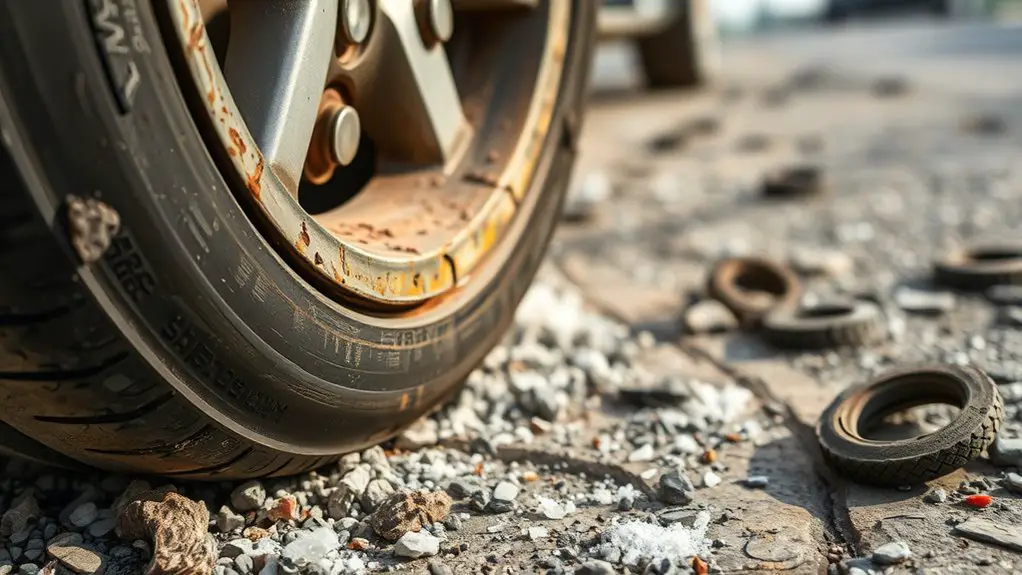
Road hazards accelerate wheel corrosion by exposing rims and fasteners to harsh elements and accelerating moisture retention. You’ll encounter several risk types that hasten degradation, each demanding precise inspection and mitigation. Road debris can strike rims, bending lips or chipping protective coatings, creating microcracks that trap water and salt residues. Tire punctures from sharp objects may force rapid deflation, stressing the wheel assembly and loosening fittings as moisture enters through compromised seals. Potholes shock rims, promoting bending and spoke or bead seat damage that widens corrosion-prone gaps. Curbs and guardrails scrape finish layers, abrading coatings and revealing bare metal for rust initiation. Gravel curls, asphalt fragments, and chemical residues lodged in wheel wells retain moisture against rims and fasteners. Temperature swings compound effects by repeatedly expanding and contracting metals, opening microfissures. You should prioritize early detection of coating loss, rim deformation, and seal integrity to preserve wheel performance and extend service life.
How Salt and Chemicals Accelerate Rust on Wheels
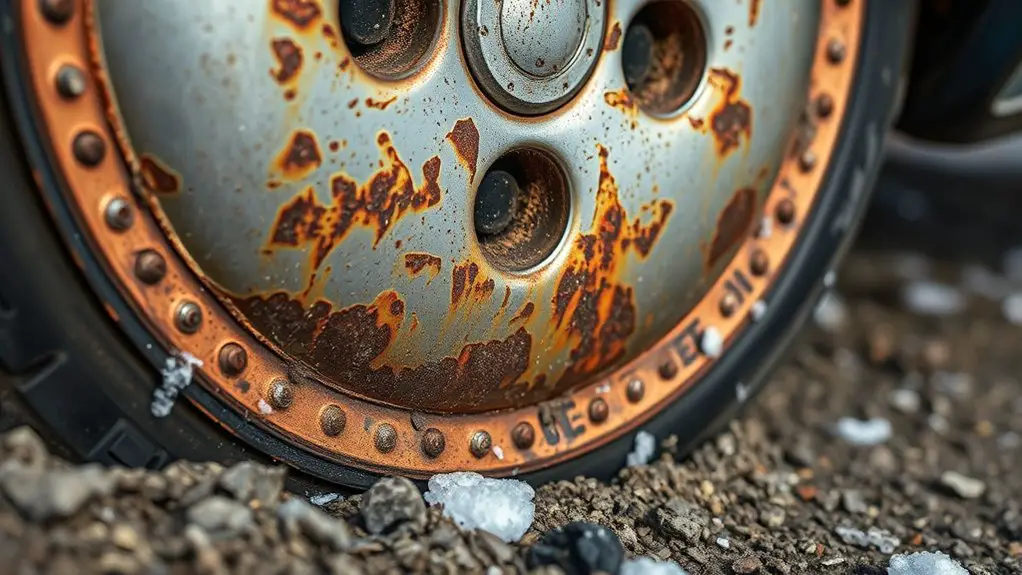
Salt and chemical compounds accelerate rust on wheels by accelerating electrochemical reactions at exposed metal surfaces. You’ll see how salinity lowers the polarization resistance, increasing anodic dissolution and cathodic reduction rates. Chemical exposure, including de-icing agents and solvents, introduces aggressive anions and cations that disrupt protective films, creating micro-pits where corrosion propagates. In intact assemblies, corrosion evolves slowly; under salt agitation, diffusion layers thin and potential differences widen, boosting rust growth. You’ll want to monitor for uniform pitting, staining, and edge scaling as indicators of ongoing damage. Focus on protective coatings, galvanic coupling, and drainage effectiveness to mitigate risk. Treat every exposed ferric surface as a site for electrochemical attack, particularly where organic residues trap moisture. Prioritize thorough washing, timely coating repairs, and shielded regions to reduce salt impact and limit chemical exposure.
Salt and chemicals accelerate wheel rust through electrochemical attack, with pitting and edge scaling signaling trouble.
- salt impact on wheel surfaces and fasteners
- chemical exposure dynamics under load
- actionable inspection cues for early rust signal
Brake Dust, Dirt, and Tracking Grime: Hidden Deterioration Factors
Brake dust, dirt, and tracking grime act as concealed accelerants of corrosion by forming abrasive, moisture-retaining layers that trap salts, solvents, and moisture against the wheel and caliper surfaces; this accelerates localized electrochemical activity and shields protective films from wear. In practice, you’ll notice dirt accumulation around the rotor hubs and lug areas, where moisture and road chemicals linger. These residues create heterogeneous microenvironments that foster pitting and galvanic differences, accelerating rust ingress under paint and cover coatings. Regular inspection should focus on wheel faces, spoke junctions, and inner barrel surfaces where grime clings. Brake maintenance routines must address residue removal with non-abrasive cleaners and soft brushes to prevent micro-scratches that serve as corrosion initiation sites. Track grime can migrate along rotor dust shields during braking, extending exposure to contaminants. Keep cleaning frequency aligned with driving conditions, moisture exposure, and chemical use, ensuring you preserve protective films and reduce initiation points for corrosion.
Metal-on-Road Contact and Surface Imperfections
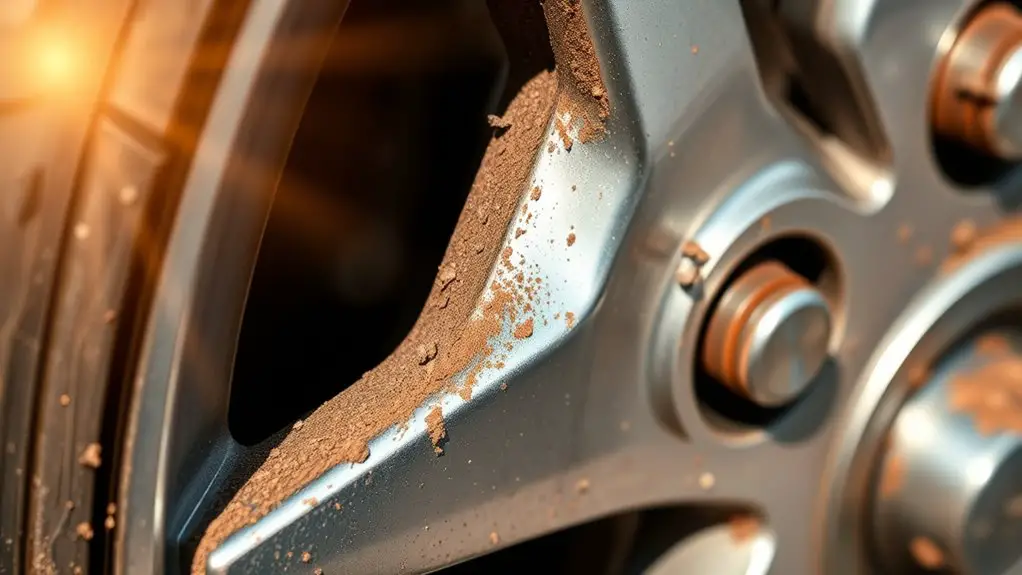
Metal-on-road contact introduces direct mechanical wear that compounds existing surface imperfections, accelerating corrosion pathways beneath coatings. You’ll observe how micro-scratches and gouges disrupt the protective film, creating initiation sites for electrolytes and hydrogen ingress. The interaction depends on wheel materials and the texture, hardness, and geometry of road surfaces, which govern wear rate and debris generation. When you inspect, focus on changes in coating integrity, edge damage, and rim bead seating that may reflect embedded grit or altered stress states. Precision interpretation helps you distinguish genuine corrosion from cosmetic wear.
- Localized thinning at high-contact zones signals altered load transfer and micro-cracking potential
- Grit-induced rim flats and edge nicks reflect abrasive transfer from road surfaces
- Worn bead seats and shoulder zones indicate abnormal wear paths and coating breach risk
This topic emphasizes controlled selection of wheel materials and awareness of road surface conditions to balance performance with long-term durability.
Moisture, Crevices, and the Lifecycle of Corrosion
Moisture entrapment factors, crevice corrosion areas, and lifecycle wear mechanisms converge to drive unseen degradation in wheels and fasteners. You’ll see how trapped moisture interacts with geometric features—gap depths, seams, and tolerances—to initiate corrosion that propagates through cycles of load, movement, and exposure. This discussion starts by identifying critical zones and the sequential processes that control initiation, growth, and eventual material loss.
Moisture Entrapment Factors
Even when exposure is brief, moisture can infiltrate crevices and joints, setting the stage for corrosion to begin and propagate over time. You’ll find entrapment driven by climate, road salt, and wash water, all acting as persistent moisture sources that linger in tight spaces. Understanding these pathways helps you target prevention steps and extend wheel life.
- Moisture sources: salt films, humid environments, and splash zones that harbor sustained dampness
- Entrapment dynamics: gaps, seams, and micro-crevices that trap water and impede drying
- Lifecycle link: cycles of wetting and drying accelerate oxide formation and corrosion progression
To reduce risk, prioritize thorough drying, minimize crevice retention, and apply coatings designed for entrapment prevention.
Crevice Corrosion Areas
Crevice corrosion areas emerge where moisture finds stationary pockets within wheel assemblies—gaps, seams, and micro-crevices that resist drying. You’ll identify crevice formation where metal interfaces trap moisture, salts, and pollutants, accelerating localized electrochemical processes. In this situation, crevices narrow airflow and hinder oxygen replenishment, sustaining anaerobic zones that drive corrosion under seals, fasteners, and joint interfaces. You’ll assess gasketed joints, bead welds, and lug holes for stagnation risk, noting that irregular corrosion often begins at corners and shifts along grain boundaries. Effective corrosion prevention hinges on removing moisture accumulation, improving drainage, and applying protective barriers or sealants tailored to cyclable stress. Document findings with precise measurements, emphasize potential propagation paths, and recommend targeted cleaning and redesign where crevice formation is likely to recur.
Lifecycle Wear Mechanisms
When moisture is present, crevices form a persistent drain on metal surfaces, shaping the lifecycle of corrosion from initiation to propagation. You’ll observe rapid initiation at protected interfaces, followed by steady, localized attack as anodic sites advance. Throughout, diffusion limits oxygen supply, shifting from uniform to crevice-dominated corrosion, then to propagation as sulfates and chlorides concentrate. A lifecycle analysis reveals cycles of replenishment and stagnation that compound damage unless intercepted. Effective corrosion prevention rests on early disruption of moisture retention, debris intrusion, and crevice formation, plus material and coating choices that resist ion transport.
- Moisture management and crevice sealing break the cycle early
- Material selection, coatings, and sealing strategies slow initiation and propagation
- Regular inspection confirms lifecycle stages and informs targeted prevention
Practical Inspection Steps to Identify Early Damage
You should look for Early Damage Indicators such as pitting, thinning, and unusual corrosion patterns that signal onset failures. Use systematic Inspection Techniques Guarding—visual surveys, tactile checks, and measurement with calipers or micrometers—to confirm anomaly presence and extent. This initial scan guides targeted assessments and informs maintenance decisions.
Early Damage Indicators
Early damage indicators are best spotted through targeted, repeatable inspections that focus on observable corrosion patterns, wear marks, and protective coating integrity. You should scan for localized discoloration, micro-pitting, and edge flaking where coatings fail, as these are early warning signs of deterioration. Pay attention to the changeover zones between painted and unpainted surfaces and any roughening under the wheel hub area. Document subtle changes over time to support corrosion prevention decisions and maintenance scheduling.
- Local discoloration and micro-pitting at seams
- Edge coating flaking and surface roughness near fasteners
- Subtle wear marks around contact patches and hub flats
Consistent checks enable you to action early warnings before advances occur, preserving strength and function. Maintain clear records for trend analysis and proactive maintenance.
Inspection Techniques Guarding
To apply targeted inspection techniques, start with repeatable, methodical checks that map known corrosion patterns from the prior findings. You’ll perform guided surface scans, edge-by-edge audits, and pinhole probing to isolate early damage signals without overreacting to benign blemishes. Maintain a standardized checklist: material thickness variance, discoloration, rim integrity, fastener corrosion, and seam seam-wear indicators. Document locations with precise coordinates, photos, and calibrated measurements to track progression over time. Prioritize corrosion prevention by flagging incongruities that could advance under road spray or salt exposure. Compare findings against baseline data, then classify risk levels to inform maintenance decisions. Use strict stop criteria when indirect indicators suggest hidden subsurface corrosion. This disciplined approach supports proactive protection while preserving your freedom to operate confidently.
Frequently Asked Questions
How Often Should You Inspect Wheels for Hidden Corrosion?
You should inspect wheels for hidden corrosion every 6 months, or sooner if you drive in salty or harsh environments. During each wheel inspection, check for bubbling paint, pitting, or discoloration beneath alloy finishes. This is your chance to catch hidden corrosion early. Use corrosion prevention techniques like cleaning with safe solvents, applying protective coatings, and ensuring proper sealing around spokes. Regular wheel inspection frequency helps prevent unexpected failures and maintain safe operation.
Do All Wheel Materials Corrode at the Same Rate?
Not all wheel materials corrode at the same rate. Aluminum alloys oxidize and form protective films, while stainless steel resists corrosion more aggressively, especially in chloride-rich environments. You’ll see differing pitting and surface wear; aluminum can suffer galvanic attack when paired with dissimilar metals. Stainless steel fares better but isn’t invincible. You should monitor for discoloration, flaky patina, and crevice corrosion, particularly in joints and wheel hubs where moisture and salt concentrate.
Can Curb Damage Accelerate Corrosion, and How?
Curb impact can accelerate corrosion, especially when scrapes reveal bare metal and moisture enters. It creates microcracks that trap salt and grit, amplifying electrochemical reactions. This hastens rust along rims and spokes, undermining protective coatings. Misaligned wheels worsen the problem by increasing curb strikes and edge damage, exposing fresh metal. Confirm wheel alignment is correct, inspect for coating damage, and treat exposed steel promptly to slow further corrosion.
What Tools Detect Early Rust Beneath Coatings?
You can use specialized tools for rust detection beneath coatings, such as ultrasonic thickness gauges, magnetic flux leakage, and infrared thermography. These methods reveal subsurface rust without removing paint, supporting early rust detection and corrosion prevention. You’ll monitor coating integrity, delamination, and substrate roughness to identify hidden corrosion. Combine non-destructive testing with periodic inspections for a proactive approach, ensuring you maintain structural safety and extend wheel life with accurate rust detection and corrosion prevention.
Do Aftermarket Coatings Prevent Corrosion Long-Term?
Yes, aftermarket coatings can provide long-term corrosion resistance if properly applied, though coating effectiveness depends on substrate prep, coating type, and environmental exposure. You’ll want to guarantee surface cleanliness, even film thickness, and correct curing. If any coating fails, you compromise protection. Regular inspections for delamination or blistering are essential. Over time, coating effectiveness may wane under harsh road salt or mechanical damage, so routine maintenance protects corrosion resistance and preserves performance.
