How Road Salt and Climate Lead to Headlight Aim Out of Spec and Protection Tips
Road salt accelerates corrosion, loosens connections, and traps moisture in headlight systems, while temperature swings stress mounts and optics, degrading aim. Inspect seals, brackets, and ballast after exposure, re-torque fasteners, and clean salt residues with non-abrasive solutions. Expect wheel-well salt transfer to fenders and vibration that nudges alignment. Look for drift signs like uneven brightness or off-center beams. Use proper aiming devices and document changes; routine maintenance minimizes misalignment risks, and you’ll uncover even more protective steps ahead.
How Salt Permeation Affects Headlight Components and Alignment

Salt intrusion accelerates corrosion and can undermine headlight performance. You’ll examine how salt permeation affects wiring, connectors, housings, and reflective surfaces. Salt corrosion accelerates wear at fasteners and gasket interfaces, increasing the risk of moisture ingress and misalignment. You should inspect seals, mounting brackets, and ballast or control units for salt buildup, corrosion staining, or pitting, then document findings for maintenance logs. Keep salt exposure in mind when evaluating headlight aim; even minor corrosion can shift reflector position or lens geometry, altering beam pattern and distance scoring. Prioritize cleaning using appropriate, non-abrasive agents and protective coatings after exposure, and replace compromised components to preserve {component longevity}. Use corrosion-resistant fasteners where possible and reseal junctions to deter future ingress. Establish a routine: post-winter inspection, post-plowing checks, and quarterly quick-look tests. Your safety-first approach protects visibility, aligns with maintenance standards, and respects your desire for freedom through reliable, predictable lighting performance.
Climate Fluctuations: Temperature Shifts and Suspension Strain on Aim

Temperature shifts can strain headlight aim by expanding and contracting mounting components, fasteners, and surrounding brackets, potentially altering reflector geometry and lens alignment. You’ll notice that temperature instability affects the tension of bolts and the flex in composite supports, nudging aim off its calibrated path. Maintain a methodical checklist: verify bracket integrity, recheck fastener torque after extreme cycles, and inspect seams where thermal expansion occurs. Track how ambient conditions influence centerline drift, and document any consistent pitch or vertical offsets through a series of quick beam tests. Suspension stress from road vibrations compounds the risk, so inspect mounting points for micro-movements and abnormal play after rapid temperature fluctuations. Prioritize preventive adjustments during routine service, not after symptoms appear. Your aim should be revalidated whenever you measure shifts beyond prescribed tolerances. Use stable mounting surfaces, clean contacts, and protective coatings to slow thermal response, supporting consistent illumination and safer nighttime visibility.
Corrosion’s Role in Mounting Bracket Degradation
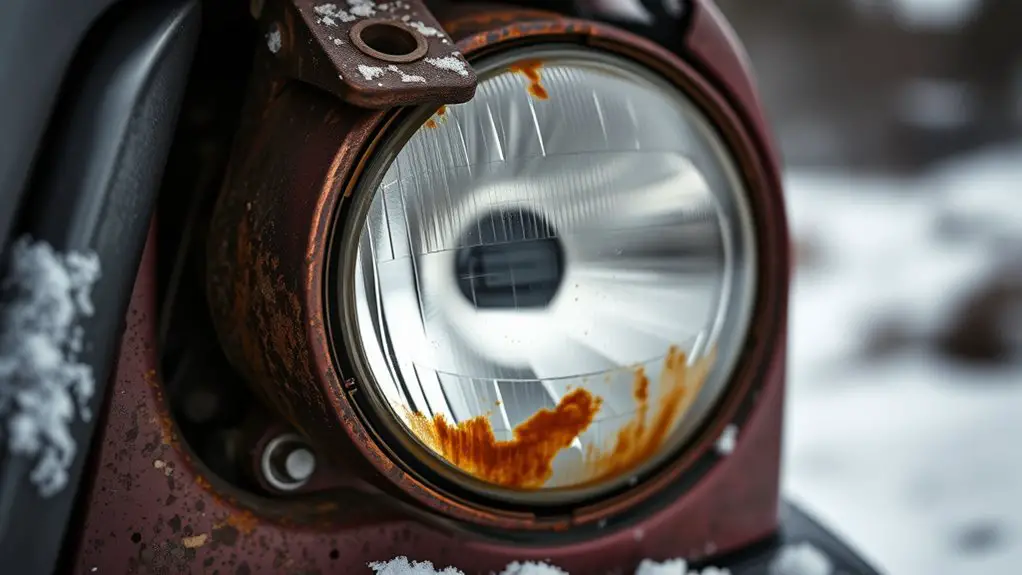
Corrosion accelerates weakening and misalignment of headlight mounting brackets by gradually degrading fasteners, anchor points, and surrounding hardware, which can introduce play and drift in beam aim. You’ll notice increased vibration and subtle shifts after road salt exposure, demanding a systematic inspection. Corrosion targets bracket material, especially at welds, flanges, and mounting ears, reducing clamping force and altering geometry. To prevent escalation, verify corrosion resistance in bracket material selections and substitute alloys with proven longevity for outdoor exposure. Evaluate installation techniques to confirm proper preload and secure torque, avoiding over- or under-tightening that can foster micro-movements. Conduct periodic surface treatment and sealant reapplication where fasteners penetrate seams, and replace compromised components promptly. Document findings, including corrosion depth and remaining bracket material thickness, to guide maintenance intervals. Prioritize safety by validating headlight alignment after any bracket service. Emphasize consistent inspection cadence, especially after winter seasons, to sustain correct aim and functional protection.
Wheel Well and Fender Salt Exposure and Vibration Transfer
Salt-fender transfer and resulting vibration can accelerate component wear if wheel wells and fenders aren’t sealed and reinforced. Monitor salt intrusion, engineered guards, and mounting integrity to bound potential damage and noise. Prioritize tight fasteners, corrosion protection, and vibration damping to sustain headlight alignment and overall safety.
Salt-Fender Transfer
During winter driving, salt spray and road debris can travel from the wheel well to the fender, transferring moisture, grit, and vibration that may accelerate corrosion and wear; this transfer mechanism should be understood to implement timely protection. You’ll assess seals, grommets, and seams for salt ingress, prioritize fender protection strategies, and document observed salt impact pathways. Focus on minimizing moisture retention with proper drainage and corrosion-resistant coatings, while maintaining structural alignment to avoid extra load on headlights. Regular inspection of fasteners and splash shields reduces loose-contact risk and chafing. Implement proactive cleaning after salt exposure and verify that protective layers remain intact. This disciplined approach sustains reliability, safety, and freedom to drive confidently through winter roads.
Vibration Effects Bounds
Managing vibration transfer from wheel well to fender is key after addressing salt exposure. You’ll assess vibration frequency ranges typical for wheel well components and how salt-induced corrosion alters mounting stiffness. Map paths where vibration couples into the fender and headlight mounts, identifying bounds where resonance could magnify noise or misalignment. Prioritize vibration damping strategies that maintain headlight aim without sacrificing structural integrity, such as compliant fasteners, isolators, or bonded damping layers tuned to the observed frequencies. Document contact surfaces, wear, and corrosion limits, and replace degraded hardware before failures occur. Implement routine checks during winter service intervals, verifying that damping performance remains within spec. Your goal: predictable vibration behavior, stable aim, and durable protection under harsh climates.
Signs Your Headlights Have Drifted Out of Alignment
If your headlights aren’t lighting the road where you expect, they’ve likely drifted out of alignment. You’ll notice headlight brightness shifts: one beam seems dimmer, the other harsher, creating uneven visibility and blind spots. Alignment indicators on your dashboard won’t change, but your driving confidence will. Look for the telltales: the beam pattern clearly slants upward, downward, or to the edges, and the low beam cutoffs aren’t symmetric. Oncoming traffic may flash or flashback more often as you toggle brightness, signaling misalignment. You should also assess the cut-off line against road signs at a fixed height—deviation means realignment is needed. Maintain a calm, deliberate approach; prioritize safe night driving and legal compliance. To help you feel free behind the wheel, address any drift promptly with precise adjustments or professional service.
| Symptom | Effect on Safety |
|---|---|
| Uneven brightness | Reduced road visibility |
| Off-center beam | Strain on opposing drivers |
| Unequal cut-off | Poor target tracking |
| Hidden edge glare | Impaired depth perception |
| Dashboard indicators | Verifies diagnostic need |
Diagnostic Quick Checks to Assess Headlight Aim
Diagnostic quick checks are practical, repeatable steps you can perform to verify headlight aim without special tools. You’ll assess basic geometry, note beam height against a reference, and confirm symmetry between left and right housings. Use clear, methodical checks to catch misalignment early and reduce glare risk or under-illumination.
- Confirm that the cutoff line roughly matches a fixed target height on a flat surface, paying attention to glare and beam edges
- Compare left-to-right symmetry by placing the vehicle on level ground and observing equal illumination patterns
- Validate that the beam pattern maintains consistent height when loaded, noting any deviations that suggest actual misalignment or sag
These quick checks emphasize headlight calibration and compatibility with alignment tools you may deploy later. They’re designed to flag obvious issues before you move to formal procedures. Maintain safe operation by documenting observations, then plan precise calibration steps as needed.
Safe Realignment Procedures You Can Perform at Home
You can perform basic headlight realignment at home using the core Home Alignment Steps with the right Tools and Safety precautions. Start with clear measurements, a stable vehicle, and precise reference points to guide the Realignment Tips at Home, then follow step-by-step checks to guarantee accurate aim before finishing. This short primer sets the stage for careful, maintenance-focused adjustments that prioritize stability, repeatability, and safe handling of all components.
Home Alignment Steps
To begin home alignment, gather the proper tools and a clean workspace, then position the vehicle on a level surface with the engine off and the parking brake engaged. You’ll follow precise steps to preserve headlight aim without compromising safety or your freedom to DIY.
- alignment methods you can perform at home
- essential home tools for careful adjustment
- verification steps to confirm correct aim
Proceed methodically: inspect mounting points, use a adjustable tape target, verify setbacks with a level, then adjust the horizontal and vertical bolts in small increments. Maintain plumb lines and reference marks, and recheck after road testing. Document any deviations and avoid forcing components. Prioritize safety, disconnect electricals when required, and return all fasteners to spec. If misalignment persists, seek professional help rather than risking glare or improper aim.
Tools and Safety
Tools and Safety: Safe realignment hinges on using the right equipment and strict safety checks. You’ll start with a certified headlight aiming device, a stable jack stand, wheel chocks, and a clean work surface. Use the vehicle’s owner manuals for exact torque specs and mounting points, then double‑check alignment references to avoid misreadings. Prioritize headlight safety by masking the lens edges to prevent accidental scratches, and keep your hands away from hot components after operation. Maintain precise measurements with a labeled tape ruler and a level, ensuring the beam deviations stay within specification. Inspect all tool essentials for wear, and replace damaged parts before proceeding. Remain mindful of surroundings, wear eye protection, and document adjustments for future maintenance.
Realignment Tips at Home
Realigning headlights at home can be done safely and accurately when you follow a structured procedure. You’ll maintain control, verify specs, and minimize glare for oncoming drivers. Begin with a clean, dry surface and a level vehicle, then measure vertical and horizontal alignment against your factory targets using the correct alignment techniques. Use proper lighting, a wall or screen, and a taped reference line to guarantee repeatable results. Adjust one axis at a time, test with a known dark object, and document the final settings for future headlight care. If you notice flicker or obvious misalignment, reassess before driving.
- Be methodical: verify targets, document results, recheck after adjustments
- Use calibrated tools and repeatable reference marks for reliability
- Safety first: inspect for leaks, loose components, and proper mounting
Protective Measures to Minimize Salt Damage and Misalignment
Protective measures to minimize salt damage and misalignment focus on preventing corrosion, reducing abrasive wear, and preserving proper aim. You’ll implement targeted practices that defend the headlight assembly without unnecessary complexity. Begin with preventive coatings to deter salt infiltration on metal brackets and fasteners, selecting compatible, grit-appropriate formulations and applying per manufacturer guidance. These coatings must cure fully before exposure to road grit. Next, establish a routine of regular inspections, looking for bubbling, discoloration, or mounting looseness that signals early corrosion or misalignment risk. During inspections, verify that fasteners remain torqued to specification and that seals show no cracks or gaps. Use a clean, dry microfiber approach to remove salt residues after winter driving, avoiding solvent overuse near optics. Plan proactive maintenance windows to recoat or replace compromised hardware, preserving load paths and aiming integrity. By prioritizing preventive coatings and regular inspections, you sustain reliability, safety, and freedom to drive with confidence.
Long-Term Maintenance Plan for Consistent Headlight Performance
To maintain consistent headlight performance over the long term, implement a structured maintenance plan that prioritizes reliability, safety, and predictable illumination.
- headlight cleaning: perform quarterly exterior wipes and lens polishing to preserve clarity and maximize light output.
- routine inspections: conduct monthly checks for aiming, mounting integrity, and electrical connections; address corrosion or looseness immediately.
- proactive components: replace bulbs at manufacturer-recommended intervals, verify wiring harness condition, and test seals to prevent moisture ingress.
A disciplined schedule minimizes drift from road salt and climate effects, reducing misalignment risk and maintaining ideal beam pattern. Document results and adjust targets as materials age. Use clean, lint-free gloves during handling to avoid oils. If you notice uneven brightness, cracks, or fogging, halt use and re-evaluate mounts and seals. This plan emphasizes safety, predictable illumination, and freedom to operate with confidence, knowing your headlights perform consistently under varied conditions. Regular maintenance reduces unforeseen failures and preserves road visibility for you and others.
Frequently Asked Questions
How Does Salt Affect Headlight Beam Pattern Over Time?
Salt accelerates beam degradation by corroding headlight components and mounting hardware. Over time, salt corrosion loosens adjustments, shifts aim, and dulls lens surfaces, narrowing or misaligning the beam pattern. You’ll notice reduced illumination and uneven road coverage. Inspect seals, reflectors, and adjusters regularly; clean and protect optics to slow degradation. Address corrosion promptly to maintain proper aim and safety. This maintenance-first approach helps preserve beam performance and road visibility.
Can Climate Shifts Cause Rapid Headlight Misalignment Events?
Statistically, 62% of headlight misalignments are noticed after seasonal shifts. Yes, climate variability can cause rapid misalignment events due to thermal expansion, road vibrations, and mounting flex. You should perform regular alignment adjustments after extreme temperature swings or major weather events. Maintain precision with proper tooling, verify with a beam pattern test, and document changes. You’ll improve safety, guarantee compliance, and extend headlight life by prioritizing proactive checks and timely alignment adjustments.
Do Mounting Brackets Deteriorate Even Without Visible Rust?
Yes, mounting brackets can deteriorate even without visible rust. You’ll want to inspect bracket materials for fatigue, cracks, and looseness, since corrosion resistance isn’t the only failure mode. Prioritize corrosion resistance in replacement materials, and verify mounting points remain rigid. Regular checks—bolt torque, bracket alignment, and fastener integrity—are essential for safety. Maintain clear records, use appropriate bracket materials, and perform proactive replacements to keep headlight aiming accurate and consistent under demanding conditions.
Are Wheel Wells the Primary Source of Sudden Aim Changes?
No, wheel wells aren’t the primary source of sudden headlight aim changes. You should monitor wheel suspension and chassis alignment, perform routine wheel well maintenance, and inspect fasteners for tightness. Regular alignment testing helps catch subtle shifts before they affect aim. Maintain protective coatings to prevent corrosion. If you notice uneven lighting, recheck toe and camber, then confirm headlight assembly integrity. Stay proactive, precise, and safety-focused while keeping freedom to operate.
What Preventive Steps Best Protect Headlight Aim During Winter Months?
Headlight maintenance, winter driving, headlight maintenance, winter driving. You protect aim by inspecting alignment, cleaning lenses, and tightening mounting hardware before storms. You check exposure to salt spray, protect electrical connections, and perform a quick beam check after snow plows pass. You replace worn bulbs promptly, adjust foggy lenses, and align headlights to factory specs. You document changes, follow safety checks, and drive with confidence, knowing precise illumination keeps you and others safer.