How to Balance and Align Wheels to Eliminate Valve Stem Failure
To balance and align wheels and prevent valve stem failures, start by diagnosing vibration sources—tire, wheel, and suspension interactions—and measure vibration amplitude and frequency. Use a dynamic balancer to correct static and dynamic imbalances, record run-out data, and verify proper weight placement. Inspect bead seating, bead seating, rim runout, and tire uniformity, then adjust weights in small increments. After alignment checks—camber, toe, and caster—retest for consistency; accurate results promise more insights ahead.
Diagnosing Wheel Vibration and Its Impact on Valve Stems
Diagnosing wheel vibration begins with identifying its source and evaluating how it affects valve stems. You’ll trace vibration to its origins—tire, wheel, or suspension interaction—and quantify its amplitude and frequency. You observe how resonance may excite valve stems, causing repetitive contact and potential fatigue. Core vibration causes often include imbalances, out-of-round tires, loose components, and bearing play; each factor alters loads transmitted through the wheel assembly. You assess whether the vibration couples with the steering system, amplifying stress on valve stems during rotation and cornering. By isolating the dominant vibration mode, you form a concrete link between mechanical motion and observed symptoms. You note that prolonged exposure accelerates stem wear, manifesting as micro-cracks or galling at stem seats. Your analysis remains objective and data-driven, avoiding assumptions. With precise measurements, you establish a baseline for corrective actions, prioritizing source elimination, component tightening, or replacement to mitigate vibration and reduce stem wear risks.
Assessing and Achieving True Wheel Balance

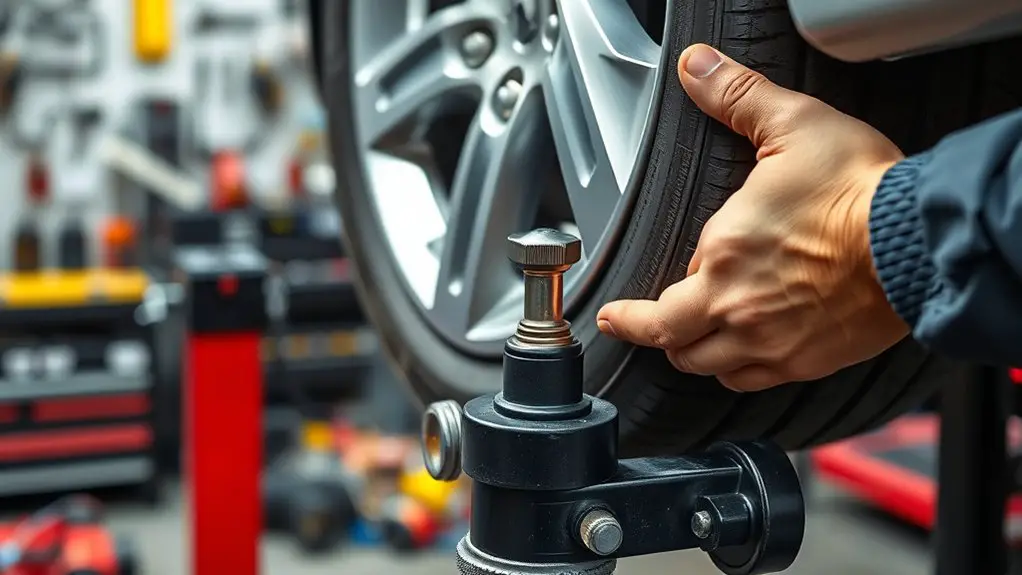
True wheel balance is achieved when all rotating components—tire, wheel, and any added weights—rotate with minimal lateral and radial imbalance across the operating range. You assess balance by isolating variables: determine if vibration originates from wheel dynamics rather than road, tire construction, or suspension. Begin with a dynamic balancer to identify static and dynamic inefficiencies, then apply targeted balancing techniques that correct both radial and angular discrepancies. Record run-out data, verify hub cleanliness, and confirm proper weight placement to maintain symmetry through acceleration, cruising, and slowdown. For precision, guarantee bead seating, valve stem orientation, and tire uniformity are accounted for in the balance plan. You should interpret balance results as a functional metric, not a single-number target. Implement iterative adjustments, re-check after rotation, and document changes. This approach preserves ride quality, reduces stress on valve stems, and sustains consistent handling across wheel assemblies.
Inspecting Tire and Wheel for True Trim and Condition

After evaluating balance, the next step is to scrutinize the tire and wheel for true trim and condition. You’ll verify rim runout, inspect bead seating, and confirm consistent tread wear. Look for conicity, sidewall damage, and any bent or cracked wheel areas that compromise alignment. Assess tire tread depth uniformity across the circumference, noting any cupping or shoulder wear that signals suspension or balance issues. Document any visible valve stem tilt or distortion that could affect seating. Ascertain the wheel center bore fits snugly and check for corrosion between wheel and hub. This scrutiny prevents false readings and long-term failures.
| Item to Inspect | What to Look For | Acceptable Condition |
|---|---|---|
| Tire tread | Uniform depth, no cupping | Even wear, within spec |
| Wheel condition | Bent rims, cracks, corrosion | Clear, true shape |
| Bead seating | Proper seal, no leaks | Seated, warning-free |
| Valve stem | Tilted, cracked | Straight, intact |
| Runout | Measured wobble | Within spec |
Selecting and Applying Correct Weights for Balance
Selecting the correct balance weights is vital for restoring true tire–wheel interaction, and it starts with confirming the tire’s dynamic behavior on the rim. You’ll choose weights based on observed imbalance patterns and wheel tolerance, not guesswork. Precision matters: weight amounts, locations, and method all influence ride quality and long-term fastener health.
- Identify the dominant imbalance axis (radial or lateral) and select weights accordingly.
- Use the appropriate balance method for your setup (static vs dynamic, on-vehicle vs off-vehicle).
- Apply weights in the smallest practical increments, verifying with multiple test runs.
- Record weight values and locations for traceability and future maintenance.
Weight selection and balance methods must be consistent with the tire–rim combination and load conditions. Keep the application clean, make certain adhesive weights are pressed securely, and avoid interference with valve stems or braking components. Precision balancing reduces vibration, extends tire life, and minimizes cosmetic and mechanical wear while preserving freedom of operation in your workshop.
Checking Wheel Alignment and Its Effect on Valve Stems
Checking wheel alignment is the next step after selecting weights, because misalignment can alter the effective targeting of balance and place unexpected stress on valve stems. You assess alignment by examining suspension sag, tire runout, and rim position relative to the hub. Alignment issues influence how mass is distributed during rotation, changing contact patterns and introducing lateral forces that stress valve stems during dynamic loads. You’ll notice changes in wheel wear, with uneven tread and edge wear signaling misalignment rather than improper inflation alone. Inspect axle geometry, camber, toe, and caster values in reference to factory specifications, then compare with current measurements from a trusted gauge. If you detect variance, correct only as permitted by your setup, documenting deviations and their potential impact on valve stems. You should also verify that balance results remained consistent after alignment checks, since residual misalignment can undermine balance precision and promote continued wheel wear.
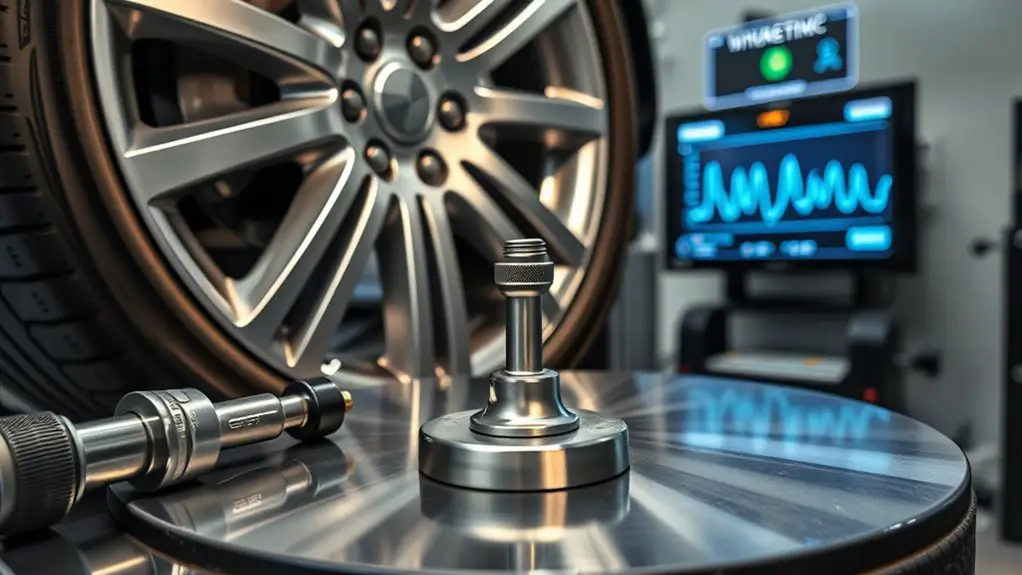
Verifying Alignment and Balance With Proper Tools and Techniques
To verify alignment and balance, you’ll start with proper tool alignment to guarantee measurements reflect true wheel position. Use precise techniques for verification, such as calibration checks and repeatable measurement methods, to confirm consistency across all wheels. This guarantees any adjustments you make are based on reliable data and maintain overall handling integrity.
Proper Tool Alignment
Proper tool alignment is essential for accurate wheel balance and steering stability. You must validate every instrument before use, as precision rests on proper setup and calibration. Rely on solid procedures to guarantee repeatable results, keeping your workflow concise and controlled.
- Inspect alignment tools for wear, corrosion, and tightness of mounting hardware; replace worn parts immediately.
- Calibrate instruments to a known reference, confirming measurements against manufacturer specifications for tool calibration.
- Securely mount wheels and sensors, verifying that contact surfaces are clean and true to avoid skewed data.
- Document baseline readings and subsequent adjustments to track deviations and maintain consistent alignment quality with reliable alignment tools.
Techniques for Verification
Once you’ve validated tools and established baseline readings, verification becomes a repeatable process that confirms both alignment and balance remain within specification. You’ll perform wheel verification using calibrated gauges and runout indicators, recording data against your baseline to detect drift. Alignment techniques rely on consistent tire bead seating and hub cleanliness, ensuring measurements reflect true wheel position rather than surface irregularities. Use laser or digital camber, caster, and toe readings to corroborate mechanical alignment with test run results. Balance verification requires a static and dynamic check, rechecking the wheel on a known good balancer after any adjustment. Documented results create traceability, enabling you to confirm that corrective actions were sufficient and that future road or track testing will stay within tolerance.
Frequently Asked Questions
How Do Valve Stems Fail Due to Misalignment During Driving?
Valve stems fail when misalignment causes uneven load and vibration, especially at high speeds. Misalignment effects include repeated bending, gouging from tire beads, and accelerated wear that can crack or leak. You’ll notice steering wobble, tire feathering, and rapid deflation if the stem isn’t aligned with the rim’s centerline or strut plane. Guarantee precise wheel alignment, proper bead seating, and use high-quality stems to minimize torque-induced stress and prevent premature valve stem failure.
Can Wheel Offset Affect Valve Stem Longevity and Performance?
Yes, wheel offset can affect valve longevity and performance. When offset shifts load and camber, it alters tire contact and steering forces, increasing valve stem bending and stress. Improper offset raises sidewall flex, amplifying vibration and potential stem wear. You’ll want precise measurements and consistent alignment to minimize energy transfer to the stem. Keep wheel offset within spec, monitor stem angles, and guarantee proper seating to protect valve longevity and overall tire integrity.
Do Lug Torque Variations Influence Valve Stem Stress?
Yes, lug torque variations can influence valve stem stress, especially under load or during high speed. You’ll want consistent lug nut torque and verify wheel alignment, because wheel misalignment concentrates forces that stress stems. Keep torque within spec, recheck after mounting, and monitor tire pressures. If lug nut torque is uneven, stem flex increases and leaks may follow. Maintain uniform torque, correct wheel alignment, and address any misalignment promptly to protect valve stems long-term.
Is There a Recommended Valve Stem Material for Alignment Issues?
Yes—there isn’t a single “best” valve stem material for alignment issues; focus on compatibility and durability with your system. You should match valve stems to your rim and tire design, selecting rubber compounds for flexibility and chemical resistance, or metal alloys for strength where corrosion protection is essential. Prioritize consistent seating, minimize bend radius, and verify stem and valve cap integrity to maintain reliability under dynamic alignment stresses. Stay precise, deliberate, and adventurous in your choice.
How Do Tire Pressure Changes Impact Valve Stem Wear?
Under pressure, tire pressure changes accelerate valve stem wear. When loads shift or temps rise, the stem flexes more, increasing shear on the base and seal area. Repeated cycles reduce bonding, risking leaks or rupture. You should monitor tire pressure regularly, avoid overinflation, and inspect stems for cracking or wobbly mounting. Use correct valve stems for your wheel, and guarantee stems remain straight during mounting. Maintain consistent pressure to minimize wear.