How to Clear False Codes and Stop Intermittent CEL
You’ll stop false codes and curb intermittent CELs by verifying codes with a trusted OBD-II reader and freeze-frame data first. Check for loose connections, corroded pins, and damaged wiring, then clean and reseat sensors as needed. Monitor live data for consistent fuel trim, sensor voltages, and spark. Clear codes only after tests confirm normal operation. Keep a maintenance log and follow up with preventive checks—and you’ll uncover more steps that can help stabilize readings.
Understanding False Codes Vs Real Issues
False codes aren’t the same as real problems, and confusing the two is a common pitfall. You’ll learn to distinguish signals from symptoms by testing, not assuming. Start with a clear definition: false codes point to non-critical or transient conditions, while real issues affect performance, safety, or emissions. Gather objective data from reputable sources—diagnostic tools, service bulletins, and manufacturer specs—and contrast code definitions with live sensor readings. Prioritize persistent or reproducible codes over intermittent ones, and verify with direct measurements before accusations of failure. Document fault histories, noting environmental factors, fuel quality, and recent maintenance, to spot patterns that suggest false codes versus true degradation. Remain mindful that human error, loose connections, and software glitches can generate false codes. When in doubt, recheck inputs, rule out wiring or grounding problems, and assess whether a code corresponds to a verifiable performance change. True issues deserve methodical confirmation before repair decisions.
Common Causes of Intermittent CEL Illumination

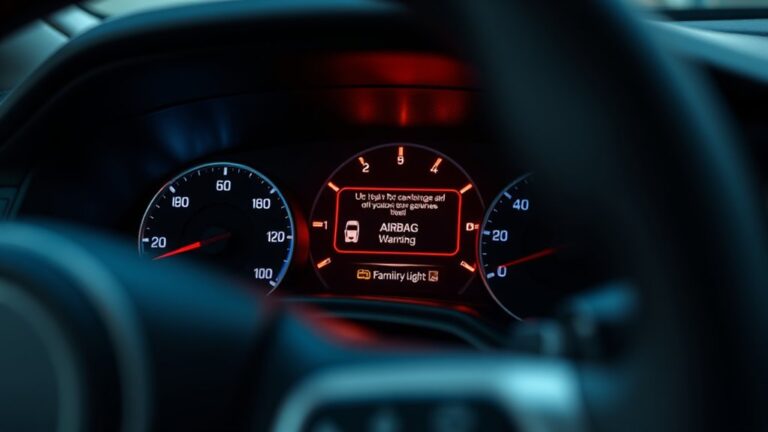
Intermittent CEL illumination can stem from transient electrical or sensor faults that don’t consistently reproduce, making systematic verification essential. In practice, you’ll encounter a handful of recurring culprits. First, intermittent issues often arise from loose or corroded electrical connections, harness damage, or grounding problems that create sporadic voltage variations. Second, sensor malfunctions—such as failing O2, MAF, or MAP devices—can produce inconsistent readings that trip and clear the code without a lasting fault. Third, connectors with bent pins or contaminated terminals can intermittently lose contact, especially with vibration or temperature cycling. Fourth, wiring harness chafing or exposed insulation can generate transient shorts or opens under motion. Finally, poor battery or alternator performance can introduce brief voltage dips, triggering fault codes temporarily. Your approach should be systematic: inspect connections, test sensors in situ, verify continuity, and rule out power supply stability before rechecking for code recurrence.
How to Verify Codes Without Overreacting

So, how can you verify codes without overreacting and chasing shadows? Start with calm, structured verification. Identify the exact stored codes and freeze-frame data from your diagnostic tool usage. Compare the codes to service bulletins or manufacturer specs to filter out non-critical alerts. Document the timestamp, engine conditions, and rpm when the code appeared, then recheck after a short drive cycle to see if the fault repeats. Use code verification techniques that separate intermittent signals from real failures: observe trend data, check for pending codes, and confirm with a second, independent fault code set if available. Rely on objective data rather than assumptions. Avoid replacing parts based on a single code; prioritize reproducible symptoms and verified data. Maintain a neutral stance, evaluate vehicle behavior, and proceed only if multiple indicators align. This disciplined approach keeps you free to pursue valid fixes, grounded in evidence rather than fear.
Quick At-Home Troubleshooting Steps
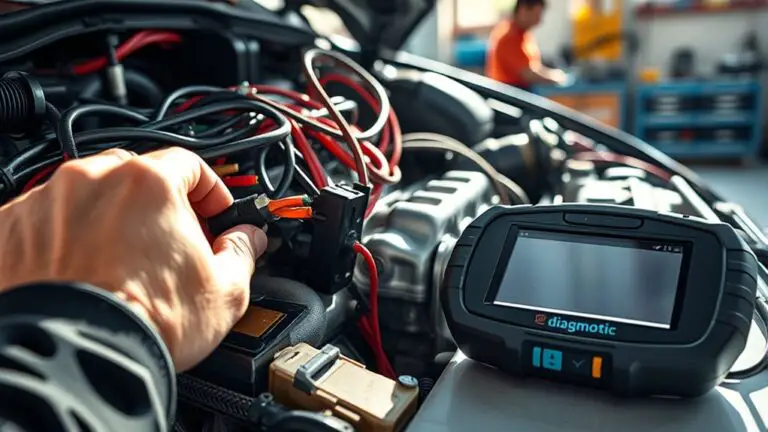
Now that you have a plan for verifying codes without chasing shadows, you can start with quick, at-home steps to pinpoint issues efficiently. Begin with a calibrated scan using your vehicle’s OBD-II port and a reputable reader; note any stored or pending codes. Focus on consistency: if a code appears under steady ignition and then vanishes, tag it as intermittent rather than decisive. Next, perform controlled, simple checks—verify fuel trim behavior at idle and light load, observe thermostat operation, and confirm spark at a single cylinder if feasible. Record sensor readings and compare to known healthy ranges from the service manual. Prioritize fixes that address the most frequent culprits first, applying quick fixes that don’t require advanced tools. Ascertain your battery is healthy and connections clean, since voltage instability can mimic faults. Finally, re-scan to confirm code status and document outcomes for future reference.
The Role of Loose Connections and Corrosion
Loose connections can cause intermittent signals and false codes, so inspect pins, grounds, and harnesses for looseness or corrosion. Corrosion can add resistance and disrupt sensor readings, making electrical contacts unreliable over time. Start with clean, tight connections and verify signal stability before assuming a faulty module.
Loose Connection Effects
Even slight loosening or corrosion at electrical connections can disrupt sensor signals and control circuits, leading to intermittent conditions that trigger false codes. In this topic, you’ll inspect how contact quality directly affects performance. A loose or dirty connector introduces impedance fluctuations, which degrade signal integrity and create erratic readings your system may misinterpret. You’ll verify each harness point with a controlled pull test and inspect for corrosion, bent pins, or damaged seals that undermine connection stability. Use quantified checks where possible—voltage drops, contact resistance, and continuity under load—to establish a baseline you can rely on during diagnostics. Document findings, then address gaps with proper seating, cleaning, or replacement. Maintaining solid, clean interfaces preserves signal integrity and supports predictable, fail-safe operation.
Corrosion Impacts Signals
Corrosion at electrical interfaces doesn’t just look ugly; it actively disrupts signals by raising impedance, creating voltage drops, and introducing noise that can mislead control modules. In practice, corrosion effects can shift reference levels, skew sensor readings, and provoke intermittent faults even without obvious breaks. You’ll notice degraded signal integrity when connections aren’t pristine, and signal interference can cascade into false codes or erratic engine behavior. Addressing corrosion requires a methodical approach: inspect, clean, and reseal interfaces; verify continuity; and replace compromised hardware when needed. Consistency in maintenance stops creeping failures before they start.
- Inspect and clean contact surfaces to restore conductive paths
- Verify continuity and impedance after cleaning
- Replace corroded components to prevent recurring signal interference
Intermittent Sensor Failures to Watch For
You should watch for intermittent sensor signs that don’t follow a steady pattern, such as sudden spikes or drops in readings that don’t match engine conditions. Look for faulty sensor signals that appear only under specific temps, loads, or speeds, then verify with repeated measurements and cross-checks against known good data. When fluctuations show up, troubleshoot methodically by ruling out wiring, connectors, and ground issues before replacing sensors.
Intermittent Sensor Signs
Intermittent sensor signs can be subtle yet telltale, arising only sporadically as wiring glitches, connector issues, or sensor wear interrupt signal consistency. When you observe irregular readings, you’re seeing patterns rather than isolated spikes, which points to underlying reliability concerns that affect diagnostic accuracy. Focus on reproducible symptoms, not one-off glitches, and document timing relative to engine load, temperature, and vibration. Systematic checks reduce ambiguity and support safer repairs.
- Wiring integrity and connector corrosion
- Sensor mounting and harness routing
- Environmental factors influencing signal stability
Faulty Sensor Signals
After handling intermittent signs, it’s time to focus on faulty sensor signals that signal intermittent sensor failures to watch for. You’ll assess signals that drift, spike, or lag, indicating unreliable input rather than a solid fault. Start by verifying sensor calibration; miscalibration masquerades as intermittent behavior and can confuse diagnostics. Check reference voltages and scaling against spec sheets, correcting any divergence with documented procedures. Examine for signal interference from nearby electronics, wiring harness chafing, or grounding issues that produce transient faults. Map the signal timeline to performance events to distinguish genuine faults from noise. Document findings and retest after adjustments. If signals stabilize post-calibration and shielding, you’ve pinpointed the root cause; otherwise, pursue controlled replacements with traceable data.
Troubleshoot Sensor Fluctuations
When sensor fluctuations appear, you should systematically distinguish genuine intermittent failures from noise by validating calibration, reference voltages, and signal integrity first. You’ll want to compare observed fluctuation patterns against known baselines, ensuring the sensor is within spec and the harness is secure. Document any correlation with temperature, load, or power cycles, then test with a controlled signal to confirm repeatability. If patterns persist, isolate the sensor from the system to verify that the issue isn’t coming from downstream circuitry or EMI. Prioritize reproducible results, not guesswork, and adjust calibration only with verified data.
- sensor calibration checks and documented baselines
- analyze fluctuation patterns across operating conditions
- confirm reference voltages and signal integrity prior to replacement
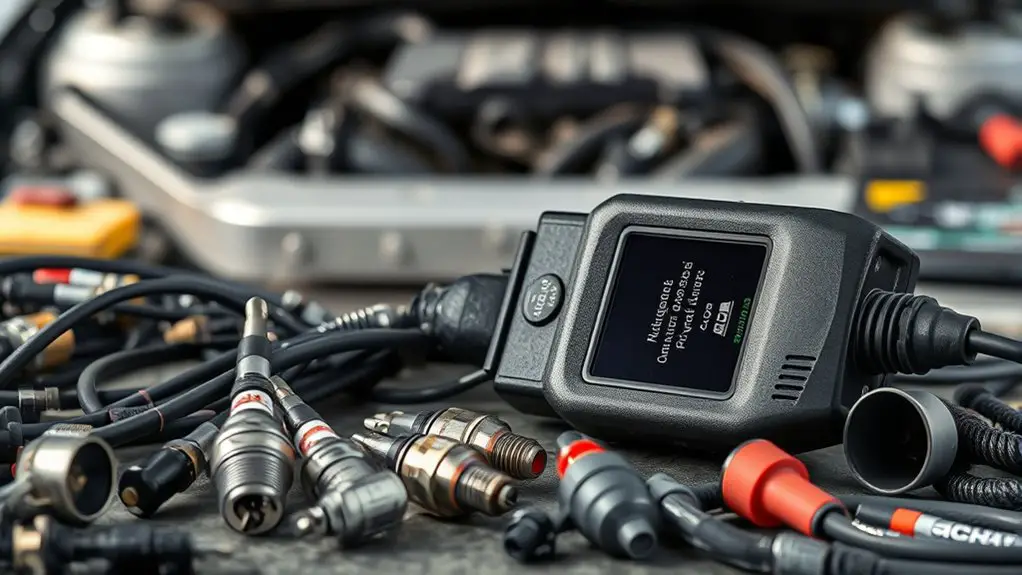
Diagnostic Tools That Add Clarity
Diagnostic tools that add clarity cut through uncertainty by translating raw data into actionable insight. When you’re chasing intermittent faults, diagnostic scanners and code readers become your most reliable allies. A diagnostic scanner gives live data streams—RPM, sensor voltages, learned fuel trims—so you can spot anomalies as they happen, not after the fact. A code reader isolates fault codes, revealing the general system involved without sifting through guesswork. Use them to establish a baseline: note normal ranges, then monitor deviations during driving, idling, and varied loads. Prefer tools that timestamp data and export logs for review. Prioritize reliability over novelty; inexpensive readers can still yield meaningful patterns if you organize observations with discipline. Document changes, correlate codes with vehicle behavior, and discard transient signals that don’t repeat. Remember, these tools illuminate, they don’t fix; your methodical interpretation drives correct interventions and keeps you moving with confidence.
When to Clear Codes Safely
Clearing codes should be done only after confirming the fault has been addressed and normal operation can be verified. You’ll follow a disciplined sequence: validate repairs, recheck system behavior, and confirm no new faults appear during operation. This guarantees code clearing reflects true conditions, not lingering errors. Use clear, safe practices to document the process and protect yourself.
- Confirm fault resolution with functional tests and sensor readings
- Verify that the vehicle runs smoothly across conditions before clearing codes
- Record results and reset indicators only after assurance of stability
Adopt a cautious mindset: avoid premature resets, and rely on data rather than assumptions. Code clearing isn’t a substitute for proper diagnostics; it’s a verification step that must be grounded in evidence. Preserve a trail of observations, test outcomes, and environmental factors. If any doubt remains about fault persistence, defer clearing and re-evaluate. By adhering to these practices, you maintain integrity in the process and support reliable, safe operation.
Preventive Maintenance to Reduce False Alarms
Preventive maintenance is your first line of defense against false alarms, and a structured routine helps keep sensor inputs stable and interpretable. You build reliability by scheduling preventive inspections and documenting findings, reducing drift that triggers spurious codes. Establish a consistent cadence for calibration checks, signal tests, and connector integrity verification, so voltage references stay within spec and noise floors don’t rise unnoticed. Use objective thresholds from your vehicle’s data sheets and hands-on measurements to verify that sensors respond predictably under known conditions. Replace worn parts before failure modes appear, and keep a log of replacements, adjustments, and environmental factors that influence readings. A routine maintenance mindset doesn’t slow you; it empowers steadier operation and faster diagnostics when a real problem arises. By prioritizing preventive inspections and routine maintenance, you minimize false alarms while maintaining the freedom to troubleshoot with confidence.
Planning Repairs for Real Problems If They Persist
If you’re facing real problems that persist, plan repairs carefully by outlining the exact symptoms, expectations for fix, and verification steps. Confirm the issue is genuine by cross-checking with reliable data, such as codes, live readings, and test results, before committing parts or labor. Track persistent codes to guide decisions, ensuring each repair action aligns with verified evidence and clear follow-up criteria.
Plan Repairs Carefully
When symptoms persist, plan repairs carefully by identifying which problems truly require attention and which might be transient or harmless. You’ll assess reliability, risk, and cost, then prioritize action that aligns with your freedom to choose. Clear documentation supports repair scheduling and budget considerations, helping you avoid unnecessary work or delays.
- Evaluate root causes with objective tests before committing to fixes
- Prioritize fixes by severity, frequency, and impact on safety and emissions
- Align timing with budget, warranty terms, and achievable maintenance windows
Adopt a disciplined, evidence-based approach: verify failure modes, estimate repair impact, and set milestones. This method guarantees you invest where it matters, minimize wasted effort, and preserve autonomy while restoring vehicle reliability.
Verify Real Problems
Verify real problems by confirming which codes, symptoms, and tests align with true faults rather than transient fluctuations. You’ll apply diagnostic strategies that separate noise from mechanics, focusing on reproducible indicators and objective data. Symptom recognition guides you to evidence-based conclusions, not assumptions, so document patterns across cycles, temperatures, and loads. If a code recurs inconsistently, test under controlled conditions and compare to baseline values before planning repairs. Below is a simple framework to prioritize issues with persistence and impact.
| Criteria | Evidence | Action |
|---|---|---|
| Code durability | Repeats after reset | Proceed to targeted tests |
| Symptom consistency | Present across drives | Confirm with diagnostic tools |
| Baseline deviation | Measured vs. spec | Schedule repair if confirmed |
Track Persistent Codes
Persistent codes require a disciplined tracking approach: identify which codes recur across drives, temperatures, and loads, then document their frequency and context. You’ll build a small, repeatable data log to support real repairs instead of guesses. Focus on consistent measurement points, timestamps, and mileage to enable solid code comparison later.
- tracking methods: establish a minimal dataset per event (code, temp, load, road type) for reliable comparison
- code comparison: align repeated codes across sessions to reveal patterns and false positives
- documented context: log ambient conditions, vehicle state, and recent fixes to avoid misinterpretation
This approach keeps you precise, evidence-based, and oriented toward genuine fixes rather than quick resets. Freedom comes from knowing what to prove and how to prove it.
Frequently Asked Questions
Can False Codes Harm Engine Performance Long-Term?
It can, to an extent. False codes won’t damage engines directly, but ignoring true faults risks missed symptoms that degrade engine performance over time. If you notice intermittent CELs, false codes can mask underlying issues, so you should methodically verify each code, perform targeted tests, and monitor sensor data. Regular maintenance helps prevent chronic wear. In short, false codes don’t harm by themselves, but neglecting real problems harms engine performance long-term. Stay diligent, stay curious.
Do Cold Starts Trigger Intermittent CELS More Often?
Yes, cold starts can trigger intermittent CELs more often, especially with sharp temperature fluctuations. You’ll likely see faster wear on sensors during initial warmup, and minor leaks or vacuum pulls may drift readings as the engine warms. Monitor ECU codes after cold starts, note any recurring patterns, and consider thermal expansion effects on hoses and connections. Cold start effects tend to lessen as temps stabilize, but persistent intermittent CELS deserve inspection and controlled testing.
How Do Weather Changes Affect False Codes?
Weather changes can dramatically affect false codes, sometimes more than you’d think; don’t overlook it. You’ll see weather impact trigger discrepancies in sensor readings, wire expansion, and vacuum leaks, altering code generation. To guarantee code accuracy, test under varying conditions, log ambient temps, and compare live data with stored baselines. You’ll gain confidence by correlating trends, not isolated digits, using consistent diagnostic steps and evidence-based checks. Trust systematic methods; freedom loves precise, repeatable analysis.
Can Aftermarket Parts Cause Intermittent Illumination?
Yes, aftermarket parts can cause intermittent illumination if they lack proper sensor compatibility or degrade under load. You’ll reduce risk by verifying sensor compatibility, choosing parts with proven reliability, and inspecting wiring for loose connections. Track reliability data, install within specified tolerances, and test with code readers during drive cycles. If illumination persists, consider recalibrating sensors or reverting to OEM equivalents. Trust evidence-based steps to protect aftermarket reliability and minimize false signals.
Are OEM Fault Codes More Reliable Than Aftermarket Ones?
Yes—OEM fault codes are generally more reliable than aftermarket ones, because OEM reliability tends to match factory diagnostics, while aftermarket accuracy can vary by component and vendor. You should rely on OEM signals for core decisions, but cross-check with aftermarket data if you suspect a sensor fault or intermittent issue. Use calibrated scanners, document fault codes, and verify with live data. This approach supports your freedom to diagnose confidently and avoid unnecessary parts swaps.