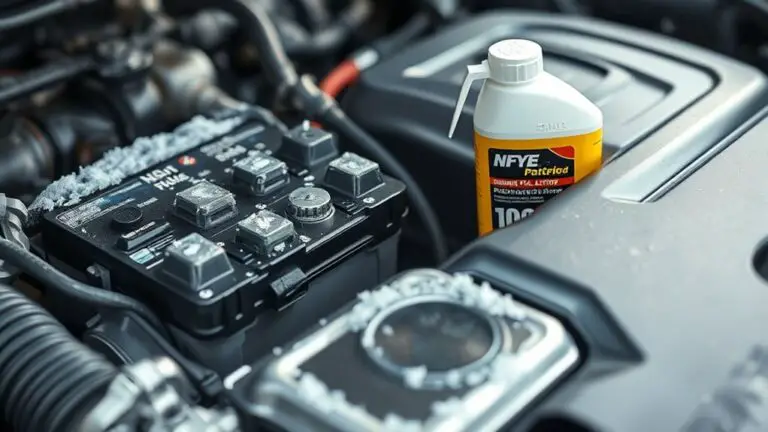
How to Detect Early Signs of Contaminated Funnel
To detect early contamination in a funnel, trust your senses and beat the baseline. Check for unusual odors or sharp, sulfurous notes that differ from normal smells. Watch for abrupt color changes in the filtrate and note exact hues. Monitor filtrate flow for irregular, pulsating, or slowed streams, and inspect for residues or films on joints and surfaces. Document environmental conditions like temperature and humidity. If concerns persist, you’ll gain more practical steps as you continue.
Spotting Unusual Odors and Aromas

Spotting unusual odors and aromas can be an early clue something’s off in your funnel. You’ll notice shifts in scent before you see visible changes, so trust your nose as a screening tool. Unusual smells often signal contamination or residue from previous batches, which can alter flow and yield if left unchecked. Focus on consistent, baseline aromas for your setup, then document any deviations.
Aroma detection isn’t about guessing; it’s about evidence-based observation. If you detect clinically sharp, sulfurous, rotten, or chemical-like smells, halt use and inspect connections, seals, and containment areas. Compare current aromas with your documented baseline and note intensity, duration, and onset relative to operation. Temperature, humidity, and airflow can influence scent perception, so control environmental factors when testing. Keep a clean path to your funnel, minimize cross-contamination, and train staff to report smells promptly. Regular odor checks reduce risk, support quality, and preserve your freedom to work confidently. unusual smells are your early warning.
Observing Color Changes in Filtrate

Color-shift indicators help you spot potential contamination early by noting unexpected hues in the filtrate. Look for discrete color clues that differ from baseline samples, as these signals can suggest foreign materials or microbial activity. Use this color information alongside established tests to confirm contamination, focusing on color changes that align with known contamination color signals.
ColorShift Indicators
ColorShift indicators involve monitoring filtrate for immediate color changes that signal contamination in the funnel. You’ll watch for abrupt shifts in color, not gradual tints, and you’ll compare them against baseline appearances. Color changes can reflect chemical reactions, microbial activity, or foreign particulates entering the stream, so documentation matters. Focus on reproducible visual cues and a consistent reference color range to reduce subjective bias. When a sudden hue or brightness shift occurs, pause processing, isolate the sample, and repeat the observation to confirm reliability. Use your observations to inform safety steps, not speculation. Embrace a disciplined workflow: note timing, lighting, and container conditions, then correlate with known control data. This approach empowers you with actionable, evidence-based color spectrum awareness.
Filtrate Hue Clues
Filtrate Hue Clues build on ColorShift observations by focusing on the subtle color signals that appear in the filtrate itself. You’ll look for small shifts that reflect underlying changes, not dramatic revolutions. Noting filtrate color and hue variations helps you detect early deviations from baseline.
- Filtrate color changes that align with known patterns
- Subtle hue variations inside the filtrate stream
- Consistent shifts across multiple samples
- Rapid, reproducible signals rather than noise
- Correlation with procedural steps and timing
Focus on reproducibility, document each color shift, and compare with prior results. If you observe persistent filtrate color changes or unusual hue variations, log them and reassess setup or materials. Maintain a calm, evidence-based approach, trusting observed signals while staying mindful of potential artifacts. Freedom in curiosity pairs with rigorous observation for early insight.
Contamination Color Signals
Contamination color signals are immediate indicators you can observe in the filtrate that suggest foreign material or process drift. You’ll notice shifts in color spectrum that don’t align with expected baselines, signaling contamination indicators you should not ignore. Document exact hues, intensity, and consistency, then compare to control runs to quantify deviation.
| Observation | Interpretation |
|---|---|
| Pale, off-white, or milky filtrate | Possible particulate, emulsified oils, or microbial activity |
| Unexpected tint (green, red, blue) | Color spectrum deviation; material mismatch or chemical reaction |
These cues are not proof alone, but they guide rapid triage and corrective action. Stay objective: record, alert, and revalidate with repeat runs. Freedom in practice means disciplined monitoring, transparent reporting, and immediate containment when contamination indicators emerge.
Monitoring Filtrate Flow and Consistency

Monitoring the flow and consistency of filtrate is essential for early detection of contamination. You’ll gauge changes in filtrate viscosity and flow rate to spot issues before they escalate. Small deviations can signal improper filter performance, paste leakage, or microbial intrusion, so document patterns over time.
- Track filtrate viscosity shifts as an early warning signal
- Compare actual flow rate against expected benchmarks
- Note any erratic or pulsating flow, not just slower or faster
- Check for color or particulate changes that accompany flow variations
- Record ambient and system conditions that could affect results
Consistent sampling improves reliability; use the same collection points and timing. If you observe persistent deviations, investigate filter integrity, pump function, or seal wear. Rely on objective measurements rather than impressions alone. Your goal is to maintain stable filtrate characteristics, ensuring early contamination signs are captured promptly. Stay disciplined about thresholds, repeat measurements, and rapid documentation to support clear decision-making and safe outcomes.
Assessing Residue Build-Up and Surface Contamination
You should look for residue accumulation indicators and surface contamination signals as early signs of funnel issues. These cues help you gauge contamination risk and guide timely interventions. Use concise observations and evidence-based thresholds to distinguish benign residues from problematic buildup.
Residue Accumulation Indicators
Residue accumulation signals contamination risk by indicating where deposits collect on surfaces or within passages. You’ll look for patterns that reveal how different residue types behave, and what accumulation effects they produce over time. This isn’t about fear—it’s about clarity, control, and safer operation.
- Visual spots where films form and linger
- Sticky or powdery deposits at joints or bends
- Gradients along flow paths indicating velocity changes
- Discoloration or opacity differences in fluids
- Parasitic residues in traps or filters
Recognize that each residue type carries distinct implications for flow, sealing, and cleanliness. Document findings with quick notes and photos. Use the evidence to adjust handling, timing, and maintenance routines, maintaining momentum toward safer, freer operation and reduced contamination risk.
Surface Contamination Signals
Surface contamination signals emerge when residue build-up on surfaces alters contact, friction, or seal integrity. You observe changing tactile feel, unexpected slip, or micro-scratches that change seal performance under load. Surface texture analysis helps quantify roughness shifts, wear patterns, and uniformity, guiding you to whether contamination is spreading or settling. You should correlate visual hints, odor, and residue color with process history to strengthen conclusions. Contamination source identification becomes actionable when you map residue to suspected stages, tools, or materials, then test hypotheses with targeted swabs or surface surveys. Keep records of times, temperatures, and pressures that align with residue events. By combining objective metrics with practical checks, you maintain control while pursuing freedom from hidden contamination risks.
Quick Check Procedures Without Special Equipment
Quick checks can reveal obvious contamination risks without any gear. You’ll rely on visual inspection techniques and quick assessment methods to spot signs early, without waiting for lab support. Look for color shifts, unexpected residues, or film on surfaces that contact fluids. Note odors that differ from the baseline, and check for unusual cloudiness or separation in analysis-ready zones. Compare current funnel parts with documented clean baselines; subtle changes can indicate contamination onset. Keep temperature and humidity expectations in mind, as deviations may accelerate growth or degrade residues. Your method is deliberate, not reactive, and you’re documenting every observation for traceability.
- Visual inspection techniques to flag visible changes quickly
- Quick assessment methods for baseline comparison
- Odor, color, and residue cues to alert you
- Surface integrity checks and seal condition indicators
- Documentation practices for traceable early signs
This approach supports freedom to act promptly while staying evidence-based.
Implementing Preventive Cleaning and Verification Practices
Preventive cleaning and verification should be built into your routine, with clear intervals, documented procedures, and measurable criteria for success. Start by defining cleaning protocols that match your funnel’s materials, exposure risks, and usage frequency. Schedule routine tasks, assign responsible owners, and log completion times to guarantee accountability. Implement preventive maintenance by inspecting seals, gaskets, and tubing for wear, cracks, or contamination pathways, and replace components before failure. Establish simple checks: visual cleanliness, absence of residues, and accurate instrument readings after cleaning. Verification should rely on objective evidence—swab tests, surface ATP readings, or rinse-water turbidity measurements—conducted at consistent intervals. Train your team to follow standardized steps, maintain traceable records, and escalate deviations promptly. Use results to refine cleaning protocols, calibrate limits, and tighten controls. The goal is reliable performance, minimized downtime, and confidence that contamination risks stay low without compromising operational freedom.
Frequently Asked Questions
How Often Should You Calibrate the Detection Checklist for Contaminants?
You should calibrate the detection checklist monthly to maintain accuracy and reliability. In a hypothetical case study, a small lab found drifting readings after eight weeks, prompting a quarterly review—but monthly calibration standards kept results consistent. Detection frequency must align with your risk tolerance and process variability. Regular documentation shows you’re meeting quality goals, not chasing perfection. Trust evidence: frequent calibrations reduce false positives and negatives, supporting safer, freer operations while protecting stakeholders.
What Are Common False Positives in Early Contamination Signals?
False alarms are common early on, often caused by benign variability in readings, temperature shifts, or sensor drift. You should treat them skeptically and verify with multiple indicators before actions. Be aware of contamination myths, like assuming any small anomaly means disaster; instead, corroborate with repeat tests and controls. You’ll gain reliability by documenting patterns, calibrating regularly, and focusing on consistent signals rather than single outliers. This disciplined approach supports your freedom to act confidently.
Which Records Qualify as Acceptable Verification Before Reuse?
Verifying records matters: 92% of near-misses are halted by solid verification methods. Acceptable verification before reuse includes documented source validation, recent lab results, chain-of-custody records, and corroborating audit notes. You should apply reuse guidelines that require up-to-date status, traceability, and clear authorization. Rely on verification methods that are repeatable and transparent, and document decisions for accountability. This keeps your workflow free, evidence-based, and aligned with best-practice standards.
How to Document Unusual Occurrences Without Halting Production?
You document unusual occurrences without halting production by noting, timestamping, and classifying events, then evaluating impact against risk criteria. You record unusual patterns, compare with baseline performance, and keep a running log you can review quickly. You preserve production continuity by implementing temporary containment, communicating decisions, and maintaining traceability. You analyze root causes after the shift, adjust procedures as needed, and share lessons learned to prevent recurrence, all while preserving safety and efficiency.
When Is It Necessary to Escalate to External Testing Services?
If you’re unsure after internal checks, escalate to external testing when results are inconclusive or no improvement after 48–72 hours. Consider a real-world-like scenario: after a suspected contamination event, your team seeks an independent lab to confirm microbes and toxins, then updates contamination protocols accordingly. You’ll use external testing to validate findings, guarantee traceability, and avoid biased conclusions. Prompt escalation protects safety, maintains compliance, and supports evidence-based decisions.