How to Diagnose Bad Battery Cell in a Sedan and Fix It
If you suspect a bad battery cell in your sedan, start with symptom checks like softer cranking, voltage sag under load, and uneven heat. Gather safety gear, a multimeter, a low‑load clamp, and a battery tester. Measure no‑load vs under‑load voltages, inspect for hot spots, and note cranking amperage. Isolate faults with cell balancing if the pack supports it; otherwise replace failing cells or modules. You’ll uncover precise causes and practical fixes as you proceed. More details await.
Identifying Symptoms of a Failing Battery Cell

When a battery cell is failing, you’ll notice symptoms that point to impaired capacity and increased internal resistance. You’ll assess performance indicators with precise observations and objective measurements. Battery symptoms may appear as softer cranking, slower engine start, or reduced accessory power when the vehicle is idle. You’ll monitor voltage under load, noting any sudden drops or inconsistent recovery after cranking. Temperature patterns matter: a hot or unevenly heated pack can signal localized degradation. Recurrent short runs or frequent state-of-charge recalibrations often accompany aging cells. Listen for abnormal electrical noise and watch for unexpected parasitic drain that worsens with vehicle use. Document patterns across multiple starts to distinguish transient from persistent issues. For cell detection, prioritize data from high-resolution battery management system logs and diagnostic codes. This approach yields actionable insights, enabling targeted testing and informed decisions about replacement or balancing strategies without unnecessary procedures.
Tools and Safety Procedures for Battery Diagnostics

You’ll start by donning the safety gear—eye protection, gloves, and non-conductive footwear—before you touch the battery system. Next, set up your diagnostic tools with proper grounding, verify tool calibration, and document baseline readings for voltage, current, and temperature. Finally, follow established hazard procedures for lead-acid or lithium cells, including isolation, venting precautions, and emergency shutdown steps, to minimize risk during testing.
Safety Gear Essentials
Proper PPE and a structured procedure are essential for safe battery diagnostics. You’ll don safety goggles and insulated gloves before any contact with electrical components. Confirm the vehicle is powered down, keys out, and the trunk or hood secured. Use a flame-free area with adequate ventilation; avoid ignition sources and metallic jewelry. Inspect cables and terminals for corrosion, wear, or exposed conductors; replace or isolate damaged parts. Keep a non-conductive mat under the work zone and have a fire extinguisher rated for electrical fires within reach. When probing or measuring, use insulated tools and keep touch points dry. Document tests methodically, note readings, and follow a defined sequence to minimize accidental shorting. Maintain awareness of capacitor discharge risks and maintain a calm, disciplined workflow.
Diagnostic Tools Setup
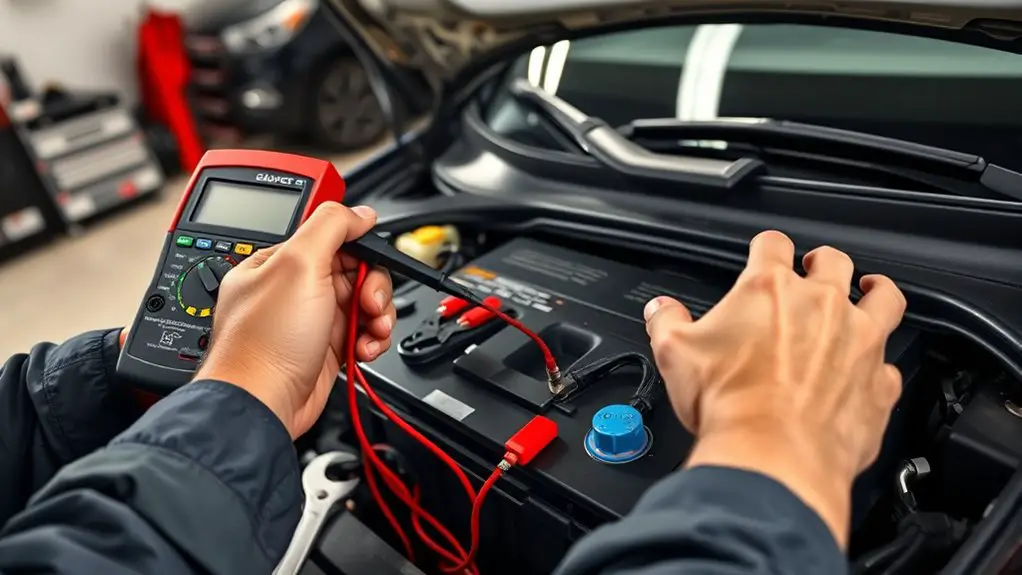
To set up for reliable battery diagnostics, compile and organize the required tools and safety gear before touching any components. You’ll use diagnostic equipment calibrated for automotive use, including an accurate multimeter, a low-load dc clamp, and a battery tester capable of performing impedance and open-circuit voltage measurements. Prepare a portable charger or load tester as a fallback to simulate parasitic draw. Know your battery types in advance to select compatible probes and connectors, minimizing measurement error. Document serials and voltage baselines for each cell bank, so you can compare against manufacturer specs. Keep a clean, labeled workspace and verify test leads are intact. This setup guarantees precise readings, repeatable results, and a safe diagnostic workflow while you assess health and fault indicators.
Handling Hazard Procedures
Handling hazardous conditions during battery diagnostics requires strict adherence to safety protocols. You’ll follow a documented hazard communication plan, PPE, and proper ventilation to prevent exposure and ignition. Before any test, confirm battery state, area clearance, and device compatibility to avoid unexpected arcs. Use insulated tools, non-sparking mats, and grounded equipment; secure the vehicle and disconnect nonessential power sources as required. If a spill or leak occurs, isolate the area and notify the supervisor; implement emergency response steps per protocol. Document observations, measurements, and any deviations. Maintain clear communication with your team and bystanders about detected risks and controls. Post-diagnostic, review procedures, refresh training, and guarantee incident reporting is complete for continuous safety improvement.
Battery Voltage and Cranking Tests Explained

Battery voltage and cranking tests assess whether the battery can deliver sufficient current to start the engine. You’ll measure state under load and no-load conditions to gauge performance, noting how voltage behaves during cranking. A healthy battery maintains voltage above starter-signal thresholds and shows minimal voltage drop under load. If voltage collapses early or remains low, suspect internal resistance or a weak cell. Document both cranking amperage and measured voltage to compare against spec. The goal is to confirm battery performance before replacing components or wiring, avoiding misdiagnosis.
| Test | Normal Range | Interpretation |
|---|---|---|
| No-load voltage | 12.6–12.8 V | Full charge; good surface charge |
| Under-crank voltage | >9.6 V | Sufficient current; acceptable health |
| Cranking amperage | Spec varies by engine | Adequate current; confirm capacity |
| Voltage drop | <0.5 V | Minimal resistance; healthy connections |
Note: Voltage drop highlights connection quality and internal cell resistance; avoid conflating with a full load test.
Performing a Basic Load Test to Pinpoint a Bad Cell
After confirming basic voltage and cranking behavior, a basic load test can pinpoint a weak or failing cell. You perform this by applying a controlled electrical load while monitoring voltage sag and recovery. Use a reputable load tester or a calibrated automotive multimeter setup to simulate typical high-demand conditions, such as 75–90% of cold-cranking amps for a sustained 5–10 seconds. Observe voltage drop thresholds: if the pack’s individual cell readings fall below manufacturer specs or show inconsistent recovery, you’re likely dealing with poor battery health. Record baseline pack voltage and per-cell resin or balance metrics if available. Maintain consistent ambient temperature, as cold or hot conditions skew results. Document which cells underperform and compare to the overall pack integrity. A clear, repeatable load test helps you decide if a fix is warranted, without guessing, while preserving safe handling practices and system integrity. Load test results guide reliable maintenance decisions.
Isolating the Fault: Cell Balancing Versus Replacement
Isolating the fault requires a precise check of cell balancing effectiveness before deciding on replacement; if balancing restores uniform cell voltages within manufacturer specs, you can avoid unnecessary part swaps. In practice, you’ll compare individual cell voltages under both rested and loaded conditions, looking for persistent deviations that exceed tolerance bands. Use a high-impedance test method to prevent cascading current flow during measurement, then trigger a controlled balancing cycle if the BMS offers it. If cells converge to a shared potential within spec, the fault lies in imbalance rather than a degraded cell; you can document the results and monitor. If, however, variance remains after balancing, you’re facing a compromised cell or a failing module, prompting battery replacement. Remember that effective balancing preserves pack health and can postpone wholesale replacement. Document all readings, guarantee safety interlocks are active, and keep the analysis anchored to manufacturer guidance for final decisions.
Repairing Vs Replacing: Choosing the Best Course of Action
When you’re deciding between repairing a faulty cell pack and replacing it, you’ll weigh the immediate fix against long-term reliability. Consider the initial cost vs expected longevity, factoring in how repair limits performance and potential warranty impacts. This discussion sets the framework to compare repair viability, total cost of ownership, and the risks of recurrent failures.
Repair Vs Replacement
Deciding between repair and replacement hinges on the battery’s condition, cost, and impact on reliability. You’ll evaluate fault isolation, accessibility, and required repair techniques to decide whether restoration preserves critical performance without introducing hidden risks. If the cell imbalance or minor internal damage is spot-repairable, targeted procedures can extend usable life without full replacement, preserving battery lifespan while minimizing downtime. In contrast, if corrosion, sulfation, or high impedance affects core modules, replacement often yields a clearer guarantee of power delivery and safety margins. Consider the vehicle’s electrical demands, charging system integrity, and warranty coverage when weighing options. Choose the approach that maximizes reliability, minimizes unintended side effects, and aligns with your risk tolerance and freedom to maintain control over the process.
Cost Vs Longevity
Cost vs longevity hinges on trade-offs between upfront expense and long-term reliability. You weigh immediate repair costs against potential future failures, balancing cost efficiency with battery lifespan forecasts.
1) Repair-focused approach: fix a single weak cell if diagnostics confirm no cascading damage, preserving original pack characteristics and avoiding full replacement while reducing upfront spend.
2) Replacement approach: swap the entire pack when cells are aging or there’s evidence of widespread degradation, maximizing reliability and long-term cost efficiency despite higher upfront outlay.
3) Hybrid/upgrade strategy: replace only at-risk modules paired with improved thermal management, optimizing battery lifespan while controlling total cost.
In all cases, assess total ownership cost, failure risk, and performance stability to decide the best course of action for your sedan’s battery health.
Steps to Verify Repair and Restore Performance
To verify repair and restore performance, begin with a controlled battery load test and compare post-repair voltages and current draw against the manufacturer’s specifications. You’ll execute a staged discharge while logging cell voltages, pack current, and overall pack impedance. Document any imbalance and note temperature rise under load. Next, perform a surface charge or gentle recharge and recheck resting voltages to confirm equalization across cells. If any cell remains out of range, reassess pack health and sealing integrity, and revisit repair techniques to address residual weakness. Use high-precision tools to quantify voltage sag, recovery time, and cold-cranking amps under standardized conditions. Evaluate performance optimization by verifying that the pack delivers rated energy within tolerance and that the BMS manages balance correctly during charging. Confirm that wiring, fuses, and connectors show no signs of arcing or resistance. Conclude with a concise report detailing measurements, deviations, and recommended follow-up steps.
Frequently Asked Questions
Can a Bad Cell Be Repaired Without Battery Replacement?
No, you can’t repair a single bad cell without replacing the battery. A failing cell typically compromises the pack’s balance and capacity, and battery repair isn’t reliable. You should test each cell, confirm with precise cell testing, and plan a full replacement or module swap. If you’re stubbornly trying to salvage, you risk further damage and safety hazards. For long-term reliability, prioritize a proper replacement rather than patchwork repairs.
How Long Does It Take to Replace a Sedan Battery Pack?
Replacing a sedan battery pack typically takes 30–60 minutes, depending on access and vehicle electronics. You’ll perform battery testing to confirm health, then disconnect and remove the pack, install the new one, and reconnect systems. Expect 15–30 minutes of core tasks plus 15–30 minutes for reprogramming or relearning. Pay attention to safety steps, and follow replacement tips for torque specs and cable routing. Afterward, retest voltage and current to verify a solid install.
Will a Failing Cell Affect Other Modules in the Vehicle?
A failing cell can ripple through your ride, yes: it affects battery cell impact on startup, accessories, and the vehicle’s electrical systems, potentially triggering faults in modules. You’ll notice dim gauges, misfires, or parasitic drain as the issue mounts. Because one weak cell drags others down, you should test and isolate it promptly. Maintain the system, verify alternator output, and protect circuits; otherwise, you’re risking broader electrical faults across the vehicle’s modules.
Can Alternator Issues Mimic a Bad Battery Cell Diagnosis?
Yes, alternator issues can mimic a bad battery cell diagnosis. You should check alternator symptoms alongside battery testing to avoid misdiagnosis. Probe for poor charging voltage, flaky LED indicators, or dim lights, then perform Battery testing under load. If voltage drops with engine RPM changes, suspect the alternator. Resolve by testing the alternator output, belts, and wiring, rather than assuming a bad cell. Accurate diagnosis saves time and preserves system reliability.
What Maintenance Prevents Future Bad Cells in a Sedan?
Battery care for a sedan starts with regular inspections and clean terminals. You should test the charging system periodically and keep battery voltages within spec. Preventative measures include tightening mounts, avoiding parasitic drains, and ensuring electrolyte levels (if applicable) stay balanced. Park in shade, use a battery maintainer during long sits, and replace aged cells before failure. By following preventative measures, you’ll extend life, reduce outages, and keep the system reliably performing for you.


