How to Diagnose BMS Warning in a Battery EV Powertrain
To diagnose a BMS warning in an EV powertrain, start with safety and isolate the system, then collect fault codes and live data. Verify cell voltages, SOC/SOH, and pack health against specs. Check cooling system performance, coolant temps, and flow, plus sensor accuracy. Inspect CAN/PCM communication, physical layers, and error frames. Form hypotheses per subsystem—cell health, thermal, or communication—then test with controlled, repeatable measurements and document results. If issues persist, advanced diagnostics await.
Understanding BMS Warnings and Fault Codes
BMS warnings and fault codes are the primary signals that alert you to abnormal conditions in the battery system. You’ll interpret them by mapping codes to subsystems, then confirming with measurements from diagnostic tools. Start with a BMS functionality overview: understand that the BMS monitors cell voltages, temperatures, state of charge, and pack current to maintain balance and safety. Each fault code points to a specific fault tree—overvoltage, undervoltage, high temperature, or communication errors between modules. You should categorize codes as critical, warning, or advisory, and prioritize actions accordingly. Common BMS issues include cell imbalances, inaccurate temperature readings, and CAN bus or I2C communication faults. When a code appears, verify sensor readings against acceptable ranges, check connectivity, and review recent operational events such as fast charging or deep discharge. Document findings, reset only if proper procedures are satisfied, and prepare a targeted follow-up test plan to isolate the fault precisely.
Safety Precautions Before Diagnostics

Before you begin diagnostics, implement stringent safety measures to protect personnel and the high-voltage system; never proceed without confirming the vehicle is properly isolated and de-energized. Begin with a formal risk assessment to identify potential hazards, quantify exposure, and define control measures. Verify service manuals and vehicle-specific procedures, then lockout/tagout the 12V and high-voltage circuits where applicable. Ascertain you have clearly labeled, intact safety gear and that doors, hatches, and scissor lifts cannot inadvertently energize the pack during work. Establish a restricted work zone, with perimeter monitoring and spectator control. Confirm battery cooling systems and contactors are confirmed de-energized before any contact with electrical hardware. Maintain clear communication channels and keep observers out of danger zones. Document all steps, including verification checks and any deviations from standard procedure. Safety gear, risk assessment, and disciplined adherence to protocol are non-negotiable to ascertain both personal safety and diagnostic integrity.
Tools and Equipment You’ll Need

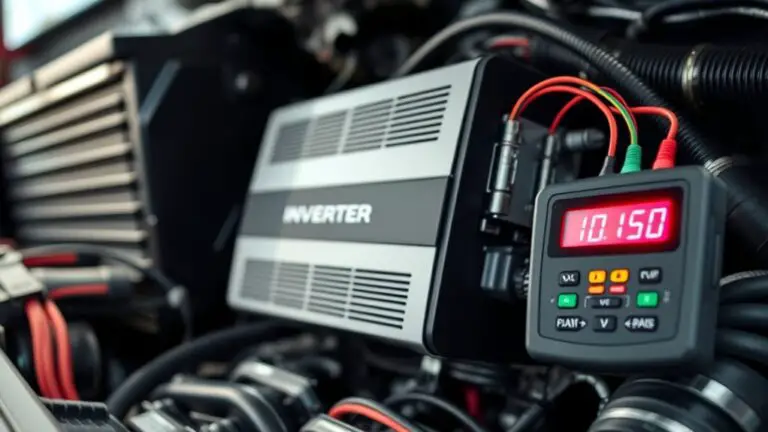
Tools and equipment are your diagnostic backbone: a calibrated electrical multimeter, a high-voltage probe set with appropriate insulation, a precision thermal camera, insulation tools, and a battery management system interface (or vehicle-specific diagnostic tool).
Tools and equipment are your diagnostic backbone: a calibrated multimeter, high-voltage probes, a precision thermal camera, insulation tools, and a BMS interface.
You’ll select diagnostic tools and essential equipment that guarantee safe, repeatable measurements, minimize risk, and support systematic fault isolation. Prioritize robustness, calibration status, and compatibility with your EV’s powertrain architecture. Establish a workspace that supports clean connections, controlled testing, and traceable data.
- High-voltage probe set with insulation rated for your system’s voltage, plus a multimeter with proper category ratings.
- Precision thermal camera and contact thermometers for thermal signatures and hotspot confirmation.
- BMS interface or vehicle-specific diagnostic tool, plus adapters, cables, and documented procedure references.
Keep documentation at hand: test step notes, expected ranges, and safety checklists. This approach aligns with disciplined, freedom-minded inquiry: precise, methodical, and ready for complex diagnostics.
Interpreting Symptoms and Visual Clues
You’ll start by correlating symptom patterns with known failure modes, focusing on repeatability, severity, and sequence. Look for consistent visual clue cues such as LED codes, fuse or connector signs, and temperature or status indicators that align with sensor signal anomalies. This initial scan should map each observation to a plausible cause, forming a prioritized list for targeted testing.
Symptom Patterns Indicators
Symptom patterns and visual indicators help you quickly distinguish between likely failure modes and normal variations. You’ll map observed signs to structured categories, supporting reproducible checks and cross‑verification with data trends. Focused recognition reduces ambiguity, guiding diagnostic strategies without guesswork.
- Symptom recognition: identify recurring, testable signals (temperature shifts, voltage dips, anomalous timing) and separate out short-term noise from persistent patterns.
- Correlation checks: compare symptom onset with operating conditions (SOC, load, temperature) to isolate root causes and rule out incidental effects.
- Data‑driven prioritization: rank suspected faults by impact likelihood, testability, and safety risk, then plan targeted measurements and follow‑ups.
This approach preserves freedom while maintaining rigor, ensuring efficient, repeatable diagnosis.
Visual Clue Cues
Visual cues provide immediate, non-invasive insight into the health of a battery EV powertrain. You’ll interpret visual indicators and battery alerts with a disciplined eye, distinguishing normal from suspect appearances at a glance. Look for color changes, corrosion, fluid residue, loose connections, and unusual routing of cables. Temperature variances on housings or battery surfaces can mirror thermal stress patterns. Distinct, consistent indicators—rapid fan cycling, visible misalignment, or indicator LEDs—signal brewing faults. Use visual clues as a triage tool to prioritize electrical checks without override. The table below frames quick checks and corresponding actions, enhancing confidence, not speculation.
| Visual cue | Immediate action |
|---|---|
| Discolored or bulging cells | Stop, inspect for swelling, isolate pack |
Sensor Signal Anomalies
Where do sensor signal anomalies typically reveal themselves in the powertrain, and how should you interpret them? You’ll detect irregular readings at the battery management interface, motor control unit, or voltage/current sensors. Treat anomalies as clues, not excuses, and verify whether the symptom aligns with expected operating ranges. To diagnose efficiently, follow a structured approach:
1) Assess sensor calibration techniques to confirm proper zeroing, scaling, and cross-checks against reference signals.
2) Perform a signal integrity assessment to identify noise, aliasing, grounding issues, or intermittent connects that distort data.
3) Correlate readings with system states and timing, ruling out transient transients and confirming persistent patterns before action.
Checking Battery Health and State of Charge
To accurately assess battery health and state of charge, start with verifying the latest Battery Management System (BMS) data and cross-checking it against pack specifications. You’ll compare reported state of charge, voltage per cell, and overall pack voltage to nominal values, noting any deviations. Next, evaluate the health indicators: remaining capacity, power limits, and charge/discharge efficiency trends over recent cycles. Look for patterns indicating battery aging, such as progressive SAR drift or accelerated capacity loss. Correlate preconditioning data, temperature history, and SOC estimates to identify calibration drift or sensor faults. Assess cycle life by reviewing available charge cycles and their impact on capacity retention. Verify consistency between BMS health flags and performance tests, and document any anomalies. If results diverge, perform a controlled rest and re-test, then reevaluate. Maintain a clear log, focusing on reliability, safety margins, and actionable thresholds for upcoming diagnostics.
Verifying Cooling System Performance
Efficient cooling performance is essential for battery longevity and safety, so start by evaluating the cooling system’s heat rejection under normal and high-load conditions. You’ll verify that coolant flow remains within specification, avoiding flow restrictions that raise temperatures and stress pack chemistries. Precision in monitoring, flow, and temperature is essential to detect anomalies early.
Efficient cooling safeguards battery longevity by verifying steady flow, temperature deltas, and rapid sensor response under normal and high loads.
- Measure coolant flow rate at the inlet and outlet under steady-state conditions, comparing against OEM targets to confirm unobstructed circulation.
- Record temperature across the cooler core and at critical return locations, ensuring the delta T stays within design limits during both normal and peak loads.
- Validate temperature monitoring sensors for accuracy and response time, confirming no lag that could mask rising cell temperatures.
Focus on repeatable test procedures, documenting ambient, load, and cycle duration. If deviations appear, isolate the path—pump, hoses, radiator, or fan controls—and re-test to confirm resolution.
Assessing Communications With the Powertrain Control Module
You’ll start by confirming CAN bus diagnostics basics and guaranteeing the physical layer is intact before interpreting PCM signals. Next, you’ll assess PCM communication signals for timing, error frames, and message integrity to verify proper command and data flow. Finally, you’ll review fault code transmission pathways to guarantee timely, accurate BMS notifications reach the PCM and related subsystems.
CAN Bus Diagnostics
CAN Bus diagnostics involve verifying that the powertrain control module (PCM) properly communicates with other ECUs over the vehicle’s CAN network. You’ll assess message flow, timing, and error counters to guarantee reliable operation under all conditions. Focus on determinism, not guesses, and document each observation for traceability.
- Check message priority and arbitration: confirm that high-priority requests (critical safety/drive functions) win bus access when needed, and note any recessive behavior.
- Verify physical and logical layers: inspect connectors, termination, and bit timing settings to rule out integrity issues that mimic PCM faults.
- Trace error frames and NPM flags: record error counts, CRC validity, and fault codes, correlating them with suspected subsystems for targeted troubleshooting.
PCM Communication Signals
PCM communication signals are the heartbeat of the powertrain, and you’ll assess them by validating the data integrity, timing, and sequencing between the host ECU and the PCM. You’ll verify channel parity, clock drift, and message framing, ensuring each packet arrives in the correct order with expected payloads. Inspect the pcm communication protocols for adherence to standard timing windows, ACK/NACK behavior, and retry logic, calibrating thresholds to avoid false alarms. Assess signal integrity by checking waveform fidelity, jitter, and line impedance under load, and confirm shielding effectiveness against EMI. Document any deviations from baseline, correlate with vehicle operating modes, and maintain a clear change log. Precision here prevents cascading faults and preserves driving freedom.
Fault Code Transmission
When verifying fault code transmission, you’ll focus on the integrity and timeliness of diagnostic messages exchanged between the powertrain control module and the host system. You’ll verify fault code identification and guarantee rapid, deterministic delivery, with correct sequencing and error handling. Interpretations must map to BMS symptoms and avoid ambiguity.
- Check message cadence and latency to confirm timely fault code transmission.
- Validate fault code identification against standard catalogs, guaranteeing correct fault code interpretation.
- Confirm framing, checksum, and retry logic to prevent misreadings or duplicate faults.
Document any mismatch between codes and vehicle behavior, and isolate communication faults from sensor or actuator faults. Maintain traceability from event to code, including timestamps, source address, and priority. This disciplined approach supports clear, actionable fault code interpretation and targeted diagnostics.
Step-By-Step Diagnostic Workflow
To begin the Step-By-Step Diagnostic Workflow, gather all relevant BMS fault codes, live data streams, and vehicle operating context, then define the exact symptom, expected behavior, and test conditions. You’ll structure the process around clear hypotheses: what fault code indicates, how it manifests in performance, and which test points verify causality. Start with data integrity checks—timestamp alignment, sensor calibration status, and communications bus health. Next, isolate subsystems: cell monitoring, pack balancing, thermal management, and SOC/SOH estimates. For each hypothesis, prescribe measurable checks: voltage and current waveforms, temperature gradients, and state shifts under controlled load. Use deterministic tests: replicate the symptom at known operating states, document responses, and compare against acceptable ranges. Maintain a concise log, linking each finding to a specific fault code. Conclude with a prioritized list of potential root causes and recommended next steps, ensuring maintenance of battery management standards within the electric vehicle platform.
When to Seek Professional Help and Preventive Practices
As soon as you notice persistent or repeating BMS alarms, or if fault codes remain unresolved after basic diagnostics, seek professional assistance to avoid safety risks and potential pack degradation.
As soon as persistent BMS alarms appear, seek professional assistance to prevent safety risks and pack degradation.
- professional assistance: engage qualified technicians for diagnostic validation, safe handling, and advanced fault isolation.
- preventive maintenance: implement routine checks on cell temperatures, insulation integrity, and connector torque to sustain pack health.
- risk-aware planning: document findings, schedule periodic inspections, and adhere to service bulletins to minimize surprises during operation.
Frequently Asked Questions
Can BMS Warnings Indicate Non-Battery System Faults?
Yes, BMS warnings can indicate non-battery system faults. When you see a warning, you should run BMS diagnostics in parallel with system troubleshooting to confirm whether the issue lies in the battery pack, inverter, or related vehicle networks. Use fault codes, live data, and subsystem logs to correlate symptoms. Don’t overlook peripheral sensors or CAN messages. If needed, recheck fuses, grounding, and harness integrity as part of a systematic diagnostic workflow.
How Do Environmental Conditions Affect BMS Warning Reliability?
Temperature effects and humidity impact can skew BMS warning reliability. You’ll notice more false alerts in extreme heat or cold, and damp conditions can accelerate sensor drift. Juxtapose ideal lab stability with real-world variability, yet you rely on robust calibration to maintain trust. You should monitor ambient temp, shield sensors from moisture, and verify diagnostics during thermal ramps. In practice, document deviations, re-run thresholds, and guarantee alerts reflect meaningful changes, not transient environmental noise.
Do BMS Faults Affect Vehicle Performance or Range?
Yes, BMS faults can affect vehicle performance and range. When a fault triggers, the system may reduce power delivery, throttle response, or charging limits to protect cells, lowering vehicle efficiency. You’ll notice faster pack balancing, potential derates, and reduced regenerative braking. To minimize impact, monitor fault codes, verify cell voltages, and guarantee cooling and isolation are intact. Regular diagnostics help you preserve range and performance while maintaining battery safety and reliability.
Are BMS Codes the Same Across Different EV Models?
No, BMS codes aren’t the same across every EV model. BMS code variations exist, and model specific interpretations shape how you read them. You’ll need to consult each vehicle’s fault definitions and wiring diagrams, then map error codes to root causes. Systematic checks—cell balance, thermals, pack voltage—must align with the model’s diagnostic handbook. This approach keeps diagnostics precise, while giving you the freedom to verify beyond generic code lists.
What Happens if a BMS Warning Clears Itself Temporarily?
A temporary warning clearing can mask an underlying issue and may come back. If it self-clears, you should monitor the vehicle, check for recurring codes, and verify that all fault flags are correctly reset. Temporary warning implications include potential system recalibration delays and misinterpretation of state-of-health. You’ll want to inspect battery temperature, voltage imbalances, and communication integrity. Use data logs, confirm with a diagnostic tool, and guarantee the BMS isn’t hiding persistent faults via self clearing mechanisms.