How to Diagnose Clunking Over Bumps in a Compact Car Suspension
To diagnose clunking over bumps in a compact-car suspension, start with a safe, organized workspace and proper supports. Inspect bushings, ball joints, tie rods, sway bar links, and mounting hardware for play, tears, leaks, or loose fasteners. Perform controlled loading with the car elevated, listening for clunks at different wheel positions. Use measurements for deflection and torque specs, and check for worn boots or lubrication issues. If noises persist, professional assessment can confirm the exact cause and fixes. More specifics ahead.
Pinpointing Common Causes of Suspension Clunks
Common suspension clunks typically originate from worn bushings, ball joints, or mounting hardware, which allow excess movement under load. In this section, you’ll identify frequent failure points by examining the suspension components involved in load transfer and articulation. Begin with bushings, since degraded elastomer or teflon compounds create variable play that translates into clunking noises as the suspension cycles. Next, assess ball joints for radial play and stiffness; excessive looseness manifests as audible, deliberate impacts when turning or driving over irregularities. Jolts can also arise from mounting hardware—bolts, nuts, and brackets—loose or fatigued fasteners compromising structural integrity. Look for anchor points that exhibit movement relative to the subframe or control arms. Systematically verify each connection with controlled loading, noting any irregular motion, binding, or preload loss. By isolating these elements, you’ll map the source of the clunk and determine appropriate suspension components servicing to restore precise, quiet operation.
Preparing Your Workspace and Safety Checks
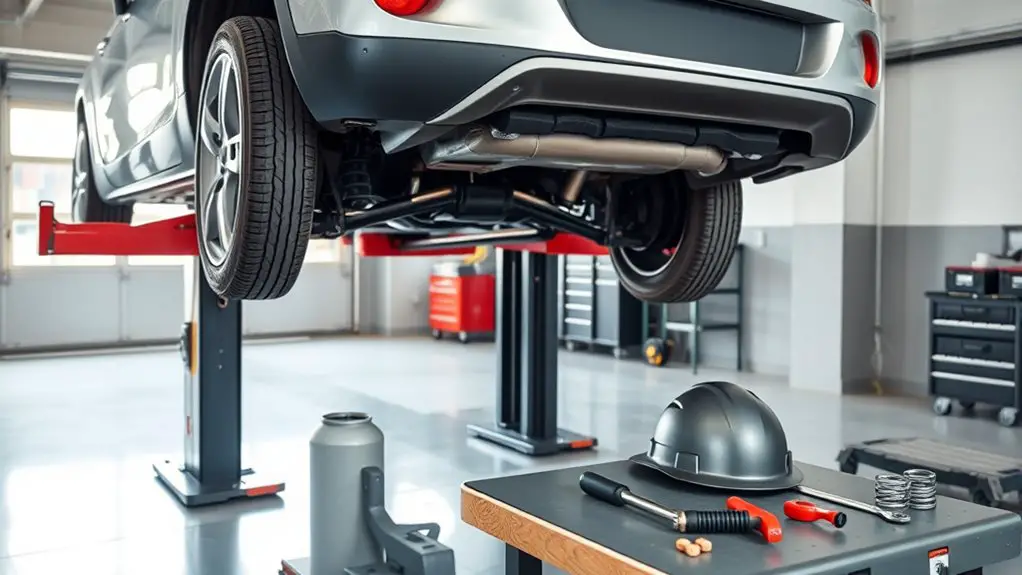
Before you begin diagnosing clunks, set up a dedicated workspace that’s flat, well-lit, and free of distractions. You’ll perform safety checks and prepare tools with disciplined, repeatable steps. Start with a clean, dry surface and a stable vehicle support plan, such as a jack with a compatible stand system rated for your car. Establish a simple workflow: inspect, document, test, verify. Prioritize workspace organization to minimize misplacement of fasteners and components. Keep a clearly labeled bin for hardware and a separate tray for removed parts. Confirm access to essential safety equipment: gloves, eye protection, and, if needed, a respirator for dusty environments. Use a torque wrench and metric/standard sockets calibrated to manufacturer specs. Mark potential hazards on a dry-erase surface or note pad, including pinch points and spill risks. Maintain clear lighting, avoid clutter, and limit distractions. A disciplined setup accelerates accurate diagnosis and reduces rework.
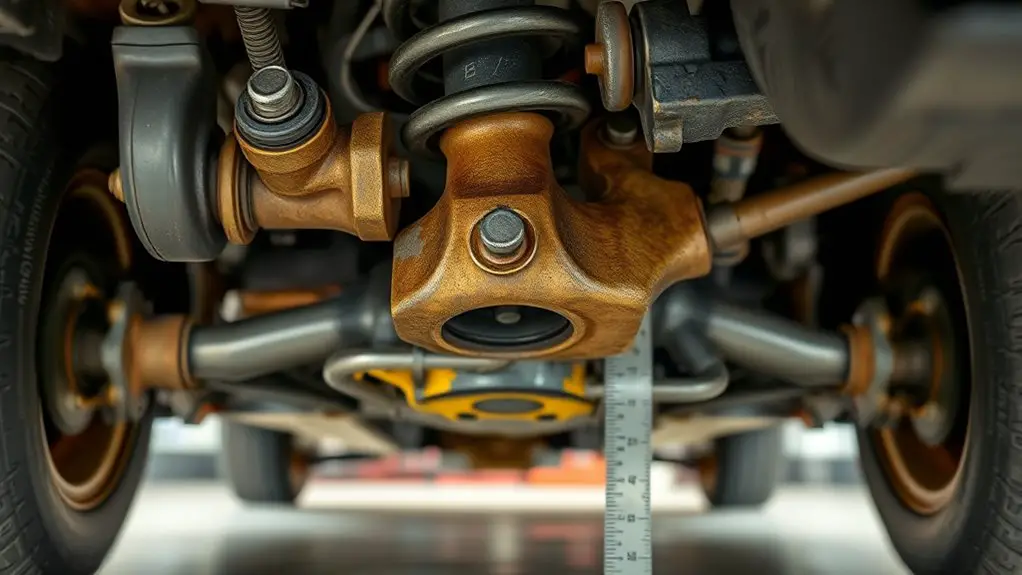
How to Inspect Bushings for Wear or Damage
You should start by visualizing bushing wear, looking for cracks, tears, or deformation that signal compromised support. Next, assess physical play by comparing movement to spec, noting any excess deflection or squirm when loads are applied. Finally, check lubrication condition, ensuring seals are intact and absence of drying or contamination that could hasten deterioration.
Visualize Bushing Wear
Visualizing bushing wear starts with a careful, hands-on inspection of the suspension links and control arms. You should assess play, misalignment, and contour changes by palpating the bushing joints for stiffness, cracks, or tearing. Look for uneven oozing of lubricant or hardened coating, and note any discoloration indicating material degradation. Compare each side to establish baseline symmetry; asymmetry often signals localized wear. Inspect the bushing material for cracks through slight bending or flexing of the arm, and check the inner sleeve for elongation or radial movement. Record play in degrees and millimeters, and consider how tire load and steering input affect the observed movement. If wear is evident, plan bushing replacement with appropriate torque and alignment checks to maintain suspension integrity.
Inspect Physical Play
Have you verified play in bushings by measuring both angular and lateral movement against a known reference? In this section, you perform structured component inspection to identify worn or damaged bushings that cause clunking. Focus on detecting excess play, misalignment, and degraded material integrity as part of suspension diagnostics. Compare motion limits to factory specs and document deviations clearly for repair decisions. Maintain a methodical approach, noting surface wear, cracking, or grease loss that could alter damping behavior. Use controlled tests with the vehicle on a suitable surface and load, ensuring repeatable results. Correlate findings with other symptoms to form a sound diagnostic conclusion about the suspension system.
- Inspect bushings for play and stiffness
- Check mounting points and fasteners for looseness
- Record measurements and reference values for traceability
Check Lubrication Condition
Lubrication condition directly affects bushing performance; inspect both the presence and state of lubricant, noting gaps, dry spots, and signs of contamination. You should assess lubrication coverage at all pivot points, including joints, sleeves, and bushings. Look for hardened, degraded, or missing grease, and check for moisture intrusion or metallic debris in seals. Compare actual lubrication types used with manufacturer recommendations to guarantee compatibility with load and motion. If you discover dry areas or inconsistent film, plan re-lubrication or replacement per service intervals. Document intervals, surfaces, and any evidence of wear that could elevate clunking. This check aligns with maintenance tips and helps prevent premature deterioration. Maintain a concise log for future reference and consistent preventive care.
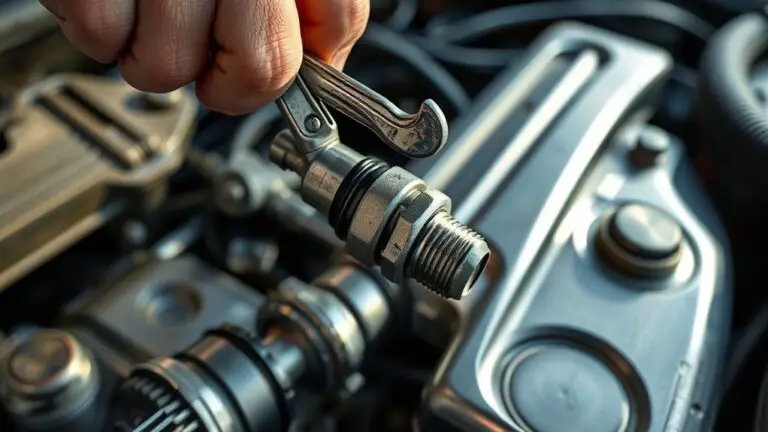
Checking Ball Joints and Tie Rod Ends
Ball joints and tie rod ends are critical for steering response and suspension alignment, so begin by inspecting them for play, wear, and linkage integrity.
You’ll want to check each ball stud and tie rod end for looseness, torn boots, and excessive movement. Grab the wheel at the 3 and 9 o’clock positions; any clunk or wobble when you push or pull suggests worn ball joints or a failing tie rod. With the wheel off the ground, cycle steering from lock to lock and listen for binding or grinding. Inspect teardrop-shaped joints for discoloration or moisture ingress, and verify that cotter pins or castle nuts are intact. Measuring play with a ruler or calipers helps quantify wear beyond feel.
- Check for excessive radial play in ball joints and tie rod ends
- Inspect boot integrity and lubrication absence
- Verify nuts, cotter pins, and linkage fasteners are secure
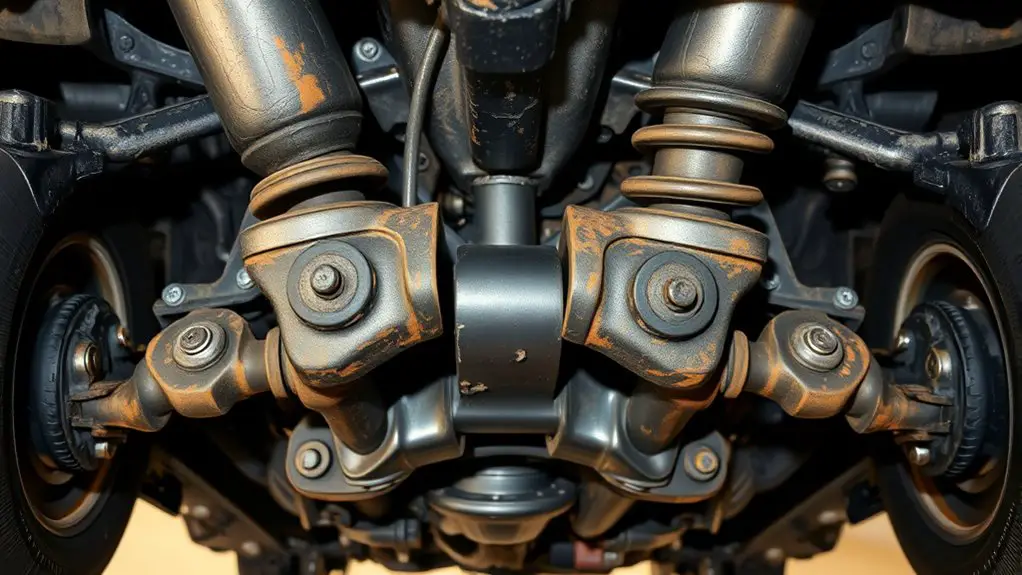
Assessing Sway Bar Links and Bushings
Evaluating sway bar links and bushings requires checking for play, wear, and integrity of the connecting hardware. You’ll assess link movement at full lock and mid‑travel to identify looseness that signals worn bushings or fatigued joints. Begin with a visual and tactile inspection: look for cracked rubber, torn boots, and oily residue, then feel for looseness by hand with the wheel lightly loaded. In the sway bar, verify the links’ threaded attachments are secure and free of corrosion; any bend or deformation warrants replacement. For bushings, test for vertical, lateral, and radial play by applying steady force to the bar; run a squeeze test to detect soft, split, or compressed material. Monitor alignment with the front wheels during rotation and bounce tests; clunking on bumps often originates from degraded link insulators or worn end‑links. Document findings, replace worn components promptly, and recheck with a short road test to confirm quiet, controlled handling. link inspection, sway bar.
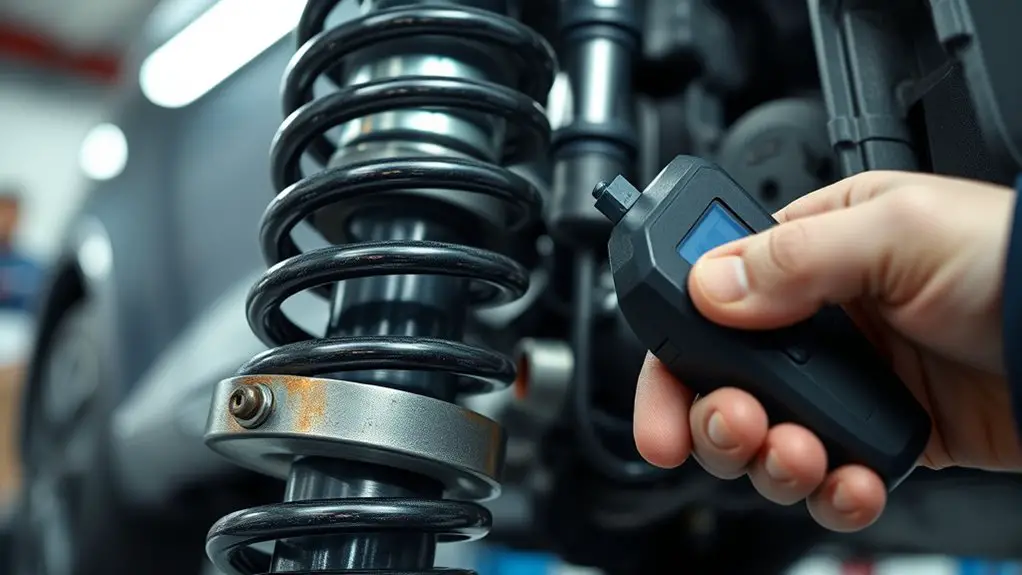
Inspecting Struts, Coilovers, and Mounts
Inspecting struts, coilovers, and mounts requires a careful assessment of vertical and rotational play, oil leaks, and mounting integrity. You’ll verify seal condition, bushing wear, and fastener security while evaluating damping response and alignment. Look for anomalous movement, audible clunks, or sticking during compression and rebound cycles. Perform a controlled bounce test and compare to factory specs; any softening or binding indicates wear or preload issues. For coilovers, check preload settings, thread wear, and ring seating; improper adjustment can translate to unstable handling or clunking. Strut inspection should include mounting collars, top mounts, and dust boots for tears or loose studs. Document observed irregularities with notes and photos to guide precise remediation. Prioritize safe handling—disconnect the sway balance if needed and support the vehicle on level ground. Address root causes with informed decisions about replacement versus reconditioning, then recheck after service.
Inspect struts, coilovers, and mounts for play, leaks, and mounting integrity; document, troubleshoot, and recheck after service.
- Inspect damping and play before and after adjustments
- Verify coilover adjustment range and thread integrity
- Confirm mounting hardware seating and boot condition
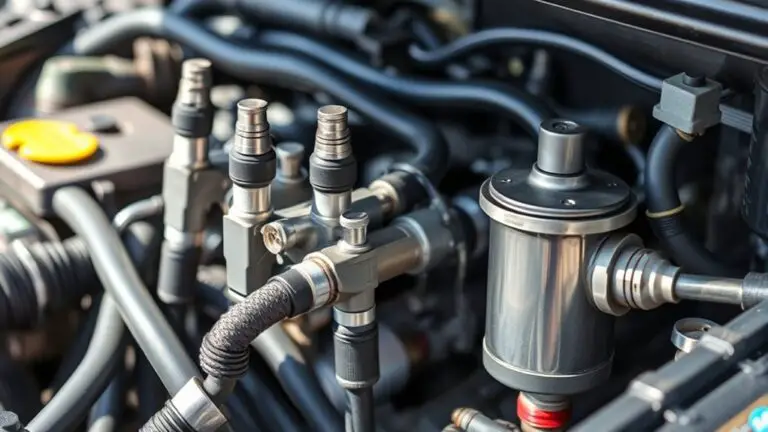
Identifying Loose or Damaged Fasteners
Loose or damaged fasteners are a critical failure point in suspension assemblies and should be identified before any ride-height or damping checks. You’ll inspect all fasteners connected to control arms, struts, stabilizers, and mounting brackets for looseness, corrosion, or deformation. Focus on fastener types common in compact cars, including bolts, studs, nuts, and captive-thread fasteners, noting any worn or rounded heads that hinder proper torqueing. Check for missing washers, spacers, or locking devices that could allow movement under load. Perform a visual and tactile sweep along joints while you gently pry suspected areas to feel play. Record looseness, repetitive clunking at wheel travel, or asymmetric movement as symptoms. When you address findings, apply appropriate tightening techniques per torque specs and hardware type, ensuring threads are clean and fasteners align properly. If fasteners show sign of fatigue, replace them with OEM-approved parts and recheck for consistent clamping force.
Performing Sound Tests With the Car Elevated
When you lift for access, secure the vehicle and establish stable points before proceeding to sound testing. Follow structured noise diagnostic steps with the car elevated, listening for clunks transmitted through suspension components while noting potential sources. Throughout, observe safety considerations, using proper supports and PPE to prevent movement or injury.
Lifting for Access
Lifting the vehicle to access its suspension components is essential for sound testing, and you should establish a stable, level support before any checks. When you lift, use designated lifting points and verify each contact point is clean and secure. Perform sound tests with the car elevated by progressively loading the suspension, noting any clunks that appear or change with height. Maintain a controlled environment, avoid sudden jounces, and keep hands clear of moving parts. Document noises at specific wheel positions to distinguish bushings from linkages. Focus on predictable, repeatable checks that reveal loose components without introducing new damage. Your goal is reliable data that guides safe, effective repairs and preserves ride quality.
- Use proper lifting techniques and verify all access points before testing
- Mark noise onset with wheel position and load level
- Re-check stability after each test, recording results
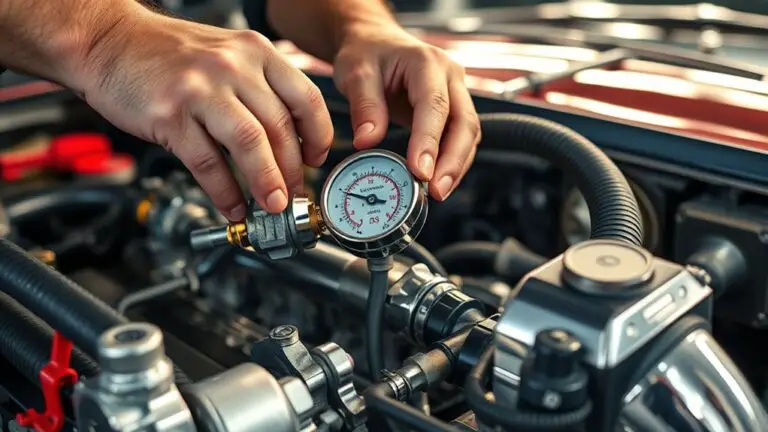
Noise Diagnostic Steps
With the car elevated, begin by applying controlled, progressive loads to the suspension while listening for changes in tone and rhythm of any clunking or creaking. You’re identifying noise types by isolating components under load, noting onset, duration, and character. Use diagnostics tools such as a stethoscope probe, magnetic pick-up, and a tape-recorded test to capture subtle shifts. Compare responses to load direction, bounce, and weight placement to map sounds to likely sources. Document correlations between contact, flex, and fastener engagement.
| Channel | Load Condition | Observed Noise |
|---|---|---|
| Front | Left wheel | Creak under compression |
| Front | Right sway | Thud on rebound |
| Rear | Medium bump | Metallic clack |
| Rear | Full load | Rattle with rotation |
Safety Considerations
Conducting sound tests with the car elevated carries significant risk if proper precautions aren’t followed, so prioritize stability, protection, and path-of-motion awareness throughout the procedure. You’ll need safety gear, proper tools, and a clear plan before lifting. Begin with solid restraint and verified center-of-gravity support, then perform checks only within the intended path of movement. Keep loads and components in view, and avoid rapid or jerky motions that could shift weight unexpectedly. Maintain a controlled environment, and stop if anything feels unstable. Document each test step, noting unusual clunks or resonance frequencies for later inspection.
- Use safety gear and proper tools as standard practice
- Confirm stable jacking and support before any test
- Stop immediately if movement compromises stability
Interpreting Symptoms: Clunk Timing and Vehicle Symptoms
Clunk timing is a critical diagnostic clue: the pattern of noise typically reveals whether the issue lies with bushings, joints, or suspension components. You’ll correlate timing with steering inputs, speed, and wheel load to parse source signals. When clunking noises occur during compression, expansion, or rebound, you can infer whether control arms, ball joints, or struts are involved. A snap or rapid transfer of load often points to a seized or worn linkage, whereas a slow, rhythmic thud may implicate worn bushings or mounts. Listen for consistency across turns, dips, and braking events; mismatch suggests asymmetric wear or stance changes. Vehicle symptoms, such as drifting, stiffness, or looseness, reinforce suspicions about specific assemblies. Document repeatability, amplitudes, and intervals to guide suspension maintenance decisions without overhauling unrelated components. Use these observations to prioritize inspections, perform targeted tests, and maintain warning thresholds that keep your driving freedom intact. Clarity here aids precise diagnosis.
When to Seek Professional Help and Next Steps
If you notice persistent or worsening clunks after an initial inspection, seek a professional diagnosis to identify structural or component failures. You should determine whether to diagnose now if symptoms appear suddenly, keep you safe, or risk more damage; a technician can assess suspension, steering, and mounts with proper tools. After the inspection, follow the recommended next steps, including repairs, replacements, or a verified maintenance plan, to restore reliability and handling.
Seek Professional Diagnosis
If you’ve noticed a persistent clunk or roughness in your suspension, seeking a professional diagnosis as soon as possible helps isolate whether the issue is safety-critical or stemming from wear that can be addressed without compromising ride quality. A professional assessment identifies root causes, prioritizes safety, and guides repair sequencing. Rely on expert recommendations to determine whether components require replacement, adjustment, or lubricant refresh, and to estimate qualified service scope. Clear communication with the technician speeds resolution and reduces downtime.
- Obtain a professional assessment to confirm safety status and repair priorities
- Expect detailed findings, including component condition and failure modes
- Follow expert recommendations for timing, parts, and service plan to restore performance
Clarity, not guesswork, keeps you confidently on the road.
When to Diagnose Now
When to diagnose now hinges on safety and symptom severity: if you notice persistent clunks, knocking, or a rough ride that worsens with load or turns, it’s prudent to seek professional assessment promptly.
Table: Signs of Urgency vs. Timing Issues
| Signs of urgency | Timing issues |
|---|---|
| Sudden loss of control feel | Delays in inspection complicate repair |
| Loud, sharp clunks over bumps | Gradual onset over weeks |
| Front-end squatting or binding | Inconsistent clunking with gauge load |
| Metallic grinding noise | Vague, intermittent symptoms |
| Leaking fluid or heat buildup | Scheduling constraints |
Precise evaluation guides decision-making: trust risk signals, don’t delay when symptoms escalate, and schedule a diagnostic visit to prevent progression.
Next Steps After Inspection
After the inspection, you should understand which issues are critical and which are manageable, and you’ll know the recommended service steps to prevent further damage. If symptoms persist or show progression, seek professional help promptly to avoid safety risks and costly repairs. A technician will verify diagnoses with structured troubleshooting techniques, confirm component wear, and test under load, road, and vibration conditions. They’ll determine whether parts need replacement, alignment, or calibration, and provide a detailed repair plan with estimated timelines and costs. When professional help is warranted, bring recent inspection notes, symptom history, and any measurements you’ve taken. Scheduling flexibility and clear expectations optimize outcomes.
- recommended tools and diagnostic gear
- structured troubleshooting techniques and validation
- clear, itemized service plan with timing and cost estimates
Frequently Asked Questions
Can Clunks Originate From Non-Suspension Components?
Yes, clunks can originate from non-suspension components. You should inspect engine mounts for looseness or cracking and the exhaust system for rattle-causing hangers or leaks, as both can transmit noise into the cabin. Check accessories, heat shields, and the steering rack for play. Look for movement with the load on the suspension, and isolate by applying throttle, braking, and cornering forces. A precise diagnosis guarantees true culprits are addressed without guesswork.
Do Road Conditions Affect Clunk Frequency?
Yes, road conditions affect clunk frequency. You’ll notice more staccato clunks on rough road surface types where impact force transmits through the suspension. Your goal is to quantify and compare how different surfaces alter timing and amplitude of clunks. Consider frequent potholes or frost-heaved patches increasing impact force, versus smooth asphalt that minimizes it. You’ll track patterns, adjust damping or alignment as needed, and maintain consistent measurements across varied road surface types.
Can Poor Wheel Alignment Cause Clunks?
Yes, poor wheel alignment can cause clunks. Imagine your steering and suspension as a tight, synced system; when alignment’s off, tires tug, springs and bushings strain, and you hear repeated thumps over bumps. You’ll notice uneven tire wear and drifting at speed. Focus on wheel alignment and related suspension issues first, as correction often quiets clunks. If noises persist, inspect ball joints, control arms, and tie rods for wear or play.
How Long Can a Clunk Occur Before Repairs?
A clunk can’t safely linger indefinitely; you should address it promptly. In most cases, clunk frequency signals mounting wear, so treat any persistent noise as an urgent repair matter. If the clunk repeats during bumps or turns, schedule service soon—don’t delay for cosmetic reasons. The repair urgency rises with symptoms like joint looseness or leaking joints. You’ll want a diagnostic check to prevent further damage and preserve handling, control, and passenger safety.
Do Aftermarket Parts Increase Clunk Risk?
Symbolism starts with a cracked gear icon, signaling risk. Do aftermarket parts increase clunk risk? Yes, if you overlook aftermarket quality and suspension compatibility. You’ll notice louder clunks when subpar components clash with stock geometry. You should verify part quality, proper fit, and mounting hardware. You deserve freedom to drive confidently, so choose OEM-tested or high-quality aftermarket parts, confirm suspension compatibility, and align with your vehicle’s tolerances to minimize clunking over bumps.