
How to Diagnose Fuel Contamination in a Gasoline Sedan Fuel System
To diagnose fuel contamination in a gasoline sedan, start with symptoms like misfiring, rough idle, and reduced acceleration, and verify with fuel level checks and unusual pump sounds. Inspect the fuel system: replace a clogged filter, trace lines for cracks, test fittings, and assess injector spray patterns. Collect samples from multiple points, check for water, dirt, or odor, and perform moisture testing. If symptoms persist, seek professional help for in-line analysis and injector testing; more steps await you.
Signs of Fuel Contamination in a Gasoline Sedan

Common symptoms of fuel contamination in a gasoline-powered sedan manifest as misfiring, rough idle, and reduced acceleration. You’ll notice hesitation during acceleration, intermittent stalling, and an engine that feels inconsistent at steady speeds. Fuel quality directly influences combustion stability, so degraded or adulterated fuel can cause unburned or partially burned mixtures, leading to performance irregularities. You may also observe increased exhaust odor, especially a stronger gasoline scent or rich, smoky emissions. Misfiring cylinders show up as vibration and uneven RPM, while rough idle signals inconsistent fuel delivery or ignition timing disturbances. Administrative indicators include false fuel trims on the onboard computer and diagnostic trouble codes related to misfire and fuel rail pressure. Contamination sources span water ingress, ethanol-washout, microbial growth, and sediment in the tank or lines. If symptoms persist despite a clean air filter and spark plugs, consider testing fuel quality and inspecting supply lines for contaminants before escalating diagnostics.
How to Verify Contamination: Basic Inspection Steps
Begin with a quick, systematic check of fuel-related indicators before diving into complex tests. You’ll start by confirming fuel level accuracy, listening for unusual pump sounds, and noting any abnormal engine behavior at idle and under load. Proceed to a visual inspection of readily accessible components for obvious signs of contamination, such as sediment in the visible portions of the fuel filler neck, staining around the cap area, or unusual odors that suggest degraded fuel. Record any discrepancies between fuel gauge readings and observed performance, and compare current fuel to recent purchases for color or clarity changes that indicate contamination. Evaluate fuel quality by noting consistency of the fuel you’re supplying—clear, bright, and free of particulates is expected; cloudy, rancid, or syrupy fuel warrants further scrutiny. Document findings with timestamps, correlating symptoms to measured indicators. This basic inspection supports a reasoned, evidence-based approach to diagnosing contamination without committing to invasive checks.
Inspecting the Fuel System: Filters, Lines, and Injectors
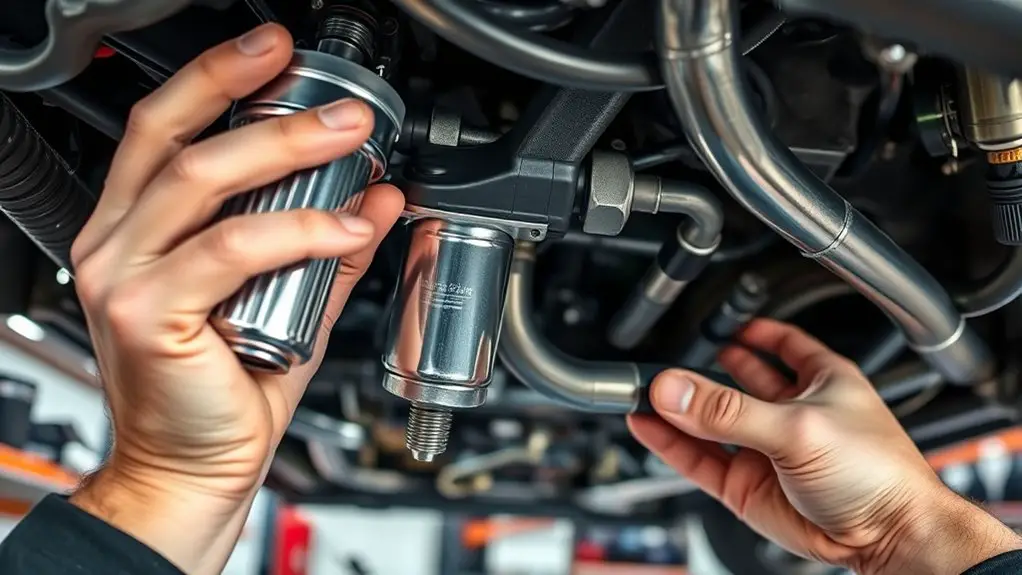
To continue from the initial checks, you’ll focus on the fuel system’s core components: filters, lines, and injectors. Begin with the fuel filter: locate, inspect for clogging, and replace if flow is restricted or visible contamination exists. Document replacement intervals and use OEM-recommended parts. Next, trace fuel lines for cracks, leaks, or soft spots; pressure test lines according to spec and replace damaged sections. Inspect fittings for tightness and corrosion, correcting as needed to maintain a clean flow path. Move to injectors: assess spray pattern, balance, and resistance with appropriate tools; note any idle roughness, misfires, or fuel odor that suggests deposit buildup. If injector cleaning is indicated, perform a validated cleaning procedure or use approved additives within manufacturer guidelines. Record results, including test pressures and observed improvements. Maintain a concise log to support diagnostic decisions and future maintenance, ensuring the system remains resilient against contaminants and fuel-quality variations.
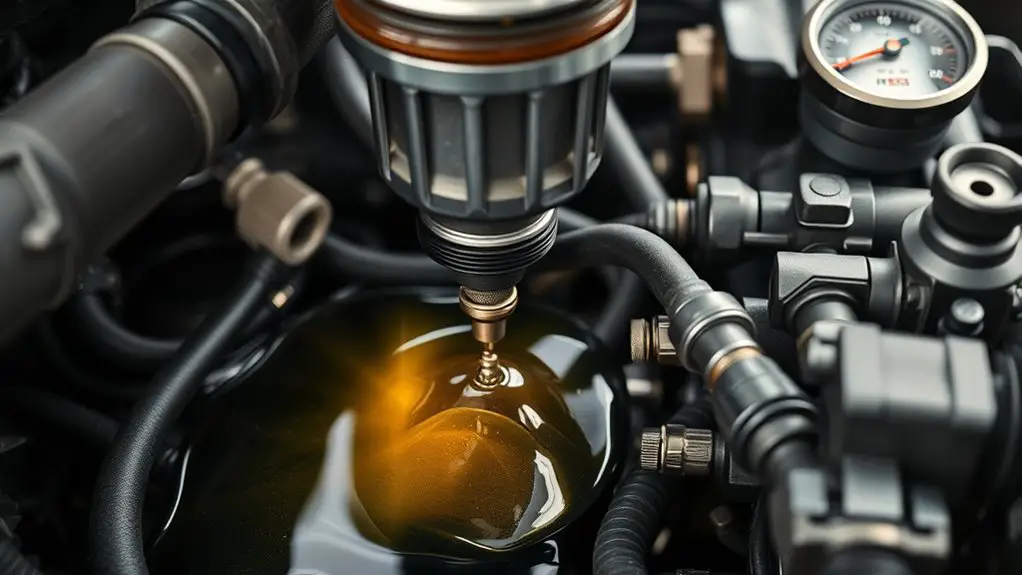
Testing for Water, Dirt, and Bacterial Growth
Testing for water, dirt, and bacterial growth starts with a systematic sample and inspection plan: collect representative fuel samples from multiple points in the system, perform visual and odor checks for contamination, and apply validated water-detecting methods to quantify moisture content. You’ll verify dirt presence, residue, and particulates with consistent sampling techniques, documenting color, sheen, and sediment. Use standardized tests for water testing to establish precise moisture levels, and implement bacterial testing when contamination indicators or odor persistently suggest microbial activity. Maintain strict chain-of-custody and record results clearly to guide decisions about fuel quality and system maintenance. This approach supports evidence-based actions and minimizes unnecessary interventions, aligning with a freedom-forward mindset.
- Collect samples from primary, secondary, and return lines to capture variability
- Use calibrated, validated water-detecting methods and thresholds
- Document odor, color, and sediment consistently
- Initiate microbial testing when indicators exceed baseline controls
Safe DIY Checks and When to Seek Professional Help
If you’re evaluating fuel quality on your own, start with simple, noninvasive checks you can trust, and know when to call in a professional. Begin with a visual inspection of the fuel itself and the resale-safe fuel you’re using; look for visible sediment or unusual color, and note any mileage or performance changes. Use a clean, calibrated fuel tester to check for ethanol content within manufacturer guidelines, and compare with your vehicle’s recommended range. Keep records of tests, fuel brands, and storage conditions to identify contamination sources over time. If you detect consistent symptoms—rough idle, stall, loss of power, or abnormal fuel trim—that persist after basic diagnostics, escalate to a professional evaluation. Professionals can perform in-line fuel sample analysis, compression checks, and injector testing to distinguish fuel quality issues from mechanical wear. Remember, recognizing contamination sources early protects your engine and your freedom to drive with confidence.
Frequently Asked Questions
Can Fuel Contamination Cause Long-Term Engine Damage?
Fuel contamination can cause long-term engine damage if left unchecked, you’ll regret it later. Think of your fuel system like a garden: one weed spreads; you’ll see slower engine performance. Contamination symptoms include misfires, knock, reduced power, and rough idling, followed by clogged injectors and fouled spark plugs. If you notice these signs, you’ll want to diagnose early, using evidence-based checks, fuel tests, and proper filtration to protect engine durability and maintain peak performance.
Does Ethanol Content Affect Contamination Sensitivity?
Yes, ethanol content affects contamination sensitivity. Higher ethanol increases water solubility and microbial risks, raising contamination risks and accelerating phase separation in certain blends. You’ll want to monitor ethanol effects on fuel system components and sensor accuracy, using precise testing and evidence-based checks. When evaluating risks, consider the blend percentage, storage conditions, and fuel additives. This approach helps you manage contamination risks while preserving engine performance and fuel system integrity.
How Do Fuel Additives Interact With Contaminated Fuel?
Fuel additives can help mitigate certain contamination effects, but they won’t fix severe water or phase-separation issues. You should evaluate fuel performance first, then choose additives designed for your contaminant (biofuel blends, water separators, or deposit cleaners). Use treatments as directed and avoid overdosing. Regularly test for varnish, gum, or ethanol content changes. If symptoms persist, drain or replace contaminated fuel, and consult a professional. Additives alone aren’t a guaranteed cure.
Are Failed Sensors Indicators of Contamination Rather Than Mechanical Issues?
Could sensor failures simply signal contamination indicators rather than outright mechanical issues? You should assess systematically: confirm sensor readings with a diagnostic scan, compare to baseline data, and rule out wiring or ECU faults. Sensor failures can accompany contamination indicators like erratic fuel trim, knock, or poor fuel economy. Gather evidence, document conditions, and test with controlled samples. If readings persist after cleaning or replacement, investigate contamination origins rather than assuming a mechanical failure.
Can Contaminated Fuel Cause Inaccurate Fuel Gauge Readings?
Yes, contaminated fuel can cause inaccurate fuel gauge readings. Contamination effects can clog or alter fuel sender signals, drift tank level sensors, or affect gauge calibration, leading you to see false fuel levels. To evaluate, you should inspect the sender unit, verify fuel quality, and check for sediment in the tank. If readings remain inconsistent, consider flushing the system and recalibrating the gauge, keeping documentation for any service steps you take.