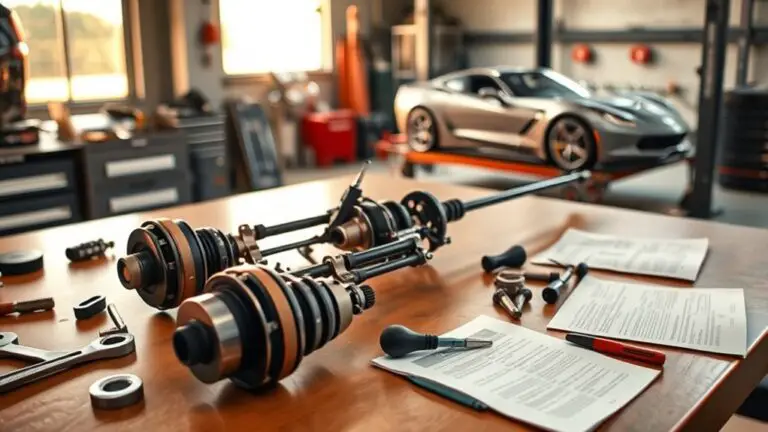
How to Perform a Pre-Trip Suspension Check for Control Arm Bush Wear
To perform a pre-trip suspension check for control arm bush wear, start with a visual inspect of the bushings for cracking, tearing, deformation, ovaling, and boot damage, plus any moisture or grease seepage. With the suspension unloaded, test for looseness or binding by gently moving the arm and listening for clunks; repeat under light load and steering input. Measure any play using a caliper or tape and compare to spec. If movement exceeds limits, plan replacement and keep documenting findings for the full guide. This will help you master more checks and steps.
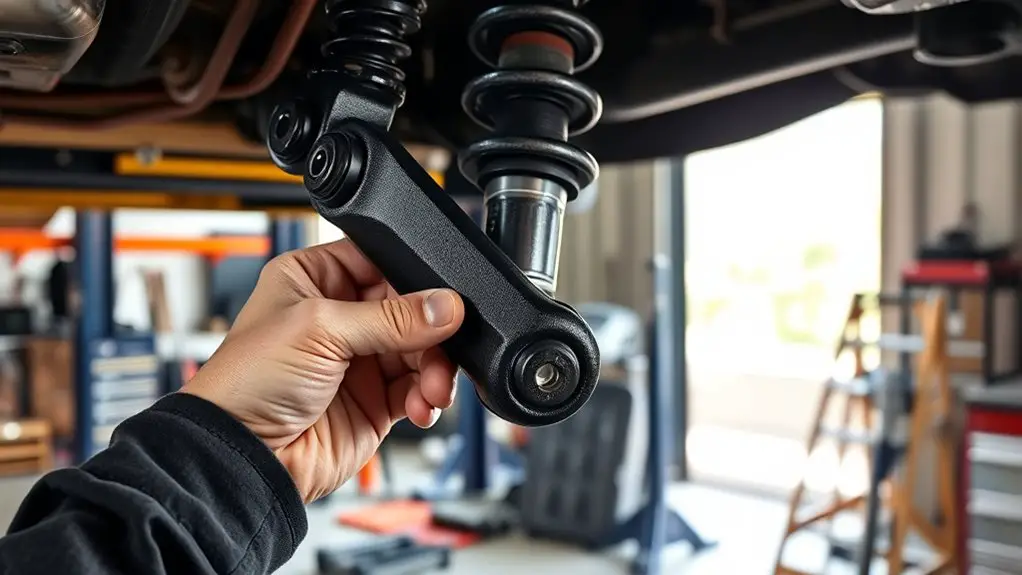
Inspecting the Control Arm Bushings: Visual Signs of Wear
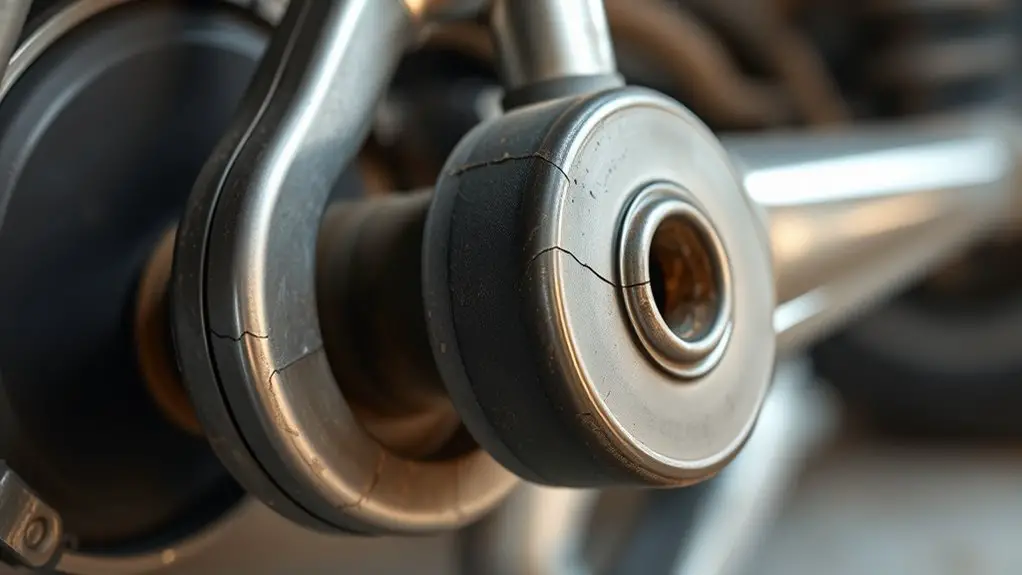
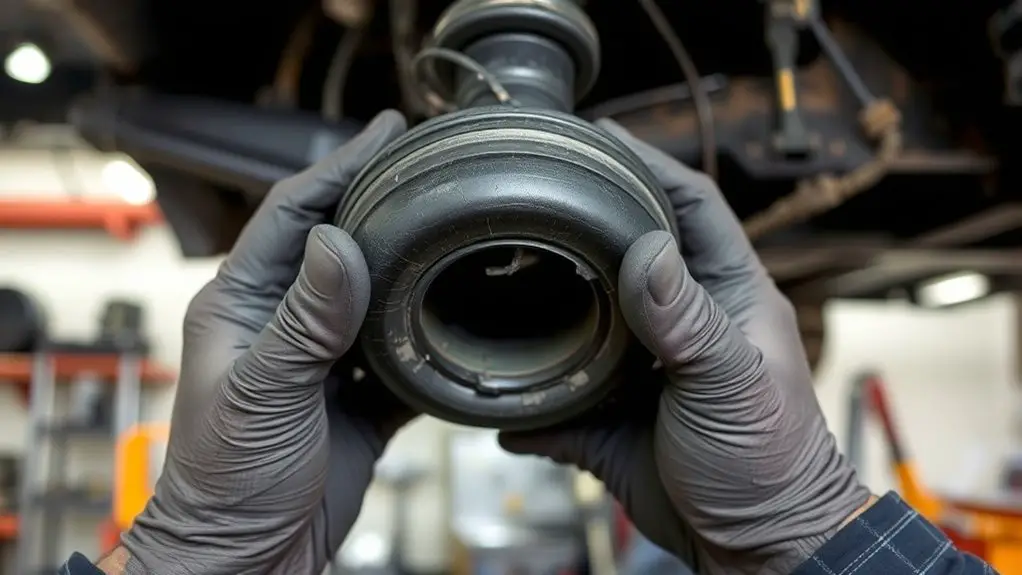
Inspecting the control arm bushings requires a careful visual check for common wear indicators. You’ll assess rubber or polyurethane material for cracking, tearing, deformation, or excessive ovaling at mounting points. Look for grease or moisture seepage along the bushing faces, which signals seal failure or lubrication loss. Pay attention to abnormal movement gaps when the suspension is gently loaded; excessive play can reveal internal wear. Inspect outer sleeves for rust, corrosion, or bending that compromises alignment. Check for torn boots that expose the bushing to dirt and debris, accelerating deterioration. Note any misalignment of the control arm relative to the subframe, which may indicate compromised installation or mounting hardware. When cataloging findings, reference bushing types to guide replacement choices and document installation techniques for accurate servicing records. This visual scan should be decisive but efficient, enabling you to determine if further diagnostic steps or proactive replacement is warranted. Your goal is a clear, actionable assessment that preserves ride quality and safety.
Checking for Cracks, Tears, and Hardening in Bushing Material
You should inspect the bushing material for visible cracks or tears, noting any surface changes that indicate compromising integrity. Look for signs of hardening, such as reduced pliability or stiffness compared to baseline, which can affect damping performance. Document findings and prioritize components showing cracking, tearing, or hardening for immediate replacement or further testing.
Cracks and Tears
Cracks, tears, and hardening in bushing material can compromise structural integrity and ride quality, so inspect all surfaces for branching cracks, thinning, or deformation. You’ll detect wear patterns that hint at fatigue and misalignment, guiding your control arm decisions. Follow these checks to decide on bushing replacements or continued service.
- Visual scan: look for surface cracks that extend from the inner bore toward the outer edge, tears in flexible material, and any hard spots indicating material aging.
- Palpation test: press with steady force to feel for softness loss, sponginess, or edge disbonding around the bore.
- Functional check: during light cycling, monitor unusual play or binding that suggests compromised control arm bushings.
Material Hardening Signs
Material hardening in bushings alters how cracks, tears, and deformities present themselves, so you must look beyond surface flaws to how the material responds under load. When you inspect for signs of hardening, test stiffness by applying controlled force and noting resistance, rebound, and motion limits. Hardened material shows limited barked deformability, increased noise, and altered friction, which can mask interior cracks. Look for micro-tears developing under repeated cycles and reduced damping efficiency. Document any unexpected changes in joint play after torqueing, as these indicate material degradation beyond visible wear. Consider the performance impact: stiffer bushings transfer vibrations, alter suspension geometry, and degrade steering accuracy. Early detection reduces risk, ensuring safer, more predictable ride quality and component longevity.
Assessing Bushing Play: How to Detect Excess Movement
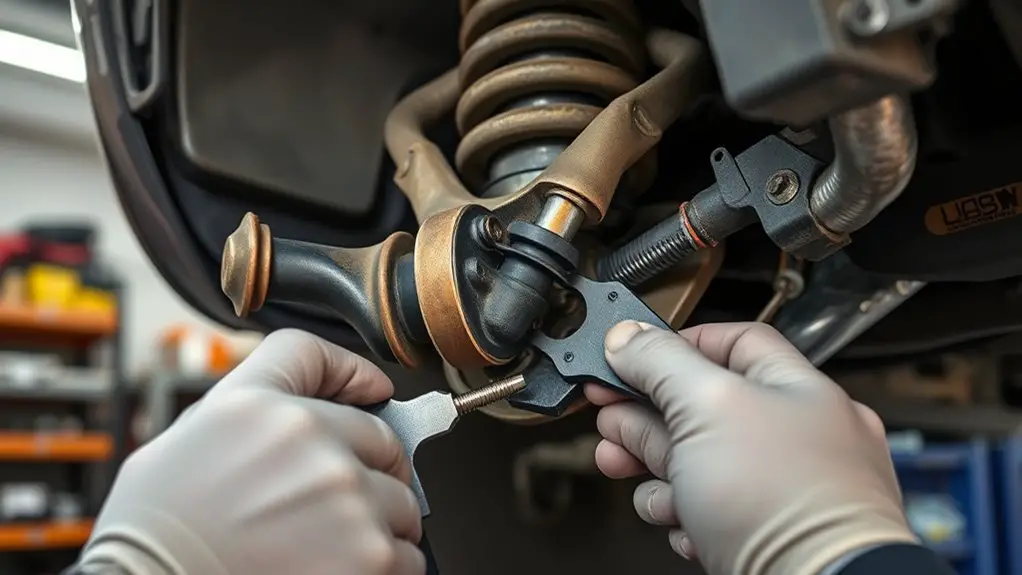
You’ll assess bushing movement by identifying signs like looseness, play, or audible clunks during movement tests. Use inline test methods to quantify clearance and compare against service specs for preventive wear cues. This initial discussion sets criteria for recognizing excessive movement and planning corrective actions.
Bushing Movement Signs
Bushing movement signs indicate when play exceeds acceptable limits in suspension bushings, which can compromise alignment, handling, and component life. You’ll evaluate play by feeling for looseness, listening for clunks, and checking alignment shifts after load changes. Be precise and methodical.
- Observe visual and tactile indicators of macro-mleap or micro-movement that exceed spec
- Correlate symptoms with steering response, tire wear, and ride quality to isolate bushing fatigue
- Plan bushing replacement if movement persists beyond baseline, ensuring proper torque and alignment
You’ll document findings and reference service limits, then determine whether to replace bushings now to preserve performance and safety.
Test Methods Inline
To assess bushing play, begin with a controlled tactile and auditory inspection while the suspension is unloaded, then compare results under load to reveal loosening beyond spec. In this inline approach, you perform repeatable checks that fit a compact workflow. Employ test procedures that isolate scalar movement—translate, rotate, and observe for binding or notchiness. Use evaluation techniques that differentiate normal flex from excessive play, listening for metallic chatter or clunking under compression. Document baseline measurements before loading, then quantify drift after a standard load cycle. Maintain consistent stance and leverage to guarantee comparable data across vehicles. Convey findings succinctly: flag bushing wear trends, specify measured play, and recommend targeted inspection or REPLACEMENT. This method supports practical decision-making without ambiguity or overload.
Preventive Wear Cues
Preventive wear cues arise from subtle deviations in bushing motion before they escalate. You’ll detect early signs by testing play, noting looseness, and comparing to spec ranges. Use these wear indicators as your compass for preventive maintenance.
- Observe axial and radial play during controlled movements, logging any excess excursion.
- Listen for rasping or clacking under load, correlating sound with shim measurements and steering input.
- Inspect for surface fretting, cracking, or lipid leakage around the control arm bushing through a careful visual check.
Treat every cue as a warning, not a fixture. Address minor movement promptly to prevent costlier repairs. Maintain records, verify with torque specs, and recheck after road tests. Your freedom depends on consistent preventive maintenance, disciplined inspection, and timely action based on wear indicators.
Tools You’ll Need for a Pre-Trip Suspension Check
Before you begin, gather the essential tools for a safe, accurate pre-trip suspension check: a jack and stands, a breaker bar or socket set, a torque wrench, basic metric and SAE wigs, a pry bar, a flashlight, a rubber mallet, a caliper or micrometer for quick measurements, a floor mat for stability, and a diagnostic or code reader if applicable.
Tools you’ll need are grouped to support your suspension tools and inspection checklist mindset. Use the table below to reflect on purpose and precision.
| Purpose | Tool | Result |
|---|---|---|
| Lifting & stability | jack and stands | secure access |
| Measurement & torque | caliper/micrometer, torque wrench | accurate specs |
| Leverage & inspection | pry bar, flashlight, mallet | reveal wear |
Note: This selection prioritizes reliability, ergonomic handling, and immediate feedback during pre-trip evaluation.
Safe Testing Techniques to Evaluate Suspension Movement
Safe testing of suspension movement requires controlled, stepwise checks that minimize risk while revealing play or binding. You’ll assess how the system responds under load, focusing on real movement rather than static measurements. Your aim is to gauge suspension performance and how it translates to handling characteristics in typical ride conditions.
- Apply a controlled vertical load at the wheel hub and observe rebound, noting any delayed return or binding.
- Gently perturb the wheel through a full travel arc to feel for play, sticking, or clunking, and compare with expected OEM tolerance.
- Repeat with steering input to evaluate cross-axis interactions, noting any looseness that could affect steering feel or stability.
Document observations precisely, including sound, feel, and timing. If you detect abnormal movement, mark it for inspection and calibration rather than guesswork. This methodical approach preserves suspension performance while delivering actionable insight into handling characteristics, aligning safety with freedom to drive confidently.
Identifying Common Wear Patterns on Different Vehicle Types
Different vehicle types accumulate wear patterns in characteristic ways, reflecting design, materials, and operating regimes. You’ll notice how suspension types influence how bush wear manifests, guiding inspection focus. On light autos, expect gradual-metallic chatter transmission and minor rubber extrusion as wear indicators, often localized near bush perimeters. In pickups and SUVs, higher payload and steering leverage promote faster inner-diameter abrasion and more pronounced ball joint play, with visible elongation on mounting sleeves. Performance cars show sharper scuffing and asymmetric wear due to stiffer mounts and aggressive camber control, making trend lines across control arms critical. Heavy commercial fleets exhibit upholstery-like cracking in polymer bushings and accelerated metal-to-metal contact under duty cycles, demanding routine torque checks and wear indicator alignment. AWD and 4×4 configurations may reveal differential binding, prompting inspection of trailing arms for side-to-side play. Always compare wear patterns to manufacturer guidance and use wear indicators as calibration points for service timing.
Interpreting Findings: When to Schedule a Professional Inspection
Interpreting findings requires clear thresholds for action: if any suspension component shows persistent abnormal movement, audible noise, or degraded wear indicators beyond the manufacturer’s criteria, schedule a professional inspection promptly. You should weigh evidence against defined limits to decide if a professional evaluation is warranted and when to adjust inspection frequency. Follow these criteria to determine urgency and next steps:
Interpreting findings requires clear action thresholds; schedule prompt professional evaluation when movement, noise, or wear exceed criteria.
1) If movement remains above spec after cycling the joint, proceed to a professional evaluation without delay.
2) If unusual noise accompanies minor play, schedule an inspection within the current maintenance window to confirm integrity.
3) If wear indicators exceed replacement thresholds, treat as high priority and arrange service promptly, documenting findings for future reference.
A professional evaluation clarifies whether you need corrective action now or can revisit at a standard interval. Maintain records to track trends, and align inspection frequency with vehicle usage and environmental factors.
Preventive Maintenance Tips to Extend Bushing Life
Preventive maintenance is your proactive step to extend bushing life after the initial findings. You’ll maximize performance by selecting appropriate bushing materials and enforcing a disciplined maintenance frequency. Regular inspection catches wear patterns before failure, guiding timely replacements. Align service with manufacturer tolerances and use compatible lubricants to minimize metal-on-metal stress. Keep suspension geometry accurate to avoid uneven loading that accelerates wear. Clean components, torque fasteners to spec, and replace damaged hardware to prevent secondary damage.
| Benefit | Action |
|---|---|
| Longevity | Schedule inspections and replace bushings before excessive play develops. |
| Reliability | Confirm bushing materials suit operating conditions (temperature, load). |
| Performance | Maintain correct alignment; monitor for unusual noise or vibration. |
| Cost Control | Adhere to maintenance frequency to avoid costly failures. |
| Safety | Verify absence of play; verify secure mounting and proper lubrication. |
Frequently Asked Questions
Do Worn Bushings Affect Tire Alignment and Handling?
Yes, worn bushings can affect alignment and handling. They loosen geometry, causing toe and camber shifts that alter tire wear and steering feel. As bushings degrade, you’ll notice vague responses, drift, or instability during cornering. Inspect for cracks, play, and movement; replace as needed. Worn bushings reduce handling stability, increasing tire wear on edges and unpredictable return-to-center. Keep suspension tight, align after replacement, and monitor for improved control and balanced tire wear.
Can Slight Bushing Wear Be Ignored Safely?
Jaw-dropping paradox: tiny wear indicators, huge risk—no, you can’t safely ignore slight bushing wear. You’ll want to check bushing lifespan before every trip, because minor degradation can escalate. When you see any play or cracking, treat it as a warning, not a shrug. Worn bushings can alter alignment under load, so replace promptly. Stay proactive, log inspections, and prioritize reliability over comfort.
How Often Should Pre-Trip Checks Be Performed?
You should perform pre-trip checks daily. Your pre trip frequency is driven by usage, environment, and duty cycle, so adjust within your maintenance schedule. You’ll inspect for looseness, wear, and leaks, then document findings. If operating conditions are harsh or speeds high, increase frequency. Maintain a rigorous maintenance schedule and adhere to manufacturer specs. You stay proactive, because consistent checks reduce risk and extend component life, aligning with a disciplined, freedom-loving maintenance philosophy.
Are Aftermarket Bushings More Durable Than OEM?
Yes, aftermarket bushings can be more durable than OEM, but it depends on material and design. Aftermarket benefits include stiffer performance options and varied bushing materials like polyurethane or performance elastomers, which resist wear longer under hard use. Choose based on driving style and load. For longevity, consider quality suppliers and proper installation. Remember, higher performance isn’t always smoother; your suspension depends on compatibility with your vehicle and intended use.
What Signs Require Immediate Professional Inspection?
If you notice warning signs of severe wear, you should seek immediate professional inspection. Look for excessive play, cracking, torn boots, or unusual clunking sounds during steering and bumps. These bushing inspection tips help you spot deterioration early. Don’t ignore looseness after potholes, quick steering changes, or drifting sensations. If any warning signs persist, stop driving, secure the vehicle, and schedule urgent service. Your safety depends on timely evaluation by a qualified technician.