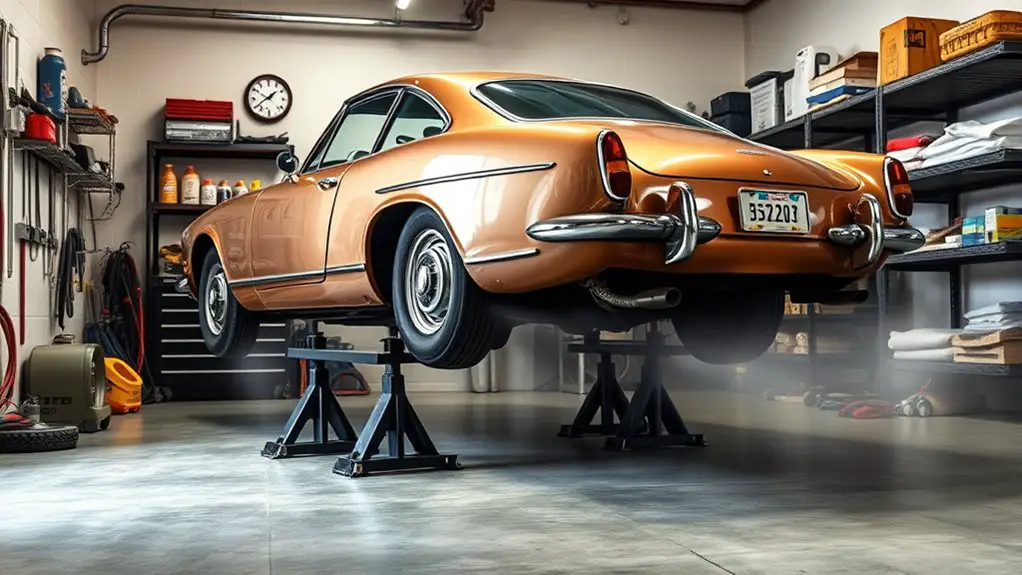
How to Prepare Your Classic Car for Long-Term Storage to Avoid Condensation in Fuel Tank
To prevent condensation in your classic car’s fuel tank, first stabilize the fuel for long storage and choose ethanol-friendly additives with anti-corrosion and moisture control. Clean and seal the tank, then fill the tank to minimize air gaps. Store in a dry, cool space with steady temperature and good airflow, using a dehumidifier or desiccants as needed. Inspect seals, venting, and lines, and keep a detailed storage log. If you keep this up, more practical steps await.
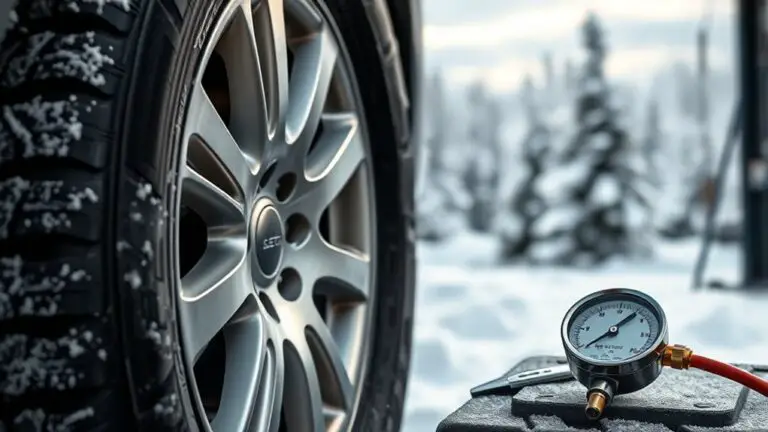
Assessing the Storage Environment and Humidity Control
Before you store a classic car, start by evaluating the environment where it will live. You’ll narrow risks by inspecting airflow, light exposure, and temperature stability in the storage space. Begin with humidity monitoring to establish a baseline, noting seasonal swings and daily variations. Record readings at multiple times, then compare against target ranges that minimize corrosion and mold. Next, perform an environment assessment focused on moisture sources: leaks, condensation-prone surfaces, and porous materials nearby. Address these issues before you move the vehicle in: seal gaps, insulate where practical, and guarantee proper drainage. Control strategies should be practical and repeatable: dehumidifiers sized for the area, desiccants placed strategically, and a small, continuous vent cycle to prevent stagnation. Maintain clean, dry surroundings by removing fuel vapors and eliminating damp clutter. Document conditions and adjustments, then recheck periodically. Your freedom to protect the car hinges on deliberate, repeatable environmental discipline.
Choosing the Right Fuel Stabilizer and Additives

Choosing the right fuel stabilizer and additives is essential to protect your classic car during storage, so start with a clear goal: prevent gum and varnish buildup, minimize moisture-related issues, and maintain fuel system integrity. You’ll select stabilizers based on fuel types you run most often and the storage duration. Look for additives with anti-corrosion, anti-rust, and moisture-control properties, plus detergents to keep injectors clean. Apply the product as directed, and don’t mix brands unless the label allows it. Store in a cool, dark place and run the engine after treatment to circulate additive benefits through the entire fuel system.
| Fuel Types | Additive Benefits |
|---|---|
| Gasoline | Prevents varnish, reduces moisture, protects seals |
| Ethanol blends | Stabilizes ethanol, minimizes phase separation, limits corrosion |
Choose a plan you can reproduce for future storage cycles.
Treating Fuel With Ethanol-Friendly Formulations
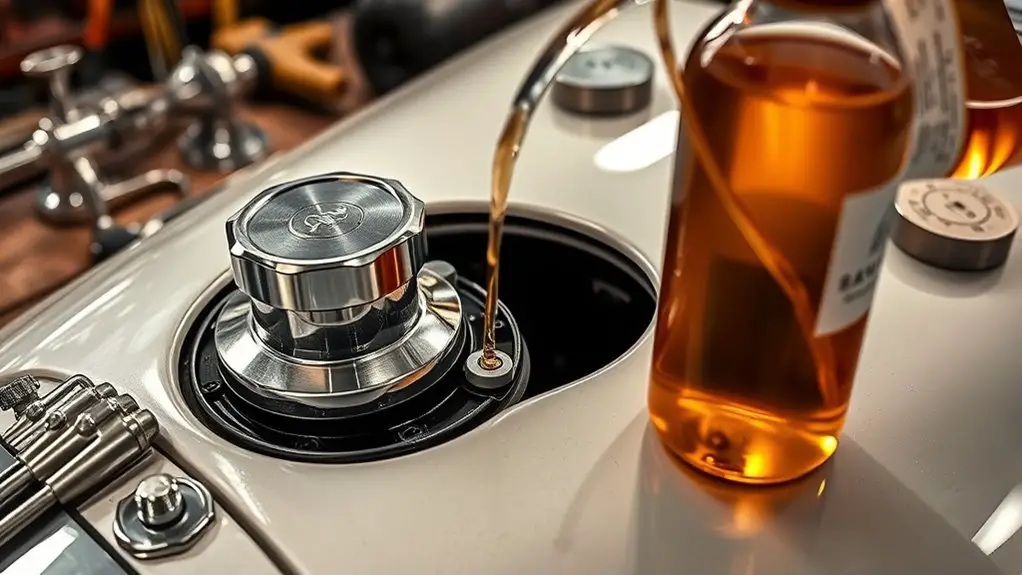
Treating fuel with ethanol-friendly formulations starts with recognizing ethanol’s tendency to absorb water and destabilize blends. You’ll choose additives that curb phase separation and improve stability, prioritizing ethanol impact control while preserving fuel longevity. Use products labeled for ethanol-rich environments and follow manufacturer dosing precisely to avoid overcorrection. Consistency matters: one stabilizer may not cover all seasons or storage durations, so align your choice with your storage plan and climate. Store ethanol-compatible fuel in approved containers and monitor shelf life, replacing if signs of separation appear. Maintain seals and fuel lines to reduce permeability and moisture ingress. Plan ahead for engine start-up after storage, ensuring additives are well mixed and peak performance is achievable.
- Verify compatibility with your carburetor or fuel-injected system
- Check dosage and storage temperature guidelines
- Prioritize ethanol impact reduction without sacrificing lubrication
- Confirm bottle freshness and batch integrity
- Schedule a post-storage fuel system check to sustain fuel longevity
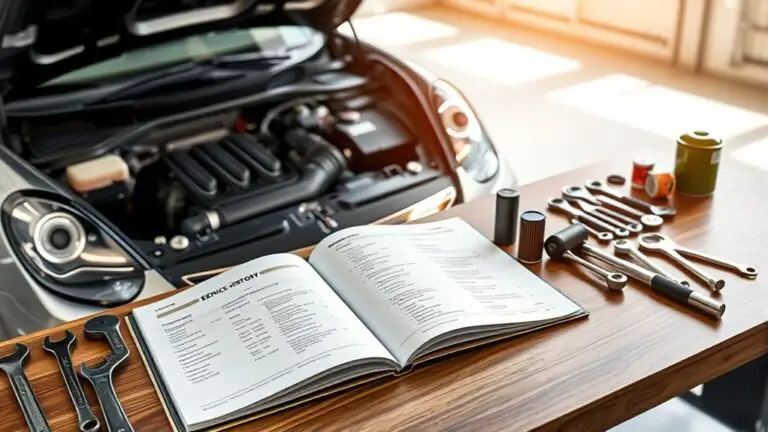
Fuel Tank Cleaning and Inspection Procedures
When inspecting and cleaning a stored fuel tank, start with a safety-focused checklist and a controlled workflow to prevent contamination and damage. You’ll verify ventilation, PPE, and ignition-source control, then drain remaining fuel into approved containers. Next, assess tank interior for rust, varnish, or sediment; document findings with a clean light and mirror, and remove loose debris using nonmetallic tools. During cleaning you’ll follow fuel tank inspection, cleaning procedures, using approved cleaners compatible with steel or aluminum tanks; rinse with compatible solvent, then thoroughly dry before refilling. Seal any access openings to prevent moisture intrusion and recheck for leaks. Finally, reassemble and label the system, recording maintenance details for future storage cycles.
| Step | Action | Outcome |
|---|---|---|
| 1 | Safety prep | Contamination risk minimized |
| 2 | Inspect interior | Rust, varnish, sediment identified |
| 3 | Clean and rinse | Debris removed, tank dry |
| 4 | Dry and seal | Moisture exclusion achieved |
| 5 | Documentation | Maintenance history complete |
Sealing the Fuel System to Prevent Moisture Intrusion
Following the fuel-tank inspection and cleaning, sealing the fuel system focuses on preventing moisture intrusion and airborne contaminants from re-entering the lines and components. You’ll implement targeted sealing steps that block entry points while preserving fuel flow. Precision matters: choose compatible sealants, gaskets, and hoses, and avoid over-application that could shed particulates. Prioritize a unified approach—tank sealing and line seals must work together to keep fuel moisture out and minimize vapor exchange. Inspect filler necks, pre-fuel lines, and vent paths for gaps, cracks, or corrosion, and address them before reassembly. Use clean, compatible materials and follow manufacturer guidance for solvents and curing times. After sealing, run a brief system check to verify no leaks and confirm pressure holds. Maintain a dry environment around the fuel system during storage and document procedures for future reference.
- Identify all potential ingress points
- Select compatible sealants and gaskets
- Seal filler necks and vent paths
- Verify no leaks after sealing
- Record the process for future care
Opting for a Full or Partial Fuel System Drain Strategy
Opting for a full or partial fuel system drain depends on how much moisture and varnish you detect during inspection and how long the car will sit. You’ll decide based on the fuel system condition, storage duration, and your tolerance for risk. A full drain removes all fuel, reducing varnish formation and moisture exposure, but requires careful disposal and reseating procedures. A partial drain targets the most problematic portion of the system, preserving usable fuel while minimizing risk. In either path, label components you’ve drained, and document volumes for future refills. After draining, run the engine briefly if permitted, to check for leaks, then seal lines to prevent air ingress. This drain strategy prioritizes reliability and freedom from worry during storage.
| Condition | Action | Rationale |
|---|---|---|
| Moisture detected | Full drain | Max moisture removal |
| Varnish present | Partial drain | Preserve fuel, reduce buildup |
| Short storage | Partial drain | Quick, low disruption |
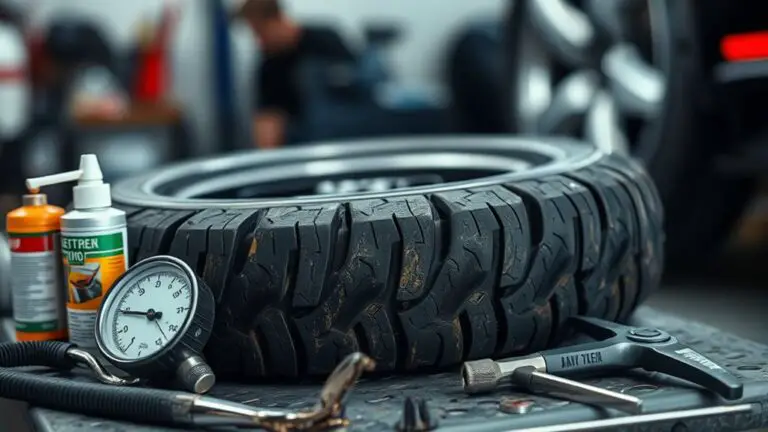
Implementing Proper Venting and Tank Cap Care
As you finish the fuel drain decision, you’ll want to address venting and the tank cap to prevent moisture ingress and vapor buildup during storage.
- Assess vent cap maintenance: clean, inspect seals, and replace if cracked or stiff.
- Choose venting options that match climate and fuel type, prioritizing controlled vapor release.
- Keep the fuel cap snug but not over-tightened to maintain a proper seal without inducing damage.
- Check gasket integrity and replace worn components before long-term storage.
- Document venting steps and cap condition for reference when you recommission the car.
Venting isn’t optional; it protects fuel quality and reduces tank pressure fluctuations. Prioritize reliable seals, compatible materials, and timely maintenance. Avoid gaps in the system that invite moisture or vapor buildup. With disciplined vent cap maintenance and thoughtful venting options, you preserve fuel integrity and ease future reawakening of your classic.
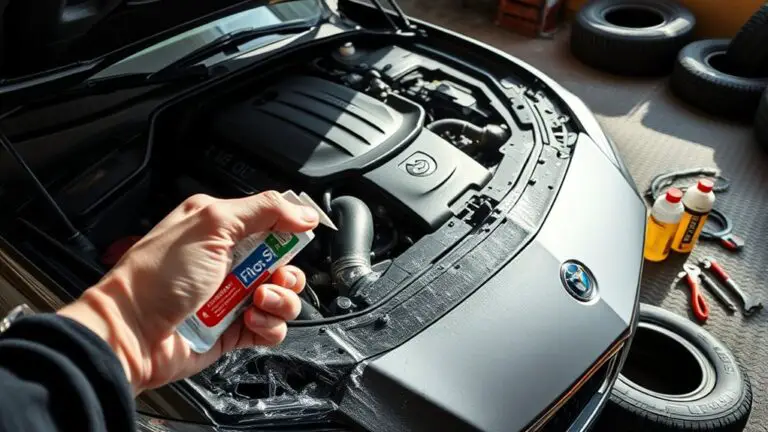
Protecting the Engine, Fuel Lines, and Tank With Stabilization
To protect the engine, fuel lines, and tank, start by stabilizing the fuel properly to prevent varnish and gum buildup. Confirm the tank ventilation is sealed correctly to avoid moisture ingress and pressure changes during storage. This sets a solid foundation for long-term preservation of your drivetrain and fuel system.
Stabilize Fuel Properly
Stabilizing the fuel you use before storage protects the engine, fuel lines, and tank by preventing oxidation and gum buildup; do this by using a proven stabilizer compatible with ethanol blends and running the engine to coat the system.
- Choose a stabilizer labeled for ethanol blends and follow the recommended dosage for your tank size
- Fill the tank to minimize air and reduce condensation potential
- Run the engine to circulate stabilized fuel through carbs or injectors until warm
- Check for fresh fuel quality and top off if needed after stabilization cycle
- Label the date and product on the fuel container for future reference to maintain ongoing condensation prevention
Seal Tank Ventilation
Seal tank ventilation is about preserving airflow and preventing moisture ingress while the car sits. You’ll want a controlled approach: keep the vent paths unobstructed, confirm seals are intact, and avoid pressure buildup. Inspect the fuel tank vent line for cracks or kinks and replace damaged sections. Use a quality vent cap that suits your climate, enabling gradual air exchange without rain ingress. When you park, open the car’s ventilation briefly to equilibrate, then seal. This protects tank, fuel lines, and engine from moisture exposure. Monitor humidity and temperature around storage, and consider a moisture-absorbing container near the tank area. Regular checks target tank ventilation effectiveness and moisture prevention, ensuring ready start-up after long storage while preserving performance and freedom to innovate.
Maintaining the Storage Space: Temperature, Insulation, and Ventilation
You’ll start by setting a stable storage temperature to minimize moisture and corrosion risks. Assess insulation quality to prevent heat gain or loss that can stress seals and wiring, and guarantee there are no gaps or damp spots. Finally, confirm proper ventilation to avoid stagnant air and condensation buildup while keeping critters and pests out.
Temperature Control
Temperature control is essential for long-term storage, ensuring the car’s finishes, seals, and interior materials don’t deteriorate.
- Monitor ambient temperature; aim for a steady range rather than extremes
- Use a thermostat-controlled HVAC or dehumidifier for consistent climate considerations
- Maintain airflow with vents; avoid stagnant pockets that foster condensation
- Seal gaps to minimize drafts while allowing controlled ventilation
- Track temperature fluctuations daily and adjust placement or equipment accordingly
Choose a storage spot with predictable conditions, not sunlit or damp areas. Keep doors and windows closed during routine checks to preserve stability. If you notice sudden shifts, relocate briefly or deploy incremental cooling/heating. Prioritize consistent climate considerations over flash adjustments. This disciplined approach helps prevent condensation risk in the fuel system and preserves finishes, seals, and the interior. Remember: freedom thrives with predictable, gentle control.
Insulation Quality
Insulation quality is central to stable storage conditions, and it hinges on minimizing heat transfer and moisture intrusion. You’ll evaluate the storage space as a system, focusing on seams, gaps, and penetrations that invite drafts. Choose insulation materials with low thermal conductivity and high moisture resistance, and install them to create continuous coverage without compressions or voids. Prioritize thermal barriers at doorways, hatches, and any access panels to maintain a steady interior baseline. Seal joints with airtight tapes or caulks designed for long-term stability, not temporary fixes. Avoid overcomplication; simple, durable layers beat complex, failing setups. Remember that proper insulation reduces condensation risk by stabilizing temperature swings and limiting humidity shifts, supporting a dependable, freedom-oriented storage environment for your classic car.
Proper Ventilation
Proper ventilation is essential to balance temperature, moisture, and air quality inside your storage space. You’ll want controlled airflow that prevents stagnation and avoids drastic swings that invite condensation. Prioritize steady, modest exchange rather than rapid drafts, and choose a layout that promotes uniform distribution of air.
- ventilation types: select passive vents for simplicity or mechanical fans for consistent results
- monitor humidity and temperature to detect shifts quickly
- place intake and exhaust strategically to maximize effective airflow
- seal cracks but allow for necessary movement of air to avoid pressure buildup
- maintain routine checks and clean ducts to preserve airflow importance
Periodic In-Storage Checks and Re-Entry Preparations
Periodic in-storage checks should be scheduled and performed without delay if you plan to keep a classic car in good condition. You’ll establish a disciplined storage routine that targets critical weak spots: fuel chemistry, seals, battery health, and moisture. Use a concise inspection checklist before re-entry to confirm stored systems operate as intended and to prevent surprises.
| Area | Action |
|---|---|
| Fuel system | Verify fuel stability, top off, and reseal venting where applicable |
| Electrical/Battery | Isolate or maintain charge, inspect for corrosion, test lights and gauges |
During re-entry, start with a controlled exterior wipe, resume fluids to normal levels, and monitor for leaks. Reconnect the battery only after a visual inspection of terminals. Run the engine briefly to observe idle behavior and heat cycles. Capture outcomes in your log and adjust the storage routine if anomalies appear. This precise cadence keeps your classic car ready, preserves condition, and fuels your freedom to enjoy when you finally roll out.
Frequently Asked Questions
How Often Should I Monitor Humidity Levels During Storage?
You should monitor humidity levels weekly during storage. This humidity control routine helps you catch spikes before they harm gauges or seals. Check readings, adjust desiccants or dehumidifiers, and re-seal vents as needed. Maintain consistent storage frequency, so you stay ahead rather than reacting. Track trends, log results, and trust your plan. You’ll preserve fuel systems and overall condition while enjoying the freedom to tinker and roam confidently.
Can Ethanol-Free Fuel Be Stored Long-Term in Tanks?
Around 90% of stored ethanol-free fuel remains stable for months if kept sealed and cool. Can ethanol-free fuel be stored long-term in tanks? Yes, but you should monitor ethanol stability in any nearby blends and use fuel additives designed for long-term storage. You’ll preserve quality by choosing ethanol stability-focused additives, keeping tanks full, and minimizing air. You deserve freedom with careful planning and precise, methodical fuel care.
Does Tank Material Affect Condensation Risk More Than Ambient Humidity?
Yes, tank composition matters more than ambient humidity for condensation risk. If your tank is metal and unsealed, temperature swings drive moisture exchange, increasing condensation potential. With tight seals and coatings, the impact drops, easing condensation prevention. You should evaluate material—stainless or treated steel, aluminum, or composite—and choose a tank composition that minimizes vapor diffusion. Pair with proper venting, inert gas, or stabilizer strategies to sustain fuel integrity and freedom.
What Signs Indicate a Fuel System Has Moisture Intrusion?
If you notice rust-colored specks, varnish odors, or sludgy grime in the tank, moisture intrusion is likely. You’ll see engine misfires, rough idling, or reduced fuel economy as symptoms. You may also detect water in the fuel via a drop test or fuel tester. Moisture detection is your first warning; fuel contamination follows. Trust precise checks, then document readings, because a small leak today protects your freedom to drive tomorrow.
Should I Run the Engine Periodically During Storage?
Yes. You should run the engine periodically during storage. This simple engine maintenance keeps seals lubricated, circulates oil, and helps prevent moisture buildup in fuel lines. Plan a short, controlled interval—about 15 minutes every 2–4 weeks—so you don’t overheat or drain your battery. Use storage tips like disconnecting other electrical draws and monitoring oil. This approach preserves performance, reduces corrosion risk, and keeps your classic ready for freedom when you’re back on the road.