How To Remove Plasti DIP From Rims
Plasti Dip has gained popularity among car enthusiasts as a temporary way to change the color of their vehicle’s rims. However, there may come a time when you want to remove the Plasti Dip and revert back to the original finish. This article will guide you on how to safely remove Plasti Dip from your rims without causing any damage.
Why remove Plasti Dip from rims?
While Plasti Dip is a great way to customize the look of your rims, there are a few reasons why you might want to remove it:
- Change of preference: Your style and preference may have changed, and you no longer want the color that the Plasti Dip provides.
- Damaged or peeling: Over time, the Plasti Dip may start to peel or get damaged, making your rims look worn out. Removing it will give you a chance to clean and restore your rims properly.
- Selling or trading in your vehicle: If you are planning to sell or trade in your vehicle, having the original finish on your rims can increase its value and appeal to potential buyers.

Safety precautions
Before you begin the process of removing Plasti Dip from your rims, it’s important to take the following safety precautions:
- Work in a well-ventilated area: The chemicals used in removing Plasti Dip can be strong and produce fumes. It’s best to work outdoors or in a well-ventilated area to ensure proper air circulation.
- Wear protective gear: Gloves, eye protection, and a mask are essential when working with any chemical substances.
- Read and follow instructions: Different products may have different instructions for application and removal. Make sure to carefully read and follow the instructions provided by the manufacturer of the Plasti Dip removal product you choose.
By taking these precautions, you can safely and effectively remove Plasti Dip from your rims, restoring them to their original condition.

Tools and materials needed
Removing plasti dip from rims requires a few specific tools and materials. Here is a list of what you will need:
List of necessary tools and materials
- Rubber gloves: Protect your hands from any chemicals or solvents used during the removal process.
- Plastic scraper: Use a plastic scraper to gently peel off the plasti dip from the rims.
- Microfiber cloth: Use a soft microfiber cloth to wipe away any remaining plasti dip residue.
- Soap and water: Mix a mild soap with water to clean the rims after removing the plasti dip.
- Solvent or paint thinner: If the plasti dip is stubborn, you may need to use a solvent or paint thinner to help remove it.
Where to find them
You can easily find these tools and materials at your local hardware store or online retailers such as Amazon. Rubber gloves are typically available at drugstores or supermarkets as well.
When selecting a plastic scraper, make sure it is suitable for delicate surfaces to avoid scratching or damaging your rims. Microfiber cloths can be found in supermarkets, automotive stores, or online.
As for soap and water, any gentle dish soap will do, and you can find these at your local grocery store.
When it comes to solvents or paint thinners, check with your local hardware store for specific products that are safe for use on car rims.
Before starting the removal process, ensure you have all these tools and materials ready for a smooth and efficient removal experience.

Preparing the rim
When it comes to removing plasti dip from your rims, proper preparation is key. It ensures a smooth and successful removal process.
Cleaning the rim surface
Before you begin removing the plasti dip, clean the rim surface thoroughly. Use a mild soap and water solution to remove any dirt, grime, or debris. Make sure to scrub the surface gently with a sponge or soft cloth to avoid scratching the rims.
Protecting surrounding areas
To protect surrounding areas from any damage, it is important to cover them before removing the plasti dip. Use masking tape and plastic sheeting to cover the tires, brakes, and any other adjacent parts that you don’t want to get damaged by the removal process. This will prevent any accidental scratches or chemical damage.
Once you have prepared the rim and protected the surrounding areas, you are ready to start removing the plasti dip.
Note: The following methods can be used for removing plasti dip from rims:
- Peeling: If the plasti dip has started to peel on its own, you can simply peel it off by hand or using a plastic scraper. Be careful not to scratch the rim surface while peeling.
- Rubbing alcohol: Soak a cloth in rubbing alcohol and apply it to the plasti dip. Let it sit for a few minutes to loosen the adhesive bond, then gently rub the plasti dip off using a soft cloth or sponge.
- Spray-on adhesive remover: There are specific spray-on adhesive removers available in the market that are formulated to remove plasti dip. Follow the instructions on the product and apply it to the plasti dip. Let it sit for a few minutes before wiping off with a cloth or sponge.
Remember to work in small sections and be patient during the removal process to avoid damaging your rims.
In conclusion, by properly preparing the rim, cleaning the surface, and protecting surrounding areas, you can safely and effectively remove plasti dip from your rims.

Removing the Plasti Dip
If you’ve decided to remove the Plasti Dip coating from your rims, there are a few methods you can try. Here are three popular options:
Peeling off the Plasti Dip
The simplest way to remove Plasti Dip from your rims is by peeling it off. Start at one edge and slowly peel back the coating. If the Plasti Dip is applied properly, it should come off in large pieces. However, if it was not applied properly, it may come off in small pieces or flakes. Be patient and take your time to avoid damaging the rims.
Using a pressure washer or hose
If peeling off the Plasti Dip doesn’t work, you can try using a pressure washer or hose. Start by wetting the rims with water to soften the coating. Then, using a pressure washer or a strong stream of water from a hose, spray the rims to remove the Plasti Dip. This method may require some scrubbing with a sponge or brush to fully remove any remaining residue.
Using a Plasti Dip remover
If the previous methods aren’t successful, you can use a dedicated Plasti Dip remover. These removers are specially formulated to dissolve and remove Plasti Dip coatings without damaging the surface underneath. Follow the instructions on the remover carefully and use a cloth or sponge to apply it to the rims. Allow the remover to sit for a few minutes before wiping off the dissolved Plasti Dip.
Remember to always test any method on a small, inconspicuous area of the rim before applying it to the entire surface. This will help you determine if there are any adverse effects on your rims.
Scrubbing off remaining residue
If you’ve decided to remove the Plasti Dip coating from your rims, there are a couple of methods you can use to get rid of any remaining residue. Here are two popular options:
Using a soft cloth or sponge
- Start by soaking a soft cloth or sponge in warm soapy water. Make sure the soap is gentle and won’t damage the rim’s surface.
- Gently scrub the rims in circular motions to loosen the Plasti Dip coating. Apply consistent pressure, but be careful not to scratch the rims.
- Rinse the cloth or sponge frequently to remove any loosened residue.
- Continue scrubbing until all the Plasti Dip is removed and the rims are clean.
- Once clean, rinse the rims with clean water and inspect them to ensure no residue is left behind.
- Dry the rims thoroughly before applying any new coatings or treatments.
Using a plastic scraper
- Start by using a plastic scraper or credit card to gently scrape off any loose pieces of Plasti Dip. Be careful not to use metal scrapers as these can scratch the rims.
- Apply some rubbing alcohol or an adhesive remover to a cloth and rub it onto the remaining Plasti Dip residue.
- Let the alcohol or adhesive remover sit on the residue for a few minutes to loosen it.
- Use the plastic scraper to carefully scrape away the loosened Plasti Dip. Again, be sure to apply consistent pressure without scratching the rims.
- Continue this process until all the Plasti Dip is removed and the rims are clean.
- Rinse the rims with clean water and inspect them for any leftover residue.
- Dry the rims completely before applying any new coatings or treatments.
Recap:
To remove Plasti Dip from your rims, you can choose to either scrub off the residue using a soft cloth or sponge with warm soapy water or use a plastic scraper with rubbing alcohol or an adhesive remover. Both methods require gentle yet consistent effort to avoid scratching the rims. Remember to rinse and dry the rims thoroughly afterwards before applying any new treatments.

Polishing and protecting the rim
If you’re looking to remove Plasti Dip from your rims, there are a few steps you can follow to ensure a smooth and safe process. Here’s how:
Cleaning the rim surface
- Start by thoroughly cleaning the rim surface using a mild detergent and warm water. This will help remove any dirt or grime that may be present.
- Use a soft cloth or sponge to scrub the rim surface gently. Be careful not to scratch or damage the underlying metal.
- Rinse off the detergent with clean water and dry the rim completely before moving on to the next step.
Applying a rim protectant
- Apply a rim protectant product to the surface of the rim. This will help protect the metal and give it a polished appearance.
- Follow the instructions provided with the rim protectant product for best results. Typically, you’ll need to apply a thin layer of the product using a soft cloth or applicator pad.
- Allow the rim protectant to dry completely before moving on to the next step.
- Once dry, use a clean and dry cloth to buff the rim surface gently. This will help bring out the shine and remove any excess product.
- Repeat this process as necessary until all Plasti Dip has been removed from the rims.
By following these steps, you can effectively remove Plasti Dip from your rims and restore them to their original condition. Remember to always wear protective gloves and work in a well-ventilated area when using cleaning products.

Finishing touches
Once you have successfully removed the Plasti Dip from your rims, there are a few finishing touches you can apply to ensure they look their best. Here are a couple of steps to follow:
Inspecting for any remaining Plasti Dip
After removing the majority of the Plasti Dip, it’s important to inspect your rims for any lingering residue. Use a soft cloth or sponge soaked in an adhesive remover or rubbing alcohol to gently scrub any stubborn areas. Be sure to avoid scratching the rim surface with abrasive materials.
Touching up the rim
If the process of removing the Plasti Dip has caused any damage or scratches to your rims, it may be necessary to touch up the affected areas. You can do this by applying automotive paint that matches the color of your rims. Clean the surface thoroughly before applying the touch-up paint, and follow the manufacturer’s instructions for best results.
By taking these steps, you can ensure that your rims are free from any traces of Plasti Dip and have a polished appearance.
Table: Recap of key points
| Key Points |
|---|
| Inspect your rims for any remaining Plasti Dip residue |
| Use an adhesive remover or rubbing alcohol to remove stubborn areas |
| Avoid scratching the rim surface with abrasive materials |
| Touch up any damage or scratches with matching automotive paint |
| Clean the surface before applying touch-up paint |

Conclusion
By following the steps outlined above, you can effectively remove Plasti Dip from your rims and restore them to their original appearance. Remember to be patient and take your time during the process to avoid damaging the rims.
Summary of the Plasti Dip removal process
- Start by gathering all the necessary tools and materials, including a plastic scraper, a rag or microfiber cloth, and a dip dissolver solution.
- Begin by gently peeling off as much Plasti Dip as possible using your fingers or a plastic scraper.
- Apply the dip dissolver solution to any remaining Plasti Dip on the rims, making sure to cover the entire area.
- Let the solution sit for a few minutes to allow it to penetrate and soften the Plasti Dip.
- Use a plastic scraper to scrape off the softened Plasti Dip, taking care not to scratch the rims.
- Repeat steps 3-5 as necessary until all the Plasti Dip has been removed.
- Finish by wiping down the rims with a clean rag or microfiber cloth to remove any remaining residue.
Tips and tricks for future applications
- Before applying Plasti Dip to your rims, thoroughly clean and dry them to ensure proper adhesion.
- Apply multiple thin coats of Plasti Dip rather than one thick coat for better durability and easier removal.
- If you encounter any stubborn areas of Plasti Dip during removal, you can use a toothbrush or soft-bristled brush to scrub them gently.
- To maintain the appearance of your rims after removing Plasti Dip, consider using a wheel cleaner or polish specifically designed for your rim material.
Remember, proper preparation and technique are essential when removing Plasti Dip or applying it. By following these tips and techniques, you can achieve the desired results and keep your rims looking their best.

FAQ (Frequently Asked Questions)
Common concerns and solutions
- Q: How can I remove Plasti Dip from my rims?
A: There are multiple methods to remove Plasti Dip from rims. Here are a few options:- Peeling: If the Plasti Dip is in good condition and not too thick, you can try peeling it off with your fingers. Start at an edge and gently peel it away.
- Rubbing Alcohol: Soak a cloth or sponge in rubbing alcohol and rub the Plasti Dip until it starts to dissolve. You may need to repeat this process multiple times.
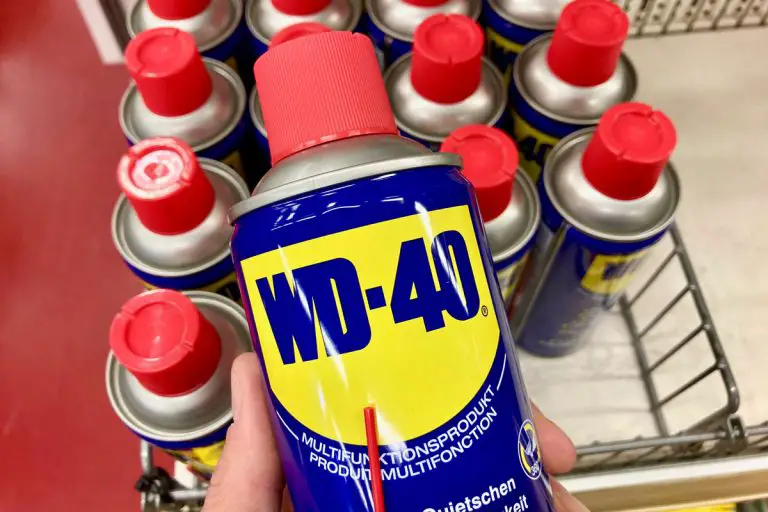
- WD-40: Spray WD-40 on the Plasti Dip and let it sit for a few minutes. Then, use a cloth or sponge to remove the softened Plasti Dip.
- Pressure Washer: If you have access to a pressure washer, you can use it to blast off the Plasti Dip from your rims. Be cautious not to damage the rims or tires.
- Q: Will removing Plasti Dip damage my rims?A: When properly applied, Plasti Dip is designed to be removable without causing damage to the underlying surface. However, if the Plasti Dip has been on for a long time or was applied incorrectly, there is a chance that it may leave residue or discoloration on the rims. It is always recommended to test any removal method on a small, inconspicuous area before proceeding.
- Q: Can I use a chemical remover to remove Plasti Dip?A: Yes, there are several chemical removers available in the market that are specifically designed to remove Plasti Dip. Follow the instructions provided with the product and take necessary safety precautions when using chemical removers.
For more detailed instructions and additional tips, it is always recommended to consult the product manufacturer’s guidelines or seek professional assistance. Removing Plasti Dip from rims can be a time-consuming process, so patience and careful handling are key.


