How to Stop Reduced Power Due to Clogged Cat Caused by Clogged Exhaust Hangers
To stop reduced power from a clogged cat caused by restricted exhaust hangers, start with a focused inspection of hanger condition, clearances, and fasteners while listening for rattles. If hangers are deformed or corroded, replace them to restore flow and reduce backpressure. Check the catalytic converter’s temperature and pressure differentials; if the cat is blocked, cleaning may help only temporarily—replacement is often necessary. After repairs, verify throttle response and backpressure again to confirm improvement, and you’ll see what’s ahead.
Diagnosing Signs of Exhaust System Blockage and Its Impact on Power
Exhaust system blockages—often from clogged hangers or restricted piping—directly reduce exhaust flow, which can manifest as a noticeable drop in engine power and efficiency. You’ll notice symptoms that point to flow restriction rather than fuel or ignition issues. Begin with exhaust noise: a deeper, more ominous note or unusual rasps can indicate restricted paths causing backpressure. Inspect mounting points for hangers, brackets, and rub marks that signal binding or contact with heat shields. Feel for increased vibration at idle or cruise, since restricted piping can alter harmonics and engine feel. When diagnosing, compare RPM behavior across gears; a disproportionate power loss at higher loads suggests backpressure effects. Use data logging to track manifold pressure, air-fuel ratio, and throttle response during performance tuning tests. Confirm findings with a physical check for collapsed pipes or crushed sections. If you confirm blockage, address it before pursuing deeper performance tuning goals or noise optimization.
Understanding How Clogged Hangers Affect Exhaust Flow and Backpressure

Clogged exhaust hangers restrict hanger-to-pipe movement, reducing exhaust flow paths and increasing turbulence. As flow is impaired, backpressure rises, altering pressure balancing across the system. You’ll see measurable shifts in exhaust velocity and overall power response, highlighting the link between hanger condition, flow, and backpressure.
Hangers and Flow
Hangers that are partially or fully blocked can disrupt exhaust flow, increasing backpressure and altering system dynamics. You measure how obstructions change pipe alignment, noting that even small deformations force the exhaust gas to seek alternate paths. When flow becomes irregular, vibrations rise and resonance can magnify, stressing mounts and seals. You’ll see subtle power loss and throttle response shifts as the system compensates. The goal is to preserve a smooth, laminar exit path; therefore, inspect hanger condition, mounting torque, and clearances during routine exhaust maintenance. If you detect corrosion, fatigue, or rubber degradation, plan replacements promptly. For longer life, consider hangers replacement as a preventive step. Prioritize clean routing, secure fasteners, and anti-vibration isolation to maintain ideal flow and reliability.
Backpressure Impact
As obstructions in the hanger path disrupt flow, backpressure responds with measurable changes. You’ll notice fuel trims and manifold pressure drift as exhaust gas speeds shift around the blockage. Clogged hangers raise localized impedance, increasing backpressure at the turbine or downstream components and altering the exhaust pulse timing. These backpressure effects can reduce scavenging efficiency, causing a slight drop in peak engine power and a shift in torque delivery. You’ll also see temperature rises upstream of the obstruction, which can impact sensor readings and catalyst behavior. By understanding this relationship, you target conditions that degrade exhaust efficiency, not merely symptoms. In practice, addressing backpressure concerns restores cleaner flow, improves predictability, and preserves performance while reducing fuel penalties and emissions.
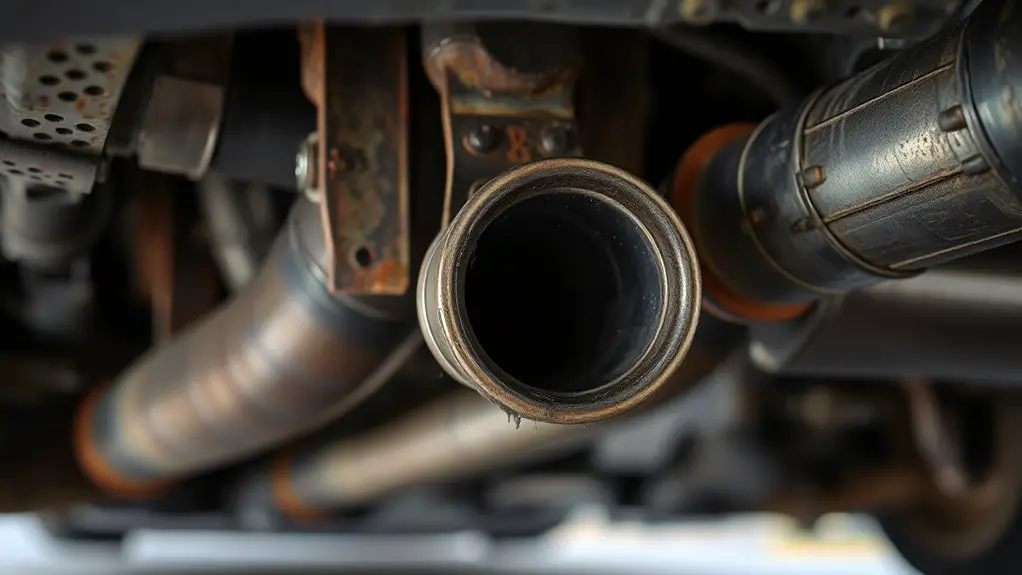
Inspecting Exhaust Hangers for Wear, Rattle, and Obstructions
You’ll start with a focused inspection of wear, looking for cracks, deformation, or loose mounting points on the exhaust hangers. Next, perform rattle checks by applying gentle percussion and hand movement to detect looseness or abnormal movement. Finally, assess obstructions by clearing debris and verifying clear paths for the hanger and exhaust to move without contact.
Wear Inspection
To begin wear inspection, check each exhaust hanger for signs of deformation, corrosion, or fraying of the strap and mounting hardware. You assess hanger materials for fatigue indicators and inspect mounting points for secure fasteners, cracks, or bending. Look for uneven gaps between the exhaust pipe, hanger, and frame—indicating compression or misalignment. Document any looseness, rivet wear, or degraded isolation bushings that could transfer vibration. Verify installation techniques have maintained proper clearance from heat shields, with no contact between moving parts. Compare hangers to manufacturer specifications, noting thickness changes or coating deterioration. Record suspected wear locations and prioritize replacements before reliability is compromised. Use consistent torque values during reinstallation and confirm updated installation techniques align with current regulations and performance goals.
Rattle Checks
Rattle checks begin with a methodical assessment of exhaust hangers for signs of wear, misalignment, and obstructions that could permit contact or amplification of vibration. You’ll inspect each hanger’s stud, bushing, and rubber isolator for cracks, looseness, or deformation. Listen for a rattle noise that persists with engine idle and under throttle, noting whether the sound changes with RPM or road load. Check mounting points for tightness and verify that hangers maintain proper spacing to prevent metal-to-metal contact. Observe exhaust tube movement at each hanger during manual flexing to detect excessive play. If you detect looseness or binding, address it before further testing. Document findings, then compare results to service limits to assess impact on exhaust vibration.
Obstruction Assessment
Obstruction assessment begins with a focused inspection of each exhaust hanger to verify that no debris or misalignment is impeding clearance. You examine hangers for wear, cracks, and corrosion, noting any looseness that could permit movement. Listen for subtle rattles at idle and during revs, which signal hanger wear or mounting fatigue. Check routing to confirm the pipe maintains proper clearance from heat shields, fuel lines, and the frame, preventing contact that could cause derating. Verify all rubber bushings are intact and not oxidized or torn. Document any obstruction that reduces exhaust flow or causes contact with other components, as these conditions can degrade exhaust maintenance and performance tuning. Resolve by replacing compromised hangers and rechecking for consistent alignment and quiet operation.
Assessing the Cat Condition: When a Clogged Cat Reduces Performance
When a catalytic converter becomes clogged, you’ll notice a measurable drop in engine performance and efficiency, since exhaust backpressure rises and the exhaust flow is restricted. Evaluating the cat condition requires you to monitor core indicators without speculation. You’ll assess catalytic converter performance by comparing engine response, fuel trim, and temperature profiles under steady load and wide-open throttle, noting any lag or hesitation. Use exhaust flow dynamics as a framework: observe pressure differentials across the converter, recorder readings, and flow velocity changes as the substrate becomes blocked. A healthy cat maintains smooth torque delivery and stable exhaust temps; a compromised unit shows elevated tailpipe temperatures and irregular sensor feedback. Avoid common myths; rely on diagnostic data rather than impressions. If you detect sustained abnormal readings, you’ve got a precise signal that performance loss stems from the cat, not ancillary components, guiding you toward informed testing and repair decisions.
Cleaning vs. Replacing: Choosing the Right Fix for Exhaust Hangers and Catalytic Converter
If you’ve read about how a clogged catalytic converter can degrade performance, you’ll want to decide between cleaning and replacing when it comes to exhaust hangers and the cat itself. This choice hinges on fault severity, cost, and long-term reliability. Cleaning techniques can restore flow when deposits are light and the substrate isn’t damaged, but they won’t fix internal, thermal, or structural failures. You should assess access, required disassembly, and potential gasket or hanger damage during cleaning, then weigh time versus benefit. Replacement options, by contrast, offer predictable results and verified efficiency gains, but at higher upfront cost and potential labor. Consider vehicle age, emission standards, and warranty implications when selecting a path. For many drivers, a staged approach works: clean for a test period if feasible, then replace if performance doesn’t return or if corrosion and physical wear are evident. In all cases, document your criteria, limits, and expected outcomes for clear decision-making.
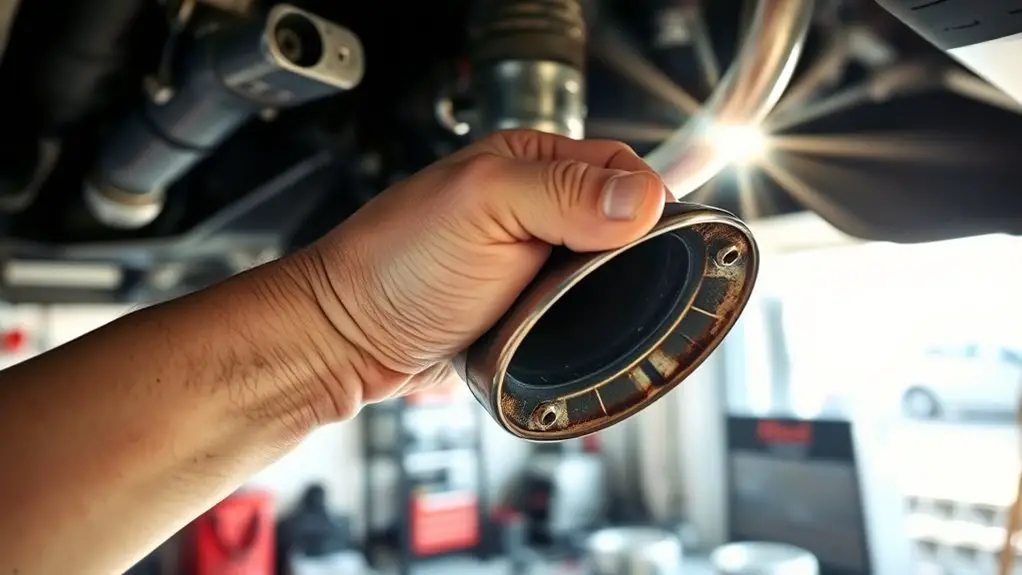
Safe Inspection and Diagnostic Procedures Without Special Tools
To inspect exhaust hangers and the surrounding exhaust system without specialized tools, start with a visual and tactile assessment while the system is cool. You’ll look for cracks, corrosion, loose hangers, missing rubber grommets, and metal contact with the underbody. Tap lightly with a screwdriver handle to hear changes in resonance; a hollow or rattling note signals looseness or breakage. Check mounting bolts for tightness and inspect the exhaust pipe just upstream and downstream of the hangers for deformation. Compare both sides for symmetry; unequal alignment hints at sagging mounts. Document any obvious defects and plan targeted checks during a later drive cycle for confirmation. This approach supports exhaust maintenance and informs power restoration decisions without tools or invasive procedures.
- Visual integrity of hangers and mounts
- Rubber cushions and isolation integrity
- Alignment and sag in the exhaust path
- Symmetry and contact indicators under load
Practical Steps to Restore Flow: Cleaning Methods and Replacement Tips
Cleaning the exhaust path to restore flow starts with targeted removal of debris and careful restoration of flow paths, then proceeds to replacing worn hangers or isolated components as needed. You’ll conduct a controlled cleaning of the exhaust riser, cat, and muffler in segments to avoid recontamination. Use a brush, compressed air, and low-residue solvents to dislodge carbon buildup without disturbing seals. Inspect hangers, clamps, and mounts for corrosion or fatigue; replace as required with OEM- or equivalents that restore proper alignment and vibration damping. Reassess flow after each intervention, verifying that the pipe bore remains unobstructed and that mounting points don’t sag or bind. When debris removal is complete, reassemble with proper torque specs and fresh gaskets to minimize leaks. Document changes for exhaust maintenance records and to support performance tuning goals. Validate improved backpressure and throttle response, ensuring the system maintains stable operation under load without rattles or hot spots.
Preventive Measures to Avoid Future Power Loss From Exhaust System Blockages
Preventive measures focus on maintaining unobstructed flow and stable exhaust dynamics, so you’ll adopt a routine that targets early signs of buildup and wear. By practicing regular exhaust maintenance, you reduce the risk of blockages that degrade power. You’ll implement proactive checks, monitor system temperatures, and verify hanger integrity to sustain peak performance tuning. This disciplined approach keeps backpressure predictable and supports consistent throttle response, even at high load. Focus on detecting minor corrosion, loose connections, and subtle rattles before they escalate, and address them with precision. Maintaining smooth internal surfaces and secure mounts preserves exhaust gas velocities and minimizes parasitic losses. Your goal is enduring efficiency without surrendering control or freedom.
- Regular exhaust maintenance checklist and inspection cadence
- Early-signal monitoring of heat and vibration indicators
- Timely hanger and fastener security verification
- Targeted action plan for wear or minor corrosion before failure
Frequently Asked Questions
Can a Clogged Exhaust Hanger Cause Misfiring or Engine Fault Codes?
“Where there’s a will, there’s a way.” Yes, a clogged exhaust hanger can contribute to misfiring or engine fault codes if it causes exhaust leak or backpressure changes that upset fuel trims and oxygen sensor readings. You’ll want to inspect for hanger looseness, leaks, and restraint damage as part of exhaust system maintenance. If misfire codes appear, check ignition, fuel, and compression too, because engine performance indicators may reflect multiple fault sources.
Do Exhaust Hangers Affect Fuel Economy Beyond Power Loss?
Exhaust hangers themselves don’t directly alter fuel economy like a misfire would, but exhaust efficiency can influence overall parasitic drag and backpressure. If hangers fail, exhaust leaks or routing changes raise pump work, nudging fuel consumption upward slightly. You’ll notice steadier efficiency when the exhaust path remains intact and mounted. In practice, guarantee proper hanger condition, monitor fuel use, and verify backpressure stays within spec to avoid subtle efficiency losses.
How Long Can You Drive With a Clogged Catalytic Converter?
A ticking clock inside you warns that you shouldn’t push it: a clogged catalytic converter can severely damage your engine, so you should stop driving as soon as you notice symptoms. In general, avoid driving long distances; aim to address the issue promptly. Catalytic converter lifespan varies, but neglect risks costly repairs. Prioritize exhaust system maintenance, and seek a professional diagnosis. You’ll preserve performance, efficiency, and freedom when you replace or repair faulty components.
Can Loose Hangers Cause Intermittent Power Drops or Vibrations?
Loose hangers can indeed cause intermittent power drops or vibrations. When exhaust mounts fail or loosen, exhaust vibrations transfer to the chassis, potentially disrupting exhaust flow and triggering power fluctuations as the engine management senses abnormal backpressure or timing shifts. You’ll notice irregular pedal feel plus rhythmic shudders at certain RPMs. Inspect mounts, brackets, and rubber isolators for wear, cracks, or gaps; tighten or replace as needed to restore steady exhaust flow and minimize fluctuations.
Is a Professional Diagnostic Needed for Exhaust Flow Issues?
Frequent professional help isn’t always mandatory, but for exhaust diagnostics, you should seek a pro if symptoms persist. You’ll benefit from precise flow analysis and a confirmed diagnostic plan. Exhaust diagnostics can reveal blockage, leaks, or hanger-induced flow restrictions that simple checks miss. If you value freedom to drive confidently, book a qualified technician for a structured flow analysis, then follow their recommended repairs to restore proper exhaust flow and sustained power.