How to Stop Water Ingress Causing Paint Chipping
To stop water ingress from causing paint chipping, first locate and fix the source of moisture—roof leaks, clogged gutters, or failed seals. Then prep the surface properly: remove contaminants, clean, dry, and feather edges. Repair damaged substrates and joints, and apply compatible sealants or waterproof membranes tailored to the substrate. Choose breathable, moisture-tolerant primers and coatings, and guarantee correct curing. Maintain drainage and inspect regularly; persistent moisture issues will require ongoing monitoring and preventative steps. More steps await if you continue.
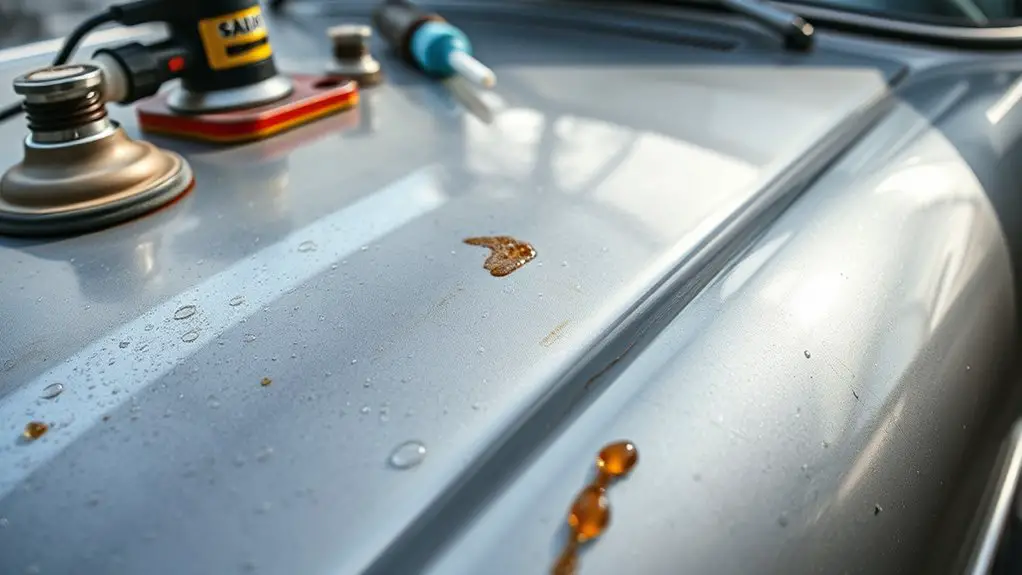
Spot Water Entry: Common Causes to Check
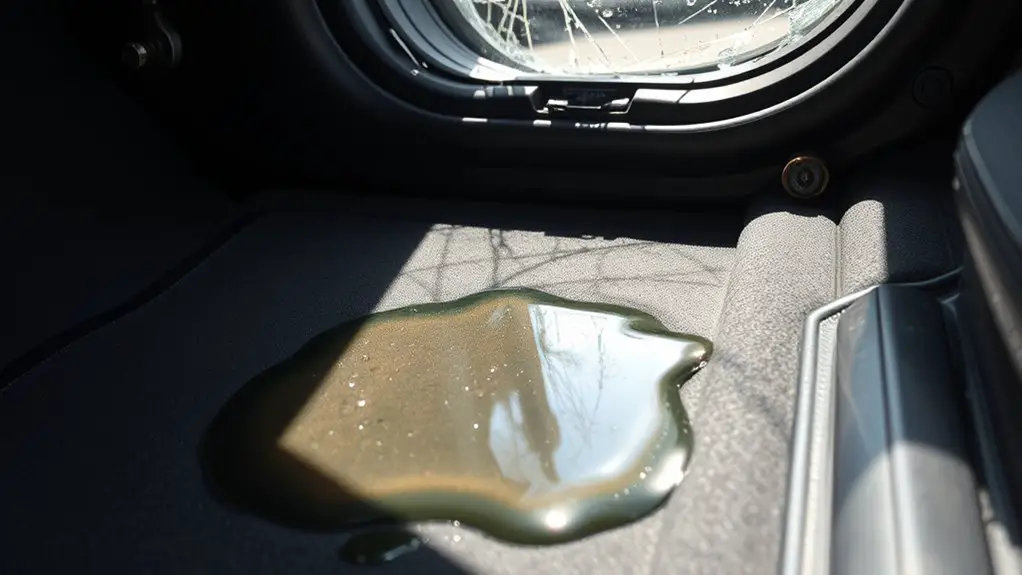
Spot water entry often stems from a few predictable sources. You’ll inspect exterior interfaces where moisture can bypass protective coatings. Roof leaks top the list: pinholes, damaged flashing, and imperfect laps allow ingress at joints and valleys. You’ll verify condition of shingles, sealant integrity, and fastener corrosion, since even small defects can channel water inward. Gutter clogs matter, because backed-up runoff overflows to fascia and soffit, saturating substrates and expanding weak points. Check downspout connections for loose penetrations and rust that can redirect moisture behind walls. Wall penetrations—pipes, vents, and electrical through-wall boxes—behave similarly: look for degraded sealant, cracked housings, and misaligned flashing. Exterior fixtures should be tested for proper drainage slope and backed by slope-compensating flashing. If you find staining on masonry, inspect mortar joints and caulked joints for cracking or displacement. Air leaks around openings can exacerbate condensation symptoms; address gaps to prevent hidden water migration.
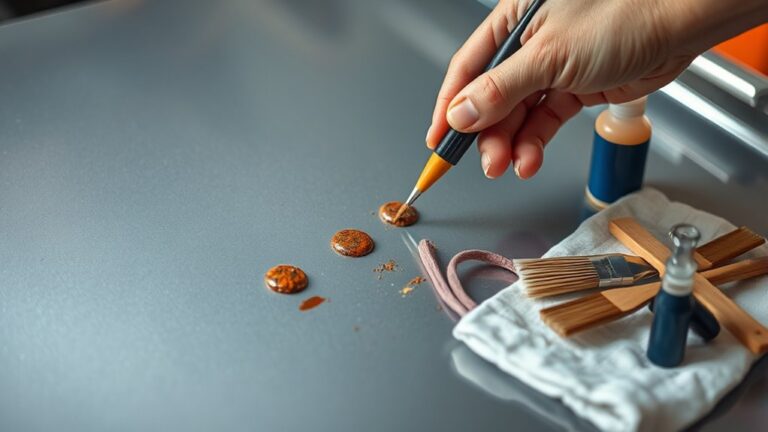
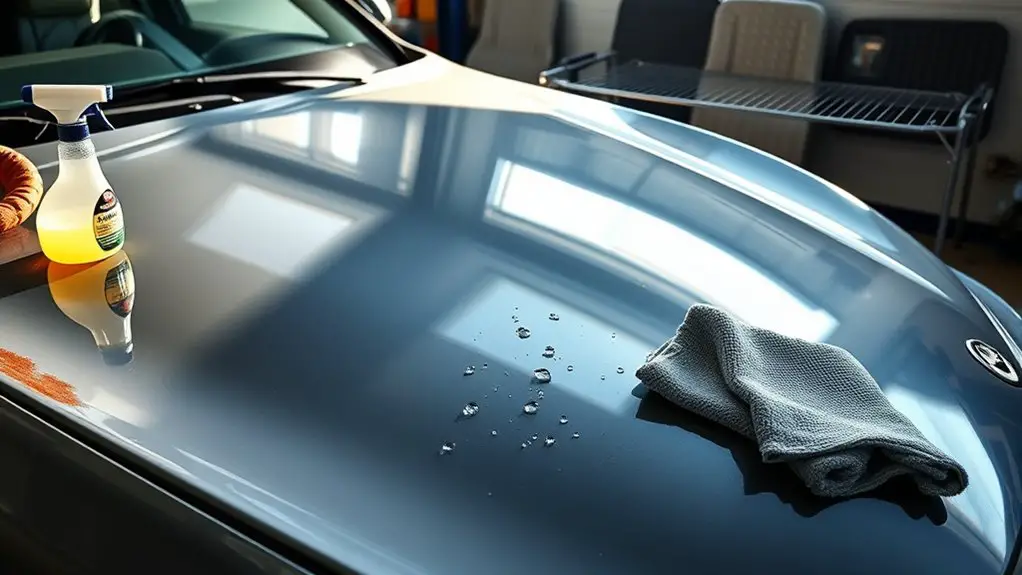
Prep Your Surface for Maximum Adhesion
Begin with surface cleaning to remove contaminants that impede adhesion. After cleaning, guarantee thorough drying, as moisture will compromise bond strength. Consider primer options that enhance adhesion properties for your substrate to maximize water ingress resistance.
Surface Cleaning First
Surface cleaning is essential to maximize adhesion, so you should remove dust, oils, and contaminants from the substrate before applying any waterproofing or sealant.
Surface preparation is decisive for coating longevity. You’ll implement cleaning methods that guarantee uniform adhesion, eliminating residues that trap moisture or inhibit bond. Precision here prevents future delamination and pigment failure.
- Use appropriate degreasers for oily substrates
- Scrub with nonabrasive brushes to lift grime
- Rinse thoroughly to remove detergent residues
- Dry completely to prevent flash drying
- Inspect for remaining particulates before coating
Drying Thoroughly Essential
Drying thoroughly is essential to secure maximum adhesion and prevent moisture-related failures. You’ll assess substrate moisture content before coating and choose approaches that eliminate residual dampness. Drying methods vary by material, climate, and ventilation; you select the method that maintains safe temperature and avoids rapid moisture loss that could cause cracking. Ascertain surface temperature supports evaporation without condensation, and use dehumidification or gentle airflow where appropriate. Avoid trapping humidity under coatings by verifying surface feel and moisture indicators at multiple spots. Track drying time accurately, recognizing that over- or under-drying harms adhesion and coating integrity. Document conditions—humidity, temperature, and time—for consistency across sessions. When in doubt, extend drying windows modestly to achieve stable, dry conditions before topcoating.
Primer Upgrades Adhesion
A well-prepared surface starts with choosing the right primer to maximize adhesion and long-term performance. You’ll upgrade adhesion by selecting primer types that suit substrate chemistry, condition, and exposure. Consider how adhesion factors like surface energy, porosity, and contamination influence film formation, film thickness, and bond strength. Apply primers that promote cross-linking, provide moisture resistance, and seal porous substrates before topcoats. Tailor priming to metal, wood, masonry, or previously painted surfaces to minimize blistering, peeling, and water ingress.
- Match primer types to substrate and environment
- Evaluate moisture, zinc, and rust inhibitors when needed
- Check adhesion factors: surface energy, porosity, contaminants
- Use compatible topcoats to avoid intercoat failure
- Seal porous substrates to prevent water ingress through pores
Cleaning and Drying: The First Step to Success
You must begin with a dry surface, using thorough drying techniques to remove residual moisture quickly and consistently. Control any moisture sources to prevent wicking, ensuring the substrate stays within the required humidity and temperature range for adhesion. This sets up effective water control and ideal conditions for subsequent bonding steps.
Thorough Drying Techniques
Once moisture is identified, begin with thorough cleaning to remove contaminants and debris that can impede drying progress, then implement targeted drying strategies to achieve first-pass moisture removal efficiently. You’ll apply calibrated drying methods that balance speed with substrate integrity, preventing flash drying and cracking. Maintain constant humidity control to minimize vapor pressure differentials that cause condensation. Use controlled air movement to direct moisture toward absorptive surfaces, avoiding rewetting. Monitor substrate temperature to stay within safe limits and prevent thermal stress. Document each phase to guarantee reproducibility and traceability. Your approach should reduce downtime, enhance coating adhesion, and prevent future ingress by promoting consistent dryness across all surfaces.
- Pre-cleaning assessment and containment
- Targeted airflow zoning
- Humidity control monitoring
- Temperature and surface feedback
- Post-drying verification and documentation
Effective Water Control
Effective water control starts with prompt cleaning and efficient drying. You assess surfaces for moisture content, targeting hidden pockets before coatings or repairs. Clean with purpose, removing loose material, salts, and residues that compromise adhesion. Drying follows using calibrated techniques: airflow, heat, and time tuned to substrate type. You prioritize rapid, uniform evaporation to prevent capillary wicking and subsequent paint failure. When monitoring, check for damp spots, sheen changes, and surface temperature shifts that signal lingering moisture. Implement waterproof coatings only after complete dryness, ensuring substrate compatibility and ventilation. Drainage systems play a critical role: direct water away from walls, install weep holes where needed, and maintain slope. This disciplined approach minimizes ingress, supporting durable finishes and freedom to pursue bold aesthetics without compromise.
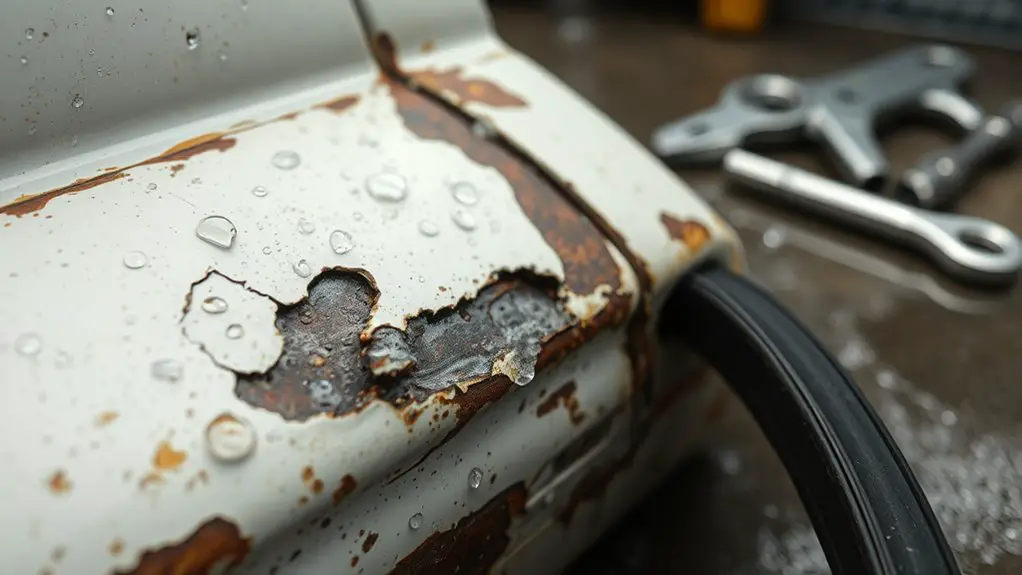
Repairing Damaged Substrates Before Painting
Damaged substrates must be repaired before painting to guarantee adhesion, durability, and a uniform finish. You’ll begin with substrate assessment to identify porosity, loose material, and embedded contaminants, then choose targeted repair techniques that restore structural integrity and surface planarity.
- Inspect for delamination, cracks, and oil/grease residues, documenting extent.
- Remove loose substrate and clean with appropriate solvent, ensuring dry, dust-free surfaces.
- Fill voids with compatible patch materials, curing according to manufacturer guidelines.
- Level high spots and feather edges to create a uniform plane.
- Perform a final surface profile check, confirming readiness for primer and topcoat.
Selecting Sealants and Waterproofing Membranes
You’ll start by checking Sealant Compatibility Basics to guarantee substrate and adhesive match, then move to Membrane Selection Criteria to align with exposure, movement, and moisture levels. Consider practical Application and Curing Tips to verify surface prep, curing times, and environmental constraints before installation. This sets the framework for selecting appropriate materials and execution methods to stop water ingress.
Sealant Compatibility Basics
Sealant compatibility is about ensuring materials seal and last together under real-world conditions. You assess how sealant properties align with substrate, temperature exposure, and movement, then validate via compatibility testing before application.
- Evaluate substrate chemistry and porosity to predict bonding performance
- Check elasticity, cure schedule, and chemical resistance in sealant properties
- Confirm joint movement range matches service conditions
- Verify primers, cleaners, and primers compatibility with the sealant
- Conduct short-term and long-term compatibility testing under expected cycles
This approach keeps assemblies durable, minimizes paint chipping risk, and supports predictable service life. You’ll reduce surprises by documenting material data sheets, cure times, and failure criteria. Precision choices here enable reliable performance in real environments, preserving aesthetics while preserving freedom to design without compromising integrity.
Membrane Selection Criteria
Membrane selection criteria boil down to matching performance needs with material capabilities, ensuring the chosen sealants and waterproofing membranes withstand substrate conditions, movement, and environmental exposure. You assess substrate compatibility, ambient temperatures, moisture regimes, and anticipated flexural demands, then translate these into membrane properties. Prioritize membrane types that resist hydrostatic pressure, UV degradation, chemical attack, and cyclical movement without loss of adhesion or integrity. Evaluate sealing details, bond line durability, and compatibility with primers, tapes, and fastenings to prevent delamination. Consider durability under long-term service, maintenance implications, and replacement intervals, choosing solutions that minimize maintenance cycles. Balance cost with lifecycle performance, ensuring the selected system delivers reliable, controlled moisture management while preserving substrate aesthetics and structural intent.
Application and Curing Tips
Selecting sealants and waterproofing membranes requires aligning material properties with project conditions, substrate compatibility, and anticipated movement. You’ll choose products based on substrate surface, expected joint movement, and exposure level, then plan for clean joints and proper substrate preparation. Focus on sealing compatibility, curing methods, and installation sequence to prevent voids that trap moisture. Achieve durable performance by coordinating application techniques with environmental constraints, substrate temperature, and film thickness. Monitor cure times and potential issues like pinhole formation, then verify adhesion through simple adhesion tests. Proper curing processes reduce stress and improve long-term integrity, so document the timeline and conditions for ongoing durability. Your goal is a continuous, watertight barrier that resists ingress without compromising building movement or aesthetics.
- Verify substrate cleanliness and dry-out before application
- Match sealant viscosity to joint width and movement
- Control temperature and humidity per product data
- Follow manufacturer curing schedules precisely
- Inspect and test adhesion after cure, avoiding early traffic
Primers That Help Block Moisture
Primers that block moisture form the first line of defense against water ingress, creating a uniform, bonded surface that improves adhesion and reduces capillary uptake. You’ll choose moisture resistant primers that seal porous substrates before painting, minimizing diffusion pathways for moisture. Primer types vary by substrate compatibility, film thickness, and moisture tolerance; select a system designed for the specific environment and substrate chemistry. For masonry or concrete, opt for breathable or penetrating formulations that still form a continuous film, balancing vapor transmission with water resistance. On timber, prefer primers with moisture barriers and rot-inhibitive additives to prevent swelling and debonding. When metal is involved, use primers that resist corrosion while impeding moisture ingress without trapping condensate. Surface preparation remains critical: clean, dry, and mechanically abrade to maximize adhesion. Apply specified coats evenly, avoid overthinning, and respect cure times. Your goal is durable, stable adhesion that resists moisture-driven paint failure over the long term.
Exterior Paint Choices for Wet Climates
When choosing exterior paints for wet climates, prioritize systems that resist moisture ingress while maintaining breathability to prevent condensation buildup beneath the coating.
- Choose water resistant finishes that form a durable barrier without sealing all vapor paths.
- Favor moisture repellent coatings with low permeability to water but high vapor permeability.
- Look for acrylic or elastomeric formulations engineered for exterior exposure and freeze–thaw resilience.
- Prefer films with UV stability and pigment load that resist streaking, fading, and hydrolysis.
- Verify compatibility with existing substrates and primers, guaranteeing cohesive adhesion and long-term performance.
Key criteria to compare include water contact angle, permeance ratings, and adhesion class. Avoid over-application that creates cracking. Consider color and reflectivity to manage surface temperature swings. Ascertain warranty terms cover wet-diagnosed failures. By selecting balanced, breathable finishes, you maintain structural dryness while preserving aesthetic freedom and climate resilience. Water resistant finishes and moisture repellent coatings enable durable, low-maintenance exteriors in challenging environments.
Application Techniques for Durable Coatings
To apply durable coatings effectively, prepare the substrate thoroughly, ensuring it’s clean, dry, and sound before any material touches the surface. You’ll rely on controlled surface preparation, including grinding, abrading, and profile creation to optimize adhesion. Select an appropriate primer compatible with the substrate and the topcoat, applying within the manufacturer’s pot life and cure parameters. Use consistent, wet-on-wet application techniques when possible to maintain film continuity and minimize pinholes. Maintain environmental controls: temperature and humidity within specified ranges, avoid rapid drying, and shield from moisture while curing. Your choice of equipment—brush, roller, or spray—should deliver uniform film thickness per coating specification, avoiding overlaps that create ridges or holidays. Document substrate conditions, batch numbers, and cure times to verify coating durability benchmarks. Prioritize contamination control, inspection after each coat, and interim adhesion tests where prescribed, ensuring long-term performance aligns with project durability targets.
Maintenance Practices to Prolong Finish Life
Regular inspection and timely upkeep are essential to extend finish life, focusing on identifying wear, micro-dissolutions, and environmental stressors before they propagate. You’ll implement a disciplined maintenance frequency that matches exposure and substrate, balancing cost with protection. Use precise tactile inspections and documented condition notes to guide proactive interventions. Prioritize protective coatings as a second line of defense, ensuring compatibility, adhesion, and UV resistance are validated before application. Schedule refresher evaluations after severe weather, substrate movement, or impact events to prevent latent deterioration. Align maintenance with environmental cycles and materials chemistry to sustain barrier integrity without overcoating. Your goal is a durable, flexible finish that resists delamination and microcracking while preserving appearance and ease of maintenance. Maintain clear records, update intervals as needed, and minimize downtime through targeted spot repairs and timely re-coatings when needed.
- Regular visual and tactile inspections with quantified wear metrics
- Documented maintenance frequency tailored to exposure
- Verification of adhesion and coating compatibility
- Timely micro-repair before propagation
- Strategic use of protective coatings and re-coating schedules
Troubleshooting and Long-Term Prevention Strategies
Troubleshooting and long-term prevention hinge on diagnosing root causes and implementing durable controls that adapt to evolving exposure and substrate conditions. You’ll start with a structured assessment: verify water sources, identify ingress pathways, and quantify moisture in substrates. Use targeted moisture detection to map wet zones, distinguishing transient conditions from persistent moisture. Prioritize enclosure integrity—sealants, joints, and cladding interfaces—against bulkwater and vapor transport, then verify drainage and slope performance. For interior surfaces, apply diagnostic coatings or moisture meters to track ingress patterns over multiple cycles. Develop a long-term monitoring plan that records environmental fluctuations, substrate changes, and coating performance, enabling timely interventions before failures evolve. Align repairs with material compatibility, cure schedules, and system warranties to prevent recurrence. Document findings, establish maintenance triggers, and train personnel to recognize early signs. Your aim is durable performance through proactive, data-driven, repeatable controls that balance protection, aesthetics, and freedom to operate.
Frequently Asked Questions
How Do I Identify Daily Humidity vs. Rain-Driven Water Ingress?
You can identify daily humidity vs. rain-driven water ingress by tracking patterns: note indoor humidity levels during dry periods and after rain, then correlate spikes with outdoor rain patterns. Use a hygrometer to log humidity levels and weather data to compare timing. Look for steady, small increases in humidity across mundane days versus sharp, post-rain surges. If ingress coincides with rain events, prioritize sealing and drainage improvements.
Can Paint Chips Indicate Hidden Structural Moisture Behind Walls?
Like a ticking clock you feel through your walls, paint chips can hint at hidden moisture. Yes, scattered chips may indicate hidden structural moisture behind walls, threatening structural integrity if ignored. You should assess patterns, moisture readings, and wall cavities promptly. Paint deterioration often reflects water phases and material stress. Prioritize an infrared or moisture-meter survey, repair leaks, and reinforce drainage. You’ll protect the structure, maintain aesthetics, and preserve long-term safety and freedom in your space.
Is There a Rapid Test to Confirm Substrate Dampness Before Painting?
You can run a rapid test to confirm substrate dampness before painting using moisture meters for quick assessments. You’ll select a calibrated pin or pinless model, test multiple shallow depths, and compare readings to species- and substrate-specific limits. Look for elevated moisture zones and document results. For accuracy, wait for stable readings, avoid surface coatings, and follow manufacturer guidance. This approach gives you precise, actionable data and supports confident, freedom-loving property decisions.
Do I Need Licensed Waterproofing for Below-Grade Surfaces?
Yes, you should hire licensed contractors for below-grade surfaces because proper waterproofing is high-stakes work. You’ll want licensed contractors who bring proven waterproofing techniques, material specs, and careful substrate prep. They’ll assess drainage, vapor barriers, and curing details, then apply proven waterproofing techniques tailored to your wall and soil conditions. You’ll get documented warranties and compliant installations, reducing risk of leaks and failures, while preserving structural integrity and long-term paint stability.
What Are Cost-Effective Long-Term Sealant Options for Historic Homes?
You’ll want cost-effective sealant types that honor historic preservation while delivering long-term performance. For historic homes, opt for breathable, lime-based or fluorinated silicone formulations that accommodate historic materials and moisture movement. Avoid rigid, modern polymers that trap dampness. Apply compatible primers and proper surface prep to prevent failure. Regularly inspect for hairline cracks and re-seal as needed. You’ll preserve integrity and appearance, maintaining authenticity while controlling water ingress with durable, reversible choices.