How to Test and Tune After Installing Parking Sensors to Avoid Failed Test Drives After Upgrades
To guarantee a smooth post-upgrade drive, verify each sensor’s range, mounting angle, and field of view, then map coverage by testing at multiple distances and tilts. Calibrate warning tones, brightness, and dash alerts to fire in sync with sensor cues. Calibrate the rear-view camera for level display, and run controlled low-speed maneuvers to log reaction times and false alarms. Keep a detailed tune-up log; you’ll uncover setup tweaks that prevent surprises down the line. More steps await.
Verifying Sensor Range and Coverage

To verify sensor range and coverage, start by identifying each sensor’s stated detection distance and mounting angle, then test under representative conditions that mimic real use. You’ll map how far each sensor can reliably detect objects and where on your bumper they respond. Record mounting angles precisely and compare them to manufacturer specifications to spot deviations that could affect performance. Perform controlled tests at multiple speeds, object sizes, and surface textures to gauge consistency across common scenarios. Note any blind spots or asymmetries in coverage, and assess how sensor performance shifts with lighting, weather, or primer finishes. Document results with clear measurements, then correlate findings with installation positioning decisions to enhance overall reliability. This approach helps you cross-check theoretical specs against lived experience, supporting evidence-based adjustments. Conclude with a concise summary of which sensors meet expectations and where calibration or repositioning may be warranted for maximum safety.
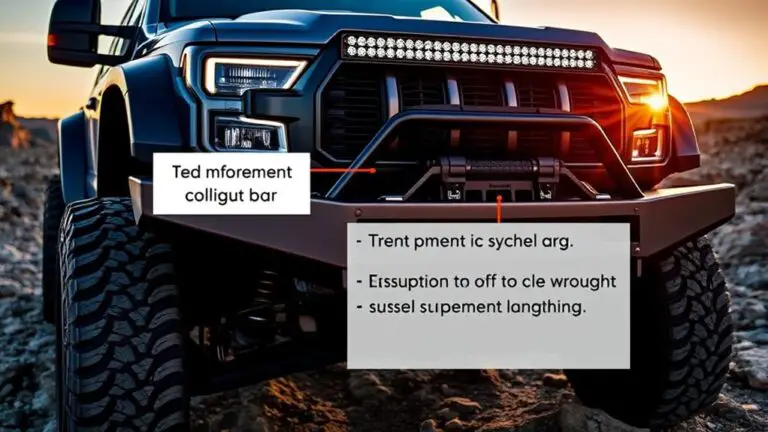
Assessing Sensor Angles and Field of View

You’ll start by confirming each sensor’s mounting angle against your vehicle’s design specs. Then, perform targeted field-of-view checks to guarantee the sensors cover the intended zones without blind spots. Record any misalignment and adjust in small increments, validating changes with repeatable tests.
Sensor Angle Basics
Sensor angles determine how effectively parking sensors detect obstacles; consequently, evaluating their orientation and field of view is a critical first step in tuning them. You’ll start by identifying your sensor types and their mounting positions, ensuring each unit has a clean line to the intended target area. Then, test incremental tilts and lateral angles to map coverage, recording what’s detected at each stance. Precision here reduces false positives and blind spots, enabling repeatable results during future drives. Your approach should be structured, not speculative, with consistent measurements and documented outcomes.
- You observe a defined boundary of clearance, feeling confident as detection stabilizes.
- You compare sensor responses across angles, confirming reliable performance across the system.
- You finalize angles, knowing sensor installation is optimized for real-world freedom.
Field of View Checks
Field of view checks involve systematically verifying each sensor’s angular coverage and detection range. You’ll map the sensor’s arc using controlled tests, noting blind spots and overlap with adjacent units. Begin with a baseline from the manufacturer’s specs, then confirm actual performance at multiple distances and angles. Use a reflective surface and safe obstacles to gauge edge detection and cross-talk. Document any deviation from expected coverage and adjust promptly. When evaluating sensor placement, consider mounting height, orientation, and potential obstructions from poor installation techniques. Recheck after any adjustment to confirm consistent field-of-view results. Record all findings, including environmental factors like lighting and noise, since these influence perception and reliability. This disciplined approach supports reliable operation and aligns with installation techniques that respect freedom and safety.
Testing Warning Tones and Visual Alerts
To verify the effectiveness of warning tones and visual alerts, start by ensuring the vehicle is in a safe, controlled area with no obstructions. You’ll test how auditory feedback and visual indicators inform you of distance, speed, and direction, then confirm they trigger consistently across scenarios. Use repeatable steps, stay objective, and document results for future reference.
To verify the effectiveness of warning tones and visual alerts, start in a safe, controlled area and document how auditory and visual cues inform distance, speed, and direction.
1) Verify the tone volume matches the vehicle’s interior acoustics and remains audible over cabin noise without being startling.
2) Confirm visual indicators illuminate promptly at multiple distances and adjust brightness for day and night driving.
3) Validate that alerts disengage only when the obstacle is cleared, ensuring no false positives or missed warnings disrupt your drive.
Record times, distances, and conditions to build an evidence-based benchmark. This process gives you freedom to trust the system, improve your situational awareness, and maintain control during test drives.
Calibrating Rear-View Camera Integration
Calibrating rear-view camera integration requires a precise, evidence-based approach to guarantee the display aligns with real-world geometry and driver perception. You’ll begin by confirming the camera is mounted level, clean, and free of distortion, then verify the image center corresponds to the vehicle’s midline. Next, establish a known reference frame: measure bumper offsets, ground plane, and parking line positions from the driver’s seat. Perform a controlled test with flat markers at defined distances to assess parallax and horizon placement. Adjust lens distortion compensation and the on-screen overlay to match real-world angles, ensuring objects appear where you intuitively expect them. Document each calibration step, including target distances and rotation corrections, to support repeatability. Address integration challenges by testing under varying lighting and weather, confirming auto-switching between modes remains smooth. Finally, re-test safety overlays and guidance lines to confirm they support confident, freedom‑driven parking decisions without compromising situational awareness.
Syncing Dash-Warning Alerts With Sensor Alerts
You’ll align dash warnings with sensor alerts by establishing a clear, real-time feedback loop that matches each sensor threshold to its corresponding dashboard cue. Start with baseline timing and consistency checks to verify that visual and audible alerts flip simultaneously across typical obstacle scenarios. Use ongoing data logs to confirm alignment, adjust tolerances, and document any deviations to maintain evidence-based accuracy.
Alert Sync Basics
Syncing dash warnings with sensor alerts guarantees that audible and visual cues match the system’s real-time status.
You’ll methodically verify that each warning level corresponds to actual sensor readings, minimizing false alarms and friction. Consistent sync reduces driver uncertainty and supports confident decisions during parking maneuvers.
- Understand how sensor types affect alert timing and thresholds, then adjust accordingly.
- Document installation tips to confirm wiring and power are steady, preventing drift between alerts.
- Test across scenarios (speed, angles, obstacles) to confirm reproducible, predictable responses.
This approach emphasizes evidence-based checks, repeatable tests, and clear criteria for acceptance. You gain freedom by predicting outcomes, not guessing. Avoid redundancy, keep changes small, and iterate with careful logging for future tuning.
Dash-to-Sensor Alignment
When aligning dash warnings with sensor alerts, you’ll start with a clear mapping of each alert level to its corresponding sensor reading, then verify that the dash indicators respond in real time as readings cross defined thresholds. Establish a one-to-one correspondence for low, medium, and high proximity, noting exact distance or signal value for each. Document the expected dash color or icon changes, and test under repeatable conditions to confirm consistency. Perform sensor calibration first, then cross-check with a controlled object at known distances to guarantee sync accuracy. Use a stopwatch or data log to confirm latency is within acceptable limits. If discrepancies arise, recheck wiring, power stability, and calibration constants. Achieve reliable dash alignment through disciplined verification and clear threshold definitions.
Conducting a Safe, Step-by-Step Test Drive
To conduct a safe, step-by-step test drive, start in a quiet, controlled environment with a cleared area and a patient observer. You’ll validate sensor responses, confirm warning thresholds, and document performance, using repeatable methods and concrete metrics. Focus on test drive techniques and safety precautions that minimize risk while gathering actionable data.
1) Prepare the vehicle: enable sensors, set volume/menu alerts, and verify firmware compatibility before any motion.
2) Execute controlled maneuvers: low-speed backing, parallel parking, and deliberate obstacle placement to map sensor feedback to real distances.
3) Record results: note reaction times, distances, and false alarms, then compare against baseline specs and manufacturer guidance.
Approach each step with deliberate cadence, validating consistency across trials. Maintain situational awareness, use a spotter if needed, and halt immediately if you notice unexpected sensor behavior. Clear, objective logs support confident tuning and safer future drives.
Troubleshooting Common False Alarms
False alarms on parking sensors can stem from environmental factors, sensor aging, or interference from nearby objects; start by confirming the root cause through a structured, hypothesis-driven approach. You’ll test hypotheses like environmental interference factors, sensor misalignment, or debris blocking lenses, then collect objective evidence (vehicle position, sensor readings, distances). Apply controlled trials: reproduce conditions, document results, and isolate variables until the source is clear. If sensitivity seems excessive, perform sensor sensitivity adjustment to dial back over-responsiveness without losing acute detection.
| Step | Action |
|---|---|
| 1 | Define suspected cause with measurable criteria. |
| 2 | Reproduce condition and log sensor outputs. |
| 3 | Adjust sensitivity in small increments and re-test. |
| 4 | Confirm resolution or identify environmental interference factors needing mitigation. |
Post-Install Tune-Up Checklist and Maintenance
After installation, run a structured tune-up to verify sensor integrity, wiring continuity, and system calibration. You’ll adopt a repeatable protocol to maximize post install maintenance effectiveness and sensor longevity, reducing risk of drift or false alarms. Begin with a visual and tactile inspection of mounting brackets, harnesses, and connectors, noting any signs of stress or abrasion. Follow with a diagnostic scan to confirm channel integrity, calibration coefficients, and alarm thresholds. Document deviations, then re-calibrate as needed using manufacturer-recommended procedures. Schedule routine checks aligned with driving conditions and vehicle usage, reinforcing sensor reliability through disciplined upkeep. This approach supports post install maintenance that preserves performance and freedom from nuisance events, enabling confident driving.
Conduct a structured post-install tune-up: inspect, calibrate, log deviations, and schedule quarterly harness checks to guard sensor longevity.
1) Confirm all sensors return to baseline values after calibration, and log any temporary offsets.
2) Implement a quarterly harness inspection, replacing frayed wires or degraded seals before issues arise.
3) Establish a maintenance window tied to service intervals to sustain sensor longevity and trust in the system.
Frequently Asked Questions
How Often Should Sensor Calibration Be Rechecked After Upgrades?
You should recheck sensor calibration every two to four weeks after upgrades, depending on usage and environment. This sensor recalibration frequency accounts for wear, temperature shifts, and lane conditions. Perform an upgrade impact analysis to identify drift risks and adjust intervals if you notice inconsistent readings. Document results and use a standardized test routine, then refine as needed. You’ll gain reliability, confidence, and faster fault isolation when you maintain a disciplined calibration schedule.
Can Sensors Affect Parking Assist With Cold-Start Engine Delays?
Yes, sensors can be affected by cold-start effects and engine delays. When the engine struggles or idles differently during cold starts, sensor signals may lag or misread distances, altering parking assist responses. You’ll want to verify calibration after cold starts, check wiring for stiffness, and run a phased test from cold to warm. In practice, observe for false alerts or delayed braking assists, document timing changes, and adjust sensitivity to maintain reliable, freedom-enhancing performance.
Do Different Bumper Materials Influence Sensor Accuracy?
Bumper materials can influence sensor accuracy, so yes, different bumper types matter. You’ll want precise sensor placement tailored to each bumper design, avoiding obvious mounting gaps and reflective surfaces. Start with a factory-recommended sensor spacing, check for consistent readings across tones and distances, then test in controlled settings. Document variations by bumper type, adjust placement as needed, and validate with repeatable scenarios. This evidence-based approach supports reliable parking assist with freedom and confidence.
What External Factors Most Commonly Trigger False Alarms?
External factors that most commonly trigger false alarms include environmental conditions like moisture, dirt, glare from sunlight, and snow or ice on sensors. Also, nearby reflective surfaces and metalized fabrics can mislead readings. Ascertain proper sensor positioning, keep lenses clean, and recalibrate after washing or weather changes. If you notice inconsistency, document conditions, test systematically, and adjust placement or shielding as needed to reduce nuisance alerts while preserving safety.
Is There a Recommended Sequence for Reprogramming After Upgrades?
Certainly, yes: follow a careful reprogramming sequence, starting with power-down, then backup, then reinitialize each sensor module in order. Upgrade considerations dictate testing after each step, noting calibration drift and parameter compatibility. You should document results, revert if thresholds drift, and proceed incrementally to minimize risk. This methodical approach gives you clear evidence and lasting control. You’ll feel freer as precision and consistency rise, with each verified parameter aligning to the intended upgrade outcomes.