Lighting Troubleshooting: Water Leak Into Trunk Causes and Fixes
Water entering a lighting trunk usually starts at end connections, joints, and gaskets, or through enclosures and drainage blockages. Inspect seal integrity, grommets, and weatherproof gaskets for cracks, compression loss, or hardening. Trace drainage paths to confirm unobstructed condensate lines and clear weep channels. Use proper surface prep, primers, and continuous sealant beads to re-establish barriers, then test under simulated rain and vibration. Regular preventive checks will help catch failures early and reduce recurrence as you continue.
Common Entry Points for Water in Lighting Trunks
Water can enter lighting trunks through a few predictable points if seals and joints aren’t properly maintained. In this section, you’ll map common entry sites with a focus on trunk design and leak prevention. Start with end connections: where cables join the trunk, seal integrity and grommets determine intrusion risk. Next, consider joints and couplings, especially field-cut sections; misalignment or degraded overlapping seals create capillary paths. Enclosures and weep channels require clear drainage; blockages force moisture inward. Cable entry ports demand proper bushings and grommets to resist edge abrasion and water ingress. Access hatches and covers should feature weather-tight gaskets and secure latches to avert pressure-driven leaks. Roof or wall penetrations introduce lateral water paths; verify flashing aligns with trunk openings and is continuous. Internal baffles must not trap water; they should promote drainage toward defined outlets. Regular inspection routines focusing on these points support leak prevention without compromising accessibility or freedom in your system’s operation.
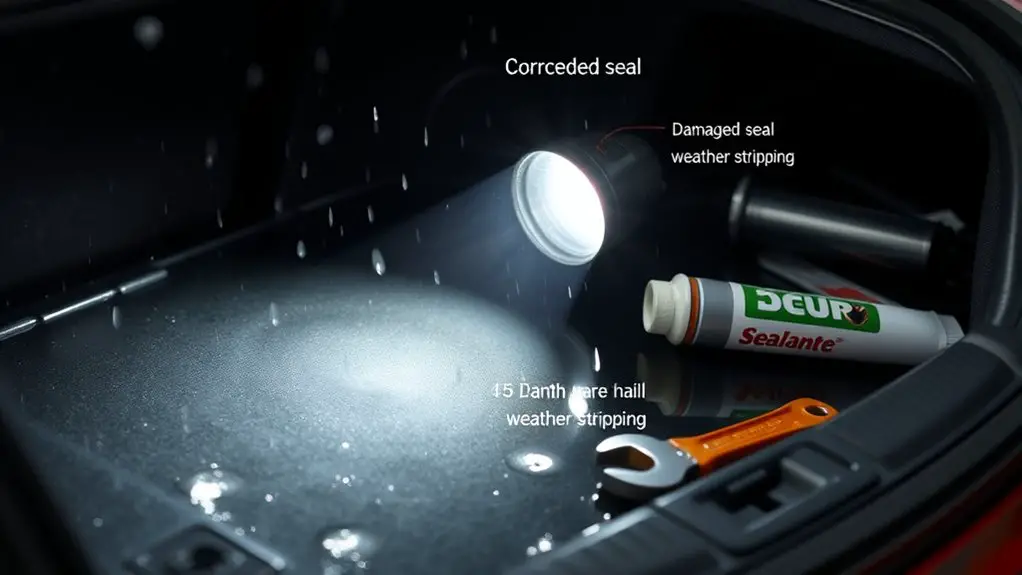
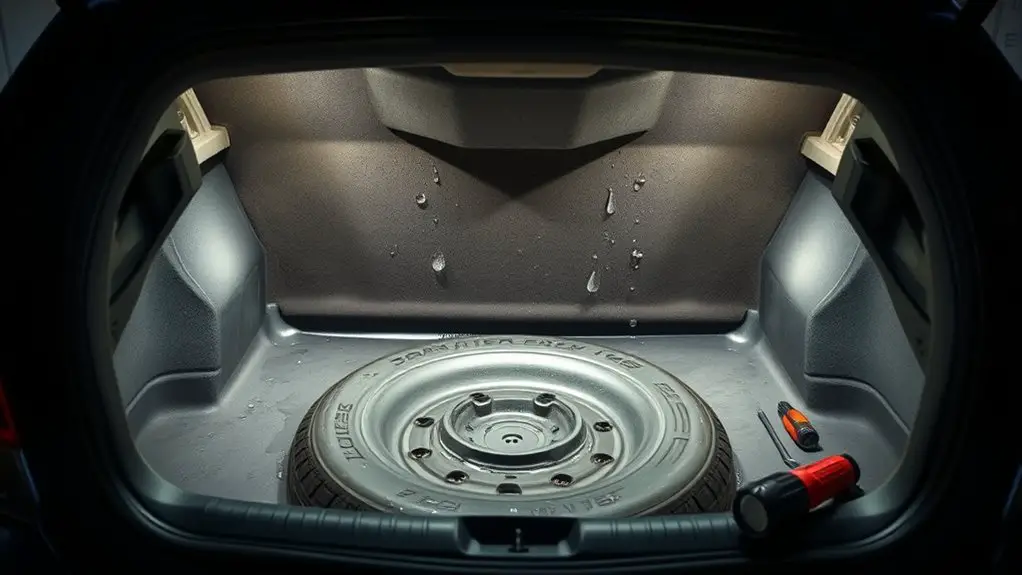
Signs Your Trunk Is Experiencing a Water Leak
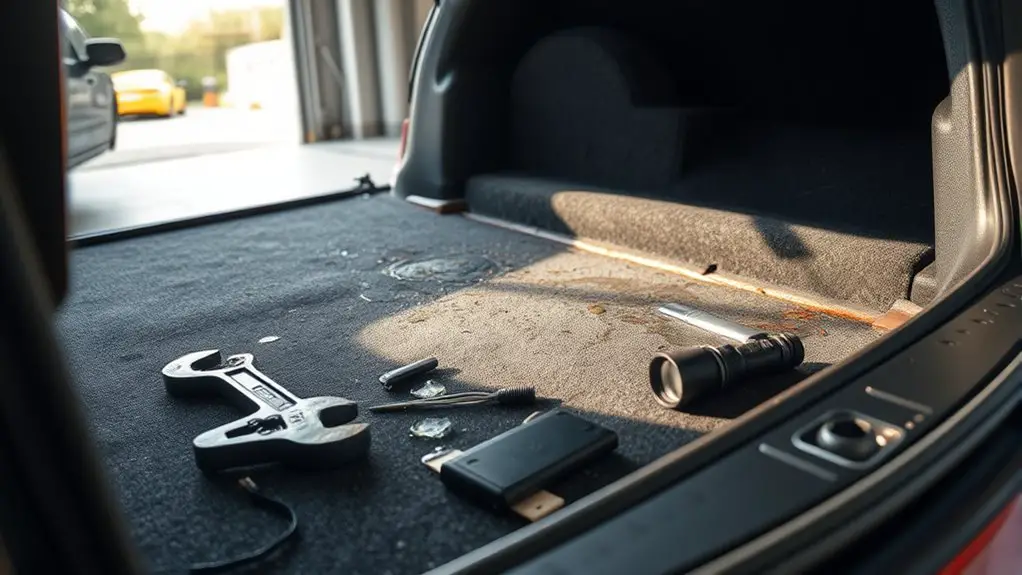
Noticing moisture in a trunk often follows subtle indicators from the points discussed earlier. You’ll recognize signs through systematic observation rather than guesswork. Start with a controlled, dry area and inspect for dampness on seal edges, carpeting, and molded panels. Look for fresh water stains, mineral deposits, or a musty odor that persists after ventilation. A persistent, cool touch on metal surfaces can indicate recent ingress, not residual condensation. Pay attention to soft or swollen insulation near the trunk lid and behind panel seams, which suggests moisture intrusion. Document any recurring damp patches with date, location, and intensity, enabling precise leak detection trends. Use a flashlight to reveal hairline cracks in gaskets and compromised weatherstrips, and perform a gentle pressure test around closures. Keep your trunk inspection logs organized to distinguish intermittent leaks from isolated incidents, facilitating targeted fixes without unnecessary exploration of unrelated components.
Assessing Drainage Paths and Water Flow

You’ll map the drainage pathways to identify where water travels from the trunk interior to the exterior. Assess the water flow dynamics by tracing routes, thresholds, and potential blockages that alter velocity and direction. This sets the framework for targeted inspections and precise corrective actions.
Drainage Pathways
Drainage pathways determine how collected moisture travels away from the trunk and into the vehicle’s drainage system. You assess routes, ensuring gravity aids flow and that seals don’t create backflow. Map each node: source, conduit, exit, and collection tray. Prioritize drainage design that channels water to visible outlets, avoiding hidden pockets where corrosion or mold could form. Water management requires maintaining slopes, checking for clogs, and verifying that condensate lines remain unobstructed.
| Node | Pathway Feature | Outcome |
|---|---|---|
| Source | Moisture origin | Initiates transport |
| Conduit | Channel slope | Guides flow efficiently |
| Exit | Drain outlet | Prevents overflow |
| Tray | Collection surface | Avoids pooling |
This framework helps you troubleshoot with precision, ensuring freedom from leaks and predictable performance.
Water Flow Dynamics
Water flows in a defined sequence, driven by gravity and pressure differences, so map each path from source to exit to predict variability in flow. You’ll chart drainage routes within the trunk, identifying the lowest points, intersections, and potential blockages that alter timing. Focus on water movement through cavities, seals, and channels, noting how surface tension and viscosity affect entry and exit rates. Apply fluid dynamics principles to quantify velocity, pressure drop, and cross-sectional changes along each segment. Assess how temperature, material porosity, and roughness influence friction losses and capillary action. Document measurements methodically, using consistent references and units, to enable repeatability. This discipline reveals where leaks originate, supports containment strategies, and empowers you to optimize drainage performance with clarity and precision.
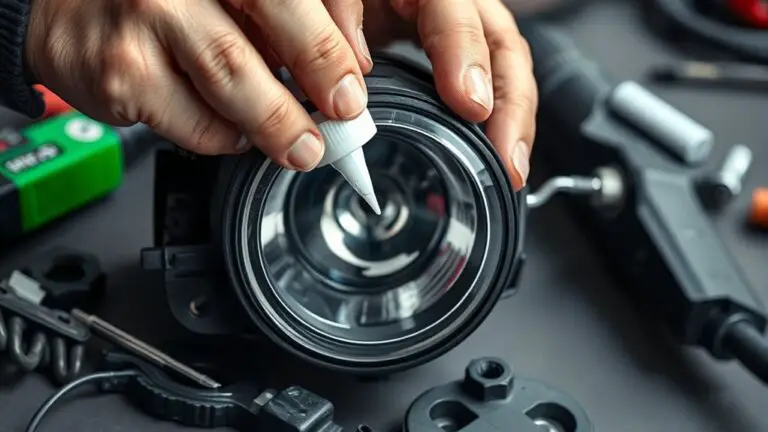
Sealing Leaks: Materials and Techniques
Sealing leaks requires selecting the right materials and applying them with disciplined technique. You’ll match sealant type to exposure, substrate, and movement so the fix lasts. Consider compatibility with plastics, metals, and fabrics, and assess environmental conditions before starting. Focus on sealant types that resist water immersion and temperature swings, then plan a clean surface, dry substrate, and precise bead control.
- Select sealants with defined cure times and cure temperatures for trunk interiors
- Prepare edges with dedicated primers when recommended by the manufacturer
- Use consistent bead shapes to bridge gaps without sagging
- Follow surface prep and cleanup protocols for ideal adhesion
- Verify seal after cure with targeted water exposure tests
Application techniques hinge on steady hand placement, minimal tooling pressure, and straight-line beads. Avoid over-sealing, which traps moisture. Document material batches and cure windows for future maintenance. This approach delivers durable, serviceable sealing that supports long-term peace of mind and freedom from recurring leaks.
Evaluating and Replacing Weatherproof Gaskets
Evaluating and replacing weatherproof gaskets is the next step after sealing techniques, because worn or degraded gaskets can compromise the fix without altering internal seals. You’ll assess gasket condition at door seals, hatch edges, and trunk interfaces for compression loss, cracks, or hardening. Inspect mating surfaces for nicks or delamination, and verify uniform contact around the opening. When replacement is warranted, select weatherproof materials rated for automotive exposure, chemical resistance, and temperature cycling. Measure groove width and bulb diameter to guarantee a proper fit, and confirm compatible profiles with your gasket installation. Clean all surfaces with a non-residual solvent, removing old adhesive and debris before placement. Apply manufacturer-recommended sealant only where specified, or rely on the gasket’s own adhesive backing if present. Install the gasket with even pressure, gradually working from one corner to the opposite, avoiding twists. Verify leak resistance with a controlled test, and document replacement intervals for future maintenance.
Inspecting Wiring, Connectors, and Enclosures
Inspecting wiring, connectors, and enclosures requires a systematic, methodical approach to identify insulation breaches, corrosion, and loose terminations. You’ll verify routing, seal integrity, and enclosure tightness first, then test for continuity and resistance with electrical meters. Inspect wiring insulation for cracking, pinholes, or chafing where trunks pass through seams or grommets. Look for connector corrosion, bent pins, or deposits that impede contact, and note any mismatched connector types that could undermine seals. Open enclosures only with power isolated, and reseal with appropriate gaskets or sealants after inspection. Document findings, replace compromised components, and recheck for moisture intrusion. Prioritize wiring insulation reliability, then address any compromised connectors or housings to prevent future leaks. Maintain a conservative approach; when in doubt, replace uncertain parts rather than risk hidden failures.
- Inspect wiring insulation for damage and wear around entry points
- Check connector corrosion and pin integrity
- Verify enclosure seals and gasket compression
- Measure continuity and resistance to confirm integrity
- Replace questionable components to guarantee moisture exclusion
Drainage and Ventilation Improvements
Drainage and ventilation improvements should begin with a precise assessment of water collection points and airflow paths, then proceed to remedies that guarantee rapid moisture removal without introducing new leakage risks. You establish a drainage design that channels condensate to an exterior exit and minimizes standing water, using graded surfaces and discrete channels that align with trunk geometry. Evaluate splash zones, seals, and factory joints for potential ingress, then implement traps or weep paths that prevent backflow during vibration. For ventilation systems, optimize cross-ventilation and airflow velocity to reduce humidity build-up without drawing in contaminants. Install breathable, water-resistant linings at critical interfaces and ascertain adequate clearance around electrical housings to prevent heat buildup that accelerates condensation. Document performance targets: moisture reduction timelines, leak incidence, and system accessibility for maintenance. Prioritize modular components for easy replacement and predictable service life, maintaining a balance between watertight integrity and functional accessibility.
Step-by-Step Fixes for Light Trunk Leaks
To fix light trunk leaks efficiently, start with a structured inspection to pinpoint exact ingress points and trace the moisture path from entry to interior surfaces. You’ll identify seams, joints, grommets, and panel gaps, then map how water travels inside the trunk. Next, apply targeted leak detection methods such as dye testing or infrared inspection to confirm entries without guesswork. Once you’ve isolated the sources, implement trunk waterproofing techniques that create a continuous, bondable barrier and resist vibration. Make certain surfaces are clean, dry, and properly primed before sealant application. Monitor for capillary flow along molded channels and flashings, and re-seal as needed. Validate fixes under load and simulate rain exposure to verify effectiveness. Maintain clear drainage paths and verify interior changes remain dry after testing. Inspect fasteners and replacements with compatible hardware to avoid future leaks.
Begin with a systematic leak audit, then seal and test under simulated rain to ensure a dry, durable trunk.
- Inspect seams, grommets, and joints for vulnerability
- Use dye tests or infrared for precise leak detection methods
- Prepare surfaces thoroughly before sealing
- Apply continuous, compatible sealants and barriers
- Test under simulated rain and load conditions
Preventive Measures to Avoid Recurrence
To prevent recurrence, implement a scheduled sealant maintenance plan, inspecting for cracking, peeling, or shrinkage and reapplying as needed. Optimize drainage paths by ensuring channels are unobstructed and directing water away from the trunk seal area. Establish regular inspection routines, documenting findings and corrective actions to verify lasting integrity.
Sealant Maintenance Tips
Sealant maintenance is proactive, not reactive: inspect and refresh sealants before signs of wear appear. You’ll keep the trunk sealed by adhering to controlled schedules, evaluating adhesive integrity, and reapplying as needed. Focus on sealant types and how they pair with substrates, then verify compatibility with surrounding materials. Use precise cleaning, surface prep, and cure conditions before any reseal. Maintain a log of temperatures, humidity, and cure times to guarantee consistent performance. Your goal is uninterrupted protection and freedom to operate without leaks.
- Inspect substrate compatibility and select appropriate sealant types
- Clean, abrade, and dry surfaces per manufacturer guidelines
- Apply consistent bead size with recommended spacing
- Cure under specified conditions; avoid premature loading
- Reassess seals after extreme temperature cycles or impact*
Drainage Path Optimization
Efficient drainage-path design minimizes recurrence by guiding water away from the trunk joint and toward a designated outlet. You implement a deliberate flow path, ensuring gravity-assisted routing, secure joints, and corrosion-resistant materials. This drainage design reduces pressure buildup and deters splash-back, aligning with practical water management strategies. Maintain slope, verify drainage channels, and seal penetrations to prevent seepage. Confirm outlet placement, unobstructed flow, and redundancy for failure modes. Document expected performance metrics, such as travel distance and clearance height, to monitor effectiveness over time.
| Feature | Outcome |
|---|---|
| Path slope | Enhanced gravity-driven flow |
| Outlet placement | Efficient discharge |
| Material resilience | Long-term integrity |
Regular Inspection Routines
Regular inspection routines are the backbone of preventive maintenance, enabling early detection of leaks, corrosion, and misalignments before they escalate. You maintain control by scheduling disciplined checks, documenting findings, and acting on trends. Your approach emphasizes consistency, minimal downtime, and clear criteria for action. Focus on inspection frequency that matches risk, exposure, and vehicle use, adapting as trunk conditions evolve. Track seal wear, mounting integrity, and drainage effectiveness to prevent recurrence and extend reliability. You’ll verify that lighting components align with the trunk’s moisture profile, ensuring prompts for remediation when deviations appear. This methodical cadence reduces surprises and supports safe operation while preserving performance.
- Establish a fixed inspection frequency and log outcomes
- Inspect seals, grommets, and weatherstrips for wear
- Assess drainage and vent paths for blockages
- Document trunk conditions with photos and notes
- Schedule corrective actions based on defined thresholds
Frequently Asked Questions
Can Rainwater Backflow Cause Leaks Inside Lighting Trunks?
Rainwater intrusion can backflow and leak inside lighting trunks. You should check for proper trunk sealing and drainage paths, because flawed seals invite standing water that migrates into housing. Like a funnel, it concentrates moisture where you don’t want it. Inspect seals around joints, gaskets, and penetrations, then replace worn components. Test with a controlled rain simulation, verify no leaks, and guarantee proper slope to direct water away from electrical compartments.
Do Solar-Powered Trunks Require Different Drainage Considerations?
Yes, solar-powered trunks require different drainage considerations. You should guarantee proper drainage design and plan solar panel placement to avoid water accumulation. Position panels to shed rainwater away from electrical conduits, and route condensate or leakage to a dedicated drain. Use sealed, rated housings and gravity-fed channels, with filters to prevent blockage. Regularly inspect seals after storms, and maintain clearances to prevent pooling, guaranteeing safe operation and long-term reliability.
How Do I Test for Hidden Leaks Behind Gaskets?
You test for hidden leaks behind gaskets by performing a pressure-and-seal check: first inspect gasket integrity visually, then apply a controlled air or dye pressure while the trunk is closed. Use a digital manometer to track pressure decay for 5–10 minutes. Look for seepage at seams, corners, and the gasket edge. For leak detection, introduce tracer dye or UV light after sealing to confirm any concealed entry points. Maintain precise, methodical documentation.
Are There Lifetime Warranties on Weatherproof Trunk Seals?
“Back to the future” you might say, but no—there isn’t a universal lifetime warranty on weatherproof trunk seals. Warranty terms vary by manufacturer and model. You’ll need to check your specific seal materials, installation, and coverage period. Some brands offer limited lifetime options; others are shorter. Inspect ends, corners, and gaskets for aging. If covered, follow the exact procedure for claims, provide proof of purchase, and document wear patterns to avoid disputes.
What Safety Steps Before Inspecting Energized Lighting Trunks?
Before inspecting energized lighting trunks, you should power down at the source and verify the circuit is de-energized. Wear safety gear, test for electrical hazards, and lockout/tagout if possible. Use a non-contact tester to confirm no live voltage, then proceed with insulated tools and proper illumination. Maintain three points of contact, keep moisture away, and document any unusual readings. If uncertain, pause and consult a qualified electrician for safe completion.