Step-By-Step: Replacing Brake Sensors to Fix No Brakes at All
To replace brake sensors and fix no brakes, start by disconnecting the battery for safety. Locate the faulty sensor in the brake assembly, then carefully disconnect the wiring harness and remove it using appropriate tools. Install the new sensor, ensuring proper alignment, and reconnect the wiring harness securely. Once installed, test the brake system by checking for firmness in the pedal and conducting a road test. Following these steps is essential for restoring functionality and safety; let’s explore further details.
Understanding Brake Sensors and Their Role
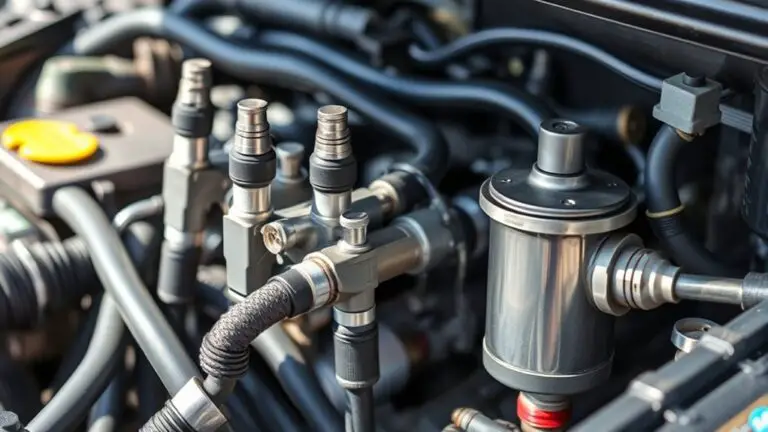
Brake sensors are fundamental components in modern vehicles, providing real-time data on the brake system’s status. You’ll encounter various brake sensor types, including pressure sensors, wear sensors, and ABS sensors, each playing an important role in guaranteeing peak braking performance. Pressure sensors monitor hydraulic fluid levels, while wear sensors alert you when brake pads need replacing, preventing potential damage.
Understanding these sensors is essential for maintaining your vehicle’s safety and performance. Regular sensor maintenance, such as checking for corrosion and confirming proper connections, can prevent costly repairs and enhance your driving experience. Ignoring these components can compromise not just your vehicle’s performance but also your freedom on the road. By staying informed about brake sensor functionality and performing routine checks, you’ll make sure that your braking system operates smoothly, allowing you to enjoy your journeys without unnecessary worries.
Symptoms of a Faulty Brake Sensor

Recognizing the signs of a faulty brake sensor is essential for maintaining your vehicle’s safety and performance. One of the most immediate symptoms is a persistent brake warning light on your dashboard, indicating that the system isn’t functioning properly. If you experience delayed braking or the brakes feel unresponsive, there may be a sensor malfunction affecting the hydraulic pressure. Additionally, unusual noises when braking, such as grinding or squeaking, can signal that the sensor isn’t relaying accurate information to the braking system. You might also notice irregularities in brake fluid levels; a faulty sensor could lead to leaks or improper fluid circulation. Finally, if your vehicle’s ABS engages unexpectedly or fails to engage at all, it’s a clear indication that the brake sensors are compromised. Addressing these symptoms promptly can help you avoid further complications and guarantee a safer driving experience.
Gathering the Necessary Tools and Materials
Before diving into the replacement process, it’s vital to gather the right tools and materials to guarantee a smooth and efficient job. Start by collecting a socket set, wrenches, and screwdrivers tailored to your vehicle’s specifications. You’ll also need replacement brake sensors compatible with your model.
Next, grab a multimeter for effective sensor troubleshooting techniques; this will help you diagnose any electrical issues. Don’t forget about brake cleaner, rags, and a torque wrench—these are essential for proper brake maintenance tips.
Lastly, consider wearing gloves and safety goggles to protect yourself during the process. By ensuring you have all the necessary tools and materials at hand, you’ll empower yourself to tackle the brake sensor replacement with confidence and freedom, avoiding any unnecessary interruptions along the way. Prepare now, and you’ll be ready to restore your braking system effectively.
Safety Precautions Before Starting the Replacement
Although you may be keen to start replacing your brake sensors, it’s essential to prioritize safety first. Begin by wearing appropriate personal protective equipment (PPE), such as safety goggles and gloves, to shield yourself from potential hazards. Confirm your vehicle is on a flat surface, with the parking brake engaged to prevent any movement during the process.
Next, organize your workspace to reduce clutter. Lay out your tools and parts systematically to avoid confusion and accidents. Keep all necessary supplies within reach, confirming nothing’s misplaced. Disconnect the vehicle’s battery to prevent electrical shock or shorts while working on brake systems.
Lastly, be mindful of any brake fluid leaks. If you see any, clean the area immediately, as brake fluid can damage paint and is harmful to skin. Following these precautions will help you work safely and efficiently, making your brake sensor replacement a successful endeavor.
Locating the Brake Sensor in Your Vehicle
To locate the brake sensor in your vehicle, you’ll first need to identify its position, which can vary by make and model. Accessing the brake components often requires removing certain parts, so be prepared for a visual inspection to ascertain you can clearly see the sensor. Familiarize yourself with these steps to streamline the process and avoid unnecessary complications.
Identify Sensor Location
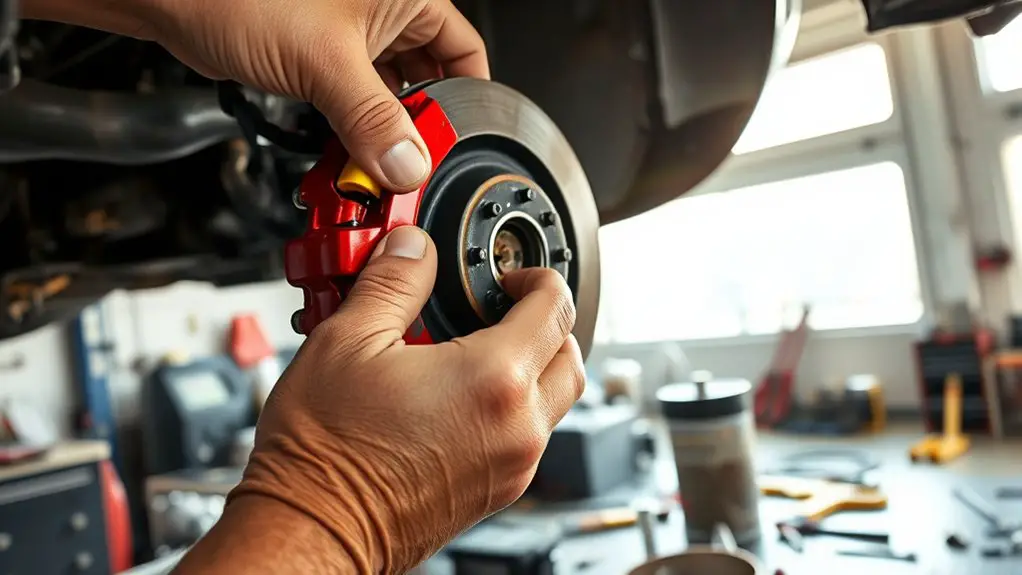
When you’re ready to locate the brake sensor in your vehicle, it is vital to know where to look. Most vehicles feature two primary sensor types: the brake pad wear sensor and the brake fluid level sensor. The brake pad wear sensor is typically mounted on the brake caliper, whereas the brake fluid level sensor is located in the master cylinder reservoir. To guarantee accurate sensor placement, refer to your vehicle’s service manual for specific diagrams and positioning. Inspect the areas around the brake components, as they can vary by make and model. Understanding the exact location of these sensors will streamline your replacement process and enhance your vehicle’s braking system performance.
Accessing Brake Components
After identifying the sensor location, the next step is accessing the brake components to reach the brake sensors. Begin by safely lifting your vehicle using jack stands, ensuring it’s stable. Remove the wheel corresponding to the brake system you’ll be working on; this exposes various brake component types, including calipers, rotors, and hoses. Carefully detach any protective covers or shields obstructing access to the sensors. Make sure to understand the sensor functionality overview—these sensors monitor brake pad wear and fluid levels, essential for safe operation. Disconnect the wiring harness connected to the sensor, taking note of its orientation for reinstallation. Once you’ve accessed the sensors, you’re set to proceed with the replacement or inspection as needed.
Visual Inspection Tips
While inspecting your vehicle, knowing where to look for the brake sensors is essential for an effective visual assessment. Start by locating the brake components: the brake pads, calipers, and rotors. The sensors are typically positioned near the brake pads or integrated within the caliper assembly. Inspect the wiring leading to the sensors for any signs of wear, fraying, or disconnection. Confirm the sensors themselves are clean and free of debris, which can hinder their performance. Don’t forget to check the brake fluid level and reservoir condition, as these can also impact sensor functionality. A thorough visual inspection will help you identify any issues before proceeding with a more in-depth diagnosis or replacement.
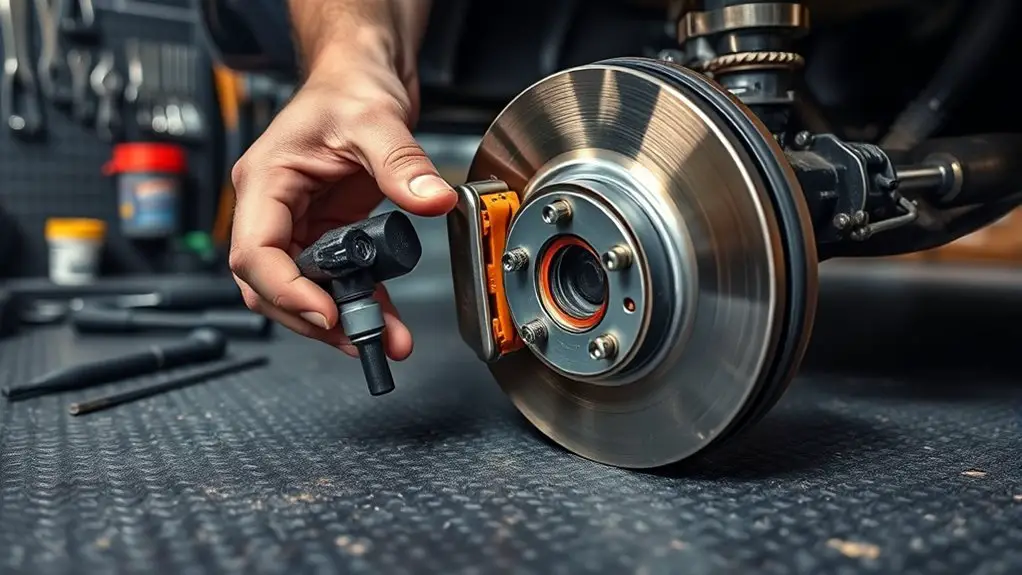
Removing the Old Brake Sensor
Begin by disconnecting the vehicle’s battery to guarantee safety while removing the old brake sensor. Now, identify the type of brake sensor you’re dealing with, as there are several brake sensor types, including pressure sensors and wear sensors. Here are some sensor replacement tips to help you:
To ensure safety, always disconnect the vehicle’s battery before replacing the brake sensor. Identify the sensor type for a smooth replacement process.
- Locate the sensor: Check the brake assembly, ensuring you can access it easily.
- Remove the wiring harness: Carefully disconnect the electrical connector, ensuring not to damage the wires.
- Unfasten the sensor: Use the appropriate tools to remove any screws or clips securing the sensor in place.
Once you’ve completed these steps, the old brake sensor should come off without hassle. Make sure to keep the area clean to facilitate a smooth installation of the new sensor later. This attention to detail can make all the difference in the performance of your braking system.
Installing the New Brake Sensor
To install the new brake sensor, you’ll need specific tools such as a socket set, pliers, and a torque wrench. Follow a step-by-step installation process to ascertain proper placement and functionality. Let’s go through each phase to guarantee a successful installation.
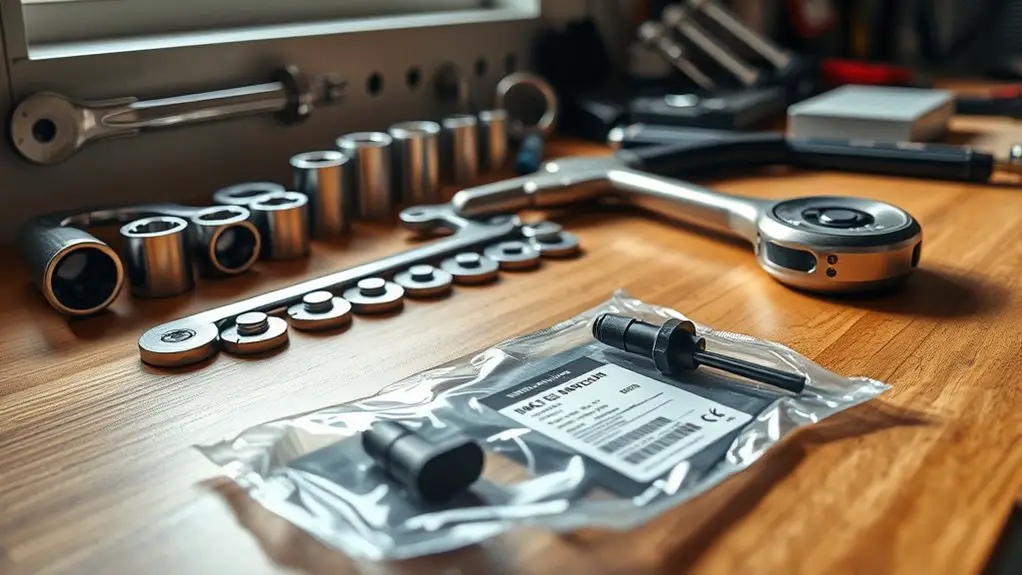
Tools Needed for Installation
When you’re ready to install a new brake sensor, having the right tools at your disposal is crucial for a successful and efficient process. Different brake sensor types may require specific tools, so here’s what you’ll need:
- Socket Set: For removing and securing bolts that hold the sensor in place.
- Wire Strippers: Useful for any necessary adjustments to the wiring during installation.
- Torque Wrench: Guarantees bolts are tightened to the manufacturer’s specifications, avoiding over-tightening or under-tightening.
Remember these installation tips: always disconnect the battery before starting, and keep your work area organized. Having the right tools not only simplifies the process but also guarantees your safety and the functionality of your braking system.
Step-by-Step Installation Process
Installing a new brake sensor involves a systematic approach to guarantee peak performance and safety. First, verify you’ve selected the correct brake sensor type for your vehicle, as compatibility is essential. Disconnect the battery to prevent any electrical shorts. Next, locate the old sensor, typically near the brake caliper, and remove it by unscrewing any fasteners. Carefully disconnect the wiring harness, noting the orientation for the new sensor. Install the new sensor by connecting the wiring harness securely, confirming it matches the original setup for sensor compatibility. Once in place, reattach any fasteners. Finally, reconnect the battery and test your brakes to confirm the installation was successful. Proper installation will restore your braking system’s functionality, granting you the freedom to drive safely.
Testing the Brake System After Replacement
Once the brake sensors have been replaced, it’s crucial to thoroughly test the brake system to guarantee peak functionality and safety. You should employ various brake testing methods to verify everything’s working correctly. Start with a visual inspection, followed by a sensor performance evaluation to confirm that the new sensors are responding accurately.
After replacing brake sensors, ensure safety by testing the system through visual checks and performance evaluations.
Here are some key steps to follow:
- Brake Pedal Feel: Press the brake pedal to assess firmness. It should feel solid without excessive travel.
- Road Test: Drive at low speeds to evaluate braking response, listening for unusual noises or vibration.
- Diagnostic Scan: Use an OBD-II scanner to check for any error codes that might indicate sensor issues.
Frequently Asked Questions
Can I Replace Brake Sensors Without Professional Help?
Yes, you can replace brake sensors without professional help if you’re comfortable with DIY brake repair. There are various brake sensor types, like wear sensors and fluid level sensors, each requiring specific tools and knowledge. Start by gathering the necessary equipment and referring to your vehicle’s service manual for guidance. Make sure you’ve got a safe workspace and take proper precautions to avoid any mishaps during the replacement process.
How Much Do Brake Sensors Typically Cost?
Brake sensors typically cost between $20 to $100 each, depending on the brand and quality. When you’re considering brake sensor pricing, it’s essential to weigh sensor quality comparison, as cheaper options might not last as long. Investing a bit more can save you from future headaches and guarantee safety on the road. Remember, the freedom of driving relies heavily on reliable brake components, so don’t skimp on quality when it comes to your vehicle.
What Tools Are Essential for This Replacement Job?
You’ll need a few essential tools for replacing brake sensors, including a socket set, torque wrench, and wire cutters. Make sure to have a multimeter handy for testing sensor types. For installation, follow sensor installation tips like ensuring clean connections and proper torque specifications. Don’t forget safety gear, like gloves and goggles, to protect yourself during the process. With the right tools, you can confidently tackle this job and enjoy the freedom of a well-functioning brake system.
Are There Any Common Mistakes to Avoid?
When installing brake sensors, avoid common mistakes like misaligning the sensors or failing to secure wiring properly. These errors can lead to malfunctioning brakes. Another frequent issue is neglecting to test the sensors after installation; always verify they’re operational. Don’t overlook checking for corrosion on connectors, as this can cause inconsistent signals. By steering clear of these common troubleshooting errors, you’ll guarantee a smoother installation and maintain your vehicle’s braking system integrity.
How Long Does the Replacement Process Take?
Think of replacing brake sensors like tuning a musical instrument; it takes precision and patience. The brake sensor installation time typically ranges from one to three hours, depending on your vehicle’s complexity. To streamline the process, gather your tools beforehand and follow detailed guides. If you run into issues, consult brake sensor troubleshooting tips to avoid unnecessary delays. This way, you’ll not only guarantee safety but also regain your freedom on the road.