Step-By-Step: Replacing Bushings to Fix Broken Spring
To replace bushings on a broken spring, start by evaluating symptoms and securing the area to prevent movement. Gather wrenches, sockets, a press or driver, lubricants, and compatible bushings. Identify worn bushings—look for looseness, cracking, or misalignment. Relieve spring tension safely, remove old hardware in order, and clean all parts. Install new bushings with proper orientation, lubricate as required, and torque fasteners to spec. Reassemble, then test door operation and safety features; future steps will help you prevent recurrence.
Assessing the Symptoms and Safety Precautions
When a spring bushing fails, symptoms like excessive play, jerky movement, or grinding noises usually point to worn or cracked components. You’ll start with symptom identification: observe how the spring interacts with adjacent parts, note any abnormal looseness, binding, or delay in response. Document the frequency, location, and severity of each cue, since patterns guide diagnosis. Next, assess safety measures: secure the vehicle or framework, support with stands or blocks, and remove any hazards that could cause sudden movement. Wear eye protection and gloves, and keep your workspace clean to prevent slips. Check for fluid leaks, damaged mounts, or corrosion that could compromise handling. If you’re unsure, pause and re-evaluate before further disassembly. Maintain a methodical record of findings, dates, and conditions. This disciplined approach minimizes risk, helps you decide whether to repair or replace, and preserves your freedom to work confidently.
Tools and Materials You’ll Need
You’ll gather the essential tools and match each item to the task, from wrenches and sockets to pliers and a torque wrench. Specify material specs for bushings, seals, and fasteners, so you choose parts that fit your spring exactly. Follow the safety guide as you lay out each tool and material, ensuring you have a clear plan before you start.
Essential Tools List
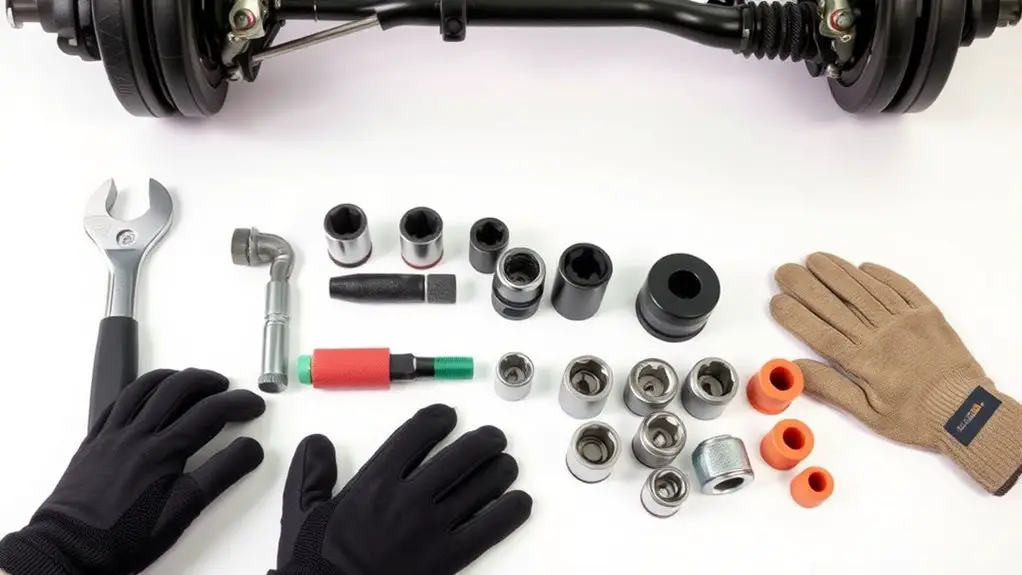
A solid list of tools and materials is essential for replacing bushings in a broken spring. You’ll pick what you need, stay efficient, and keep momentum without frustration. Focus on reliability and simplicity, not guesswork.
- Wrenches and sockets
- Press or suitable driver for bushing installation
- Protective gear and cleaning supplies
You’ll want bushing materials and bushing types clearly in mind as you prepare, but save the specifics for the next section. This list emphasizes essential, reusable items, plus the few disposables you’ll use up. Keep everything organized in a workstation you can move around, so you’re not chasing tools mid-task. Once you’ve assembled these core items, you’ll approach the job with confidence and a clear, controlled rhythm.
Material Specifications
Identify the core tools and materials you’ll actually use, then verify compatibility with your spring and bushing design. You’ll select components based on material durability and appropriate bushing types for the load and environment. Choose compatible bushings, sleeves, and fasteners, plus lubricants and cleaners that won’t degrade the metal. Inspect tolerances and finish, ensuring corrosion resistance where needed. Document part numbers for future service.
| Item | Reason |
|---|---|
| Bushing types | Match load, fit, and wear patterns |
| Lubricant | Reduce friction, extend life |
| Cleaners | Prepare surfaces without residue |
| Fasteners | Proper strength and compatibility |
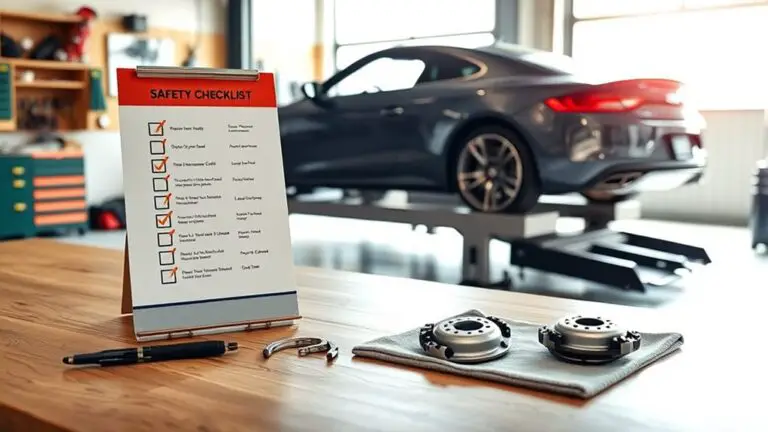
Safety Precautions Guide
Before handling bushings and springs, gather and review the safety gear and workspace requirements that will support reliable work and minimize risk. You’ll prepare a clear area, secure supports, and verify tools before starting. Prioritize disciplined, calm steps to avoid rush-related mistakes. Use proper safety gear and know emergency procedures to counter incidents quickly.
- Safety gear: gloves, eye protection, and a sturdy face shield for flying debris
- Workspace: clean floor, stable lift, and barrier to bystanders
- Emergency procedures: know shutdown steps, first aid basics, and how to summon help
Keep your mindset focused on control, not speed. Follow these precautions, and you’ll reduce risk while maintaining progress. If you encounter an unexpected issue, pause, reassess, and apply emergency procedures calmly. Your freedom lies in safe, deliberate work.
Accessing the Garage Door Hardware
To access the garage door hardware, start by unplugging the door’s opener or disconnecting the automatic power source to prevent unexpected movement. Then, gain clear access to panels and brackets by loosening exterior fasteners and sliding the cover aside. Inspect track gaps for clearance, and verify safe room around torsion components. Keep hands away from springs and confirm the door is fully supported by clamps before touching any hardware. Label screws and parts as you remove them to simplify reassembly. Maintain clean work surfaces and wipe away dust or lubricant buildup. When in doubt, re-check that power is cut and the door is secured. This approach keeps you efficient and in control, honoring your desire for freedom through careful preparation.
| Step | Action | Safety note |
|---|---|---|
| 1 | Disconnect power | Verify no movement |
| 2 | Remove cover | Expose hardware |
| 3 | Inspect tracks | Verify clearance |
| 4 | Label parts | Aid reassembly |
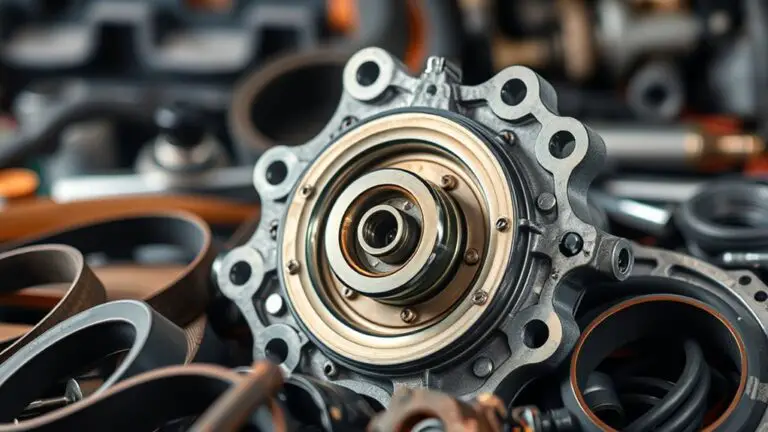
Identifying the Worn or Damaged Bushings
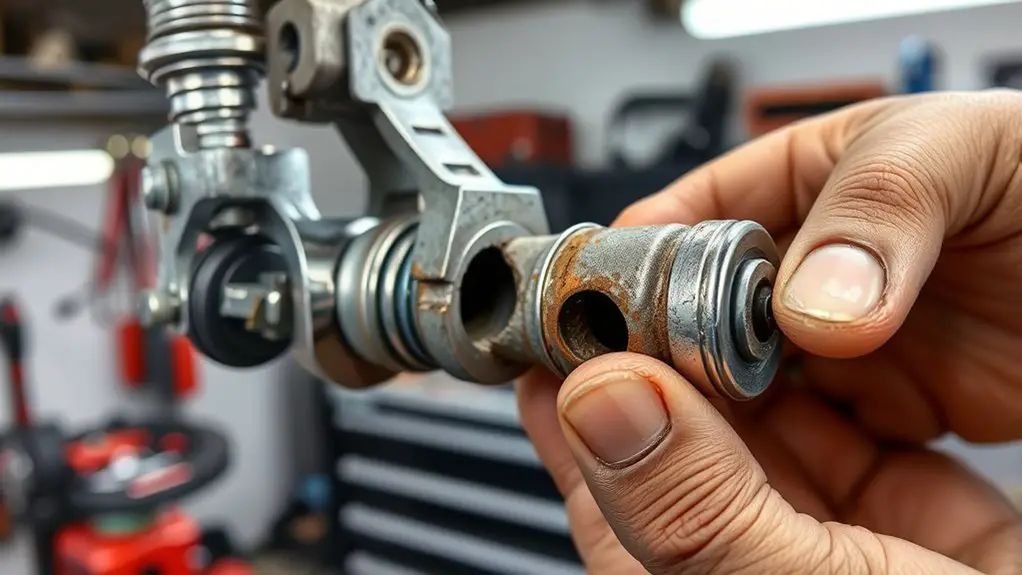
You’ll start by recognizing common signs of worn bushings, such as looseness, play, or unusual movement in the spring area. Look for visible wear, cracking, or flattening on the bushing surfaces, and note any metal-on-metal noises during operation. Use these observations to guide your next steps—whether reusing with replacements or proceeding to replace worn or damaged bushings.
Worn Bushing Signs
Worn bushings typically show up as subtle but distinct symptoms in the suspension and steering system. You’ll notice changes in handling feel, odd noises, and uneven tire wear signals that something’s off with the bushings. Focus on clarity: identify patterns, not excuses, and verify with simple checks before replacement.
- Look for increased play or looseness at control arms or links
- Listen for squeaks, clunks, or grinding when you shift weight or steer
- Check for misalignment indicators like uneven tire wear or shifting ride height
If you spot bushing wear, prioritize bushing alignment during reassembly and confirm proper torque. These signs point to wear before failure, guiding your step-by-step approach to safe restoration.
Damaged Bushing Signs
Damaged bushings show up as clearer, more serious signs than ordinary wear, and spotting them early helps prevent further suspension issues. You’ll notice increased play, misalignment, or clunking noises when you move the suspension with the vehicle parked. Look for uneven tire contact, steering looseness, or a shudder under load that wasn’t there before. Inspect bushings in both control arms and mounts, because stress often travels through neighboring components. Wear isn’t just surface-deep; it can crack, split, or collapse under pressure. Compare current bushing materials to their original spec and check for softening or cracking. Recognize bushing types that suit your handling goals, then assess whether replacement or upgrade is warranted for long-term reliability and freedom in you daily drive.
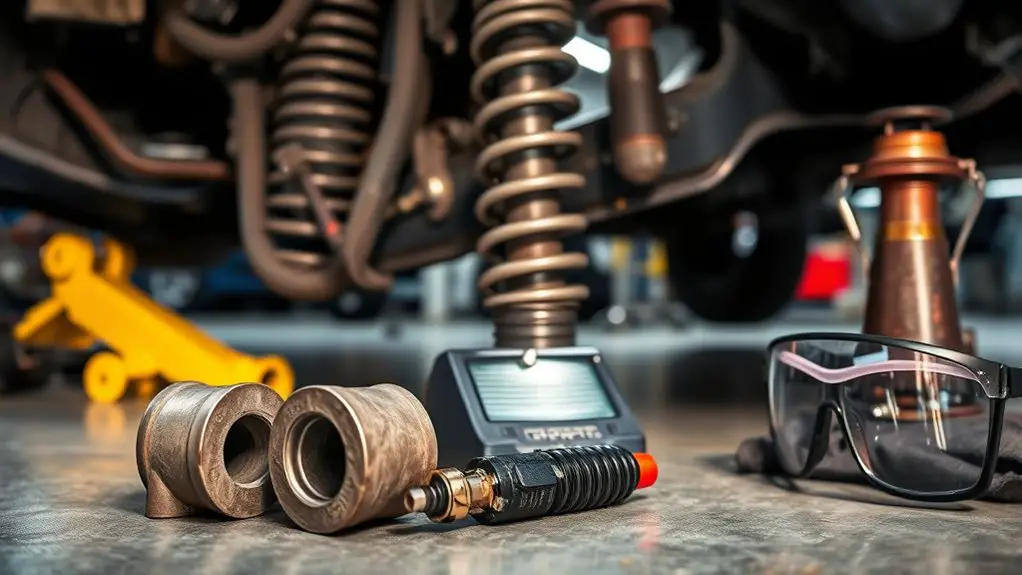
Relieving Tension Safely and Halting the Spring
To relieve tension safely, start by setting the spring you’re working with into a controlled, stationary position and securing the workspace.
- Keep your hands clear of the arc and components until you confirm restraint and alignment.
- Use a calibrated tension-relief tool or a reputable clamp, applying gradual pressure to unwind spring tension with predictable movement.
- Verify lockout of any power source or motion mechanism, then recheck stability before proceeding with any further steps.
Relieving tension is about discipline, not force. You should monitor the spring’s behavior continuously, listening for any creaks or shifts that signal danger. Maintain a steady, deliberate pace, and pause if you notice unexpected movement. Document the tension level and the tools used so you can reproduce safe practices later. Remember: the goal is to halt the spring safely, preserving control and preventing recoil. Stay focused on controlled motion, precise loads, and a clear work zone.
Removing the Old Bushings and Hardware
With the spring secured and tension fully relieved, start by removing the old bushings and hardware in a controlled sequence to prevent binding or sudden shifts. You approach this task with focus: identify each fastener, note its orientation, and place it where you can recover it easily. Use the correct tool for the fastener head to avoid rounding. If a bushing resists, back it out slowly rather than forcing it. Document any wear patterns you observe for future reference, but stay on target with removal. Apply steady, even pressure to detach bushings without prying, and keep the surrounding components aligned to avoid galling or misfit. For hardware disposal methods, segregate recyclable metal from nonrecyclables and dispose of any damaged fasteners per local guidelines. Maintain a clean workspace so parts don’t slip or roll away. Your deliberate handling protects the assembly and prepares you for precise replacement.
Cleaning and Inspecting Related Components
Begin by giving the work area a quick sweep and wipe down the components you’ll inspect, then visually check each part for wear, corrosion, or deformation. You’ll verify alignment, cleanliness, and any glide surfaces before you proceed. Focus on critical connectors and linkage points to guarantee nothing will bind after reassembly. Use deliberate, steady movements and avoid forcing components.
Begin with a clean workspace, inspect each part for wear, and verify alignment while moving deliberately.
- bushing types: note sizes, sleeves, and any play that could affect fit or motion
- cleaning techniques: remove grime with a non-abrasive brush, solvent wipe, and dry before inspection
- sequence: inspect mounting points first, then spring seats, then adjacent hardware for fatigue
Store and label parts as you assess them so nothing gets mixed up. If you spot pitting, rust, or cracking, mark them for closer review but don’t replace yet. Maintain a calm, controlled pace to preserve safety, accuracy, and a sense of freedom in your work.
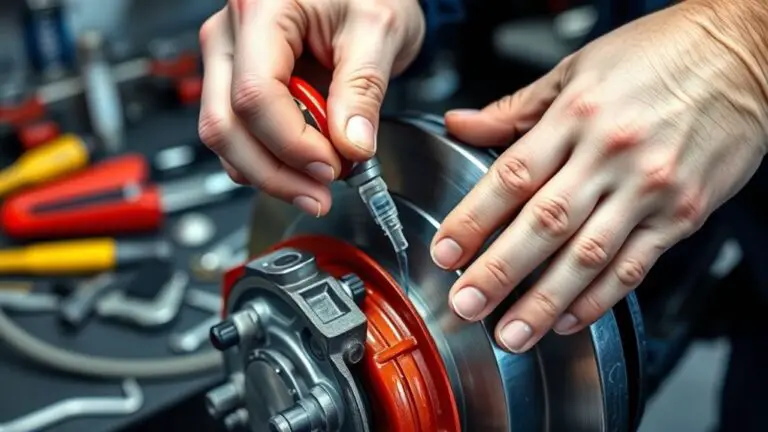
Installing New Bushings and Reassembling
Reinstall the new bushings thoughtfully, then reassemble the linkage in the reverse order of disassembly. You’ll approach bushing installation with clean components, clear seating, and correct orientation. Inspect each bushing for fit and any deformations before seating it in its bore. Use the specified lubricant or dry-fit as required by the design, ensuring even coverage without excess. Align the linkage so that the bushings sit squarely and without binding, then tighten fasteners to the manufacturer’s torque values. Work methodically, checking each joint for smooth movement before moving to the next. When reassembling, follow the original sequence to preserve alignment and function, confirming that washers, spacers, and clips are seated firmly. Maintain consistent tension across fasteners to prevent uneven wear. Document any deviations from the original hardware, and store removed parts for potential reuse only if specified. This is the stage where precise alignment and careful reassembly set the foundation for reliable operation.
Testing the Door’s Operation and Safety Checks
Before you start, verify that all reassembled components are secure and correctly aligned. You’ll test door operation and verify safety features with controlled, deliberate checks to ascertain reliability and freedom in use. Begin by cycling the door slowly, listening for smooth movement and noting any binding or unusual noise. Observe the balanced travel, stopping points, and return actions to confirm proper alignment and function. Check that safety features engage consistently, such as auto-reverse or limit switches, and verify that vision indicators or indicator lights reflect correct status. If anything feels off, pause, recheck fasteners, and adjust before continuing.
- Inspect door function through full-range cycles, confirming smooth operation and consistent stops.
- Confirm safety features respond predictably, including obstruction detection and auto-reverse.
- Document any anomalies and reset hardware to meet specified tolerances before use.
Maintenance Tips to Prevent Future Issues
Implement a regular inspection routine to catch worn parts early and schedule timely replacements before issues worsen. Keep lubrication consistent on moving components and guarantee proper support to minimize stress on the spring assembly. Establish a clear replacement schedule for critical components to maintain reliability and prevent recurrence of failures.
Regular Inspection Routines
Regular inspections are the backbone of preventing repeat issues, so set a routine you can actually keep. You’ll build confidence by scheduling simple checks that don’t derail your day, and you’ll catch early signs before they become costs. Focus on consistency, not intensity, and record what you find. This keeps your inspection frequency predictable and actionable.
- routine checks: verify mounting, fasteners, and visible wear without disassembly
- cadence: choose realistic intervals and adjust after heavy use or seasonal shifts
- documentation: log findings, actions taken, and dates for trend tracking
Keep the process lean: concise notes, quick visual scans, and repeatable steps. Your freedom comes from dependable habits that prevent surprises.
Lubrication and Support
Lubrication and support are about keeping each component aligned and moving smoothly to prevent future issues. You’ll inspect contact points first, then choose lubrication methods that suit the material and load, avoiding excess. Apply a thin, even film to pivots, bushings, and mating surfaces, wiping away any residue to prevent gumming. Reapply at intervals that match usage and environment, not a rigid calendar. Maintain clear pathways for lubrication, preventing dirt intrusion with covers or shields when possible. For support structures, verify alignment fasteners are torqued to spec and braces aren’t bent or fatigued. Replace compromised elements promptly to preserve load distribution. Document maintenance moments, so future checks stay predictable and effective, reinforcing freedom through consistent, disciplined care.
Component Replacement Schedule
After you’ve aligned and lubricated moving parts, set a clear replacement schedule for components prone to wear, fatigue, or failure. A precise cadence helps you maintain performance and safety, while supporting your sense of freedom to operate confidently. Track component lifespan and plan replacements before symptoms appear, not after. Balance practical intervals with usage intensity, environment, and load patterns to avoid surprises. Document dates, part numbers, and inspection results for future reference. Adhere to manufacturer guidelines, but customize timing to your reality. Continuous evaluation keeps you in control and minimizes downtime.
- Monitor component lifespan to determine ideal replacement frequency
- Schedule proactive replacements before wear accelerates or failure occurs
- Record intervals and outcomes to refine your maintenance plan
Frequently Asked Questions
How Often Should I Replace Garage Door Bushings on Average?
Typically, you should replace garage door bushings every 5 to 7 years, depending on usage and climate. If you notice rough operation, unusual noises, or visible wear, don’t wait. Maintain bushing maintenance frequency by inspecting monthly and lubricating as needed. This care supports garage door longevity and prevents uneven stress on springs. You’ll keep smooth performance, safer operation, and more freedom to focus on other projects while you stay proactive.
Can I Replace Bushings Myself Without Professional Help?
Yes, you can replace bushings yourself if you’re careful. Gather DIY tools and choose appropriate bushing materials, then follow a methodical sequence: safely disconnect power, support the door, remove hardware, extract old bushings, install new ones, lubricate, reassemble, and test. Use the right tools for leverage and alignment. If you feel unsure at any step, pause and consult guidance. Your freedom comes from knowledge, preparation, and respecting safety while you DIY.
What Signs Indicate Urgent Replacement Beyond Wear?
Urgent replacement signs show up when noise, odd vibrations, or sticking force appear, louder than normal wear. You’ll notice bushing failure indicators like looseness, visible cracking, or metal-on-metal contact. If alignment shifts, or the part heats unusually, stop use and replace promptly. You want freedom, so don’t push past these cues. Trust careful inspection, document findings, and act on urgent replacement signs before damage spreads.
Do Different Spring Types Require Different Bushing Sizes?
Yes, different spring types often need different bushing sizes due to varied spring dimensions. You should check each spring’s diameter, coil count, and end geometry to guarantee bushing compatibility. Measure accurately, then consult manufacturer specs. If mismatched, don’t force fit. When in doubt, remeasure and compare, adjusting for tolerances. You want reliable performance, so precision matters and practical testing verifies fit before load.
Will Replacing Bushings Affect Door Balance and Opener Safety?
Yes, replacing bushings can affect door balance and opener safety. If bushings wear unevenly, door alignment shifts, causing extra strain on the opener and jerky operation. After replacement, test balance by lifting, watching for smooth, steady movement. Re-torque hardware as needed and recheck spring tension per manufacturer specs. If misaligned or unbalanced, adjust before use. This keeps opener performance reliable and guarantees you maintain safe, free movement.