Step-By-Step: Replacing a Faulty Cabin Air Filter
To replace a faulty cabin air filter, locate the housing behind the glove box or under the dash, using your owner’s manual as a guide. Gather a replacement filter, flashlight, and gloves, then turn off the vehicle and unplug accessory power. Open the housing, remove the old filter, and note its orientation. Install the new filter with airflow arrows correctly oriented, reseal the housing, and snap the cover back in place. Properly reassemble; more steps await if you keep going.
Locating the Cabin Air Filter

To locate the cabin air filter, start by checking your vehicle’s owner’s manual for the exact location, as it varies by make and model. You’ll often find it behind the glove box, under the dashboard, or near the center console. Begin by removing any panels or covers that conceal the access area; use a flashlight to spot clips, screws, or hinges. Note the orientation of the existing filter so you can reinstall it correctly. When you reach the filter compartment, slide out the old element carefully to avoid dropping dust into the intake. Inspect the air intake path for debris and wipe it clean with a damp cloth before inserting the new filter. Confirm that the seal sits flush to prevent unfiltered air from bypassing the filter. Reassemble everything, and test the blower at different speeds to validate proper airflow. This process identifies the filter location and guarantees clean air intake.
Tools and Safety Precautions
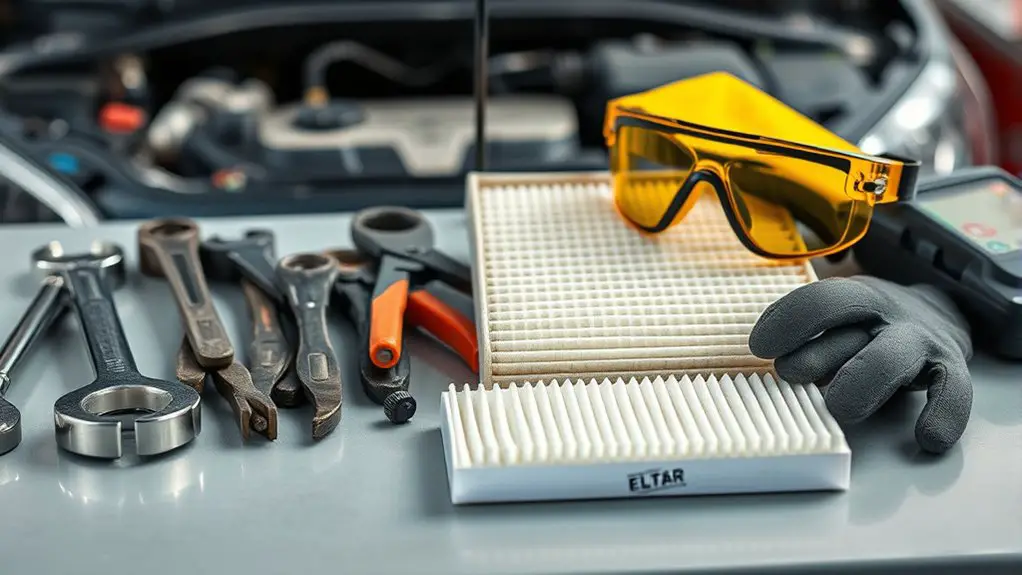
Tools and safety precautions are essential before you start: gather a clean work surface, a flashlight, and the right replacement filter, plus basic PPE like gloves and eye protection. Before you touch anything, switch off the vehicle, unplug the accessory power, and set the parking brake. Inspect tools for cleanliness and remove any debris from the workspace. Safety gear goes on: gloves to protect hands, and eye protection to guard against dust. Confirm proper ventilation in the area; cracked windows or a fan helps minimize exposure to allergens and particulates. Use the flashlight to inspect the housing and locate the seal. Keep track of screws or fasteners so you don’t misplace them. Read the filter orientation and confirm the airflow arrow matches the system. Do not force a tight fit; if resistance occurs, recheck the housing. When finished, dispose of the old filter per local guidelines and wipe surfaces to remove dust.
Signs Your Filter Needs Replacement
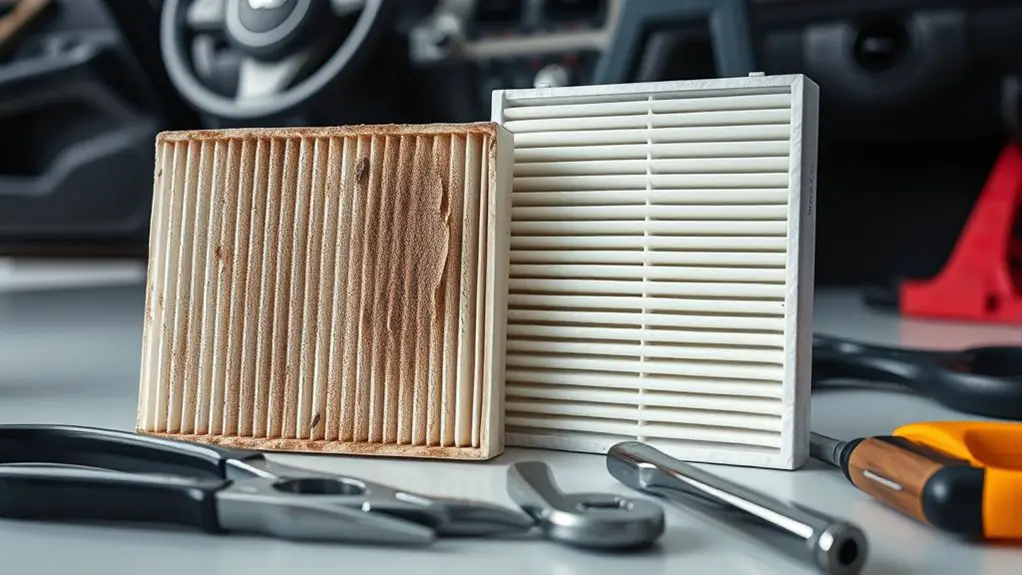
If you notice reduced airflow, that’s a common sign the cabin air filter is clogging and needs replacement. You may also observe louder blower noise, musty odor, or uneven air distribution. These cues point to deteriorating filter performance and declined air quality. Stay systematic: inspect for visible debris, listen for strain on the fan, and note any changes in scent when you run the system.
| Condition | Indicator | Action |
|---|---|---|
| Reduced airflow | Blower struggles, weaker gusts | Check filter and replace if dirty |
| Odor | Musty or stale scent | Verify seal and replace filter |
| Noise | Unusual whirring or clicks | Confirm filter seating, replace if needed |
If symptoms persist after replacement, reassess seal integrity and duct cleanliness. Prioritize air quality by maintaining fresh intake and avoiding over-pressurization. Your vehicle’s comfort and ventilation rely on timely filter maintenance and clear airflow.
Selecting the Right Replacement
When choosing a replacement cabin air filter, start by checking your vehicle’s owner’s manual or the vehicle’s build specifications to confirm the correct part number and filter type (panel or cylindrical) and any special features like activated carbon. You’ll want to verify three essentials to guarantee reliable performance:
Check your manual for the correct part number, filter type, and feature options to ensure proper fit and performance.
1) Filter types: confirm panel vs. cylindrical, size, and whether activated carbon or allergen filters are needed for your environment.
2) Compatibility checks: cross‑match part numbers with your trim level, engine, and HVAC system to avoid poor sealing or fitment issues.
3) Feature alignment: verify added options (odor control, anti-bacterial coatings) match your goals without sacrificing airflow or fit.
Proceed to shop with those criteria in mind, avoiding aftermarket parts that don’t show clear compatibility. Record the final part number and any warranty details. When in doubt, compare two reputable brands side by side to confirm you’re selecting the best balance of fit, function, and value.
Accessing the Cabin Air Filter Housing
To access the cabin air filter housing, start by locating the blower motor cover or glovebox area as described in your manual, then remove any panels or access doors that seal the housing. You’ll identify the filter housing behind or beside these openings, with clear access points for the tool-free or small-fastener method your vehicle uses. Inspect screws, clips, and hinges, and set aside removed components in a safe spot. Maintain a steady, deliberate approach so you don’t misplace parts or bend brackets. If you encounter resistance, double-check the alignment and return to the exact access points you opened. Avoid forcing components; loosening gradually prevents damage. Once the housing is surfaced, confirm there’s no debris blocking the entry. Note the orientation of the air path for when you install the new filter. This step guarantees a clean, efficient replacement process and lays a solid foundation for the rest of the procedure.
Removing the Old Filter
Carefully remove the old filter from the housing, noting its orientation so you can install the new one correctly. You’re about to clear a path for better air quality, so stay steady and deliberate as you work.
- Grip the filter edges and slide it straight out, avoiding tilting that could dislodge debris into the housing.
- Inspect the filter frame for cracks or stains, and set aside any debris that fell into the ducting during removal.
- Measure the filter size and confirm the replacement matches the air intake opening, ensuring correct airflow direction.
This step is about evaluating condition and preparing for maintenance without introducing new contaminants. Keep your workspace clean, wipe any dust from the housing rim, and store the old filter flat to prevent deformation. You’ll follow with the install, but for now focus on removal accuracy to support ongoing filter maintenance and air quality. Freedom in your routine comes from precise, purposeful actions.
Installing the New Filter and Reassembling
Slide the new filter into the housing with the airflow arrows facing the correct direction, then press it firmly until it seats evenly and the gasket sits flush all around. You’ll hear a click as it seats, signaling proper filter orientation. Next, reattach the housing cover, aligning it with the dashboard tabs. Securely fasten the securing clips until they snap into place, ensuring there’s no gap at the edges.
Table:
| Step | Action |
|---|---|
| 1 | Check filter orientation before seating |
| 2 | Press evenly, confirm gasket contact |
| 3 | Engage securing clips and reseal housing |
Notes: confirm no debris remains in the intake, and verify the door closes smoothly. If a clip doesn’t engage, reseat the cover and re-secure. You’re finished when the housing is solid and quiet, and the system is ready for a test run.
Frequently Asked Questions
How Often Should I Replace the Cabin Air Filter?
You should replace the cabin air filter every 12 months or 12,000 miles, whichever comes first. If you drive in dusty areas or have allergy concerns, shorten that to every 6–9 months. Check for a clogged, musty, or reduced airflow as signs it’s time. Track your replacement schedule and note the filter lifespan in your vehicle logs, so you stay ahead of performance drops and maintain clean air intake.
Can I Clean a Dirty Cabin Air Filter Instead?
Sure, you can’t truly clean a dirty cabin air filter enough to restore performance. Remove it, inspect for damage, and replace if degraded; otherwise, you can try light cleaning as a last resort. For most filters, cleaning methods aren’t reliable. Regarding filter maintenance, stick to replacement on a set schedule. If you insist on attempting cleaning, use a gentle vacuum and minimal washing, then dry completely before reinstalling.
Will a Dirty Filter Affect AC Efficiency or Odor?
Yes, a dirty filter can reduce AC efficiency and worsen odor. It restricts airflow, makes the compressor work harder, and lets stale air linger, impacting air quality. You’ll notice less cooling and longer cycles. Replace it to restore performance and odor control. This also protects filter lifespan by minimizing strain. Stay practical: check monthly, swap when dirty, and keep a fresh one on hand for freedom to ride with clean, efficient climate control.
Is It Safe to Drive With a New Filter Installed?
Yes, it’s safe to drive with a newly installed filter, as long as the installation is correct. Before you hit the road, double‑check the filter orientation, seals, and housing—filter installation should be snug with no gaps. If you notice odd smells or reduced airflow, pull over and inspect. Keep driving safety in mind: replace filters on schedule, and don’t operate the HVAC system with a loose or dislodged filter.
Do Different Vehicles Use Different Filter Types?
Yes, different vehicles use different filter types. You’ll need to check filter compatibility against your vehicle specifications. Start by locating your owner’s manual or door jamb sticker, then confirm the exact part number. Don’t assume a universal size fits all—airflow and housing shapes matter. If you’re unsure, consult a parts catalog or dealer. When you match the specs, you’ll guarantee proper fit, performance, and longevity.