Seasonal Maintenance to Prevent Dirty Filters in Your Work Van
Seasonal maintenance keeps your work van’s air, cabin, and fuel filters from getting clogged. Start with a quick visual check for dirt, moisture, or cracks, then test for air flow and pressure drop. Spring and summer demand clean intake and cabin filters for better airflow and reduced odors; autumn traps dust and pollen, so inspect seals and housings. In winter, protect against moisture and frost, and replace as needed. Stick to a simple log—you’ll uncover more practical, step-by-step tips down the line.
Understanding How Dirty Filters Affect Your Van’s Performance

Dirty filters restrict airflow and reduce system efficiency, so when they’re clogged, your van has to work harder to perform the same tasks. Here’s the practical breakdown: you’ll notice slower acceleration and longer warmups, especially in hot weather or on hills. Air intake restrictions reduce engine efficiency, leading to slightly higher fuel use and more vibration as a consequence. In the cab, HVAC performance drops, so comfort and visibility can suffer during long shifts. The key is understanding filter types and how they affect performance impact. Some filters block more air than others, altering air-fuel ratios and causing minor but measurable power loss. Routine inspection helps you catch a decline before it becomes a drag on productivity. Prioritize consistent replacement or cleaning per your van’s manual, track mileage, and be mindful of unusual sounds or odor. Keep the airflow clear, maintain freedom of movement, and your workday stays smooth.
Key Signs Your Air and Fuel Filters Need Attention
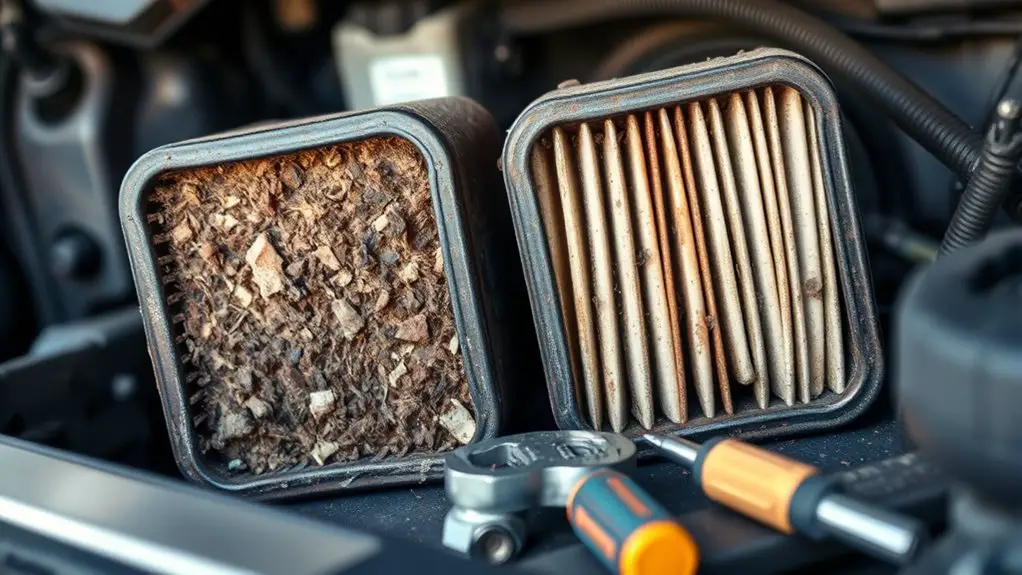
If you notice a clog, start with a quick check of the air and fuel filters and replace them if the flow is restricted. You’ll also see efficiency dips and rough idle or reduced acceleration as a clue to inspect both filters. Use clear maintenance timing cues—follow your van’s service intervals and replace filters on schedule to prevent performance drops.
Filter Clog Indicators
Wondering how to spot filter trouble early? You’ll notice indicators that aren’t dramatic, but telltale. Start with your rides feeling slower, a stumble during acceleration, or a slight surging at highway speed. Listen for a whine from the intake or an unfamiliar rattle when you push the throttle. Check the dashboard for a low-pressure or warning light related to the air or fuel system. Visual and tactile cues matter too: reduced airflow from vents, a dusty or cloggy intake tube, or a dirty mass air flow sensor. Habitual inspections save you future downtime. Use these signals for proactive filter maintenance and clog prevention, documenting mileage and replacing components on schedule. Stay disciplined, keep the system breathing easy, and your work van stays ready.
Air/Fuel Efficiency Drops
Air and fuel efficiency can take a hit long before you notice a warning light, so pay attention to subtle changes in performance. You’ll feel it as fuel consumption climbs and power drops, signaling potential air/fuel delivery issues. Track these signs and act before bigger problems crop up.
1) Noticeable throttle lag and weaker acceleration
2) Higher fuel consumption during steady highway cruising
3) Rough idle or misfires at low speeds
4) Degraded performance under load, like hauling gear or climbing grades
If you observe any of these, inspect intake seals, filter condition, and ignition timing. Don’t overlook hose leaks or vacuum lines. Addressing air and fuel delivery early reduces performance degradation and keeps your system efficient, so you stay free to focus on the road ahead.
Maintenance Timing Cues
As performance hints show up, it’s time to zero in on maintenance timing cues for your air and fuel filters. You’ll notice subtle signs that tell you when to act: slower acceleration, reduced MPG, and a rough idle. Check for increased engine noise or smoke during startup, which can signal clogging. Use a steady, visual check routine—pull air and fuel filters, inspect for dark, gritty residues, and note moisture or mold. Track change intervals against your maintenance schedule, not just miles. If you’re unsure, test for pressure drop across the filters to gauge restriction. When signs appear, replace or clean as needed to protect filter lifespan. Keeping a clear maintenance schedule helps you maximize performance and avoid unexpected costs.
Seasonal Checklist: Spring Cleaning for Filters

Today, start with a quick spring filter inspection to identify debris and signs of wear. Remove loose debris, then compare OEM and aftermarket filter options to match your van’s needs. We’ll cover how to choose, install, and maintain filters for peak performance.
Spring Filter Inspection
Spring is a good time to inspect and replace fleet filters before the heavy use of the season begins; start with the engine air, cabin, and fuel filters to prevent reduced performance and fuel economy. You’ll approach spring cleaning with a tight plan, focusing on visibility into filter types and their condition. Inspect housings for cracks, look for leaks, and note any irregular airflow signs. Replace filters that show excessive dirt, swelling, or damage, and keep a simple maintenance log. Use these steps to stay ahead of season demands:
- Check engine air and cabin filters for dirt and wear, replacing as needed.
- Inspect fuel filter integrity and replace if you notice reduced pressure.
- Confirm seals are intact and corrosion-free.
- Store used filters properly and update your maintenance checklist.
Debris Removal Tips
Now that you’ve checked and refreshed the filters, it’s time to focus on debris removal. Begin with a quick exterior sweep of the van’s intake area to trap larger bits before they enter the system. Use a soft brush or compressed air to dislodge dust from vents, then wipe surfaces with a damp, lint-free cloth. Prioritize debris cleanup near the engine bay and under the hood—motionless debris can shift during drives and cause clogs. Empty any nearby dust pans and bags to prevent recontamination. Inspect lint screens and replace damaged components promptly to safeguard filter protection. Schedule routine checks after each long trip or dusty job site. Keep a dedicated rag and brush handy for instant maintenance, preserving airflow and extending filter life.
OEM Vs Aftermarket Filters
When deciding between OEM and aftermarket filters, consider fit, filtration efficiency, and long-term cost. You want reliability without overpaying, so balance these factors with your van’s needs. Here’s a practical way to compare:
- OEM filter advantages: guaranteed fit, consistent filtration, service history alignment, resale value retention.
- Aftermarket filter considerations: price advantage, broader availability, varied quality; research brand reputation and warranty.
- Fit and compatibility: verify part numbers, mounting style, and seal integrity before installation.
- Total cost of ownership: factor replacement intervals, potential labor savings, and any franchise restrictions.
Summer Tips to Preserve Air Quality and Efficiency
Keep your work van running clean and efficient by starting with a simple, proactive routine: inspect the air filters, cabin and engine, and replace any that are dirty or clogged before the hottest days hit. In summer, focus on preserving air quality and performance without slowing you down. Start with the cabin filter: remove debris, rinse if allowed, and replace if it’s saturated. For the engine, check the intake and turbo paths for dust buildup, and verify the filter is intact and properly seated. Maintain proper airflow by tightening hoses and avoiding leaks, then confirm the HVAC blows evenly on all speeds. Park in shade when possible to reduce heat soak during maintenance. Schedule a midseason check to validate sensor readings and refrigerant levels aren’t drifting. Remember summer air thrives on clean passages and steady filtration; regular, quick filter cleaning keeps efficiency high and emissions low.
Autumn Prep: Guarding Against Dust and Pollen
Autumn prep starts with sealing out dust and pollen before they sneak into your van’s cabin and engine bays. You’ll guard against autumn allergens by building a simple maintenance schedule that targets filters, seals, and air paths. Stay practical, keep it tight, and maintain your sense of freedom on the road.
1) Inspect and replace cabin air filters before dust season hits.
2) Seal door gaps and vent openings with weatherstripping or tape to reduce ingress.
3) Vacuum and wipe dash crevices to remove hidden pollen reservoirs.
4) Change engine air filters on the recommended cadence to sustain airflow and efficiency.
This approach is deliberate, not dramatic. It fits a concise routine you can trust, without slowing your momentum. The goal is smoother air, fewer irritants, and consistent performance.Remember to log autumn allergens and maintenance schedule updates so your van stays ready for ongoing, open-road work.
Winter Readiness: Maintaining Filters in Cold Weather
Winter can be rough on filters, so you’ll want a straightforward plan to keep them performing in freezing conditions. In cold weather, you stay sharp about filter maintenance by keeping intake areas clear, using protectors where applicable, and scheduling quick checks before each shift. Start with a visual scan for debris, crusted dust, or ice buildup, then wipe and reseal as needed. Make certain seals stay pliable; replace if cracking appears. Rotate filters when you notice pressure changes or reduced airflow, and store spare units in a dry, warm spot to avoid moisture damage. Document each check so your van remains predictable and reliable.
| Quick checks | Actions |
|---|---|
| Clear intake area | Remove debris, remove ice if present |
| Inspect seals | Confirm pliability, replace if cracking |
| Airflow test | Verify steady, unobstructed flow |
| Spare filters | Keep dry, accessible for rapid swap |
Step-by-Step Guide to Inspecting and Replacing Filters
To inspect and replace filters efficiently, start with a quick, organized check: confirm accessibility, gather replacement filters, and have a clean workspace. You’ll move fast if you know what you’re dealing with and keep a simple rhythm.
- Identify filter types: cabin, engine, or HVAC, and locate the correct replacements.
- Check replacement frequency: follow vehicle manufacturer guidelines and interpret signs like reduced airflow or odor.
- Inspect condition: look for cracks, residue, or bending; if in doubt, swap.
- Execute replacement: remove old filter, clean housing edges, insert new filter firmly, and reseal.
Tips to finish: label the date, note mileage, and reset any indicators. By choosing the right filter types and sticking to a sensible replacement frequency, you maintain clean airflow and performance. This approach respects your freedom to perform maintenance on your terms, without excess chatter. Keep it tight, repeat as needed, and you’ll stay ahead of dirty filters.
Tools and Supplies for Quick Filter Maintenance
Setting up a quick-filter routine starts with the right tools and supplies, so you can work fast without hunting for items. Keep a compact kit in your van: a microfiber cloth, a soft brush, and a can of compressed air for light dust. Add a small reusable container for old filter debris and spare gaskets. For filter cleaning, include a spray bottle with soapy water or a dedicated cleaner, plus a disposable wipe pack for wet spots. Maintenance tools matter, too—basic screwdrivers, pliers, and an adjustable wrench cover most tasks without slowing you down. A torque wrench is handy if you’re resealing housings, and a flashlight helps you spot grime in tight spaces. Label your supplies for quick access, and rotate stock so cleaners stay effective. This setup minimizes downtime while keeping your van’s filters clean and ready for service.
Best Practices to Extend Filter Life Between Services
Keeping up with a quick-filter routine from the previous setup sets you up for longer filter life between services. You’ll protect filter longevity by sticking to solid maintenance techniques and disciplined checks, not guesswork. Focus on simple habits that maximize efficiency without slowing you down.
1) Inspect and clean the intake area weekly to reduce debris intake and wear.
2) Replace or clean pre-filters during routine service to extend the main element’s life.
3) Monitor vibration and mounting; secure connections to prevent abnormal wear and noise.
4) Schedule proactive checks after heavy use or dusty conditions to catch issues before they escalate.
These steps are practical, concise, and designed for freedom-loving crews who value reliability. By following these maintenance techniques, you minimize downtime and extend service intervals, keeping your vehicle running smoothly and your workflow uninterrupted. Aim for consistent care, not perfection.
Frequently Asked Questions
How Often Should I Replace Cabin Air Filters in a Work Van?
Answering now: you should replace your cabin air filter about every 15,000 to 25,000 miles, or once a year if you don’t reach that range. Irony aside, neglecting it costs you airflow and comfort. In practical terms, monitor cabin filter lifespan and track filter replacement frequency, especially if you drive dusty routes. If you notice reduced airflow or odors, swap sooner. Keep it concise, functional, and aligned with your free-spirited, efficient van life.
Do Diesel Vans Require Different Filter Maintenance Than Gas Vans?
Diesel vans do have filter differences and diesel maintenance isn’t identical to gas. You should expect heavier particulate exposure and use lab-tested, high-efficiency filters; check for tighter seals and more frequent changes in dusty service. Track filter condition, replace per manufacturer intervals, and inspect for oil or soot buildup. Stay proactive: document mileage, note any performance changes, and carry spare filters. This approach keeps airflow steady and protects your engine’s life.
Can Dirty Filters Affect Fuel Efficiency in a Work Van?
Yes, dirty filters can hurt fuel economy in a work van. When filters clog, your engine works harder, increasing fuel consumption. To keep performance steady, follow practical maintenance tips: replace or clean air and fuel filters on schedule, check for leaks, and inspect the intake system. Stay disciplined with regular maintenance tips, monitor mileage, and don’t ignore warning lights. You’ll preserve fuel economy and enjoy smoother driving freedom across your routes.
Are Factory Filter Replacements Better Than Aftermarket Options?
“Time is money,” and you’ll want the right pick. Factory benefits usually beat aftermarket drawbacks in consistency, fit, and warranty coverage, so factory filters often perform better long-term. Yet some aftermarket options can save you money and meet specs if you choose trusted brands. You decide based on price, vehicle requirements, and maintenance goals. If you value reliability, start with factory; if you chase alternatives, compare specs carefully and document changes.
What Costs Are Typical for Seasonal Filter Maintenance?
Typically, filter replacement costs run from $20 to $60 per filter, plus labor if you don’t DIY. For seasonal maintenance, budget about $100 to $250 per year for a single van, depending on filter type and frequency. Track expenses in your maintenance budget, and plan for extra for premium filters or belts. You’ll keep airflow steady, extend component life, and avoid downtime. Stay methodical, timely, and flexible so you maintain freedom and reliability.

