Step-By-Step: Replacing a Broken Hood Latch
To replace a broken hood latch, start by diagnosing the issue with both interior and exterior releases, and inspect the latch, cable, and brackets for rust, wear, or misalignment. Gather a metric toolkit, lubricant, and safety gear, then disconnect the battery if needed. Remove the old latch, compare the new part for fit, and install it with the bolts tightened evenly. Reassemble, adjust for even gaps, and test the release; more steps await to guarantee a secure, smooth finish.
Diagnosing a Stuck Hood Latch
A stuck hood latch can prevent you from opening the hood, so start by confirming the issue. You’ll test the interior release, then the exterior latch, to locate where the resistance or failure originates. Begin with the hood slightly ajar if possible, and gently press the latch area while pulling the release. If it doesn’t budge, move to the second step: inspect the cable, linkage, and mechanism for rust, corrosion, or kinks. Look for a misaligned or bent latch hook that binds against the striker. Apply a small amount of lubricant to moving surfaces and reattempt operation. If you can’t disengage the latch from inside, avoid forcing it. Document symptoms, such as sticking, squeaking, or inconsistent release. Use the troubleshooting tips to decide whether the issue is the latch itself or the linkage. Note any unusual resistance and plan for a replacement if the latch won’t release under controlled attempts.
Tools and Safety Precautions
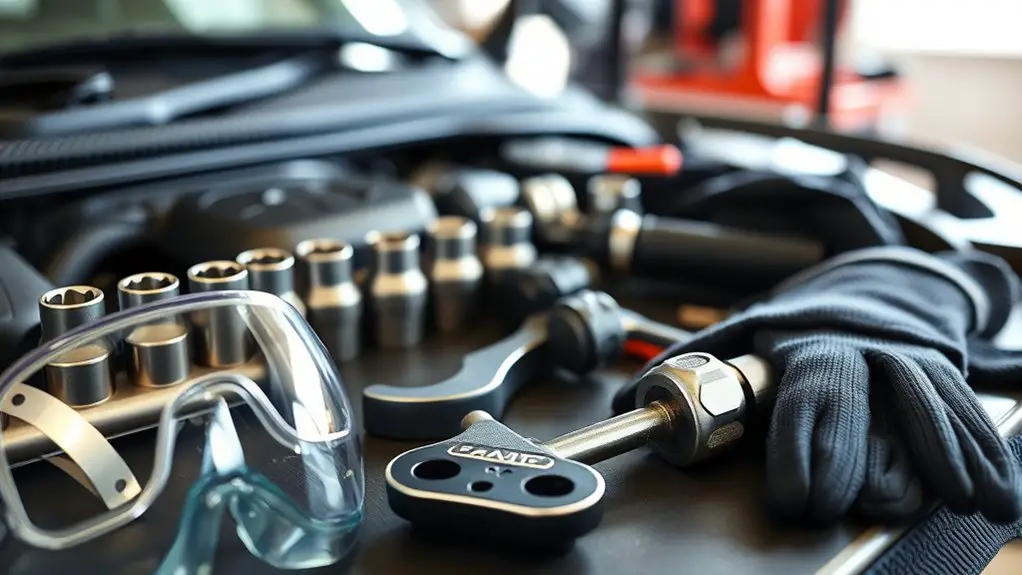
Tools you’ll need are straightforward, and safety comes first: wear eye protection, gloves, and have a fire extinguisher or first-aid kit within reach. In this section, you’ll outline safety gear and tool selection before touching any components. Start with a quick assessment: clear space, good lighting, and a stable vehicle position. Choose essential safety gear—eye protection, gloves, and a dust mask if debris is present. Then plan your tool selection: a basic metric socket set, screwdrivers, needle-nose pliers, a trim removal tool, and lubricating spray. Keep a magnetic tray for small fasteners to avoid drops. Use a flashlight or headlamp to illuminate tight spots. Follow standard precaution: disconnect the battery if you’ll reach electrical connectors, work slowly, and avoid forcing parts. After loosening, pause to confirm latch movement is safe before final removal. This approach minimizes surprises and keeps the job controlled and efficient.
Locating the Hood Latch Batch Components

To locate the hood latch components, start by identifying the latch housing inside the engine bay and tracing the actuation cable or rod to the hood latch itself. From there, map how the latch mounts to the support structure, noting any brackets, springs, or fasteners. You’ll want to confirm whether a single or dual latch system is present, as this affects removal and replacement steps. Assess the surrounding heat shields, wiring, and nearby components to guarantee clean access without interference. Document the path of the cable or rod, including any routing guides or clips you’ll need to reattach. When you examine latch assembly types, compare how each style engages the striker and how pull force translates into release. Pay attention to hood latch materials, noting metal alloy or plastic components, and check for corrosion or wear. This quick survey keeps you prepared for a smooth swap and helps you choose compatible parts.
Inspecting for Common Failure Points
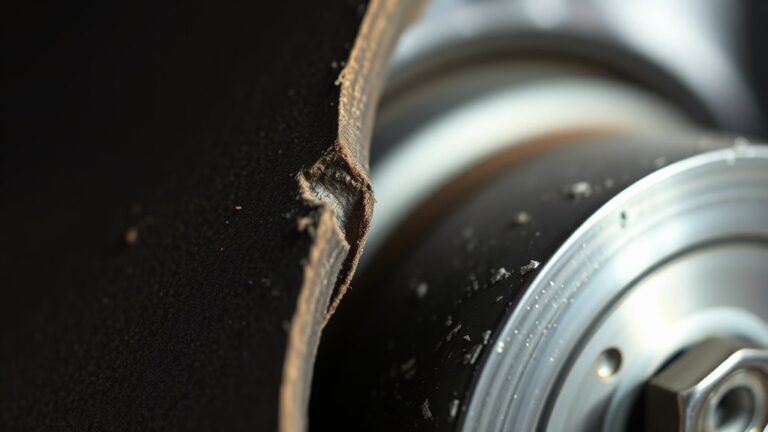
Start by visually inspecting the latch housing, cable or rod, and mounting brackets for obvious wear, breaks, or corrosion. You’re hunting for signs that creep in over time: frayed cables, stretched rods, bent brackets, or loosened mounting points. Check fasteners for looseness and rust, noting any movement that suggests future failure. Observe the latch keeper and strike alignment; misalignment often causes intermittent release or sticking. Inspect the return spring or tension mechanism if visible, looking for fatigue or deformation. Look for hardened lubricant, seized pivots, or dirt buildup that hampers action. Pay attention to wear on the latch pawl and catch surface, which can indicate reduced engagement. Document common wear patterns you find, and assess whether they’re repairable or symptomatic of broader age-related decline. Prioritize latch maintenance tasks that restore reliability: tightening fasteners, cleaning contacts, re-lubricating where appropriate, and replacing components showing wear beyond safe limits. This inspection sets up confident, freedom-driven maintenance decisions.
Testing the Hood Release Mechanism
To begin testing, you’ll verify latch engagement to guarantee the hood securely latches when closed. Next, you’ll test the release safeties to confirm they function without sticking or false triggering. Finally, you’ll check cable tension to ensure smooth operation and consistent release effort.
Verify Latch Engagement
Begin by testing the latch engagement with the hood closed and the release handle or lever operated. You’ll confirm the latch seats fully and releases smoothly without binding. Cycle the hood multiple times, noting any sticking points or misalignment. Compare engagement against your latch mechanism types and note if the action feels consistent across attempts. If you detect partial engagement, adjust only as needed to guarantee full catch without forcing. Record results for engagement testing methods and adjust hardware or alignment before proceeding. Ascertain the hood stays secure when latched, and verify that the release returns to rest after each cycle. If issues persist, revisit mounting or striker alignment.
| Step | Action | Result |
|---|---|---|
| 1 | Close hood, operate release | |
| 2 | Cycle hood several times | |
| 3 | Inspect latch seating | |
| 4 | Confirm release returns |
Test Release Safeties
Verify the hood release mechanism is safe to operate before full reassembly. You’ll test release safeties by simulating access and confirming the pedal or lever engages without binding. First, make certain the latching path is clear and the hood is supported. Squeeze or pull the release control as designed, then watch the hood rise slightly to its initial safety gap. If it doesn’t budge or sticks, stop and recheck alignment and hardware. Next, rearm the safety catch and repeat the operation from multiple angles to confirm consistent engagement. Confirm that the release mechanism returns to locked after each test, and that the hood won’t spring open unexpectedly. Document any deviations, focusing on safety features and proper release mechanisms. Proceed only after all tests pass.
Check Cable Tension
Check cable tension by manually testing the hood release lever and ensuring the cable moves smoothly with minimal play. You should feel instant response when pulling the lever, with no binding or lag. If you notice sticking, wobble, or hard spots, stop and inspect the sheath, housing, and mounts for kinks or misalignment. Look for cable wear near the latch and at the lever end, replacing any frayed sections as needed. Then recheck motion; it should return to rest quickly without staying taut. For tension adjustment, loosen the mounting screws slightly, slide the cable housing to increase or decrease slack, and retighten evenly. Verify full travel from release to latch, and confirm the hood pops cleanly. Document results and proceed if performance remains stable.
Removing the Damaged Latch Assembly
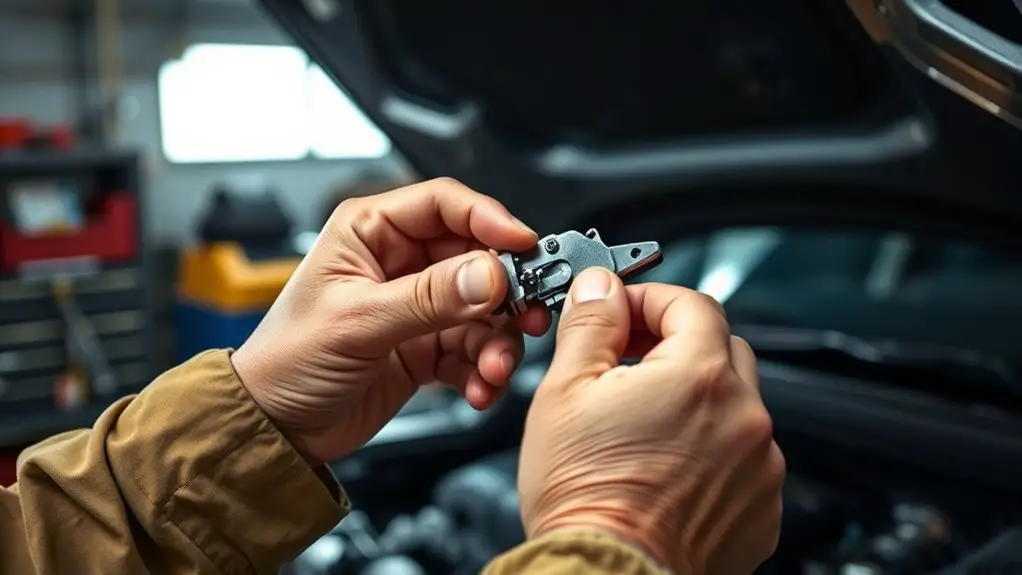
To remove the damaged latch assembly, first disconnect the vehicle’s battery to prevent any short circuits, then locate the hood latch housing under the hood edge and remove any surrounding fasteners or clips. You’ll want to note how the latch sits and how the mounting bracket aligns with the support structure. Next, free the latch from the housing by carefully prying or unbolting, keeping finger pressure steady to avoid spring-release surprises. Inspect the linkage for bent or stretched ends; detach the cable connector if required, and set aside with the screws in a labeled tray. Record any obvious signs of damage for later comparison, practicing damaged latch identification so you know what failed. When the latch frees, test movement within the housing to confirm it’s not binding. If the inner mechanism shows excessive wear, prepare to remove the entire assembly for replacement. Maintain a clean workspace and bag fasteners for reassembly.
Choosing the Right Replacement Latch
When you choose a replacement, start by checking fitment—confirm the latch matches your hood latch opening and mounting points. Consider material and finish to resist corrosion and match the existing hardware, so it stays reliable and looks consistent. If in doubt, compare by model and keep the original’s specifications as your baseline.
Fitment Considerations
Choosing the right replacement latch starts with matching the latch type, size, and mounting pattern to your hood and striker. You’ll verify latch compatibility issues by comparing the new part’s geometry to the factory latch, ensuring mounting holes align and the release mechanism operates freely. Check vehicle model specifications to confirm that the latch fits your year, make, and trim level, then review any required brackets or adapters. Measure striker height and hood gap to prevent binding or intermittent locking. Consider whether your hood supports universal versus vehicle-specific designs. Confirm the latch’s pull cord, lock, and release lever travel match the original. Avoid guessing; select a latch labeled for your exact vehicle model and hood setup, and document part numbers for future reference.
Material and Finish
Material and finish choices impact both durability and function. You’ll compare latch materials to match strength, corrosion resistance, and weight, then weigh finish options for weather tolerance and ease of care. Start by identifying alloy steels for stiffness, stainless options for rust resistance, and zinc or aluminum blends for lighter use. Consider heat treatment, hardness, and compatibility with the hood latch mechanism to prevent stiffness or creep. Next, evaluate finish options that resist corrosion and fingerprints while staying visually discreet. Black oxide, zinc plating, and powder coatings vary in wear and repairability; pick a finish that suits your climate and exposure. Finally, document compatibility with your hood latch, ensuring proper engagement, smooth operation, and freedom from interference during opening and closing.
Installing the New Hood Latch
First, align the new hood latch with the mounting holes and start a few securing bolts by hand to confirm proper threading, then snug them with a wrench without forcing anything. You’ll verify latch compatibility by confirming the striker, cable, and linkage align smoothly with the latch’s pawl. If any mismatch shows, pause and recheck part numbers before proceeding. Installation techniques call for clean, dry threads and light thread-locking compound only when specified by the manufacturer. Tighten bolts evenly in a crisscross pattern to avoid misalignment. With the latch seated, test operation by closing the hood slowly and pulling the release handle from inside the car to confirm full catch and release without binding. If resistance appears, back off, re-align, and re-tighten. Do a final visual check: gap uniformity, paint clearance, and that the hood returns to full closed position with a firm, audible latch click. You’ve preserved function and freedom with precise, deliberate steps.
Reassembling and Adjusting for a Secure Fit
Align the latch with the striker for proper alignment, then tighten mounting hardware to remove play. Check for even tension and small gaps along the edges, adjusting the latch position as needed to eliminate binding. Test the hood closure by lowering and lifting the hood to confirm a secure fit before finalizing the setup.
Alignment for Latch
To guarantee the latch seats correctly, start by cleanly aligning the striker, latch assembly, and mounting points before reassembly. You’ll want precise contact surfaces to make sure even bite and smooth operation. Begin with light, deliberate adjustments to the latch housing, then test fit against the striker. Check that the latch button travel feels firm without sticking. Make small alignment adjustments, focusing on lateral and vertical planes, until the latch engages the striker with minimal effort. Documented steps include confirming the hitch point aligns with the hood edge and that mounting bolts don’t bind. During this process, maintain consistent torque and avoid over-tightening. When you’re satisfied, perform a full lock-unlock cycle to verify latch positioning and alignment adjustments, making certain reliable hood closure.
Tension and Gaps
With the hood aligned, focus on tension and gaps to lock in a secure fit. You’ll perform tension adjustment by evenly tightening the latch linkage and hood latch screws in small, measured steps. Check that no parts bind as you move the hood monitorily, then verify smooth operation through full-range opening and closing. Next, conduct a precise gap analysis: eyes on the panel edges, eyeballing uniform seams, and confirming consistent clearance around the hood. If you detect high spots or misalignment, loosen and re-seat components, then re-torque to spec. Maintain equal pressure across the latch area to avoid binding. Document any deviations and recheck after replacements. When gaps sit cleanly and tension feels firm, you’ve established a secure, reliable closure.
Test After Fit
After reassembling the hood components, you’ll recheck the fit by test-running the latch and hood through full open-close cycles, noting any binding, gaps, or uneven pressure.
- Confirm latch durability factors by observing smooth engagement and return, with no sticking mid-travel.
- Verify hood safety features align, ensuring the latch catches firmly and the hood sits flush at rest.
- Record any deviations and adjust mounting, alignment shims, or striker position to achieve even force distribution.
If you notice binding or uneven pressure, tweak adjustment screws in small increments, then retest. A precise fit prevents hood flutter and accidental release. When satisfied, recheck alignment across the entire hood edge and confirm consistent latch feel from multiple positions.
Verifying Hood Alignment and Latch Performance
Once you’ve aligned the hood, test the latch by closing it gently and noting how smoothly it engages; if you feel any resistance or misalignment, adjust the hinges or latch position until the hood drops fully into place and stays closed without you needing to apply extra force. Verifying hood alignment and latch performance is a quick, practical check you can complete in minutes. First, operate the hood a few times, listening for any creaks or catching sounds. Observe the gap around the hood edge; it should be even and consistent. If the latch doesn’t engage cleanly, recheck the striker alignment and verify the hood latch travels freely without sticking. Confirm the health of return springs and linkage, cleaning any debris. Finally, perform a light bounce test at the latch area to verify it remains secure under slight vibration. Document any alignment issues and correct them before road use.
Frequently Asked Questions
Can a Broken Hood Latch Affect Engine Cooling or Safety Sensors?
“Hold your horses.” A broken hood latch can’t directly cool the engine, but it can cause engine overheating if the hood won’t stay shut during driving. It also compromises hood safety, increasing the risk of the hood flying up and obstructing your view. You should inspect mounting points, cables, and latching mechanism, then replace or repair promptly. Don’t ignore warning signs, test the latch, and verify the hood sits secure before driving for peace of mind.
Will Hood Latch Replacement Require Professional Alignment Tools?
Yes, you’ll likely need alignment tool necessity and professional repair considerations to guarantee a proper hood latch replacement. You should assess whether your vehicle requires a crowbar-free alignment or a simple bolt-and-pin setup, and decide if you’ll proceed yourself or call a shop. If you pursue DIY, follow precise measurements and test the latch’s throw. If alignment feels off, stop and consult a pro to avoid safety issues.
How Long Does a Typical Hood Latch Replacement Take?
Usually about 1–2 hours, depending on your car and tool access. You’ll work through prep, remove, install, and test. You’ll want to follow hood latch types to pick the right replacement. Use latch installation tips to align and secure properly, then test with the hood open and closed. If anything feels off, pause and recheck. You’ve got this—steady hands, clean seams, quick adjustments, and you’ll finish confident and free.
Are Aftermarket Latches as Reliable as OEM for Safety?
Yes, aftermarket latches aren’t assured to match OEM for safety. You should expect trade-offs in aftermarket quality and latch durability, and verify specs, certifications, and fit before buying. You’ll want to compare material grade, vehicle compatibility, and testing data, then inspect and test after installation. If in doubt, choose OEM or reputable brands. Research warranty and service options, and document any issues to guarantee you stay aligned with your safety standards.
Can I Reuse Bolts From the Old Latch Assembly?
Yes, you can reuse bolts from the old latch assembly, but inspect them first. Check for stripped threads, corrosion, or bent shanks, and replace any doubt with new hardware. When reassembling, torque to spec and use thread-locking compound if recommended. Keep handling of reusing hardware concise: make certain the latch assembly seats properly, verify hood alignment, and test the latch several times before driving. If you’re unsure, don’t risk it—safety first.