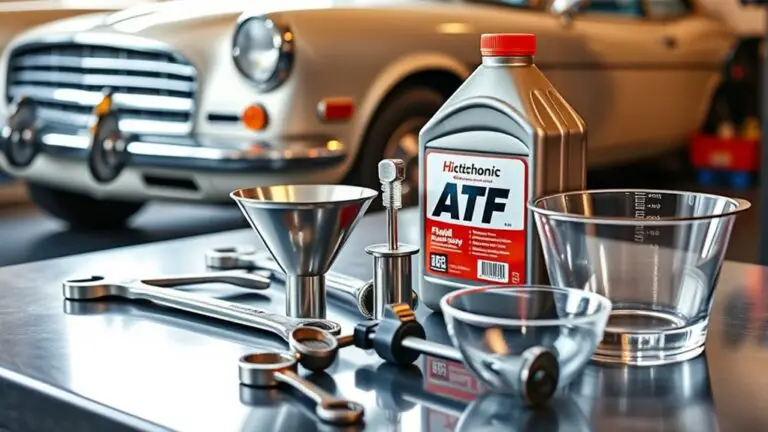
Tools You Need to Service Sump Plug Seal at Home
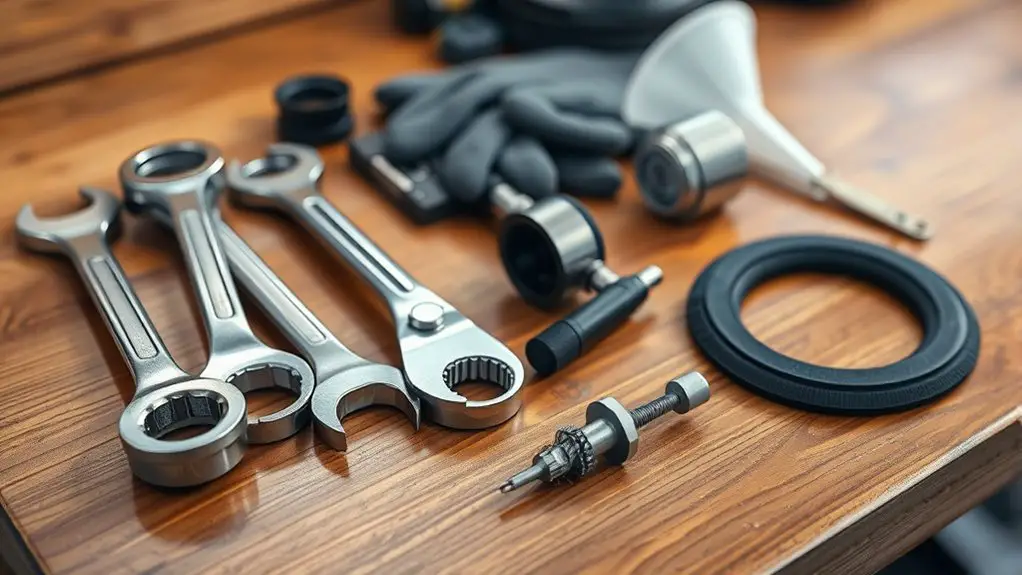
You’ll want a practical toolkit to service a sump plug seal at home. Gather inspection tools, wrenches and a torque wrench, plus a ratchet and sockets for awkward access. Keep sealants, gaskets, and a replacement plug on hand, and use degreaser and biodegradable cleaners for grime. Lubricants and anti-seize help with threads, while marking tools guarantee accurate alignment. Have testing gear to confirm seal integrity. With the right setup, you’ll handle the job efficiently and confidently. More tips await you.
Tools for Inspecting Sump Plug and Seal
To inspect the sump plug and seal, gather a few simple tools: a flashlight, a mirror if accessible, a small magnet or pick, a putty knife or flathead screwdriver, and a torque wrench or adjustable wrench for the plug. You’ll approach the task with calm, deliberate steps, keeping gear organized and within reach. Begin by lighting the area and visually tracing the plug area for signs of damage or leakage. Use the mirror to peek behind any obstruction and confirm seal seating. A magnet or pick helps free any tramp metal or debris without prying. The putty knife or screwdriver lightly tests the gasket edge for softness or tearing, noting any irregularities. Finally, apply the correct torque to the plug with the wrench, verifying it sits evenly and seats fully. Document any sump plug issues and perform a seal inspection promptly to maintain reliability and freedom from surprise leaks.
Essential Wrenches and Torque Gear

When you’re working on the sump plug, you’ll want a dependable set of wrenches and torque gear that match the plug size and gasket type. Choose wrench types that fit tight angles and avoid rounding. A combination of metric and SAE opens lets you cover common plugs without swapping tools mid-task. Include a torque wrench suitable for small fasteners, with a calibrated range near the manufacturer’s torque specifications. Use a ratchet and socket set for awkward access, plus a breaker bar for stubborn loosenings—but stay mindful of force limits. Keep eye on the plug’s seating surface and gasket contact; torque should secure without over-tightening. Document torque specifications on the project sheet and double-check before reassembly. Maintain clean, dry tools to prevent corrosion. Organize tools in a labeled tray, so you can grab the right wrench types quickly in future maintenance.
Sealants, Gaskets, and Replacement Plugs
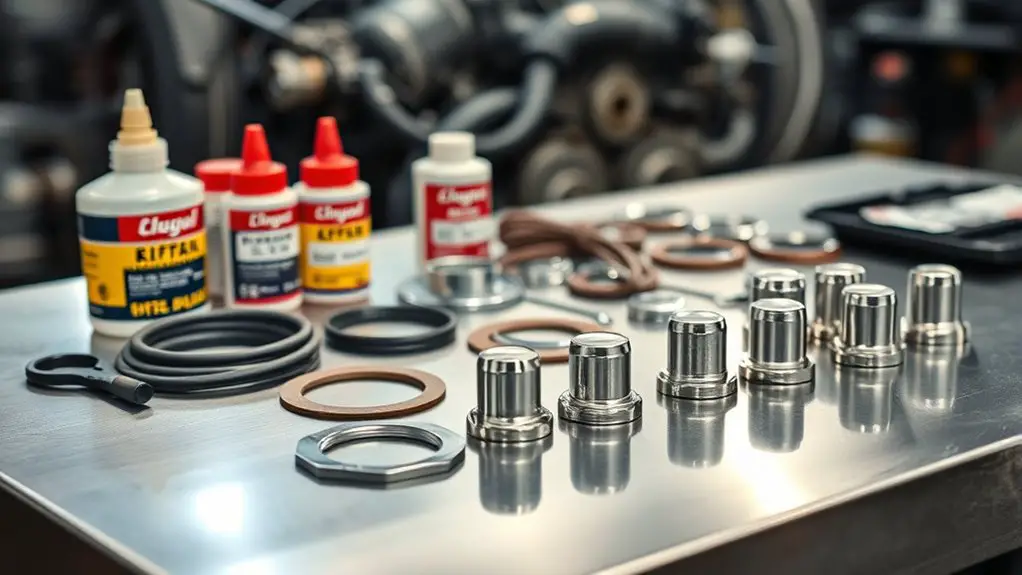
When you choose sealants, pick a product compatible with your sump material and the plug type you’re using. Consider gasket materials that resist oil, moisture, and temperature changes to maintain a tight, leak-free seal. We’ll compare common sealant options and gasket fabrics next, so you can match them to your replacement plugs and service needs.
Sealant Choices
Sealant choices break down into three practical options: sealants, gaskets, and replacement plugs. You’ll pick based on compatibility, temperature, and vibration tolerance, then tailor your approach to the sump plug’s actual demands. For sealant types, consider density, cure time, and solvent resistance to guarantee a lasting seal. When you assess application techniques, prepare surfaces cleanly, apply evenly, and avoid excess that can trap debris.
1) Sealant-first approach: select a proven compound, then apply with steady pressure to spread a uniform bead.
2) Gasket-backed efficiency: use pre-cut gaskets where fit permits, guaranteeing edge alignment and compression.
3) Replacement-plug confidence: install plugs with proper torque, recheck after a short run, and verify no leaks.
This methodical use empowers you to maintain freedom from leakage and downtime.
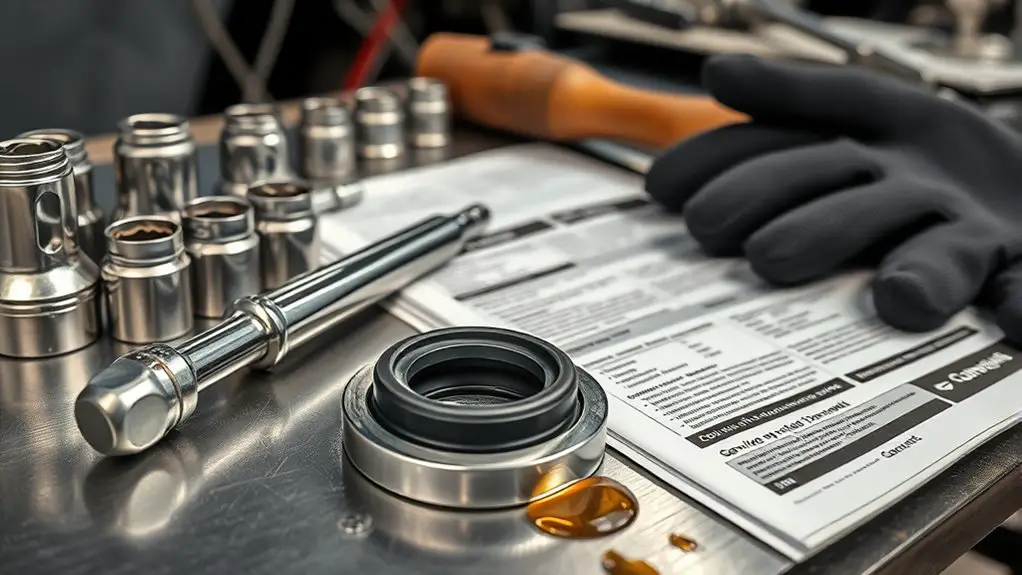
Gasket Materials
Gasket materials matter because the right choice guarantees a reliable seal under operating temps, pressures, and vibrations. You’ll select gasket materials that tolerate oil exposure and heat cycles without leaking or degrading. Consider gasket types by application: non-metallic for ease, composite for balance, and metallic for high temp or pressure zones. Match thickness to machining tolerances and surface finish to guarantee a uniform crush. Before gasket installation, inspect surfaces for nicks and debris; clean with appropriate solvents and dry thoroughly. Use the correct sealant only where specified; avoid overapplication that can squeeze into passages. When fitting, align the gasket precisely and tighten in a crisscross pattern to the recommended torque. Keep replacement plugs ready, and store gaskets dry and labeled for future gasket installation.
Cleaning and Degreasing Supplies
Start by degreasing the area before you clean to prevent grease from spreading. Use a dedicated degreaser or solvent that’s compatible with sump materials, applying it only to the suspected grime and wiping away with a lint-free cloth. Then proceed with a standard cleaning step, choosing safe degreasing methods that minimize residue and corrosion risk.
Degrease Before Cleaning
Degrease the area before cleaning to guarantee grime doesn’t interfere with the seal or any fasteners. You’ll remove oil and residue so you can inspect threads, surfaces, and the plug properly. Start with a repeatable sequence: wipe, rinse, rewipe, then inspect for remaining slick spots. Choose degreasing agents known for metal safety and minimal residue, then apply with a clean cloth. Allow dwell time if needed, then wipe away thoroughly.
1) Use a corrosion-safe degreaser to lift grime without masking wear
2) Rinse and dry completely to prevent spots and corrosion
3) Recheck surfaces for slick patches, repeat if necessary
This approach gives you clear access, accurate assessment, and confidence, using effective techniques that respect your hands-on freedom while protecting the seal.
Safe Degreasing Methods
Safe degreasing methods are essential to protect metal surfaces and guarantee a clean seal. You’ll choose methods that remove grime without corroding parts. Start with a quick wipe to assess expansion joints and threads, then plan your approach. Use biodegradable solvents for initial breakdown of heavy oil, applying with a lint-free cloth and working in small sections. Follow with steam cleaning to lift remaining residues—the heat helps loosen stubborn film while evaporating quickly. Keep solvents away from seals and gaskets, and never mix cleaners. Rinse with minimal water, dry promptly, and inspect for missed spots. Document concentrations and contact times for future reference. This methodical process minimizes risk, promotes safety, and preserves the sump plug’s integrity while you regain a frictionless seal.
Lubricants and Anti-Seize Compounds
Lubricants and anti-seize compounds simplify assembly and prevent galling on threaded plugs; choosing the right product depends on material compatibility and operating conditions. You’ll select lubrication techniques that suit your sump plug materials, oil type, and temperature range, ensuring a consistent seal without excess smear. Anti seize applications protect threads during installation and future removals, reducing risk of thread damage and seized plugs.
- Pick a compatible lubricant and apply a thin, even coat to the threads to facilitate smooth threading and torque control.
- Use an anti seize compound on dissimilar metals or high-temperature environments, then wipe any excess for clean reassembly.
- Document the product type, application method, and torque target for future maintenance and repeats.
Aim for precise, clean application and verify that the seal seat remains unobstructed. This approach balances freedom with discipline, empowering you to service the sump plug confidently.
Safety Gear and Protective Equipment
Protective gear is essential for keeping you safe while servicing a sump plug. When you prepare, choose clear safety precautions: goggles or a face shield to guard eyes from splashes, gloves with good grip to protect skin and fingers, and a sturdy, non-slip pair of boots for footing on wet surfaces. Wear protective clothing that covers your arms and legs, and a long-sleeve shirt to minimize skin exposure. Use a breathable, resistant outer layer if you’re working around oil or solvents, and keep a hat handy for debris. Keep a well-fitted respirator only if you’re dealing with fumes or dusty environments, not for routine tasks. Inspect gear before each session and replace damaged pieces. Have a dedicated, clean changing area to avoiding cross-contamination. Store equipment in a labeled, accessible kit, ensuring you can grab everything quickly for safe, efficient service.
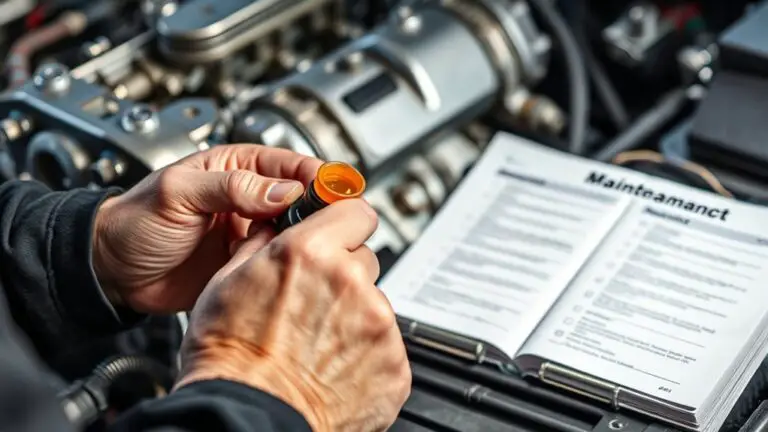
Measuring and Marking Tools
When you move from selecting protective gear to the actual servicing task, you’ll rely on measuring and marking tools to guarantee accurate work. You’ll use these tools to plan placements, verify depths, and confirm symmetry, keeping the job efficient and safe. Focus on reliable measuring techniques and deliberate marking precision to eliminate guesswork and rework.
1) Tape measures and calipers for quick, repeatable readings that stay true over time.
2) Scribe, sharp pencils, or marker pens for clear marks that resist oil and grime.
3) Depth gauges and center punches to translate measurements into durable guides on metal surfaces.
Choose tools that feel balanced in your hand and suit the space you’re working in. Calibrate where possible, test marks on scrap areas, and keep a clean surface to prevent misreads. Precision in measuring and marking translates to fewer surprises and smoother service overall.
Tools for Reassembling and Testing the Seal
To reassemble and test the sump plug seal reliably, gather the specific tools you’ll use to align components, seat the seal evenly, and confirm function. You’ll want a torque wrench, appropriate hex or socket set, and a feeler gauge for minor clearances. Include a small mallet or dead blow for gentle component seating, and a non-contact infrared thermometer to confirm hub temperature after initial start. Have a gasket scraper or plastic scraper to clean mating faces without damage, plus a seal driver or socket that matches the seal diameter to guarantee even seating. Use seal lubricants or anti-seize compound sparingly, only where recommended by the manufacturer. For seal testing, perform a pressure or leak test according to the system’s spec, observe for seepage, and confirm fasteners stay within torque tolerance. These reassembly techniques balance precision with efficiency, empowering you to validate reliability without overcomplication.
Frequently Asked Questions
How Often Should I Replace the Sump Plug Seal to Prevent Leaks?
You should replace the sump plug seal with every oil change or whenever you notice seepage. Regular inspections help you catch leaks early and maintain reliable performance. Sump maintenance tips emphasize checking the seal’s surface for nicks and ensuring proper torque. Don’t skip routine changes; oil change frequency guides replacement timing, not just mileage. If you see dampness, replace immediately. This keeps your system trustworthy and your freedom intact.
Can I Reuse a Stripped Sump Plug Without Replacement?
No, you shouldn’t reuse a stripped sump plug. It won’t seal properly and can strip threads or cause leaks. Replace with a new plug and proper washer, then torque to spec. For ongoing reliability, consider sump plug alternatives like a sealing washer or bossed plug. Maintain, inspect, and store components to avoid future damage. Your maintenance tips: replace damaged parts, don’t force threads, and keep torque consistent for a confident, leak-free setup.
What Torque Specs Are Critical for the Sump Plug?
The critical specifications are the sump plug torque values and the proper seating depth. You should torque to the manufacturer’s spec, typically within a precise range, and never exceed it. Check the gasket or any washer for crush consistency before tightening. If the plug feels tight suddenly, stop. Maintaining the correct sump plug torque prevents leaks and damage, preserving your freedom to drive with confidence and trust in your mechanical discipline.
Is a Sealant Safe for Use With All Sump Plug Materials?
No, sealant isn’t safe for all sump plug materials. You must check sealant compatibility with your sump plug materials before use. Some metals and alloys react, others resist; always read the manufacturer’s guidance. If you’re unsure, test a small area first and prefer products labeled sealant compatibility for automotive plugs. By sticking to proven options, you maintain a reliable seal rather than risking leaks or damage.
How Should I Dispose of Old Sealant and Plugs Properly?
You dispose of old sealant and plugs by following local hazardous waste rules, never pouring chemicals down drains. Sealant disposal should go to a designated household hazardous waste collection site or a permitted facility; plugs may be recyclable if metal or plastic, otherwise absorb residues and bag before disposal. Choose eco friendly alternatives when possible, like biodegradable sealants, and reuse salvageable parts. You’ll minimize risk by labeling containers and keeping them separate until drop-off.