Top Causes of Alternator Noise and Long-Term Fixes
If you hear a whine, grind, or chatter from the alternator, the fault usually lies with worn bearings, belt wear, failing pulleys, or wiring issues. Start by checking internal play in the bearings and replace if you detect noticeable motion or roughness. Inspect drive belts for cracks, glazing, or misalignment, and replace as needed. Inspect pulleys and tensioners for wear, then secure or replace to restore proper tension. For reliability, verify wiring grounds and routing; more details follow.
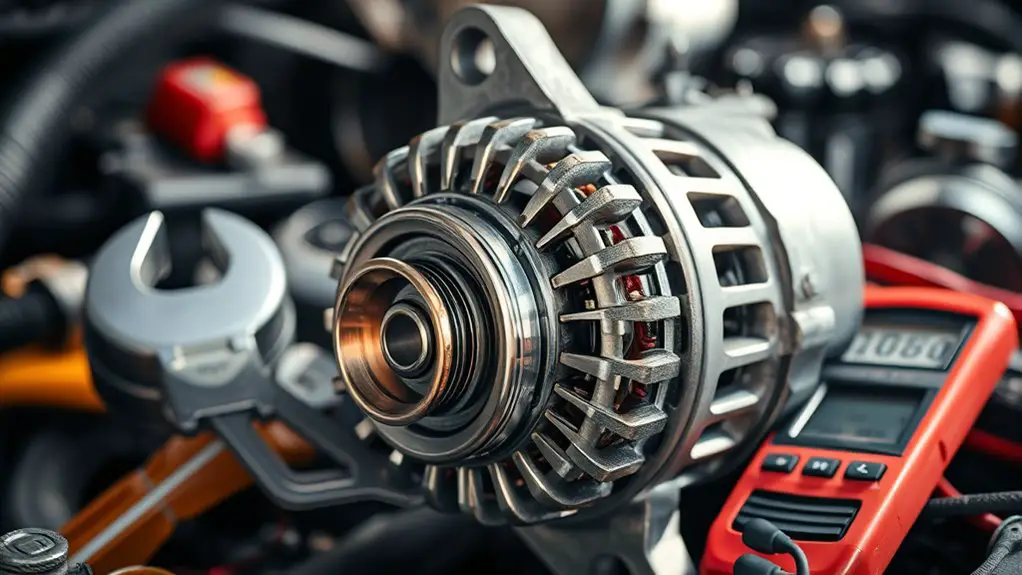
Worn Bearings and Internal Component Wear

Worn bearings and internal component wear are common culprits behind alternator noise, as increased internal play allows parts to rub and resonate at operating speeds. You’ll notice metallic chatter or a faint grinding when you start the engine, and noise can worsen with RPM. Inspect bearings for play by rotating the pulley and feeling for roughness or backlash, then verify shaft alignment and bearing preload. If play is evident, bearing replacement becomes the most reliable fix to restore proper tolerances. Before disassembly, tag wiring and measure spacer clearances to guarantee correct reassembly. When you replace bearings, use manufacturer‑specified seals and a press setup to avoid radial damage. Don’t overlook the need for component lubrication during reassembly; proper lubrication reduces friction, minimizes heat, and extends life. After servicing, recheck alternator torque, belt tension, and electrical output under load to confirm the noise is eliminated and performance is stable.
Misaligned or Worn Drive Belts

Misaligned or worn drive belts can let the alternator stall or slip under load, producing whine, chirp, or intermittent charging. You’ll want a precise, repeatable check to prevent voltage dips and battery strain. Start with a visual inspection for cracks, glazing, or fraying, then measure belt tension and track alignment across pulleys. A marginal belt won’t hold rpm smoothly, so you’ll notice fluctuating charging and belt noise under load. If misalignment is found, you’ll perform an alignment check against the pulley centers and belt path, adjusting as needed. When wear is beyond spec, belt replacement is the reliable fix to restore consistent output. Keep torque specs handy and verify pulley grooves are clean to avoid slippage. Maintain a schedule that pairs alignment checks with periodic belt replacement to prevent cascading failures. A disciplined routine gives you predictable charging and greater freedom on and off the road.
Misaligned belts spark charging woes; inspect, align, and replace for steady power.
- Prevents unexpected outages by catching wear early
- Keeps tension accurate for stable charging
- Reduces noise and vibration signature
- Extends overall electrical system life
Failing Pulleys and Tensioners

Failing pulleys and tensioners can quietly undermine belt drive performance, causing slip, uneven load sharing, and intermittent charging. When you suspect noise or erratic alternator output, inspect pulleys for glazing, cracks, or excessive play. Worn bearing surfaces produce subtle rumble that escalates under load, while misalignment or a seized sheave can abruptly throw the belt, triggering voltage fluctuations. Focus your evaluation on bearing condition, belt contact surface, and pulley runout with a straight edge and dial indicator if available.
If you find pitting, looseness, or out-of-roundness, plan a tensioner replacement and pulley refresh as a paired service. Replace the tensioner with a unit that meets OEM specifications, ensuring proper spring tension and pulley alignment. After installation, recheck belt tension, run the engine at idle, and listen for smooth operation without squeal. Document evidence of wear, noting miles and service intervals. This proactive approach preserves belt integrity and stabilizes charging performance. pulley inspection, tensioner replacement.
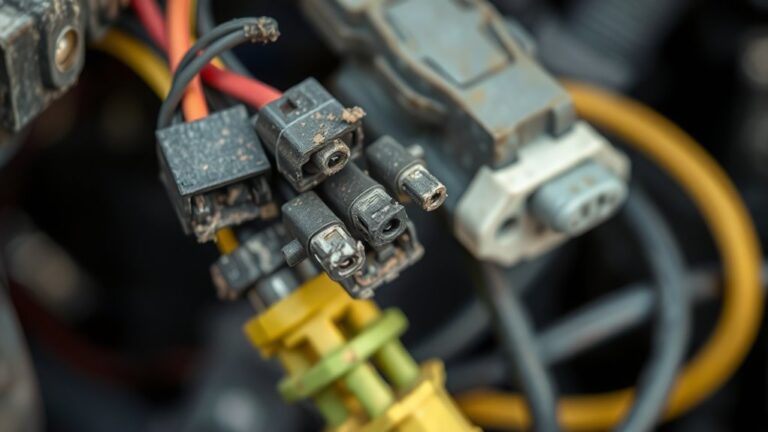
Electrical Issues: Wiring and Ground Problems
Electrical issues often stem from compromised wiring or poor grounding, which can mimic or mask alternator faults by causing irregular voltage, intermittent charging, or accessory flicker. You’ll want a precise, methodical approach: verify ground paths, inspect harness integrity, and confirm battery connections are clean and tight. Grounding techniques matter because a weak or corroded return can produce fluctuating loads that stress the alternator without obvious failure signs. Prioritize clean grounds at the engine block and chassis, and test for voltage drop under load to locate hidden resistance. Wiring inspections should map harness routes, check for insulation damage, and confirm connector pins aren’t float or loose. If faults are detected, document findings and recheck after remediation to guarantee stability. This work isn’t glamour, but it protects the entire electrical system and your freedom to drive without surprise.
- Spot weak grounds early to prevent cascading faults
- Trace harnesses to expose hidden insulation damage
- Measure voltage drop under load for accurate diagnosis
- Reassess after fixes to confirm sustained reliability
Diagnosing, Repairing, and Long-Term Fixes for a Reliable Electrical System
To diagnose, repair, and implement long‑term fixes for a reliable electrical system, start with a structured approach: verify the charging circuit components, confirm battery health, and establish consistent ground paths before addressing components that commonly fail under load. You’ll prioritize voltage regulation as the anchor of stability: test the alternator’s regulator output, observe under varying RPMs, and confirm that the customer load doesn’t exceed design margins. Next, isolate noise sources, aiming for noise reduction through proper wiring routing, shielded cables where appropriate, and secure grounds to minimize hum and ripple. Repair tasks should be precise: replace worn bearings, worn brushes, or a failing diode trio only when diagnostics point to these parts. Long‑term fixes include upgrading to a regulator with tighter tolerance or employing a capacitive or LC filter where transient spikes occur. Document findings, implement standardized inspection intervals, and educate the user on preventive checks to sustain reliable electrical performance.
Frequently Asked Questions
How Does Alternator Noise Affect Battery Life Long-Term?
Noise can accelerate battery degradation over time, since untreated alternator issues cause fluctuating charging, leading to uneven wear and reduced capacity. You’ll see a faster decline in battery health when noise correlates with charging disturbances, especially under load. As noise worsens, battery degradation accelerates, shortening lifespan. To protect longevity, monitor voltage consistency, fix bearing or belt noise, and address pulley misalignment promptly. Early diagnostics reduce noise correlation and preserve your battery’s useful life.
Can Weather Impact Long-Term Alternator Noise Levels?
Weather can affect long-term alternator noise, so yes, it can shift noise levels over time. Temperature and humidity influence bearing wear, belt tension, and lubrication, altering vibration patterns you’ll hear. In colder, damp conditions, you might notice subtler noise, while heat accelerates wear and can raise pitch or amplitude. To combat this, monitor mounting integrity and belt tension, pursue targeted noise reduction measures, and track changes across seasons for proactive maintenance.
Do Aftermarket Parts Influence Long-Term Noise Stability?
“it rides on thin ice”—you’ll find aftermarket quality can influence long-term noise stability. You’ll want to choose parts designed for automotive electrical tolerances, focusing on bearing rigidity, pulley balance, and regulator consistency. In practice, aftermarket quality can reduce vibrations and electrical chatter, aiding noise reduction. However, poorer options may introduce mismatches that worsen wear. You should test under load, monitor for creeping noise, and document results to guarantee sustained stability.
Is Noise a Reliable Indicator of Charging System Health?
Yes, noise isn’t a reliable standalone indicator of charging system health. You should treat it as a diagnostic cue within a broader context of electrical performance. If you hear consistent noise, perform targeted noise diagnostics, check belt tension, bearings, and mounting, then verify alternator output under load. Don’t ignore voltage drops or poor charging. Use a multimeter and load tests to confirm system health before concluding.
What Maintenance Schedule Best Prevents Future Alternator Noise?
Like a vigilant lighthouse keeper, you should implement a preventive maintenance schedule and perform regular inspections. You should check belts, tension, and mounting for play; listen for bearing noise; and monitor electrical output. Establish a cadence—monthly belt checks, quarterly voltage tests, and annual alternator service. This technical routine keeps wear visible, prevents surprises, and respects your freedom to drive with confidence. Stay proactive, document findings, and address faults promptly to minimize noise and downtime.