Top Causes of Clogged Fuel Filter and How to Fix Them
Dirty or contaminated fuel is a top culprit, so start by checking fuel quality and looking for sediment, color changes, or water. Drain any water, replace the filter, and verify seals and venting. Replace a saturated filter and confirm correct flow direction during installation. Inspect the pump and lines for restriction, leaks, or debris, and test fuel pressure to guarantee proper delivery. Ascertain proper maintenance timing and installation to prevent repeats; you’ll uncover more causes as you continue.
Dirty or Contaminated Fuel
Dirty or contaminated fuel is a common culprit for a clogged fuel filter. You start by evaluating fuel quality before your system reaches the filter. Check for unusual color, sediment, or water presence in the fuel you’re using. If you’re attempting a quick diagnosis, review recent fueling events and storage conditions, because contaminated supply is a frequent culprit. Prioritize fuel filtration as a line of defense—high-quality fuel filtration helps prevent debris from reaching the filter element. When you suspect poor fuel quality, switch to a known clean source and avoid risky fillers. Document symptoms like rough idle, sputtering, or reduced power, then correlate them with fuel quality indicators. Maintain your filter by following the manufacturer’s replacement interval and using the correct filter type. If the problem persists after using clean fuel, recheck lines for restriction and confirm no water ingress. Your goal: consistent fuel delivery and dependable performance.
Water Contamination in the Fuel
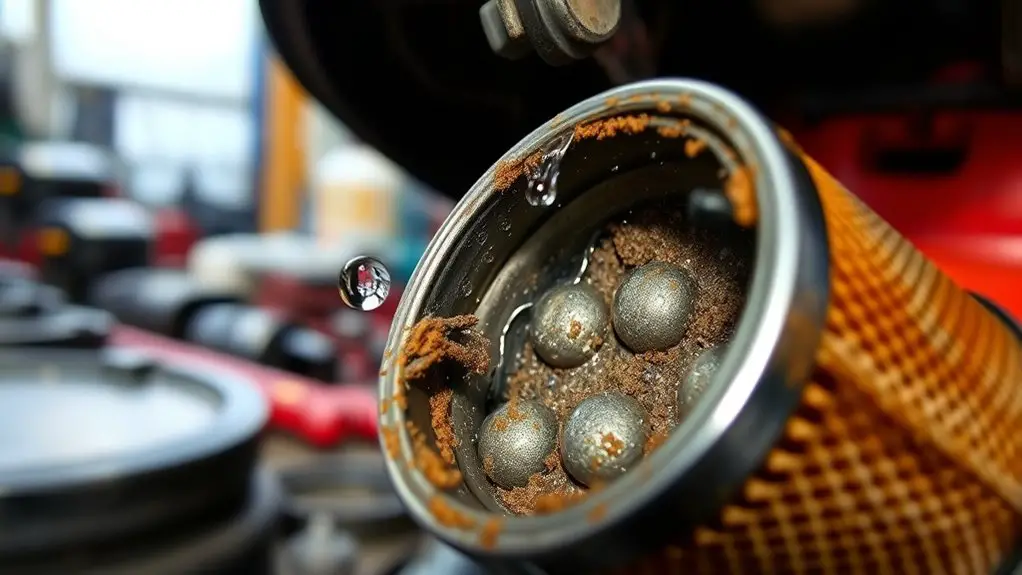
Water contamination is a common cause of a clogged fuel filter, and it can quickly compromise system performance. You’ll detect moisture and separate water from fuel by testing for phase separation and watching for drops at the filter bowl. Identify water sources such as ingress from containers, poor sealing, or contaminated storage and transport. Moisture accumulation settles at the bottom of tanks and lines, promoting microbial growth and fuel degradation. Act quickly: drain any water, replace the filter, and verify seals and venting. Use clean, dry fuel from trusted suppliers and minimize exposure to humidity during handling.
| Source | Pathway | Action |
|---|---|---|
| Fuel storage | Ingress, lid leaks | Drain water, seal container |
| Transport/dispensing | Condensation, spills | Replace filter, inspect lines |
| Tank bottom | Moisture accumulation | Refill with dry fuel, test fuel quality |
Water sources must be addressed; moisture accumulation signals contamination risk and needs remediation.
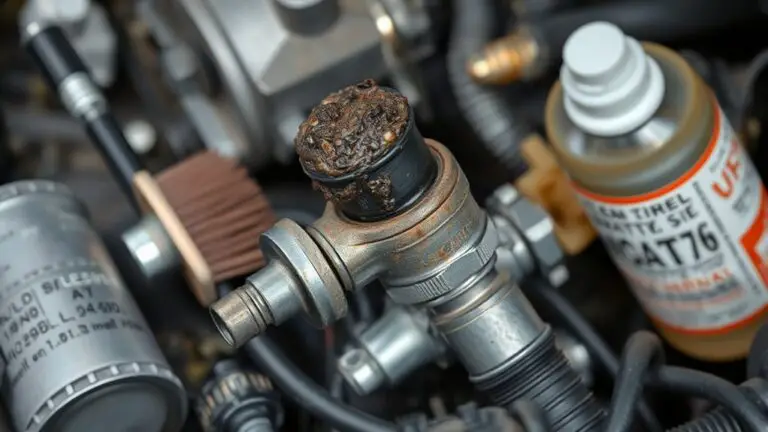
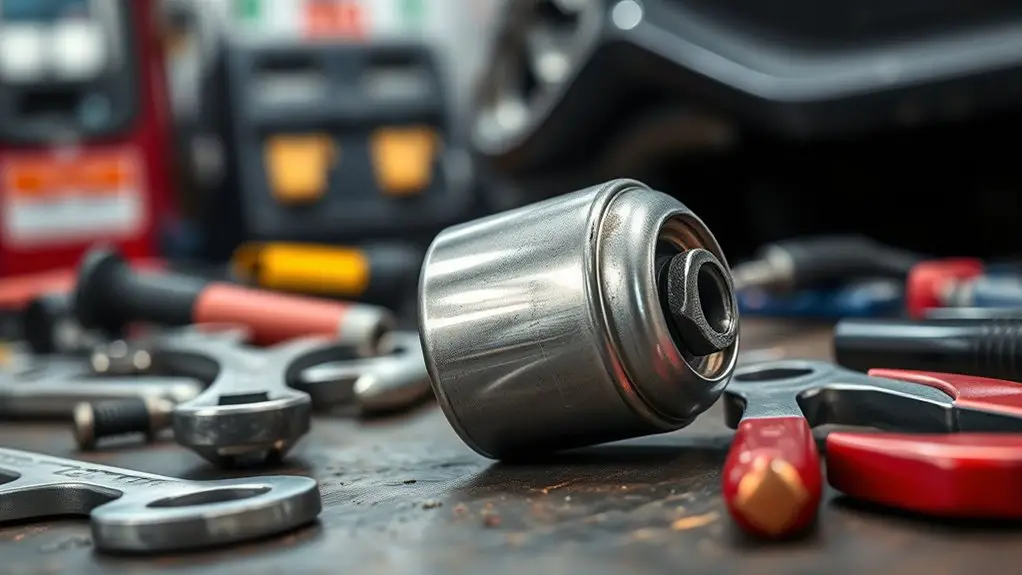
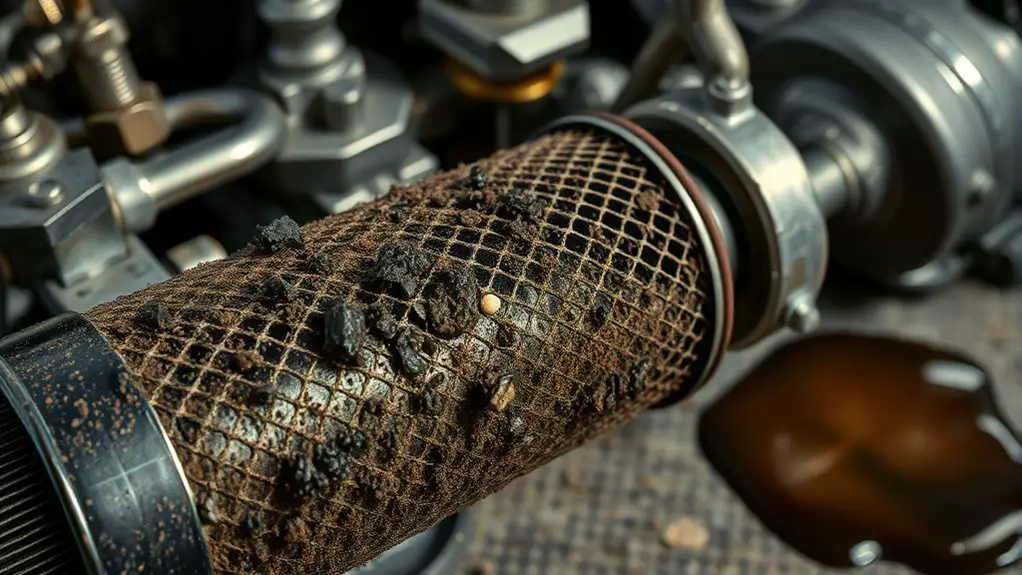
Aging or Saturated Fuel Filter

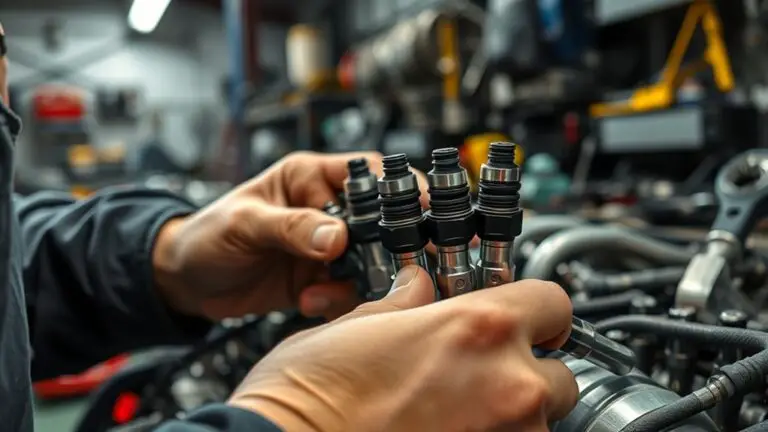
An aging or saturated fuel filter can restrict flow and allow particulates to pass through, causing reduced engine performance and stalling. You notice hesitation, rough idle, or sudden loss of power as symptoms. Check the filter for clogging by inspecting fuel pressure after the pump; a drop indicates restriction. If you’ve got a gauge, compare readings to your vehicle’s spec; consistently low pressure points to the filter. Survey the service history: fuel filter lifespan varies by vehicle and driving conditions, but most layouts benefit from replacement every 20,000 to 40,000 miles, or as recommended by the manufacturer. When replacing, relieve system pressure first to avoid spills. Install the new filter with the flow direction indicated on the housing. Reconnect clamps or fittings securely and purge any air from the line. After installation, start the engine and confirm stable idle and proper acceleration. Record the fuel filter replacement date for maintenance tracking.
Poor Fuel Quality and Additives
Poor fuel quality can introduce contaminants and oxidized residues that clog filters early. Be aware that additive interactions may change fuel properties or leave deposits, increasing varnish and gum formation. Check storage practices and fuel sources to minimize contamination and maintain predictable performance.
Contaminants in Fuel
Contaminants in fuel—primarily poor quality and additives—can sneak into the system and clog a filter before you know it. You’ll trace symptoms to fuel, not wiring or pumps. Start by inspecting fuel quality: uneven engine performance, rough starts, or stalling point to contamination sources. Document observed color, grit, and odor in the tank and at the nozzle. Next, verify supply continuity: a clogged fuel filter materials list often includes sediment and varnish from degraded fuel. If you suspect poor batch or contaminated storage, drain test samples and compare against specification. Replace the filter and flush lines to restore flow. Maintain a routine: know fuel contamination sources and keep backups ready, so you stay ahead and keep the engine running freely.
Additive Interactions Risk
When fuel quality is suspect, additives can interact with contaminants to worsen clogging or form varnish and sludge that resist filtration. You’ll want to assess whether your fuel system additives and any additive you’ve added lately are compatible with the fuel you’re using. Poor compatibility can alter solvency, raising precipitate formation and accelerating filter buildup. Check labels for compatibility notes and use only products proven to work with your fuel type. If you notice sudden hard starts, rough idle, or increased fuel trims after an additive cycle, pause usage and re-evaluate. Maintain a routine where you document batch sources and additives used. This disciplined approach helps prevent hidden interactions that promote clogging and keeps the system flowing. additive compatibility, fuel system additives.
Poor Storage Practices
Storage conditions directly impact fuel quality and how additives behave. Poor storage practices introduce moisture, evaporation losses, and contamination, hurting fuel stability and increasing filter stress. You’ll assess fuel storage, confirm tank cleanliness, and track exposure to heat, which accelerates degradation. If fuel storage is questionable, drain and test samples before refueling, and replace suspect fuel with fresh stock. Implement strict inventory controls and use proper seals to minimize air ingress.
| Step | Action | Rationale |
|---|---|---|
| 1 | Inspect tank cleanliness | Prevents debris clogging |
| 2 | Verify seals and venting | Reduces moisture ingress |
| 3 | Schedule regular draining | Removes degraded fuel |
| 4 | Maintain clean storage area | Protects fuel quality |
Keep fuel storage disciplined; when in doubt, err on fresh stock to protect engine performance and reduce additives’ adverse interactions.
Faulty or Failing Fuel Pump
If you suspect a faulty fuel pump, start by checking for signs like sputtering, loss of power, or hard starting that point to poor fuel delivery. Next, verify electrical connections and fuses, since intermittent power can mimic a mechanical failure. We’ll use these symptoms—faulty pump signs, delivery issues, and electrical checks—as the basis for troubleshooting.
Faulty Pump Symptoms
A faulty or failing fuel pump can prevent your engine from starting or cause stalling and surging as you drive. You’ll diagnose by listening for a whir or hum from the pump area and checking fuel pressure with a tester. If pressure is low or fluctuates, suspect pump issues affecting pump performance and fuel efficiency. Don’t ignore changes in how hard it is to accelerate or maintain speed; those are clues you can trust.
- Listen for abnormal/quiet operation at key cycles
- Check fuel pressure against spec and note any drops
- Inspect electrical connections for corrosion or looseness
- Observe engine symptoms during load and acceleration
- Verify fuel filter condition doesn’t mask pump faults
Address faults promptly to preserve performance and fuel efficiency.
Poor Fuel Delivery
Poor fuel delivery stems from a faulty or failing fuel pump, which can leave the engine starved of steady pressure and volume. You’ll verify fuel flow is steady, not sporadic, and listen for prime sounds that signal pump activity. If pressure is low, diagnose by checking inlet and outlet lines for restriction, then test with a pressure gauge and flow rate. Address delivery issues by confirming correct fuel pressure, inspecting worn pump internals, and replacing a failing unit. Remember to rule out electrics after confirming mechanical faults. Track symptoms against specs, and proceed only after ruling out leaks. Use the table below to map symptoms to fixes and restore reliable delivery.
| Symptoms | Fixes |
|---|---|
| Fuel pressure drop | Replace pump or service regulator |
| Unsteady flow | Inspect lines; replace restrictive components |
Electrical Troubleshooting
Electrical faults often masquerade as fuel starvation, so start by confirming power delivery to the pump before chasing mechanical causes. You’ll verify wiring issues and run circuit diagnostics to rule out voltage drop, blown fuse, or a corroded connection. If power is present, listen for fuel pump activation and check pressure specs; if not, trace from the relay to the pump, testing for continuity and grounds. Replace faulty grounds or relays as needed, then recheck flow. If pressure is low despite power, inspect the pump and sender for internal failure and consider flow limits from debris.
- Check fuse and relay operation
- Test voltage at the pump under load
- Inspect wiring for damage or corrosion
- Confirm proper ground connection
- Reassess fuel pressure after service
Incorrect Fuel System Maintenance and Installation
Incorrect fuel system maintenance and installation often leads to compromised filtration and reduced performance; improper procedures, mismatched parts, or skipped steps can cause air leaks, contamination, and incorrect fuel pressure. You’ll improve reliability by sticking to a clear sequence: verify compatible parts, drain old fluid, and clean mounting surfaces before install. Use OEM or proven aftermarket components rated for your system, and follow torque specs to prevent leaks. Refill with clean fuel, inspect seals, and bleed air per manufacturer instructions to avoid vapor locks. Check fuel lines for kinks or cracks; replace any questionable sections. After maintenance, test for leaks at all connections, scan for codes, and confirm correct pressure with a gauge. Document service events and ambient conditions to spot trends. If you suspect contamination, perform a controlled flush rather than crude bypasses. Fuel system health hinges on disciplined maintenance tips and disciplined installation—precision saves you from clogged filters and costly downtime.
Frequently Asked Questions
How Can I Tell if Fuel Filter Is Clogged Quickly?
If you notice sluggish acceleration, rough idling, or stalling, your fuel filter might be clogged. Check the fuel pressure with a gauge at the rail; a drop from spec means trouble. Look for hard starts or engine ‘miss.’ Inspect the filter during maintenance intervals and replace if pressure stays low. Don’t ignore signs. After replacement, recheck fuel pressure to confirm improvement. Regular filter maintenance keeps deliverables consistent and performance smooth for you.
Do Fuel Additives Help Prevent Filter Clogging?
Additives won’t magically fix bad fuel or a dirty filter, but they can help with maintenance. If you’re chasing smoother runs, fuel additives can stabilize or clean lightly, and they aid filter maintenance by reducing deposits. You’ll want to follow label directions and avoid overuse. In short, use additives to support cleanliness, not as a replacement for good maintenance or timely filter changes. Diagnose symptoms, then decide if additives fit your fuel system.
Can a Clogged Filter Cause Engine Stalling?
A clogged filter can cause engine stalling. When fuel flow drops, your engine protection senses lean conditions and stalls or hiccups. You’ll notice rough idle and reduced engine performance as the fuel system struggles. Check for symptoms, verify pressure, and replace the filter if a drop is confirmed. Don’t overlook line restrictions or a failing pump, which can mimic a clogged filter. Diagnose methodically, and restore steady fuel delivery for peak engine performance.
How Often Should I Replace the Fuel Filter?
The replacement schedule really depends on your vehicle, but you’ll typically replace the fuel filter every 20,000–40,000 miles or as recommended in your owner’s manual. Check signs like reduced performance or sputtering as prompts. Track fuel filter lifespan by noting mileage and service intervals, then plan ahead. If you drive in dusty or old-fuel conditions, shorten the interval. Stay diagnostic: follow the manual, and replace when it’s due for ideal flow and protection.
Can Ethanol Fuel Worsen Fuel Filter Clogging?
Yes, ethanol fuel can worsen fuel filter clogging. Ethanol effects include attracting water and creating sediments that trap in the filter, and higher ethanol blends can accelerate varnish and deposit buildup if your fuel quality is poor. To diagnose, check for water in the filter, note fuel smell, and inspect spark plugs. If you notice clogging, consider ethanol-free or higher-quality fuel, and replace the filter routinely as part of maintenance.