When a Hose Clamps Needs Replacement Vs Repair
A hose clamp should be repaired if it shows minor issues like seepage, reduced tension, or slight corrosion, and if you can reseat, re-torque to spec, or clean and rebalance the band without compromising fit. Replace it when leaks persist, corrosion undermines tension, or cracks and stripped components are visible. Inspect worm-drive, C-ear, and constant-tension types for wear. Choose a compatible clamp and correct size. If issues continue, you’ll uncover more options and steps further on.
Common Signs a Hose Clamp Needs Repair
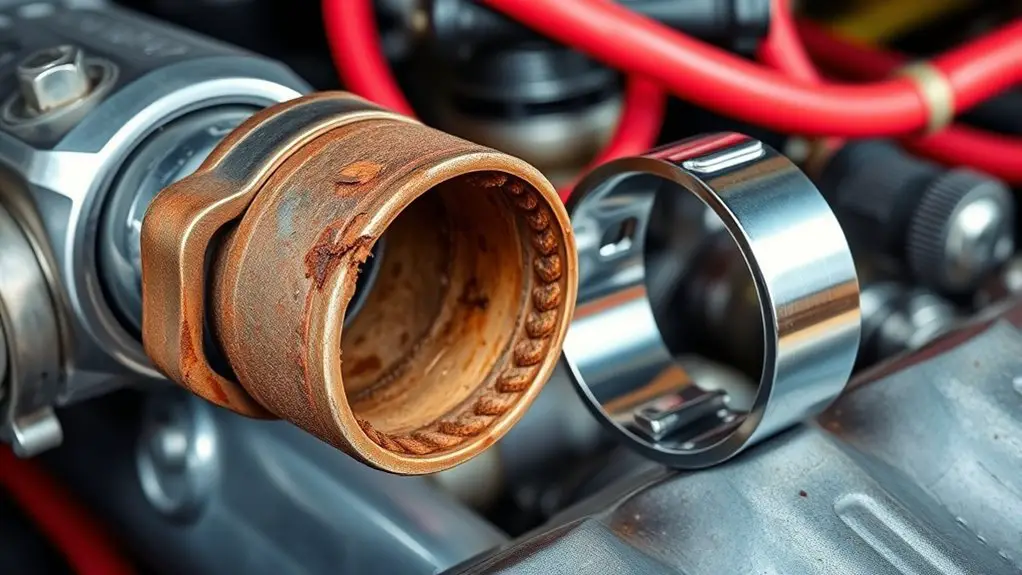
Hose clamps that need repair usually exhibit obvious, compromise‑inducing signs. You’ll notice seepage around the joint, reduced clamp tension, or audible leaks during pressure tests. Look for surface corrosion or discoloration near the band ends, which signals material fatigue and compromised clamp durability. In most cases, leaks arise where the screw or bolt threads mate with the worm gear, so inspect threads for stripping, galling, or cross‑threading. Pay attention to uneven bite marks on hoses, indicating misalignment or over‑tightening that damages the hose surface and weakens seal integrity. Rattling, fluttering, or sudden changes in system pressure can also reveal a failing clamp. When testing, use leak detection methods appropriate to your system—soap solution, dye, or electronic sniffers—to identify discreet seepage. If you observe persistent leaks or deformities, plan for replacement or targeted repair before performance is compromised, preserving overall system safety and reliability.
Indicators That Replacement Is Required
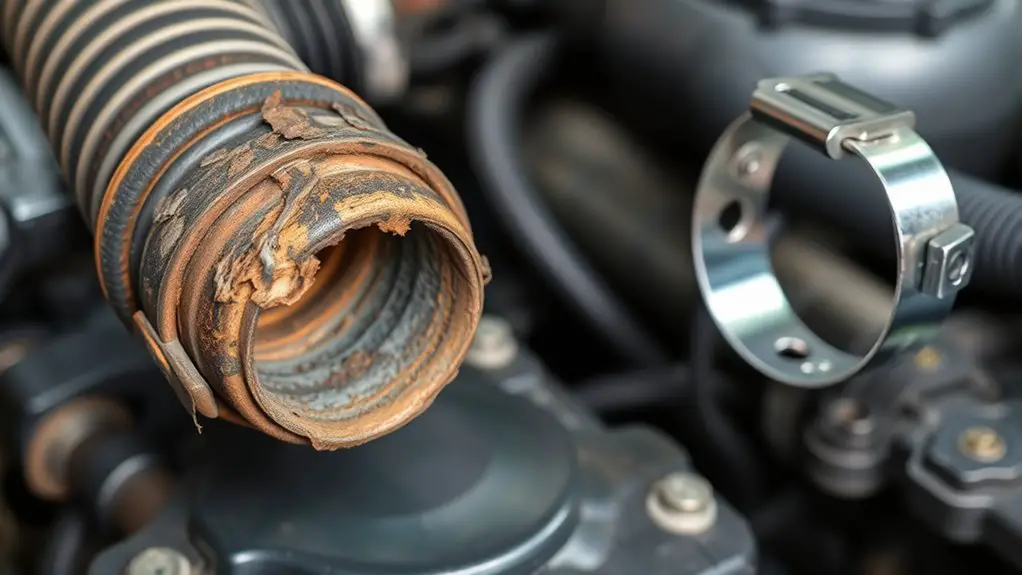
There are clear, objective cues that indicate replacement is required. You’ll notice persistent leakage, even after reseating, which signals a compromised seal or deformed seat. Inspect for corrosion at the clamp material joints, which undermines tension consistency and can lead to sudden failure under load. Visible cracks or fraying in the band edge indicate structural fatigue beyond simple tightening. Warped profiles or distinct flattening reduce clamping force and create uneven pressure distribution, increasing the risk of hose rupture. If the screw housing shows stripped threads or rounded heads, you won’t regain reliable torque with rework, necessitating a full replacement. Excessive wear and tear along the band or bolt surface reduces effectiveness and can promote slip. Consider material compatibility; mismatched clamp materials with the identified hose type may accelerate degradation. In ambiguous cases, measure residual clamping force against spec sheets, but when uncertainty persists, replacement is the prudent choice to preserve system integrity.
Quick Fixes You Can Try Before Replacing
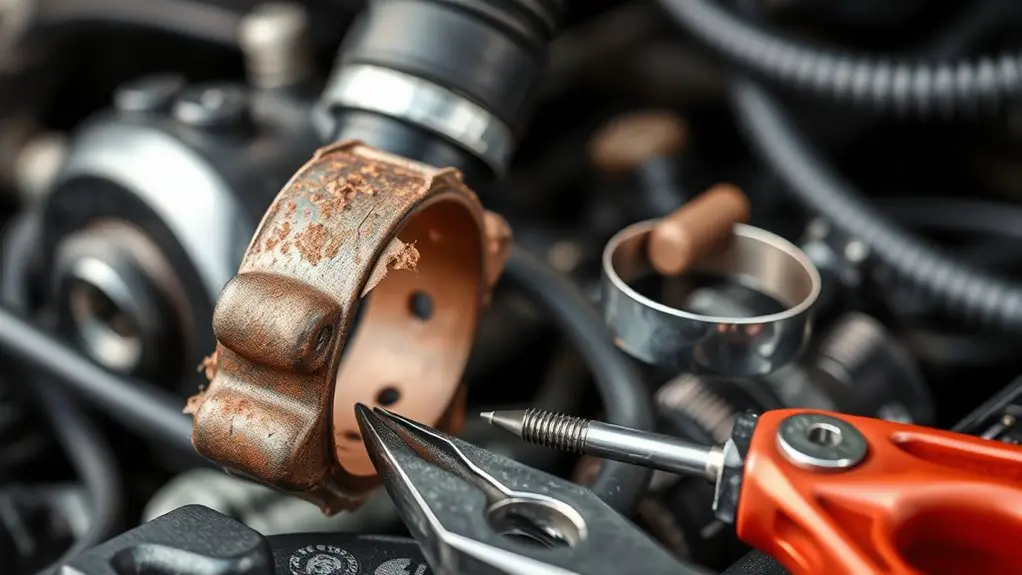
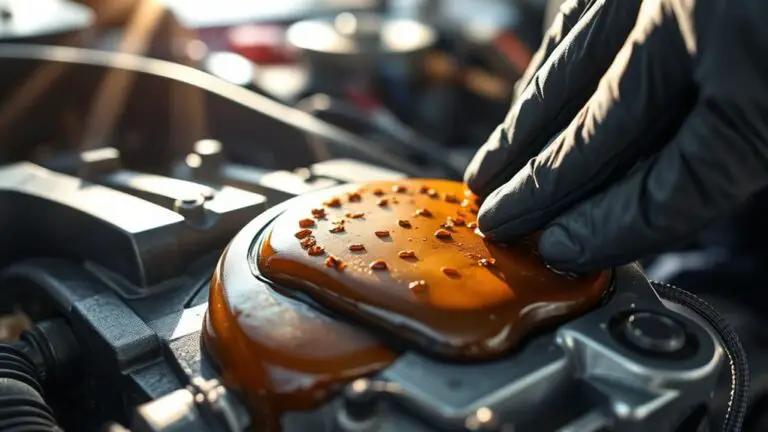
In the meantime, you can try a few quick, non-permanent fixes to regain function and buy time before replacing. First, inspect the barbed area for minor deformation; if the clamp seat is slightly out of round, gently rebalance it with a blunt tool and reseat the band. Tighten to manufacturer torque specs, not max pressure, to avoid overloading the hose. For mildly corroded screws, apply penetrating oil, wait a moment, then re-torque within spec. If you detect a minor leak at the joint, re-seating the hose with a careful twist can improve contact, but discontinue if leakage persists. Consider temporary solutions like a high-triction wrap or silicone paste as a stopgap, ensuring it does not obstruct venting or drainage. DIY methods should be used only for short durations and low-pressure applications. Track performance, and replace promptly when function deteriorates or safety is compromised. Prioritize stability and documentation of any interim repair.
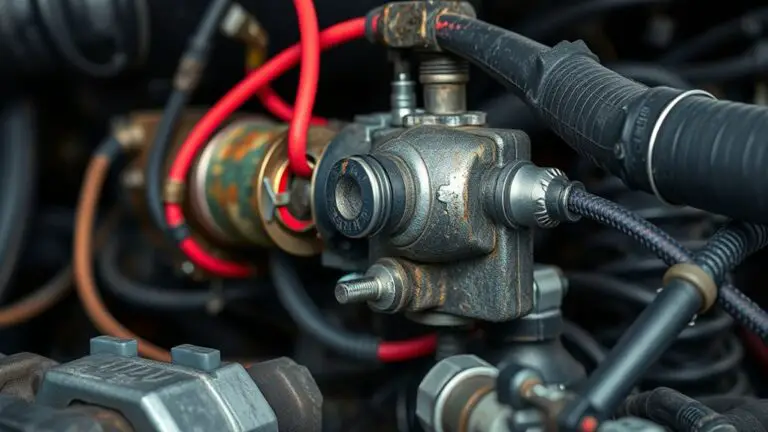
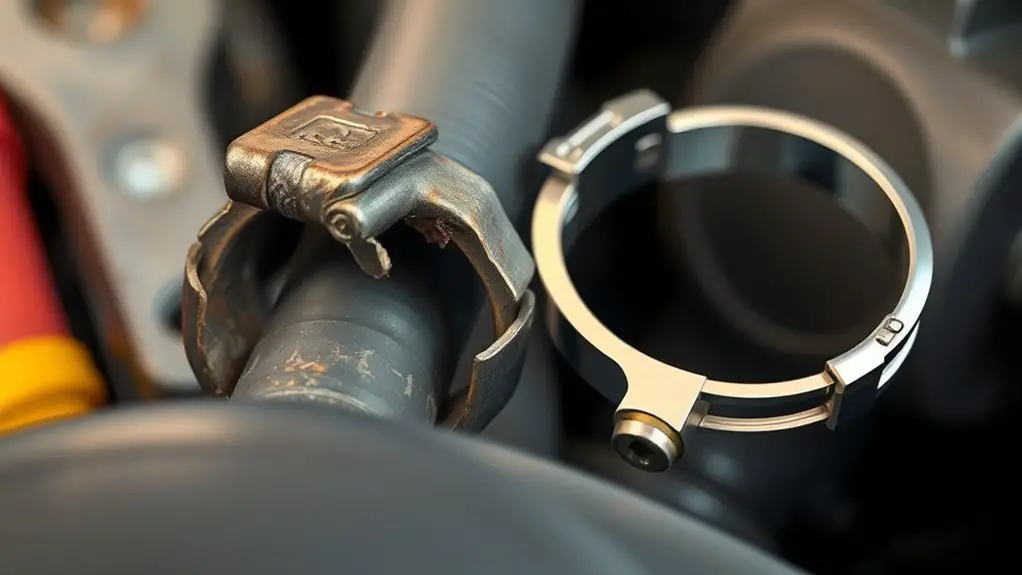
How to Inspect Different Clamp Types
Different clamp types demand distinct inspection checks to ascertain integrity and performance. You’ll assess each variant methodically, starting with visible corrosion, cracks, or deformation on the band. For worm-drive clamps, verify thread engagement, nut rotation smoothness, and housing integrity; binding or stripped threads signal replacement. For C-clamps or ear clamps, inspect band deformation, crimp integrity, and ear condition, noting any loosening or fatigue cracks. For constant-tension or spring clamps, measure preload behavior and spring leg wear; loss of tension indicates failure risk. For hose-securing designs, confirm uniform contact along the hose and absence of pinhole leaks at the seaming edge. Evaluate clamp materials in context: stainless steel resists corrosion, but coating wear or galling can compromise performance; zinc or plated variants may show flaking. Assess clamp designs for compatibility with hose material, temperature, and pressure ranges. Document findings, plan replacements when weaknesses appear, and consider future durability by selecting appropriate clamp materials and designs for your system.
Choosing the Right Clamp for Your System
Selecting the right clamp depends on hose material, operating conditions, and maintenance goals. You’ll assess material compatibility first, since clamp materials must resist corrosion, temperature, and chemical exposure without embrittling. Next, evaluate clamp sizes to guarantee proper bite without over-compression; incorrect sizing invites leaks or hose damage. Consider hose wall thickness and inner diameter tolerances, because tight tolerances demand precise clamps and, sometimes, multiple adjustment points. For high-vibration systems, you’ll favor clamps with robust gaskets or spring elements that maintain tension over cycles. In pressure-driven lines, you’ll prioritize clamps rated for your maximum PSI and thermal expansion range, not merely nominal fits. Accessibility matters too; choose designs that you can torque consistently with your available tools. You’ll also weigh maintenance goals—reusability, ease of inspection, and replacement costs. By focusing on clamp materials and clamp sizes, you align your clamp choice with reliability, service interval goals, and freedom to work confidently.
Step-by-Step Replacement Process
Step-by-step replacement starts with a precise plan: identify the hose, clamp type, and replacement parts, then document the current system state and required torque specs before disassembly. You’ll verify material compatibility, measure bore diameters, and confirm clamp range. Next, gather replacement tools, fasteners, and spare parts, ensuring you have the correct installation techniques for your clamp style. With the system depressurized, loosen and remove the old clamp, noting any damage to the hose or fittings. Clean mating surfaces and inspect for corrosion or wear that warrants replacement rather than repair. Install the new hose and clamp at the specified position, aligning tabs or grooves as required. Use calibrated torque to the manufacturer’s specs, then recheck for leaks and proper tension. Document steps, part numbers, and torque values for future service. This approach minimizes risk, supports reliability, and preserves system freedom while delivering precise, repeatable results.
Frequently Asked Questions
Can Clamps Be Repaired More Than Once?
A clamp is like a fastener that can sometimes endure a second life, but you should not count on perpetual reuse. Yes, clamps can be repaired more than once, yet consider clamp durability and repair costs; each cycle wears the band, threads, and valve. If failure recurs, replacement is wiser. You balance effort against reliability, keeping systems safe, while you pursue freedom in maintenance choices with precise, technical checks.
Do Stainless Steel Clamps Last Longer Than Zinc-Coated?
Yes, stainless steel clamps last longer than zinc-coated ones. You’ll notice stainless steel durability because it resists corrosion in harsh environments, reducing maintenance and replacement frequency. However, zinc coated limitations include quicker wear under chemical exposure and higher fatigue risk on tight bends. You should weigh cost and application stress; for freedom-minded users, choose stainless for reliability, but reserve zinc coating for light, low-corrosion duties where cost matters more than longevity.
Are Clamping Torques Universal Across Brands?
No, clamping torques are not universal across brands. You’ll find clamping torque specifications vary by clamp model, material, and band width, plus brand-specific compatibility issues can affect performance. You should verify torque values in the manufacturer’s chart for each clamp and understand any label-driven limits. Don’t assume cross-brand equivalence; mismatched torque can lead to leaks or damage. Always reference brand compatibility issues and aim for the exact specifications.
How to Tell if Corrosion Voids Warranty?
Corrosion indicators point to warranty implications being affected or voided if damage predates shipment or isn’t from normal wear. You’ll want to document dates, environmental exposure, and any third‑party analyses. If corrosion is extensive or shows signs of unauthorized repair, the warranty may be invalid. Check your warranty terms for exclusions, notify the manufacturer promptly, and preserve all original components. Your risk of denial rises with evidence of deliberate alteration or non‑compliant use.
Can Improper Clamp Cause Unseen Leaks?
Yes, improper clamps can cause unseen leaks. If clamp integrity is compromised, pressure may escape without obvious drips, delaying leak detection. You should inspect for uneven bite, threading damage, or misalignment that reduces seal quality. A faulty clamp can undermine system integrity, so you’ll want to test with a pressure hold and visualize for stains. Regular leak detection checks keep the line safe, and proper tightening prevents hidden leaks from persisting.