When a DIY Upgrade Leads to Check Engine Light After Modification: How to Roll Back Safely
When a DIY upgrade triggers a check engine light, first roll back changes safely by restoring OEM wiring routes and rechecking sensor connections. Disconnect power, verify grounds, and confirm that vent, vacuum, and fuel lines are correctly reattached. Reassemble in reverse order of the modification, then scan for codes and compare live data to factory baselines. If codes persist, revert one change at a time and perform a cautious test drive. More precise steps await you if you continue.
Diagnosing the Check Engine Light After a DIY Upgrade
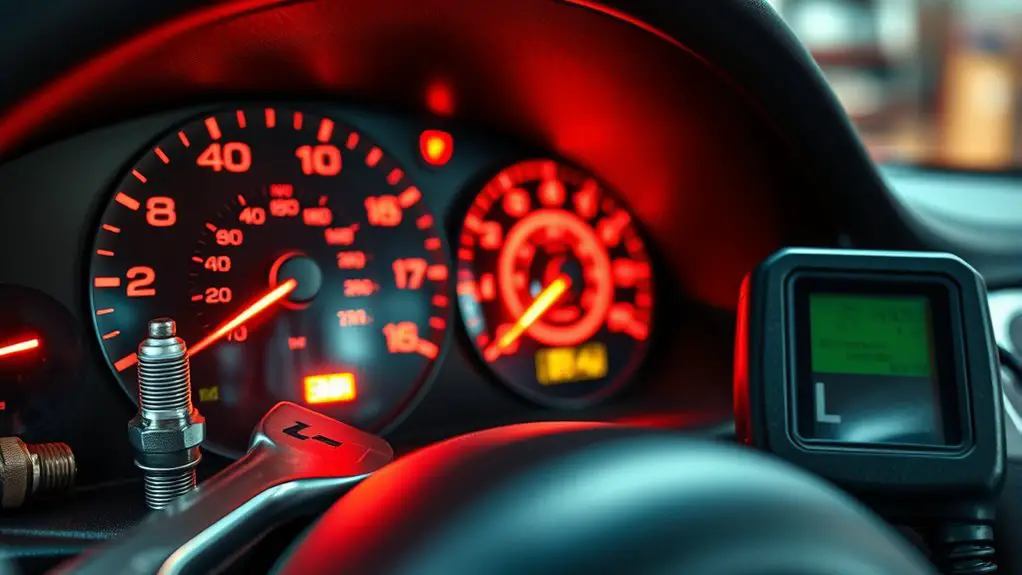
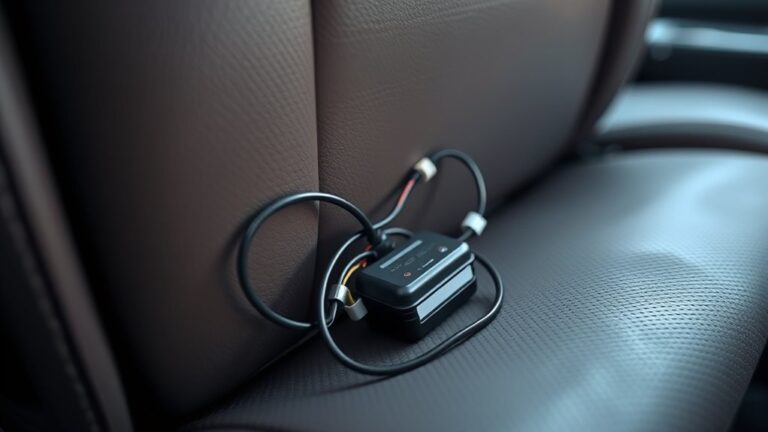
When your DIY upgrade triggers the check engine light, start by establishing a baseline: note when the light came on, what you were modifying, and any abnormal symptoms you observed. With that baseline in hand, you’ll proceed with a focused diagnostic approach. Use diagnostic tools to pull stored codes, then cross-check each code against your modification’s plausible effects. Identify whether a sensor reading or a wiring concern could be implicated, and isolate the area you altered to reduce noise from unrelated issues. Inspect engine sensors for obvious faults: loose connectors, corrosion, damaged harnesses, and displaced components. Confirm fuel trim and ignition data against expected values under your current load and RPM. Document each finding, including successful tests and failed hypotheses. Prioritize fixes that restore baseline behavior, not just suppress the light. Maintain a calm, methodical pace, and verify improvements with a follow-up scan after road testing.
Common Causes of CEL After Modifications
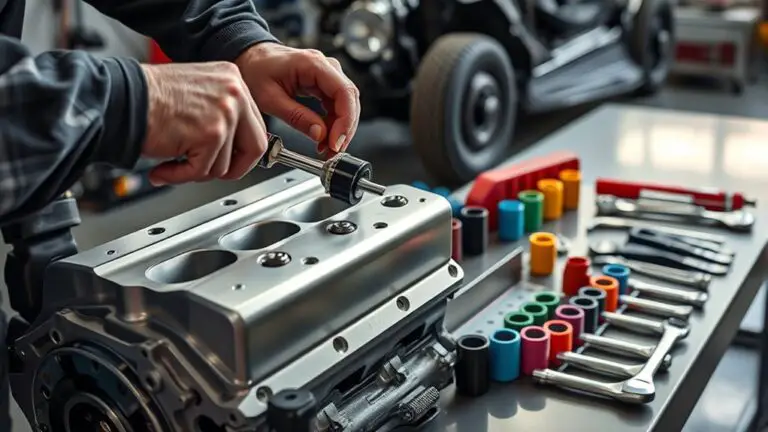
Common causes of a check engine light after modifications often boil down to sensor or wiring changes, improper reassembly, or fuel and ignition readouts thrown off by the upgrade. You’ll want to verify connections, sensor integrity, and calibration as the core steps. Start with visible wiring: unplugged plugs, pin damage, or loose grounds can trigger faults. Next, review sensor health—faulty sensors are a frequent culprit when you tinker, so test or replace them as needed. Reassembly must restore OEM routing and torque, avoiding bent hoses or misplaced clamps that can create leaks or vacuum leaks. Fuel and ignition signals may be altered by aftermarket parts, so confirm correct fuel trims and timing references. Below is a quick reference to keep you organized.
| Step | Focus |
|---|---|
| Wiring | Inspect connectors, grounds, and harness routing |
| Sensors | Test for faults, clean or replace as needed |
Safety First: Immediate Steps Before Digging In
Before you start, make sure the engine is cool and the battery is off to prevent shocks or shorts. Check for basic safety gear and clear workspace, then gather essential tools for quick diagnostic steps like code readers and basic hand tools. Set a simple plan: confirm immediate safety, then run through the quick diagnostic checks to identify any obvious faults.
Immediate Safety Prep
To begin safely, power down the vehicle and remove the key, then disconnect the negative battery terminal to prevent sparks or shorts while you inspect or work on electrical or engine components. You’ll build a clean, controlled workspace before you touch anything. Prioritize preparation over guesswork with a concise plan and proper PPE.
- Verify you have safety gear on hand (gloves, eye protection, insulated tools) and an accessible emergency kit in reach.
- Clear the work area of clutter, and position the vehicle on level ground with the parking brake engaged.
- Double-check loose cords or components before handling any wiring or fittings to avoid unintended reactivations or injuries.
With these steps, you maintain control, reduce risk, and preserve your freedom to diagnose confidently.
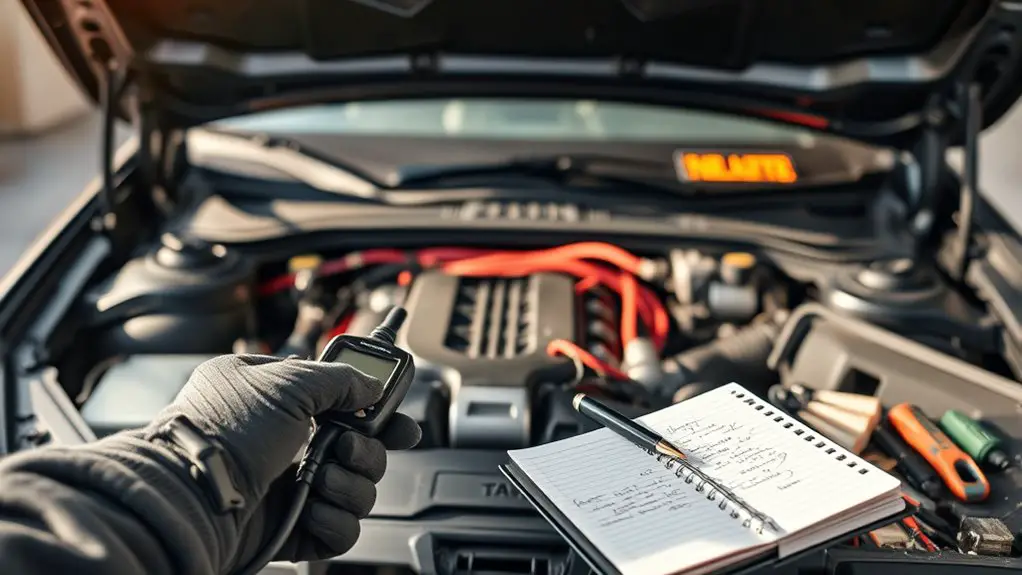
Quick Diagnostic Steps
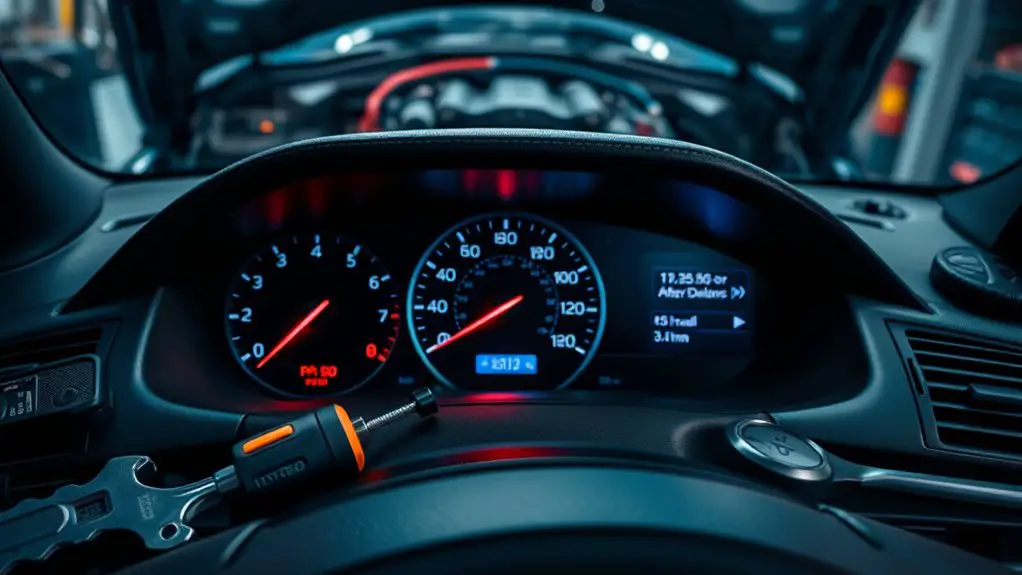
Once safety gear is on and the area is secured, start with quick checks you can do with the engine off. Begin with a visual inspection: look for loose hoses, damaged wires, or oil leaks, and verify battery terminals are clean and tight. Check fuses and relays in the box for obvious signs of wear or corrosion. Confirm connections to the ECU aren’t bent or disconnected. If you have access to scan tools, note any stored fault codes even when the engine is off, and record a timestamp. Perform initial scans of live data once the harness is reconnected and the key is on. Document abnormal readings, vacuum leaks, or misfire indicators, and plan a targeted rollback approach from this concise diagnostic baseline. Quick checks set a solid, actionable foundation.
Tools and Techniques for Non-Destructive Troubleshooting
Tools and techniques for non-destructive troubleshooting focus on quick, accurate diagnostics without harming components. You’ll lean on systematic checks that reveal issues without invasive disassembly. Begin with clear goals, then isolate symptoms to avoid chasing shadows. Your approach blends practical rigor with a sense of freedom, so you move efficiently and safely.
1) Use your diagnostic techniques to verify failures at the source, not from assumption.
2) Apply non-destructive tests first, reserving invasive steps for confirmed cases.
3) Document findings and paths to rollback, keeping options open without fragmenting your plan.
Focus areas include:
- troubleshooting tools you can trust for repeatable results
- measurement methods that quantify conditions, not guesswork
- quick verify steps to confirm fixes before road test
This mindset keeps you in control, preserves parts, and preserves momentum. You’ll gain confidence as tests validate every decision, reinforcing safe, effective upgrades.
When and How to Revert Upgrades Without Hurting Performance
When upgrades don’t deliver the expected gains, reverting them carefully safeguards performance without needless risk. You assess the upgrade’s purpose against observed outcomes, focusing on measurable changes rather than promises. Start by isolating the feature you altered, then compare baseline performance to current metrics to identify the performance impact. If gains are marginal or negative, plan a controlled rollback that preserves safe operating limits and data integrity. Document each change, including timestamps, settings, and any error codes, so you can reapply confidently or explain results later. Prioritize reversibility: keep backup configurations and restore points accessible. Consider incremental reversions to verify impacts step by step, rather than a full undo from the outset. Reassess after each adjustment using objective tests, such as torque curves, fuel trims, or response latency. Only proceed with a rollback when the evidence supports a net improvement in reliability, efficiency, and satisfaction with the upgrade benefits. Aim for a balanced, repeatable process.
Systematic Rollback: A Step-by-Step Plan
To begin a systematic rollback, you’ll outline a controlled sequence that isolates each change, preserves safety margins, and maintains data integrity. You’ll map every modification to a rollback point, then execute in reverse order with clear checkpoints. This approach delivers predictable outcomes and minimizes risk, while you maintain the freedom to adapt as needed.
- Establish baseline: confirm current signals, fuel trims, and sensor readings before changes, guaranteeing a solid reference for troubleshooting techniques.
- Revert changes stepwise: undo the most recent modification first, test, then proceed to the next, documenting results at each stage.
- Validate performance and safety: recheck key systems, ensure no new faults arise, and confirm OEM tolerances are respected for rollback strategies.
Keep records, implement small, auditable trials, and avoid sweeping fixes. This disciplined method empowers you to regain control without guesswork, balancing autonomy with system integrity.
Verifying Repairs and Clearing the CEL Safely
First, you’ll confirm the repair by rechecking the affected systems with the proper scan tool and live data to guarantee the fault is resolved. Then, you’ll clear the CEL only after confirming no current or pending codes remain, using the correct reset procedure and documenting the process. Finally, you’ll verify that the CEL stays off after a short test drive and recheck for any reoccurring codes to confirm a true fix.
Verify Repairs Safely
After performing repairs, begin by verifying that the issue is resolved using a systematic, step-by-step approach. You’ll focus on repair validation and solid inspection techniques to confirm the fix without guessing. This keeps you in control and minimizes repeat work.
- Confirm symptom elimination with targeted tests and a light own-vehicle drive to observe stability.
- Recheck related sub-systems for collateral effects, logging any anomalies for later review.
- Clear the CEL only after all tests pass and data shows normal ranges, then monitor for reoccurrence within a defined drive cycle.
Maintain precise records of tests, thresholds, and outcomes. A disciplined verification routine protects your freedom to DIY confidently and safely.
Clear CEL Properly
Clearing the check engine light properly starts once you’ve verified that all tests pass and normal ranges are restored. You’ll perform clearance checks to guarantee no residual faults linger and all monitors reset. If a pending code remains, re-run self-diagnostic steps before clearing the light. After confirmations, clear codes using the OEM tool or protocol, then drive in a controlled pattern to let sensors recalibrate. Sensor recalibration is essential; unverified values can re-trigger the CEL. Document results, including date, test outcomes, and calibration notices. If the light returns, halt further clearing and reassess repairs. Use a methodical approach, avoiding rushes that compromise safety or data integrity.
| Step | Action |
|---|---|
| 1 | Confirm tests pass |
| 2 | Perform clearance checks |
| 3 | Clear codes |
| 4 | Validate sensor recalibration |
When to Seek Professional Help and Warranty Considerations
If your DIY upgrade triggers an ongoing check engine light, there are clear signs it’s time to consult a professional: persistent fault codes despite basic checks, unusual engine behavior (misfires, rough running, loss of power), or if you’re unsure about interpreting diagnostic data.
If your DIY upgrade triggers a check engine light, seek a professional when codes persist or engine performance drops, and diagnostic data is unclear.
Consider these steps to protect yourself and your vehicle:
1) Assess warranty implications: confirm what parts/modifications void coverage and what documentation you’ll need for claims.
2) Seek a professional assessment: a qualified technician can validate codes, perform safe rollback, and determine if factory integrity is restored.
3) Decide on post-service options: request a written report, preserve diagnostic data, and discuss future upgrade paths that won’t compromise warranty or reliability.
Reasonable haste isn’t needed, but timely action is. Professional guidance keeps you aligned with manufacturer intent, ensuring a documented, reversible path. If doubt persists, prioritize safety and warranty integrity over “do-it-yourself” bravado.
Frequently Asked Questions
Can Rollback Affect Other Electronic Modules Unexpectedly?
Yes, rollback can affect other electronic modules unexpectedly.
You should assess rollback implications carefully, checking compatibility across modules before applying changes. Start by documenting current configurations, then reflash or restore original calibrations, and verify each module’s status after rollback. Guarantee electronic compatibility of firmware versions, sensors, and control units. Keep backup logs, use safe diagnostic tools, and proceed methodically to prevent cross-talk or re-learn routines from triggering new faults. Monitor for CEL avoidance and confirm functional stability.
Will Rolling Back Affect Tuned Performance Profiles or Maps?
Rolling back can alter tuned performance profiles, so yes, it may affect maps. You’ll want to save your stock baseline first, then reflash carefully. Check rollback implications on ECU, transmission, and any tuner modules; some profiles could remain active until reinitialized. After rollback, verify performance parameters, torque limits, and fuel trim. If you reapply tuning, test in a controlled environment and document changes. You control the balance between safety and freedom.
How to Protect Warranty During a Rollback Process?
You’re asking about warranty implications during a rollback. You protect yourself by documenting everything, saving original files, and using manufacturer-approved rollback procedures. Follow your vehicle’s service bulletin steps, and avoid non‑OEM tools that could void coverage. Keep receipts, timestamps, and notes of changes. If in doubt, consult the dealer prior to rollback; this clarifies warranty coverage and avoids missteps. Carefully execute rollback procedures to minimize risk and preserve warranty protections.
Can DIY Tools Void Insurance Coverage During Repairs?
Yes, DIY tools can affect insurance coverage. You may face insurance implications if repairs aren’t performed to standards or if you cause further damage. Your policy could deny claims or raise rates, shifting repair liability onto you. To minimize risk, document work, use proper tools, and follow manufacturer specs. Verify coverage with your insurer before repairs, and consider professional help for high-stakes tasks to protect repair liability and preserve benefits.
Is There a Risk of Latent Faults After Rollback?
Yes, there is a risk of latent faults after rollback. You might uncover latent issues that weren’t obvious before, and rollback consequences can reveal ECU or sensor mismatches, wiring quirks, or calibration drift. To minimize risk, document changes, test thoroughly, and verify system states after rollback. Use safe procedures, reset codes, and recheck error histories. If problems persist, consult a pro. Stay methodical, disciplined, and aware that latent issues can surface anytime.