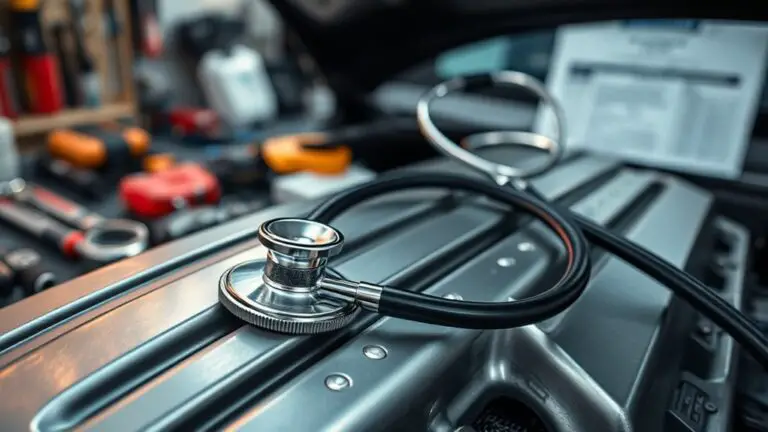
Step-By-Step: Winterizing Your Car to Prevent Fuel Degradation in Storage
Winter storage can degrade fuel, so start with a plan. Assess your storage, climate, and vehicle type, then choose a fuel stabilizer compatible with your fuel. Fill the tank near full, add stabilizer per label, and run the engine to circulate it. Keep the battery charged or disconnected, and clean/storage seal the system. Check oil, coolant, and lubricants, seal containers, and store upright. Maintain ventilation to minimize moisture, and when you’re ready to move again, you’ll be set for a quick restart.
Understanding Why Winter Storage Affects Fuel Quality
Winter storage can alter fuel quality because temperature shifts, containment conditions, and fuel aging all influence volatility and additive effectiveness. You’ll notice that fuel composition changes when stored, driven by evaporation of lighter hydrocarbons and phase separation in ethanol blends. Temperature effects accelerate or slow these processes, so siting and tank design matter. When you cycle storage temperatures, you create differential expansion and contraction, stressing seals and potentially allowing moisture ingress that promotes microbial growth and sediment formation. Keep in mind that volatility shifts change how the fuel vaporizes and burns, altering ignition characteristics and cold-start performance. Additives may degrade or segregate if exposure is prolonged, reducing corrosion protection and deposit control. To maintain stability, you should monitor storage intervals, keep tanks vented, and use stabilized fuel or minimal storage duration. Understanding these dynamics helps you manage risk and preserve engine reliability during idle periods.
Assessing Your Vehicle’s Storage Needs and Timeline
To determine how long you should store a vehicle and what you’ll need, start by outlining your usage window, climate, and storage conditions. Next, identify your vehicle type and how it will be used after storage, because different kinds demand different timelines. Assess storage duration by evaluating expected gaps, seasonal variations, and potential opportunities to drive briefly for system circulation. Consider your climate’s humidity, temperature swings, and exposure risk, then map a practical calendar with milestones for inspections, battery maintenance, and gasket checks. Your plan should specify whether you’ll store indoors or outdoors, and if outdoors, add protective covers and windbreaks. Decide on a minimum pre-storage preparation routine for the vehicle type, including fuel and fluid checks that align with your timeline. Finally, document your findings in a simple checklist, so you can enforce the timeline and adjust as conditions change while preserving fuel quality.
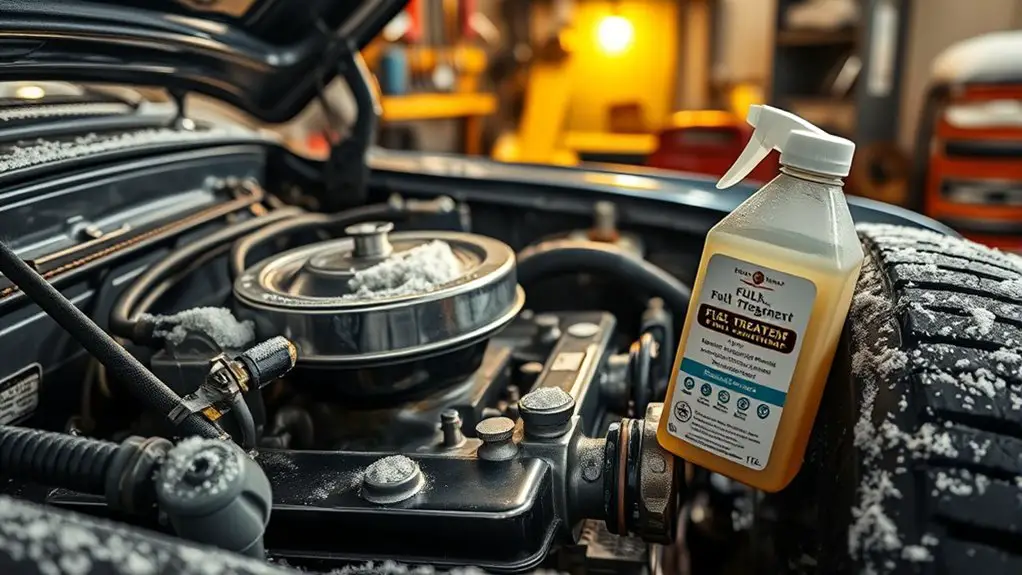
Choosing the Right Fuel Stabilizer and Additives

Choosing the right fuel stabilizer and additives starts with the stabilizer types that suit your engine and fuel; pick one labeled for your fuel system and climate. Additive benefits should be weighed by how they prevent gum, corrosion, and sediment, while matching them to your storage timing and expected idle period. Use clear, concise steps to plan mixing ratios and timing, and keep your labels handy for future reference.
Stabilizer Types
When selecting a fuel stabilizer, start by matching the product’s claim to your fuel type and storage period. You’ll compare options by bottle wording, not hype, and identify which formulations target gasoline, diesel, or ethanol-blended fuels. Focus on stability duration and compatibility with your storage plan, whether months or a full season. Choose a stabilizer that clearly states additives designed to minimize varnish, gum, and moisture issues in the chosen environment. Check bottle instructions for dosage, mixing steps, and any required fueling sequence. Consider stabilizer brands with transparent labeling and consistent test results. Assess stabilizer effectiveness from independent tests or user experiences, prioritizing proven performance over price alone. Keep your selection aligned with your goals: reliable protection, minimal fuss, and freedom to store confidently.
Additive Benefits
Sticking with the goal of reliable storage, the right fuel stabilizer plus additive blends work together to prevent common problems like varnish, gum, and moisture buildup. You’ll choose additive types that target your storage duration and fuel type, focusing on oxidation inhibitors, metal deactivators, and water scavengers. Pair these with a stabilizer to extend shelf life without altering burn quality. Evaluate performance benefits: reduced sediment formation, stabilized octane, and preserved volatility. Follow the product labels for dosing; avoid overloading your tank or mixing incompatible brands. Consider a baseline test in your climate to verify compatibility with your engine and fuel. This approach keeps fuel fresh, starts reliably, and supports a flexible, freedom-minded storage plan.
Storage Timing
To store fuel effectively, start by selecting a stabilizer and additives that match your storage duration and fuel type, then follow the label instructions for proper dosing. You’ll control quality by timing precisely and prepping for seasonal factors that affect volatility and contamination.
1) Choose stabilizers rated for your storage duration and climate, then mix to the recommended strength.
2) Match additives to fuel type (gasoline, diesel) and consider moisture control for seasonal factors.
3) Note bottle expiration dates and refresh every season or sooner if you open the container.
4) Use a dedicated, sealed container and perform a final shake and inspection before storage.
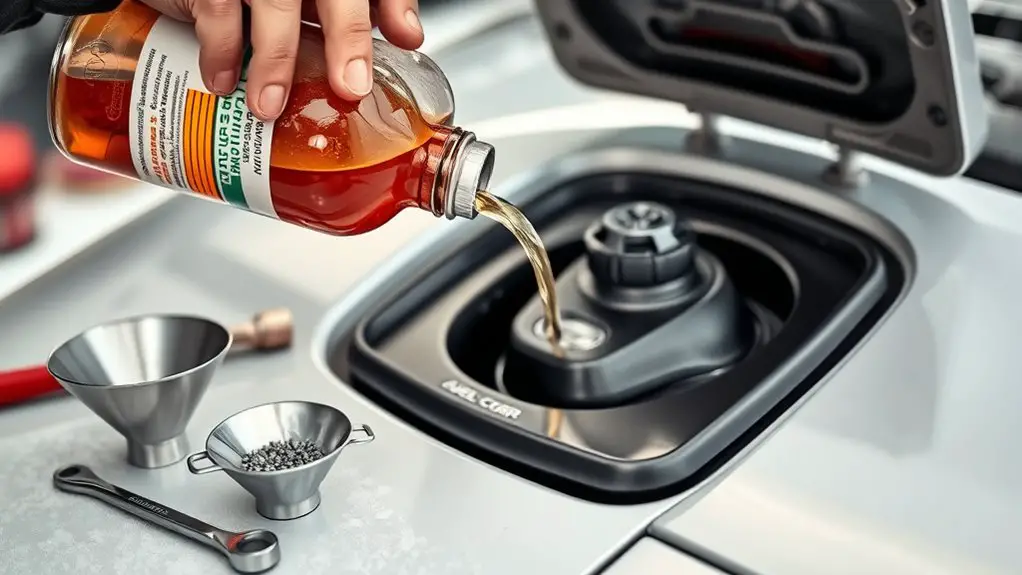
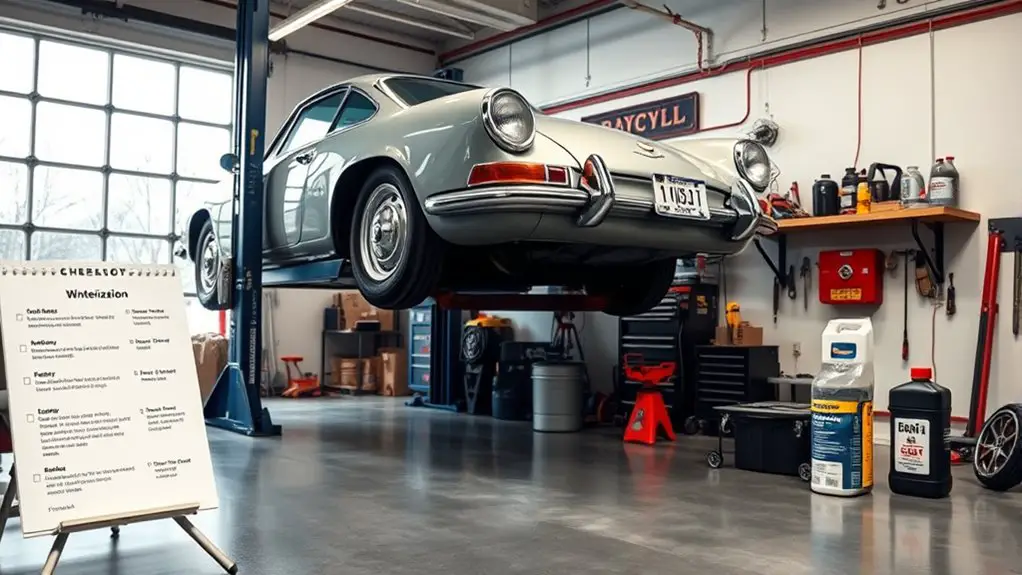
Fuel Tank Preparation: Topping Up and Sealing
Topping up the fuel tank before winter storage helps prevent condensation and corrosion, so start by ensuring you’re in a well-ventilated area and parking on level ground. You’ll fill to near full, leaving a small vented space for expansion, then seal the cap firmly. This reduces air contact and slows moisture buildup, preserving fuel quality and minimizing microbial growth. Next, add a compatible fuel stabilizer per label directions, then run the engine briefly to distribute stabilizer through the system. Inspect for leaks, reseal as needed, and store with the vehicle on level ground.
| Step | Action | Result |
|---|---|---|
| 1 | Park level, ventilated area | Safe topping, moisture control |
| 2 | Fill tank close to full | Maximize fuel quality, minimize airspace |
| 3 | Add stabilizer, run engine | Stabilized fuel circulating |
This routine keeps fuel tank maintenance simple while preserving freedom to store confidently.
Battery Care During Extended Parking
Battery care during extended parking is essential to prevent discharge, corrosion, and parasitic drain. You’ll keep power available by following a simple routine that minimizes risk and preserves battery health during storage.
1) Check electrolyte health and terminals: clean corrosion, tighten connections, and guarantee posts are free of grime before long idle periods.
2) Maintain charge strategically: use a smart charger or disconnect the battery if storage exceeds several weeks; avoid full discharges that shorten lifespan.
3) Plan for jump starting: store a portable jumper pack or guarantee access to a vehicle for a safe discharge-recharge cycle if needed.
4) Schedule periodic wake-ups: recharge every 4–6 weeks and test voltage, aiming for 12.6–12.8V when rested.
This battery maintenance approach reduces parasitic drain and extends life. You’ll appreciate the reliable start when you return, without surprises. Jump starting should remain a last resort, not a daily habit.
Tire and Wheel Maintenance for Long-Term Storage
Long-term tire and wheel storage requires proactive steps to prevent flat spots, moisture buildup, and corrosion, so you’ll protect performance and prolong life. Start by cleaning tires and rims, removing grime that could trap moisture. Inflate tires to the recommended tire pressure for off-season storage, reducing contact with the floor and distribution of weight. Inspect for cracks or bulges; replace if needed before storage. Park on a clean, flat surface or lift using supports under the jack points to avoid tire sag. Rotate wheels periodically to even wear and prevent flat-spot formation. If you tow or place weights on tires, make sure supports won’t crush sidewalls. Check wheel alignment before reinstalling; misalignment can stress tires and damage suspension. Cover wheels with breathable fabric to minimize dust while avoiding trapping moisture. Record storage conditions and dates for maintenance reminders, and keep a visible, portable gauge to verify tire pressure at regular intervals. Stay proactive to maximize longevity and performance.
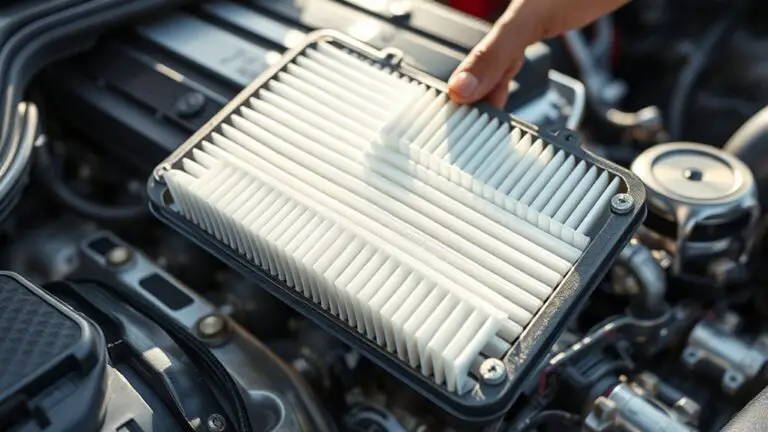
Protecting Fluids: Oil, Coolant, and Other Lubricants
Caring for your car’s fluids starts where tire storage ends: with keeping oil, coolant, and other lubricants stable and ready. You’ll protect performance by confirming baseline conditions and avoiding surprises during storage.
1) Check oil viscosity and level, replacing if it’s dark or sludge-prone, so viscosity remains consistent when temperatures swing.
2) Test coolant concentration with a refractometer or tester; adjust to the manufacturer’s spec, ensuring freeze and boil protections stay intact.
3) Inspect other lubricants (gear oil, hydraulic, power-steering) for separation or varnish; replace or top up to maintain lubrication film integrity.
4) Seal containers airtight, store upright in a cool, dry spot away from direct sun, and label all fluids with date and content for quick future checks.
Combating Moisture: Ventilation and Condensation Prevention
Ventilation and proper condensation control are essential once moisture can enter a stored car. To begin, set up a simple routine that promotes humidity control without overhauling the climate. Open vents minimally to establish steady air circulation and prevent stagnant pockets near seals and floors. If you’re storing in a dry environment, run a brief circulation cycle daily—ten minutes is enough—to exchange interior air without exposing contents to cold drafts. Use a calibrated desiccant or moisture absorber in the cabin area, replacing as directed, to suppress humidity build-up. Inspect window gaskets and door seals for gaps; seal any breaches to maintain consistent air movement and condensation prevention. Avoid windows left cracked for extended periods, which can invite humidity and frost. Monitor the interior temperature relative to outside air; aim for gradual shifts to minimize condensation on glass. Document dates and results to refine humidity control over time and preserve fuel integrity.
Starting and Periodic Maintenance While Parked
To start, you should perform a quick battery health check and confirm it holds a proper charge. Then, you’ll monitor fluid levels—engine oil, coolant, brake fluid, and windshield washer—and top up as needed. Regularly schedule short, parked-period inspections to catch any slow leaks or weak connections before winter drives.
Battery Health Checks
If your car sits for extended periods, check the battery health regularly and before starting it again. You’ll want a concise routine that preserves power without drama.
1) Inspect terminals and cables for corrosion; clean with a baking-soda solution if needed, then dry.
2) Test voltage with a multimeter; aim for 12.6–12.8V when idle.
3) Schedule periodic charge cycles using a smart charger, following charging tips to avoid overvoltage.
4) Note signs of weakness: slow crank, dim lights, or warning indicators; address promptly to maintain battery maintenance and reliability.
Keep a log of dates, voltages, and any charges. This simple cadence reduces storage risk, supports safe re-starts, and respects your freedom to store without compromise.
Fluid Level Monitoring
Fluid levels matter just as battery health does when a car sits parked. You’ll monitor fluid levels during storage to prevent surprises. Start by checking engine oil, coolant, brake, and transmission fluids on a calm, level surface. Note any thirst-pelt changes in color or odor, and log your readings. Perform fluid checks with the engine off, using the correct dipsticks and ranges from the manual. Top up only as specified; avoid overfilling, which can cause pressure issues. Confirm fuel, windshield washer, and coolant mixes remain within recommended ratios, and verify the fluid consistency of each reservoir. If any level is low, add the appropriate brand and spec, then recheck after 24 hours. Maintain records for ongoing, proactive winter care.
What to Do When You’re Ready to Move Again
When you’re ready to move again, start by checking your tires, battery, and wipers to guarantee nothing’s compromised by winter storage. You’ll arrive with confidence if you follow a tight, practical routine that respects moving logistics and a steady preparation checklist.
- Inspect tires for tread wear and proper inflation; replace or rotate as needed before the move.
- Test the battery, clean terminals, and make sure there’s a full charge to prevent mid-move failures.
- Verify fluids, seals, and exhaust; top off as required and look for leaks.
- Schedule a quick exterior and interior clean, secure loose items, and confirm load distribution.
This approach prioritizes clarity and efficiency, letting you maintain momentum without excess. Use the preparation checklist to track tasks and timing, then align your steps with moving logistics, so your shift stays smooth, controlled, and free. You’ll feel ready to roll, not overwhelmed.
Frequently Asked Questions
Can I Store My Car With an Empty Gas Tank Safely?
If you’re asking, yes—you can store a car with an empty gas tank, but there are cautions. Fuel tank safety matters: never leave it completely dry for long, as rust or contamination can plague lines. Add stabilizer if you’ll store for months, and keep the tank one-quarter to half full to reduce moisture. For storage concerns, guarantee vents are closed, battery isolated, and fuel lines checked before you reintroduce fuel. You’ll protect viability and freedom in your approach.
How Often Should I Run the Engine During Storage?
You should run the engine briefly every couple of weeks during storage. This keeps fuel system components lubricated and prevents seals from stiffening. A 10–15 minute idle or short drive each time is enough to circulate oil and verify charging. Consider engine maintenance and a gentle load to avoid battery drain. Monitor storage duration and adjust frequency if temps swing or you notice stiffness. This routine helps you preserve long-term reliability.
Will a Partial Fuel Fill Harm Fuel Quality?
A surprising 40% of gasoline quality degrades in just a few months of partial fill, so yes—partial fuel fill can harm fuel quality. You should prioritize fuel tank maintenance and storage best practices by keeping the tank near full or stabilized, minimizing air and moisture exposure. Follow a precise, procedural routine, and stay practical: seal gaps, use a stabilizer, and perform regular checks to sustain performance while you enjoy the freedom of reliable storage.
Do Fuel Stabilizers Expire or Lose Effectiveness?
Yes, fuel stabilizers do expire and can lose effectiveness over time. Keep an eye on the product’s label for the recommended shelf life, and store it in a cool, dry place. If it’s past its date, don’t rely on it; replace it. When you plan long storage, consider batches with fresh stabilizer to maintain fuel quality. Check fuel stabilizer lifespan and note any signs of effectiveness degradation before your next trip.
Is a Car Cover Necessary for Winter Storage?
Sometimes you need luck and strategy alike; yes, a car cover isn’t strictly necessary, but it helps. If you park outside, a breathable cover reduces frost, dust, and debris, aiding car protection during winter maintenance. If you store in a controlled garage, you can skip it. Decide based on exposure and climate. In any case, perform regular checks, keep fuel stabilized, and guarantee tires, fluids, and battery stay reliable for freedom and peace of mind.