
How to Balance and Align Wheels to Eliminate Vibration at Speed
To eliminate vibration at speed, you methodically diagnose vibration sources first—identify if it’s mechanical, structural, or balance-related, and inspect tires, bearings, and suspension for play. Then balance the wheels with precise weights on a stable turntable, ensuring proper tire pressure and clean mating surfaces, while documenting weight changes. Check alignment to confirm camber, caster, and toe are within spec and recheck after any adjustment. If issues persist, you’ll uncover more steps that’ll guide you toward steadier performance.
Diagnosing Vibration Sources

Diagnosing vibration sources begins with identifying whether the vibration is mechanical, structural, or balance-related. You’ll follow a structured approach to isolate the root cause, starting with symptom characterization and controlled testing. First, determine if the vibration varies with speed, road surface, or steering input; this points to vibration causes linked to drivetrain components, tire issues, or suspension interfaces. Next, perform a systematic inspection of tires for irregular wear, out-of-round conditions, or improper inflation, since tire issues often drive perceptible shake at both low and high speeds. If the vibration persists after tire checks, assess wheel bearings, control arms, and subframes for play or binding, then evaluate mounting hardware for looseness. Use a tachometer and road tests at specified speeds to map the vibration profile, documenting frequency and amplitude. Maintain precise records to guide repairs without unnecessary disassembly. Your objective is a reproducible diagnostic trail that informs corrective actions efficiently.
Wheel Balancing Fundamentals

Wheel balancing is the process of identifying and correcting imbalances in a wheel-tire assembly so that rotational motion remains smooth at varying speeds.
Wheel balancing fixes imbalances to keep rotational motion smooth across speeds.
You’ll approach balancing methodically: measure vibration, inspect the wheel and tire, and determine corrective actions with precise wheel weights and placements. The goal is to achieve a dynamic balance at typical road speeds, minimizing lateral and radial runouts. Start with tire pressure checked to nominal values, as improper pressure shifts mass distribution and affects balance results. Use a consistent balancing technique—static and dynamic—as you assign wheel weights to the proper positions. Record each weight addition, its exact location, and the resulting change in vibration to guide future setups. Expect incremental adjustments and rechecking to converge on a stable condition. Balance is not a one-time fix; it’s an iterative process that honors accuracy and repeatability for safe, confident driving.
- Identify baseline vibration
- Set nominal tire pressure
- Apply precise wheel weights
- Recheck and document results
Checking and Adjusting Alignment
You’ll start by outlining the Wheel Alignment Basics to establish the baseline measurements and acceptable tolerances. Next, apply the Adjustment Procedures Tactics to identify misalignment symptoms and select the appropriate corrective actions with repeatable methods. Finally, document the results and verify alignment through a methodical check to guarantee consistent, holds-under-test performance.
Wheel Alignment Basics
Wheel alignment basics involve checking that the wheels sit square to the vehicle and travel parallel to each other and the centerline. You’ll verify caster, camber, and toe concepts without drifting into full adjustment procedures. Focus on how wheel types influence stance, contact patch, and steering feel, and on how tire pressure interacts with alignment outcomes. This approach keeps your ride responsive while remaining within safe limits and designed for freedom in handling.
- Confirm wheel types are appropriate for vehicle dynamics and load
- Inspect tire pressure and uniformity across all corners
- Check parallelism between front and rear axles
- Assess toe direction relative to the centerline for straight tracking
Adjustment Procedures Tactics
To begin adjustment procedures, gather the required tools and establish a controlled baseline, then verify that each suspension member and fastener is within specification before proceeding. You’ll perform systematic checks on caster, camber, and toe, documenting readings against manufacturer tolerances. Use calibrated gauges, observe alignment marks, and confirm track width remains constant after any trim. If readings drift, adjust with incremental turns, then recheck, avoiding overcorrection. Maintain suspension preload, tire pressures, and ballast to preserve accuracy throughout the procedure. After adjustments, remeasure wheel alignment and inspect steering geometry for binding or abnormal play. Record results, note vibration reduction outcomes, and verify road-test performance at speed. This disciplined approach supports precise wheel adjustment while preserving freedom through controlled, purposeful motion.
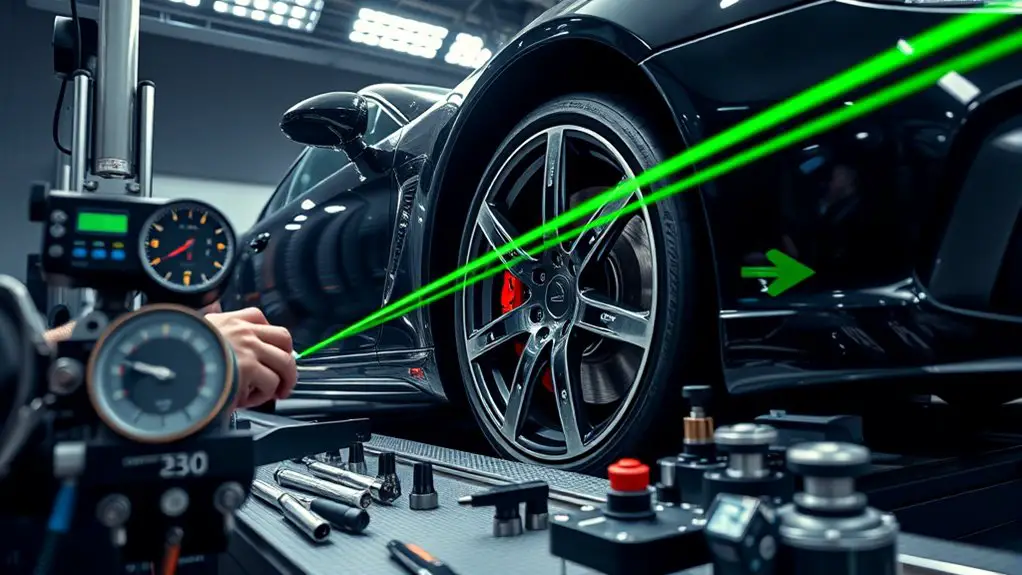
Tools and Techniques for DIY Balancing
Balanced wheels depend on accurate measurement and proper instrumentation. You’ll approach DIY balancing with measurable steps, not guesswork, using practical tools and repeatable methods. The goal is repeatable outcomes: identify imbalance, apply corrective weights, verify, and iterate until vibration is minimized at speed. Your toolkit should reflect balancing tool essentials: a stable turntable, precise dial indicator or sensor, and calibrated weights with placement guidance. For DIY balancing techniques, organize your workflow to minimize error sources like wheel runout and mounting inconsistencies. Maintain clean mating surfaces, secure fasteners, and document weight changes for future reference. Accuracy hinges on consistent procedures, not haste. Embrace a disciplined routine, log data, and recheck after each adjustment. With this mindset, you gain reliability, freedom, and confidence in road conditions you control.
- DIY balancing techniques
- balancing tool essentials
- precise measurement setup
- repeatable verification steps
When to Seek Professional Service
When DIY balancing shows persistent vibration at speed despite repeated corrections, it’s time to contemplate professional service. You’re not abandoning control—you’re preserving it by targeting root causes with specialized tools and calibrated procedures. A professional inspection assesses hub concentricity, rotor runout, tire uniformity, and wheel mounting surface integrity, then differentiates mechanical from dynamic contributors. Vibration troubleshooting proceeds with controlled road testing, high-speed spin balancing, and instrumentation data review to pinpoint faults beyond DIY limits. If imbalance, misalignment, or assembly anomalies persist, service is warranted to restore confidence and safety.
| Visual cue | Diagnostic implication |
|---|---|
| Subtle steering shimmy at cruise | Potential tire/wheel imbalance or out-of-round condition |
| Vibration vanishes under load | Likely suspension or tire dynamic issue |
| Noise accompanies vibration | Possible bearing, hub, or mounting fault |
| Vibration at specific speed bands | Possible harmonics or balance ring defect |
Proceeding now with professional inspection will yield definitive vibration troubleshooting outcomes and preserve long-term wheel integrity.
Maintaining Wheels for Long-Term Smoothness
Maintaining wheels for long-term smoothness starts with establishing a reliable baseline and then preserving it through systematic checks. You’ll build consistency by documenting baseline tire pressure, tread condition, and wheel runout, then monitor changes over time. Precision comes from regular, repeatable measurements and disciplined maintenance rituals.
Maintaining wheel smoothness starts with a baseline and disciplined, repeatable checks.
- Check tire pressure regularly and adjust to the vehicle spec before each long trip
- Inspect wheel rotation patterns and balance signs during rotation intervals
- Track wear indicators and correlate them with vibration data for early detection
- Schedule proactive alignment reassessments after impacts or pothole events
In practice, stay disciplined: log values, perform quick visual audits, and compare against prior records. When you notice deviation, return to baseline procedures, recheck torque and mounting surfaces, and validate with a fresh balance. This rhythm reduces variance, preserves ride quality, and supports safe, confident driving at speed while keeping freedom to explore without compromise.
Frequently Asked Questions
How Do Lug Nuts Affect Wheel Vibration at High Speeds?
lug nut torque can calm or exaggerate vibration at high speeds. If torque is too loose, lug nuts can allow wheel wobble, amplifying noise and steering feel; too tight, you risk stud stress and deformation that also covertly tells you something’s off. Vibration causes include improper lug engagement, missing washers, or uneven clamp load. You’ll want precise torque specs, clean mating surfaces, and proper star-pattern tightening to minimize vibration causes and preserve ride freedom.
Can Tire Rotation Influence Wheel Alignment Outcomes?
Yes, tire rotation can influence alignment outcomes. When you rotate tires, you redistribute wear patterns, which affects steering feel and tracking. Monitor tire wear after every rotation, noting any deviations that suggest misalignment. If wear isn’t symmetric or alignment adjustments are required, perform toe, camber, and caster checks. Proper rotation cadence helps preserve alignment targets and reduces rare, subtle vibrations. Keep torque specs, hub cleanliness, and lug nut re-tightening in your procedure for precise results.
Do Wheel Weights Need Rebalancing After a Tire Change?
Yes, after a tire change you’ll likely need to rebalance with a new wheel weight. If weights were removed or shifted, vibration can return. You’ll reinstall or replace wheel weight to restore true balance, then recheck with a road test. Precision matters: confirm the tire change didn’t alter runout, and verify static and dynamic balance. This keeps handling confident and directions clear while you explore freedom on the road.
Can Steering Wheel Play Indicate Misalignment or Imbalance?
Yes, steering wheel play can indicate misalignment or imbalance, but it isn’t definitive. You’ll want to assess steering feedback and alignment indicators methodically: check for consistent pull, uneven tire wear, and wobble at speed. If play exceeds spec, pursue wheel alignment and tire balance first, then recheck. Document readings, adjust toe and camber as needed, and verify steering response with test drives. Maintain clear records for future diagnostics.
What Are Signs of Bent Wheels Causing Vibration?
Bent wheel signs include unusual tire wear patterns, crescent or cupping wear, visible wheel wobble, and steering pull. Vibration causes arise from out-of-round rims, bends transferring imbalance at speed, and contact issues with brake components. You should inspect for runout with a dial indicator, spin balance checks, and tire bead seating. If found, replace or true the rim, reseat tires, and recheck alignment. Addressing bent wheels promptly prevents further vibration and unsafe handling.