How to Prepare Your Car and Tools Before Tackling Complex Electrical Gremlins
Before you tackle complex electrical gremlins, set a clear safety plan: park or neutral with the parking brake on, disconnect the battery, and wear gloves and eye protection. Organize a stable workspace with good lighting, labeled zones, and a tidy tool zone. Gather diagnostic gear, spare fuses, relays, and a portable power source. Define goals, log symptoms, and label wires and connectors. Follow a disciplined disconnect/reconnect sequence to protect components, then proceed to targeted tests for faster, reliable results. You’ll uncover more as you progress.
Safety First: Essential Precautions Before You Begin

Before you do anything, make certain the car is in park (or neutral, with the parking brake engaged) and the key is out of the ignition. Safety isn’t optional when you tackle electrical gremlins; it’s the framework that lets you think clearly and work confidently. Start with personal protective measures: gloves, eye protection, and insulated tools, chosen for their comfort and reliability under pressure. Disconnect the battery only after you’ve verified you’re prepared, and label any circuits you test. Create a simple emergency kit nearby: reflective jacket, flashlight, spare fuses, and a first-aid guide. Maintain a disciplined workflow—survey the scene, identify hazards, then proceed in controlled steps. Avoid loose jewelry and metal accessories that can bridge circuits. Keep a tidy workspace, remove flammable materials, and never improvise fixes with live power. With these precautions, you preserve control, minimize risk, and stay aligned with your freedom to troubleshoot deliberately and safely.
Workspace Setup: Organizing Your Vehicle and Work Area

A well-organized workspace minimizes distractions and keeps critical components accessible, so start by clearing a wide, level area around the vehicle and laying out a designated tool zone. You’ll map the workspace layout to minimize reach-time and maximize visibility, reducing bending and scrambling. Establish stable lighting that won’t cause glare or shadows on diagnostic points. Plate the floor with a non-slip mat and keep cords routed along walls or under a shielded edge to prevent trips. Create clear zones: one for under-hood access, one for interior inspection, and one for tool accessibility. Label bays for common tasks and reserve a dedicated area for loose fasteners and components to prevent misplacement. Maintain a clean workflow by returning items to their zones after use, and document any access restrictions or safety holds. This disciplined setup supports deliberate, safe work and preserves mental bandwidth for problem solving.
Tools and Materials: Diagnostic Gear, Fuses, and Spares to Have On Hand
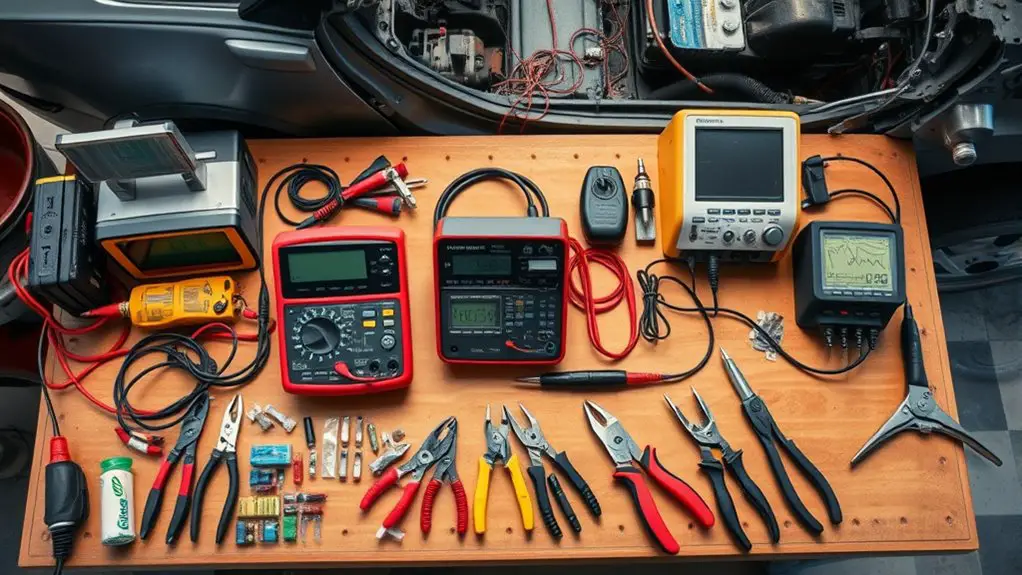
To diagnose and address electrical issues effectively, you should assemble a focused set of diagnostic gear, fuses, and spares that cover common failure points and testing methods. You’ll want diagnostic equipment that can read codes, monitor live circuits, and verify continuity without guessing. Include a multimeter, a test light, and a basic OBD-II scanner if your vehicle supports it. Keep a small, portable power supply to simulate loads when needed. For fuses, stock replacement fuses in common amperages and styles, plus a few high-current fuses for stage tests and temporary bypasses. Keep spare relays, a handful of blade and mini-fuse adapters, and spare bulbs for quick checks. Label and store everything in a compact organizer to reduce clutter and save time. Prioritize quality tools from reputable brands, and maintain a simple inventory so you know what’s on hand and what needs restocking.
Plan and Documentation: Goals, Symptom Recording, and Wiring Labels
Start with a clear set of goals: identify the electrical issue, confirm its location, and determine a safe, repeatable path to resolution. You’ll approach planning as a verification process: define objectives, capture symptom data, and map circuits to avoid detours. Use goal setting to structure your work: what constitutes a successful diagnostic, what measurements matter, and which steps finish safely. Maintain meticulous symptom tracking, logging when issues appear, under what conditions, and any notable changes after tests. This data creates a traceable timeline you can review later or share with a helper. Create lightweight wiring labels before you touch any harnesses: label connectors, grounds, and power feeds with concise identifiers that won’t confuse you later. Keep the labeling consistent and legible, using a simple coding scheme. Review your plan briefly, confirm you have access to key tools, and proceed calmly. Precision in documentation reduces ambiguity, speeds restoration, and supports your freedom to work confidently.
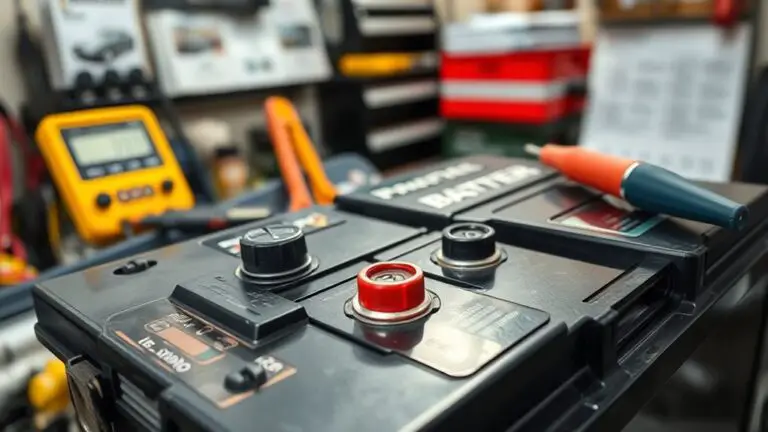
Power Management and Battery Protocols: Disconnecting, Reconnecting, and Safety Tips
Power management and battery protocols require careful sequencing: disconnect the battery, power modules, and grounds before inspecting circuits, then reconnect in the opposite order to restore function. You approach this with discipline, tracking steps as you proceed, to reduce risk and preserve system integrity. Battery maintenance becomes a routine practice, not a guesswork ritual, and electrical diagnostics gain reliability when performed with proper isolation and documentation.
Power management demands disciplined sequence: disconnect, then reconnect, with careful isolation and documented steps.
1) Disconnect order: battery negative, then battery positive, then any ground straps, verifying absence of residual charge.
2) Reconnection order: grounds, then power modules, then battery positive, confirming belts, fuses, and relays sit correctly.
3) Verification: recheck all connections, clear fault codes, and test circuits in a controlled sequence before full reassembly.
Approach this with clarity and deliberate tempo, balancing safety with momentum. You protect equipment and preserve your freedom to troubleshoot, knowing precise procedures underpin successful battery maintenance and accurate electrical diagnostics.
Frequently Asked Questions
How Do I Identify Hidden Electrical Gremlins Safely?
You should first inspect wiring for obvious damage, then use a multimeter to test continuity, voltage, and resistance, while keeping the power off whenever possible. Look for corroded grounds and burred connectors that hint at hidden faults, and tag any suspicious circuits. Maintain electrical safety by wearing insulated gloves and keeping liquids away. If anything seems off, halt work and consult a professional. Trust your measurements, document findings, and avoid shortcuts.
What Branding or Specs Matter for Automotive Multimeters?
Brand reputation and multimeter accuracy matter for automotive meters. You want a unit from a trusted maker with solid aftercare, proven input protection, and clear DC/AC specs. Ascertain a wide voltage range, low burden on circuits, and true RMS for fluctuating signals. Look for auto-ranging, fusing, and robust leads. You’ll rely on repeatable readings, fast response, and durable construction. Choose a brand you respect, then verify accuracy with calibration data and documented test results.
Can I Test Circuits Without Disconnecting the Battery?
Yes, you can test circuits without disconnecting the battery, but proceed with caution. Keep one hand away from grounded surfaces and use insulated tools for circuit testing and measurements. Establish a safe test path, minimize spark risk, and monitor voltages carefully. Prioritize battery safety throughout the process, avoid shorting any nodes, and limit probe contact to live pads only. If you’re unsure, stop and recheck steps before continuing with precise, methodical testing.
Which Wiring Diagrams Are Most Reliable for Complex Issues?
Anachronism: You’ll want a modern blueprint unfolding like Da Vinci’s notebook—precise, methodical, practical. For the question, go with reliable sources and prioritize diagram clarity. You’ll find the most dependable wiring diagrams in factory service manuals, OEM tech notes, and reputable automotive databases. Cross‑check against multiple diagrams, note color codes, and verify with logical tracing. Trust sources that clearly annotate grounds, feeds, and relays so you can diagnose complex issues confidently.
How Do I Document Intermittent Faults Effectively?
Intermittent fault documentation hinges on disciplined logging. You’ll record time, conditions, and symptoms each occurrence, then correlate with sensor data and event frames. Use neutral, precise language and avoid assumptions. Effective troubleshooting techniques rely on repeatable steps: reproduce when possible, note failure cadence, and attach photos or codes. You’ll build a timeline, sketch wiring paths, and annotate odds and potential causes. This methodical approach grants you freedom to diagnose confidently and optimize repair strategies.