How to Prepare Your Car and Tools Before Tackling Lack of Diagnostic Info
To tackle a lack of diagnostic info, start with a clean, well-lit workspace and secure it from distractions. Gather a focused core toolkit: multimeter, basic scan tool, flashlight, insulated screwdrivers, and a battery tester. Establish a safe baseline with visual and functional checks—look for leaks, wear, and obvious damage, then confirm starting, lighting, and climate controls work. Document findings as you go and plan tasks by impact and feasibility. If you stay organized, you’ll uncover actionable clues and progress further.
Assess the Situation and Set Goals

So, start by evaluating what’s really happening and what you want to achieve. You’ll begin with problem identification: what symptoms show up, when they occur, and what changes you’ve noticed in performance. Then define your goal setting: what successful repair looks like, what you’re willing to DIY, and what outcomes you insist on before you proceed. Map the gap between current symptoms and your target state, separating root causes from surface issues. Prioritize tasks by impact and feasibility, and set a realistic timeline that respects your budget and skills. Document specifics: noises, warning lights, error codes, and the exact conditions under which the problem appears. Decide on constraints and success criteria—how you’ll verify fixes, what tools you’ll need, and when you’ll stop if the situation doesn’t improve. This disciplined start keeps you focused, reduces wasted effort, and empowers you to take precise, informed next steps.
Safety First: Personal Protective Equipment and Precautions

Safety starts with the right gear and disciplined habits. You’ll protect yourself by choosing PPE with purpose, not presence. PPE selection isn’t cosmetic; it’s a diagnostic tool that keeps you in control when odds shift. Start with eye protection that seals against splashes, sparks, and debris, then layer in gloves rated for chemical or mechanical exposure. Footwear should shrug off impact and slips, with tread you can trust on oily floors. Hearing protection is essential in noisy environments and when testing components near loud, transient alarms. Clothing should be snug, flame-resistant where needed, and free of loose ends that can snag hoses or tools. Before you power up, verify safety precautions—disconnect the battery if required, relieve stored energy, and confirm ventilation. Maintain a clean workspace to prevent accidental contact with hot or sharp edges. You’ll move with focus, document findings, and adjust PPE choices as the diagnostic situation evolves.
Create a Clean, Organized Workspace

To start, you’ll clear the work area to reduce hazards and locate the core components you’ll be inspecting. Do a quick tool inventory check so you have the right wrenches, sockets, and diagnostic gear at hand, avoiding interruptions. Then set up safety steps, like securing the vehicle and steamlining power sources, so you can work efficiently and accurately through each task.
Clear Work Area
A clear, organized workspace starts with a simple rule: clear the area, then structure it for the task at hand. You’ll keep the bench free of clutter, remove loose parts, and designate zones for tools, parts, and notes. Prioritize car organization by grouping fasteners and components by project step, so you waste no motion. Establish a clean surface for diagnostics, with lighting that reveals anomalies without glare. Label bins and tray lids to speed retrieval, and wipe spills immediately to prevent slipping or corrosion. Maintain workspace efficiency by keeping cords tucked, brushes and rags within reach, and a dedicated area for documentation. With discipline, you’ll work faster, safer, and with greater confidence, turning disorder into deliberate, actionable progress toward repair.
Tool Inventory Check
With a clean workspace in place, you’ll validate the tools you’ll rely on and guarantee nothing interrupts the repair process. Begin with a deliberate scan of tool types you expect to need, then confirm each item is present, functional, and within reach. Create a precise inventory management system: label drawers, assign purpose, and log replacements or repairs. As you assemble, group tools by task—diagnostic probes separate from hand tools, fasteners, and consumables—so you can move with confidence. Check for worn sockets, adapters, and secure power sources, replacing or repairing before work begins. Maintain a minimal footprint: remove duplicates, cap off clutter, and keep cords tidy. A focused inventory check reduces downtime, enhances flow, and preserves your sense of control and freedom while you work.
Safety Setup Steps
Before you lift a finger, establish a clean, organized workspace that minimizes risk and maximizes focus; a deliberate setup reduces surprises once you start diagnosing and repairing. You’ll layout tools within easy reach, designate a dry, non-slip surface, and keep lighting steady to prevent mistakes. Adhere to a safety-first routine: wear appropriate safety equipment, including eye protection and gloves, and secure cords to avoid trips. Maintain personal hygiene by washing hands before and after work and avoiding loose sleeves that could snag machinery. Clear the area of clutter, drain fluids in approved containers, and mark hazards visibly. Establish a controlled workflow with quiet, predictable steps, so interruptions don’t derail progress. Document procedures briefly to preserve consistency and uphold disciplined, freedom-aware practice.
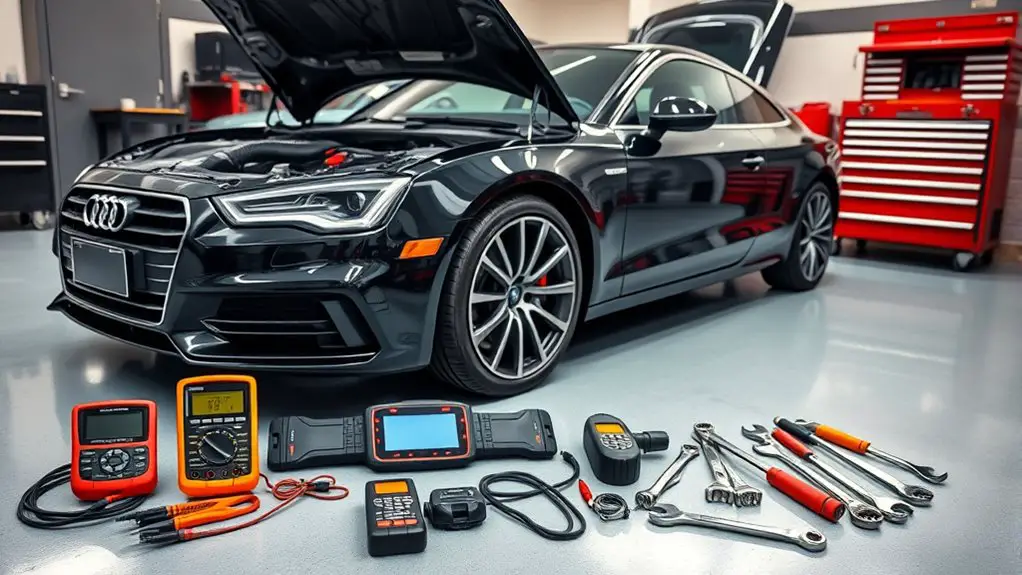
Gather a Core Diagnostic Toolkit
You’ll start with a core diagnostic toolkit: assemble essential gear, a concise core tools checklist, and quick prep steps to speed up diagnostics. Keep it focused on practical items—multimeter, basic scan tool, flashlight, fuses, and a clear labeling system. This sets a precise, methodical baseline for accurate assessments and efficient repairs.
Essential Diagnostic Gear
A core diagnostic toolkit is your first investment in reliable repairs: a compact, well-chosen set of tools lets you identify faults quickly and safely. You’ll prioritize essentials that let you read data, verify conditions, and test limits without guesswork. Start with a basic scanner, multimeter, and a reliable flashlight, then add a trusted strain gauge or pressure tester as needed. diagnostic software and tool calibration are core supports that keep readings trustworthy and repeatable. Stay disciplined: label cables, document results, and test after each adjustment. The right gear keeps you mobile and confident.
| Column A | Column B |
|---|---|
| Diagnostic software | Tool calibration |
| Quick-test meter | Verifiable data |
| USB adapters | Calibration records |
| Portable light | On-site checks |
Core Tools Checklist
To start building a reliable diagnostic toolkit, gather a core set of proven tools you can trust under real-world conditions. You’ll assemble essential items with purpose: a dependable multimeter, a quality scan tool, a reliable flashlight, insulated screwdrivers, and a durable battery tester. Add a digital caliper, a basic tool kit, electrical tape,OEM manuals or access, and a magnetic tray for fasteners. Prioritize ergonomic handles and repeatable accuracy, because steady hands save time. Maintain a clean, organized workstation to support fast diagnostics. Plan for tool maintenance, scheduling regular checks, calibration when needed, and straight storage to extend life. Consider diagnostic upgrades when your needs evolve, ensuring you stay current without clutter. This core toolkit supports efficient, freedom-driven troubleshooting.
Quick Prep Steps
Gather a core diagnostic toolkit quickly by prioritizing practical, reliable essentials: a dependable multimeter, a quality scan tool, a bright flashlight, insulated screwdrivers, a durable battery tester, and a basic tool kit. You’ll move with deliberate focus, keeping quick diagnostic tips in mind while you assemble essentials and prep your workspace for clean, controlled checks.
| Tool | Purpose |
|---|---|
| Multimeter | Voltage, resistance, current checks |
| Scan tool | Live data, DTCs, system readiness |
| Flashlight | Clear visibility in tight spaces |
| Insulated screwdrivers | Safe, precise fastener work |
| Battery tester | Health, cranking amps, load test |
Each item stays within reach, streamlining diagnosis. Your approach remains practical, precise, and freedom-driven, minimizing guesswork while maximizing clarity and confidence.
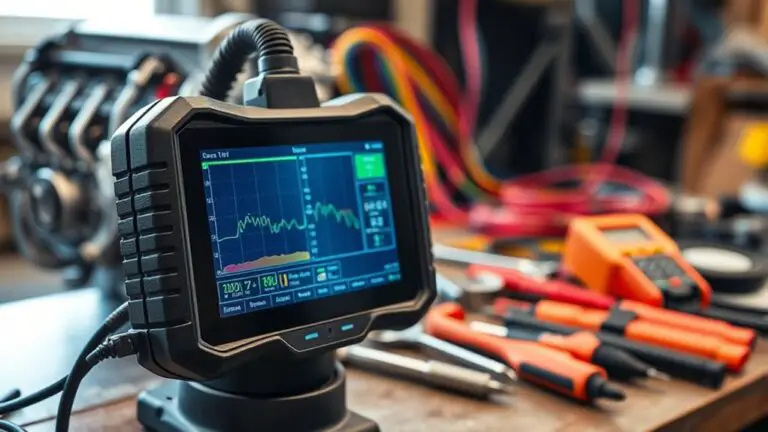
Establish a Baseline: Visual and Functional Checks
Before you plunge into repairs, establish a baseline by performing a quick but thorough visual and functional check: note obvious damage, tire tread and pressure, fluid levels, lights, and accessibility of critical components, so you have reference points for later diagnostics.
You’ll conduct a visual inspection first: scan for leaks, corrosion, loose connections, cracked hoses, and worn belts. Then perform a functional assessment: confirm starting reliability, horn, wipers, and climate controls operate as expected. Check gauges and warning lights for baseline readings; listen for abnormal noises at idle and under light throttle. Assess accessibility: identify the nearest service ports, fuse box locations, and plug-and-play points you might need later. Don’t rush; document findings with quick notes or photos. This baseline isn’t a verdict, it’s a map. It guides your diagnostic path and clarifies what’s truly abnormal, enabling focused, safer repairs and more predictable outcomes.
Prioritize Tasks and Plan a Systematic Approach
After you’ve established a baseline, you can map out your repair plan by prioritizing tasks and choosing a systematic approach. Begin by listing all potential issues uncovered during baseline checks, then rank them by impact and ease of verification. Allocate time blocks to each item, avoiding multitasking that muddies diagnostic focus. Use task delegation to assign clear roles if you’re collaborating, ensuring someone handles tools, another documents observations, and a third cross-checks results. With a prioritized queue, you execute a structured cycle: observe, test, confirm, and record. This is where systematic troubleshooting shines—treat each step as a controlled hypothesis rather than a guess. Keep your notes concise and precise, linking symptoms to potential causes. Don’t skip containment steps for safety. Reassess after each completed task to confirm progression and refine the plan. A disciplined sequence preserves momentum and confidence while you move toward a correct diagnosis.
Basic Diagnostic Strategies Without OBD Data
When you don’t have OBD data, start with a disciplined, hands-on checklist to establish a reliable baseline and guide your diagnosis. Begin with safety: disconnect power if needed, secure the vehicle, and wear gloves. Next, verify symptoms with controlled tests—duplicate the issue in a safe, repeatable way, then note exact conditions (temperature, speed, load). Use basic troubleshooting techniques: inspect for obvious causes, listen for abnormal sounds, feel for rough idle, and check for leaks. Move to fuel and ignition basics: confirm spark, fuel delivery, and air intake integrity. Test sensors and connections visually, then gently wiggle harnesses to detect loose contacts. Document readings and compare them to expected behavior, not to another vehicle. When OBD is unavailable, apply alternative diagnostic methods: surface scans with external meters, pressure and vacuum checks, and simple leak-down tests. Stay precise, methodical, and objective, building a concise picture before pursuing deeper, data-driven steps.
Documentation and Next Steps for Troubleshooting
Documentation and next steps for troubleshooting should start with a precise, written record of every finding and action. You’ll lock in observations, test results, and decisions, creating a clear trail to review later. Use a consistent format: date, symptom, condition, steps taken, results, and conclusions. This is your diagnostic backbone, so keep it concise and objective.
Focus on documentation methods that support traceability: checklists, labeled photos, timestamped notes, and simple diagrams. Capture constraints, variables, and failed hypotheses as you test each possibility. When you reach a plausible cause or suspect several competing issues, document rationale and risk assessment for each path.
Next steps flow naturally from evidence: plan prioritized actions, verify with targeted measurements, and log outcomes to refine your model. Your aim is repeatable, auditable troubleshooting techniques that empower independent work and informed decisions.
Frequently Asked Questions
How Do I Verify Tool Compatibility With Non-Obd Systems?
You verify tool compatibility with non-OBD systems by matching the device’s supported protocols to the system’s interfaces, then test commands against safe, isolated diagnostics. Start with a theory: cross-check manufacturer specs and real-world reports before you buy. You’ll want robust tool selection that covers legacy and modern buses. Perform system analysis during testing, confirming data types and baud rates. Confirm adapters are rated for automotive use, and document your findings for reliable, freedom-driven troubleshooting.
What Signs Indicate Misdiagnosis Without Error Codes?
Misdiagnosis indicators show up when symptoms don’t match expected fault patterns, you’re chasing intermittent issues, or multiple components share similar signs. Start with thorough symptom analysis: note when, where, and under what load the problem appears. If fixes recur or new faults appear after a repair, recheck wiring and sensors. Compare live data to known baselines, and trust repeatability over single anecdotes. You’ll avoid drift by documenting steps and remaining objective.
Which Lighting Helps Diagnose Electrical Issues Effectively?
LED flashlights beat dim shadows, yet workbench lighting reveals the truth. You’ll want both: handheld LEDs for focused checks and broad workbench lighting to map circuits. Start with a bright, neutral source then switch to pinpoint beams to trace wiring without glare. Use contrasting light angles to expose hotspots and inconsistencies. You stay methodical, documenting findings as you go, because clear illumination empowers precise troubleshooting and a freer, confident diagnostic path.
How Can I Test Sensors Without Reference Data?
You can’t rely on reference data, so you test sensors by loopback methods and known-good baselines you generate yourself. Use diagnostic signal analysis to compare output trends, variance, and response times under controlled stimuli, noting deviations. Apply sensor testing techniques like stepping inputs, limiting variables, and cross-checking with related sensor data. Document each result, adjust harnesses, and repeat until stable. Stay methodical, precise, and curious, preserving your freedom to trust your measurements.
What Recording Method Best Tracks Ad-Hoc Test Results?
A simple answer: use a handheld recorder or ECU-compatible data logger set to continuous data logging with timestamped entries. Your best method tracks ad-hoc test results by recording every run, pause, and spike, then exporting as CSV for review. Start with a tested protocol, log engine RPM, load, temps, and fuel trims. Keep test protocols repeatable; your anecdote: I once logged 15 seconds of idle, found a fault. Stay precise, methodical, diagnostic-focused.