
How to Prepare Your Car and Tools Before Tackling Security Immobilizer Codes
Before you tackle immobilizer codes, verify your vehicle’s compatibility with the immobilizer system and any manufacturer requirements. Gather essential diagnostic tools—scanner, meter, multimeter—and organize them on a clean, well-lit workspace. Set up safety gear: insulated gloves, eye protection, and anti-static measures. Create a plan with step-by-step checks, test results, and clear documentation. Keep a dedicated notes log for settings and timings. Confirm battery health and power isolation before work. If you keep going, you’ll uncover more practical safety and prep steps.
Understanding Immobilizer Systems and Legal Considerations

Immobilizer systems are security devices that prevent your engine from starting unless the correct key or transponder is present. You’ll approach immobilizer functionality with clear, practical steps, ensuring you understand how the system integrates with your ignition and ECU. Know that modern immobilizers use cryptographic keys, transponder signals, and sometimes rolling codes to deter theft; this means any modification or bypass can disable safety features and violate policies. Before you modify or service, confirm your vehicle’s legal obligations: in many jurisdictions, tampering can void warranties, affect insurance, or violate theft-prevention laws. Keep documentation from the manufacturer and service records accessible. When diagnosing problems, distinguish between sensor faults, key issues, and ECU communication errors. Maintain a calm, methodical process: verify key battery, check fuse circuits, and respect warnings from the vehicle’s dashboard. Your goal is secure operation that preserves freedom while adhering to rules and safety standards.
Verifying Vehicle Compatibility and Requirements
To verify you’re working with a compatible system, start by checking your vehicle’s make, model, year, and trim against the immobilizer’s documented requirements and any applicable service notes. You’ll confirm that the vehicle models listed align with the system’s supported configurations, and you’ll note any deviations or exceptions before proceeding. Next, review the secure boot sequence and the applicable security protocols, ensuring your PCM and immobilizer modules share compatible firmware baselines. If discrepancies are found, pause and consult official documentation or dealer advisories to avoid unintended immobilizer conflicts. Verify that all related integration points—key fob types, immobilizer display messages, and diagnostic lanes—match the documented expectations for your exact trim. Keep a clear record of confirmed compatibility, including software version numbers and service bulletin references. This careful early step reduces risk, supports safe handling, and preserves performance while you work within permitted, defined security boundaries.
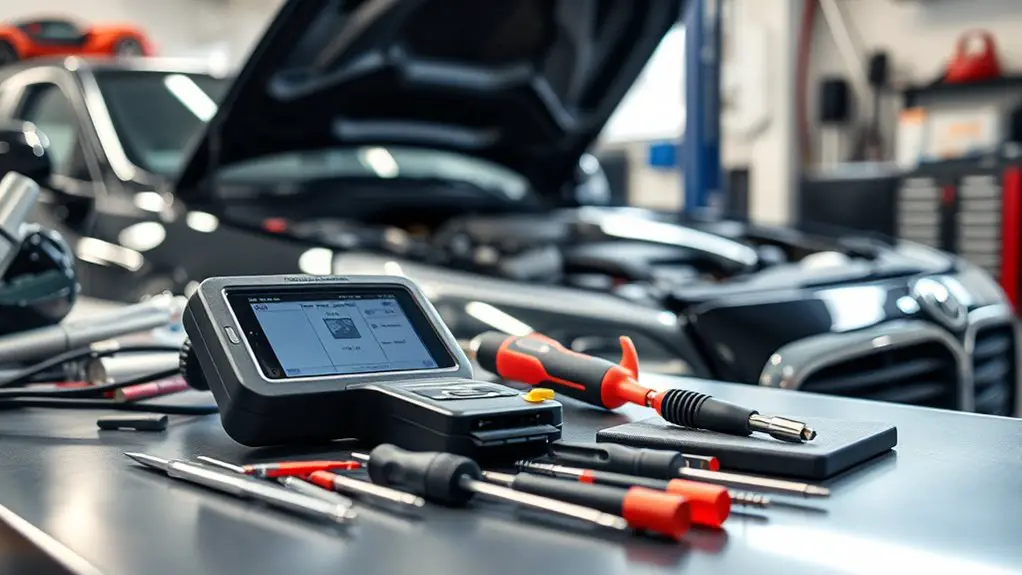
Essential Diagnostic Tools and Equipment

You’ll start with a focused diagnostic essentials set—meter, scanner, and basic multimeter—to confirm system status without guesswork. Prepare an equipment checklist that covers tool compatibility with your vehicle’s immobilizer interface, safety gear, and clear calibration steps. This upfront setup keeps you aligned with precise procedures and minimizes risks during code transfer or diagnostics.
Diagnostic Essentials
When preparing to work with security immobilizer systems, begin with a clear, methodical setup of the diagnostic tools and equipment you’ll need. You’ll rely on diagnostic software to interface with the vehicle’s data stream and to interpret immobilizer codes safely. Keep code readers calibrated and compatible with your car’s protocol, ensuring they’re up to date. Use a stable laptop or tablet, a clean power supply, and a grounded workspace to prevent data corruption. Protect sensitive electronics with anti-static measures and organize leads, adapters, and connectors so nothing docks incorrectly. Verify firmware levels before any live connection, and document each step for traceability. Maintain focus, proceed deliberately, and never bypass safety interlocks or manufacturer warnings. Freedom here means precision, control, and disciplined caution.
Equipment Checklist
A solid-equipped kit starts with a core set of essential diagnostic tools and devices you can rely on across most immobilizer interfaces. This Equipment Checklist focuses on practical, portable gear you can trust under pressure. Prioritize equipment types that cover reading codes, testing circuits, and validating power supply without damaging components. Include a multimeter with current and resistance modes, an OBD-II scanner, a basic logic probe, a clean power supply, and insulated handling gloves. Add a reputable flashlight, a precision screwdriver set, and a digital storage case for manuals and dongles. Keep tool maintenance consistent: wipe connectors, inspect cables for cracks, label leads, and recharge batteries after use. Rely on this disciplined setup to maintain momentum while preserving safety and control.
Tool Compatibility
Tool compatibility matters because the right combination of diagnostic tools guarantees accurate readings, safe testing, and smooth operation across immobilizer interfaces. You’ll verify compatibility before you start, ensuring the interface cables, adapters, and probes fit your model without forcing connections. Choose tools that cover essential tool types: scanning, coding, and programming where permitted, plus multimeters for live voltage checks. Prioritize reputable tool brands known for reliability and update support, and confirm vendor software includes immobilizer modules for your makes. Maintain a clear labeling system so you don’t mix functions or brands under pressure. Test in a controlled environment with the engine off, then document results. This disciplined approach minimizes risk, preserves safety, and preserves your freedom to work efficiently.
Safety Gear and Precautions for Electrical Work
Electrical work requires proper protection to prevent shocks, burns, and equipment damage. You’ll minimize risk by inspecting gear, wearing fitted safety items, and following a disciplined, calm routine before you touch any circuit.
- Wear insulating gloves and eye protection, and check for cracks or tears before use
- Use a voltage tester on all circuits, and lock out any live lines when service is needed
- Keep one hand in your pocket to reduce current across your heart in unexpected faults
- Work on a nonconductive surface, away from water or metal moisture paths
- Label breakers and document steps to reinforce safety precautions and traceability
Choose tools with insulated handles, and store them correctly after use. Maintain a clear workspace, remove jewelry, and avoid multitasking during testing. Respect electrical hazards, adhere to manufacturer guidelines, and pause if you’re unsure. Your safety mindset is essential for precise, controlled work.
Workspace Setup and Organization Tips
Set up your workspace with a clear layout that keeps essential tools within arm’s reach and the work area uncluttered. Prioritize a safe, clean zone by organizing tools for quick access and ensuring cords and loose parts won’t create trip hazards. Keep the area efficient and focused on safe, precise work as you prepare to work with immobilizer codes.
Workspace Layout Essentials
A well-organized workspace starts with a clearly defined footprint: dedicate separate zones for planning, work, and clean-up, and keep each zone within easy reach of the other. You’ll optimize flow with a simple, efficient layout that reduces backtracking and improvisation. Prioritize clear surfaces, stable supports, and accessible power. Maintain safety by isolating sharp edges and storing tools in designated trays. Your mindset blends discipline with freedom: you design space to empower precise work, not hinder it. Track cable paths, ventilation, and lighting to preserve focus. A thoughtful layout supports consistent motor skills and reduces fatigue, so you can stay deliberate when tackling immobilizer codes.
- Define zones and traffic paths
- Place essential tools within arm’s reach
- Clear, labeled storage for small parts
- Proper lighting and ventilation checkpoints
- Cable management and safety margins
Tool Organization Quick-fit
To keep your workspace efficient, quickly audit and categorize your tools by function, then place each category in clearly labeled, reachable zones. This quick-fit approach minimizes search time and enhances safety, letting you work with confidence and freedom. Keep tool storage modular: use a tray for small bits, a magnet tray for fasteners, and a labeled bin for specialty instruments. Maintain a predictable layout so you always know where to grab what you need, reducing misplacement and clutter. The following table highlights the core idea:
| Category | Benefit |
|---|---|
| Hand tools | Immediate accessibility |
| Fasteners | Organized, quick access |
Safe, Clean Work Area
Keep your workspace clean and organized to reduce errors and injuries. A safe, efficient area minimizes distractions and protects you while you work on immobilizer codes. Prioritize stable surfaces, clear floor space, and proper storage so tools don’t drift into your path. Verify adequate workspace lighting to reveal fine details and prevent mistakes. Keep cleaning supplies within arm’s reach but away from heat sources and electrical connections. Maintain a dedicated corner for manuals, labels, and reference materials to speed up tasks without compromising safety. Regularly inspect tools for wear and replace damaged items promptly. Clean as you go to prevent buildup and confusion, and document any issues for future sessions.
- Clear surfaces and stable mounts
- Proper storage and labeling
- Adequate workspace lighting
- Accessible cleaning supplies
- Routine inspection and maintenance
Power Management and Battery Protection
Power management and battery protection are essential for reliable immobilizer operation. You’ll preserve power while limiting risk, so plan before you connect. Start with a fully charged battery and disconnect nonessential loads during testing. Use a low-current power source when bench-feeding components, and monitor voltage to prevent deep discharge. Keep cables organized, avoid shorts, and wear insulating gloves for safety. Prioritize battery maintenance by inspecting terminals, cleaning corrosion, and securing clamps. For power efficiency, run only necessary peripherals and enable sleep modes where possible. Record voltages at key steps to detect drift early. When done, restore backup power paths carefully and recheck immobilizer function. Table below highlights safe practices at a glance.
| Step | Action | Result |
|---|---|---|
| 1 | Inspect terminals | Reduced resistance |
| 2 | Disconnect nonessential loads | Lower drain |
| 3 | Verify voltages | Stable operation |
Planning, Documentation, and Troubleshooting Steps
Planning, documentation, and troubleshooting steps are essential for reliable immobilizer testing and safe equipment handling. You approach the process with a clear plan, then confirm each action aligns with your goals. Begin with planning strategies that define scope, required tools, and potential failure modes. Next, establish concise documentation methods to record tests, results, and any deviations. Maintain a log of settings, timings, and observed responses to reproduce outcomes later. Troubleshooting steps should be iterative and evidence-based, starting with simple verifications before complex diagnostics. Use a checklist to guarantee safety protocols, electrical isolation, and proper shielding are in place. Prioritize repeatability, auditability, and accountability so you retain freedom to adapt while staying responsible.
- planning strategies for scope, tools, and risks
- documentation methods for tests and results
- stepwise troubleshooting with clear criteria
- safety checks and isolation procedures
- consistency, traceability, and adaptability in practice
Frequently Asked Questions
How Often Should I Recalibrate Immobilizer Codes After Use?
Do you really need a fixated schedule for it? You should recalibrate immobilizer codes only as recommended by your vehicle’s manufacturer, not on a guess. In practice, perform recalibration frequency during routine immobilizer maintenance or after any system fault, software update, or battery change. Keep records and use proper procedures. By staying methodical and safety-conscious, you protect your tech and your freedom. Recalibration frequency varies; consult manuals and trusted pros for guidance.
Can I Legally Bypass an Immobilizer on a Personal Vehicle?
Short answer: you can’t legally bypass an immobilizer on a personal vehicle. It’s illegal in most jurisdictions, and doing so undermines immobilizer laws and vehicle ownership protections. If you’re locked out or malfunctioning, contact the manufacturer or a licensed technician, follow proper procedures, and document steps taken. You’re safer staying compliant, respecting the law, and preserving your rights as a vehicle owner. If you need help, seek official guidance and avoid risky DIY bypasses.
What Are Red Flags for Counterfeit Diagnostic Tools?
Red flags for counterfeit diagnostic tools include poor build quality, loose connectors, and missing or inconsistent branding. Look for counterfeit tool indicators like vague serial numbers, off-brand software, and irregular translations. Check for reliable warranties and official updates from the manufacturer. Ascertain compatibility with your vehicle’s make and model, and verify published diagnostic tool reliability with trusted reviews. If anything feels questionable, don’t proceed; your safety and data integrity come first.
Which PPE Is Mandatory for High-Voltage Immobilizer Work?
High-voltage work requires you to wear mandatory PPE: high voltage gloves and safety goggles. You’ll power down, lock out, and test before touching any circuitry. Inspect gloves for cracks, use approved insulation, and keep goggles vented and clean. Follow procedures precisely, verify resistance, and stay mindful of arc flash risks. If in doubt, pause and recheck. Your safety hinges on disciplined gear use and deliberate, controlled actions.
How Do I Document Changes to Immobilizer Configurations?
You document changes to immobilizer configurations by recording every adjustment, timestamping, and who made it, using your chosen documentation method. Start with a clear change log, then note the original state, the new settings, and the rationale. Include device identifiers and tool versions, plus any verification results. Keep it concise, auditable, and secure. Use standardized formats you’re comfortable with, ensuring future teams can review changes without ambiguity, while preserving your freedom to innovate safely.