
How to Test Your Alternator With a Hydrometer
To test your alternator with a hydrometer, you’ll first safety-check the area, disconnect the negative battery cable, and gather tools. With the engine off, measure the battery voltage, then start the engine and load electrical systems to watch the alternator’s output, aiming for about 13.8–14.8 volts. Calibrate the hydrometer, note electrolyte density at a controlled temperature, and compare to your battery’s specs. Document results and look for drift or anomalies; more details close by will guide you further.
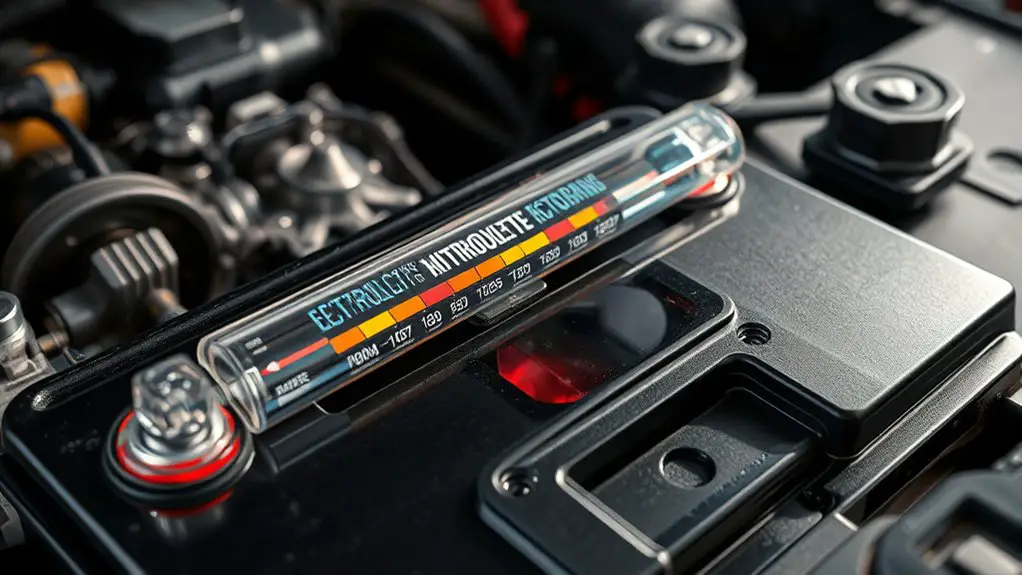
What Is an Alternator Hydrometer Test

An alternator hydrometer test isn’t a common diagnostic you’ll see used every day, but it’s a simple check that gauges the health of your car’s charging system. You’re evaluating how well the alternator maintains charging performance and how the system responds under load. The test hinges on understanding alternator function: it measures how effectively the alternator sustains voltage while you demand power from the battery and electrical accessories. Hydrometer types vary in design, but the principle remains: you compare readings to manufacturer specs and reference points for electrolyte saturation, if applicable, or interpret indirect indicators like voltage stability. You’re not chasing perfection; you’re confirming the system stays within reasonable bounds during typical driving. Use the results to decide if you need further diagnostics, battery service, or alternate charging source. Precision matters, so record the readings and relate them to your vehicle’s charging behavior, not vague impressions.
Safety Measures Before You Start

Before you start, put on the right protective gear and guarantee you’re working in a well-ventilated area. Handle the battery safely by disconnecting it if required, avoiding sparks, and keeping terminals covered. This groundwork minimizes shock and short risks as you proceed with the alternator test.
Wear Protective Gear
Wear protective gear before you start. You’ll approach the test with a clear, deliberate mindset, not a rush. Put on protective gloves and safety goggles to shield skin and eyes from battery acid splashes, fumes, and accidental sparks. Choose snug, non-slip footwear and long sleeves to minimize contact hazards. Inspect your workspace for spills, corrosion, and loose connections; clean up minor leaks with appropriate absorbent material before proceeding. Keep a fire extinguisher within reach and avoid synthetic fabrics that can melt if heat is generated. Use insulated tools to reduce the risk of shorting terminals. Remove jewelry to prevent accidental grounding. Verify lighting and ventilation meet basic safety standards, so you can focus on the procedure with confidence.
Handle Battery Safely
Handle battery safely to prevent shocks, burns, and corrosion. Before you begin, inspect vents and terminals for damage, and guarantee the area is dry and well-ventilated. Battery maintenance hinges on deliberate, calm steps rather than haste, so keep tools insulated and away from sparks.
1) Disconnect and isolate the negative cable first, then the positive, avoiding contact with metal surfaces.
2) Wear eye protection and gloves, and dust off corrosion with a non-metallic brush before testing.
3) Work on a stable surface, clean the tray, and store caps securely to prevent leaks and accidental contact.
This safe handling mindset minimizes risk, supports accurate readings, and maintains system integrity while you diagnose the alternator.
Understanding Battery Electrolyte Density
Battery electrolyte density tells you how much electrolyte sits in the cells and whether the battery is capable of delivering peak current. Start with the basics of electrolyte density, then note how to calibrate a hydrometer and read the target ranges accurately. Temperature can skew readings, so account for it and compare results to standard charts to assess overall health.
Electrolyte Density Basics
Electrolyte density is a practical measure of a battery’s state of charge and health, reflecting how much dissolved sulfuric acid remains in the electrolyte. You use it to gauge available chemistry without guesswork, tying liquid properties to overall battery performance and reliability. Understanding this density helps you predict starting power, charging behavior, and long-term durability.
- electrolyte composition basics guide your eye on how concentration shifts with charge states.
- Density trends link directly to battery performance, indicating when capacity wanes or recoveries occur.
- Practical checks keep you ahead of issues, enabling targeted maintenance rather than generic fixes.
Hydrometer Calibration Tips
Hydrometer calibration is essential for accurately reading electrolyte density, because even small measurement errors can misrepresent a battery’s state of charge. To calibrate, verify the hydrometer against a known reference sample at the same temperature, and record the baseline reading before testing. Clean the float stem and remove bubbles that cling to the chamber, as they skew results. When you take a reading, confirm the level is settled and vertical for consistency. Note electrolyte density variations across cells, and average multiple measurements to improve reliability. integrate regular checks into hydrometer maintenance tips, scheduling periodic calibration alongside electrolyte replenishment. For effective battery testing techniques, document results, compare against manufacturer specs, and adjust charging or replacement plans based on aggregate data rather than a single datum point.
Temperature Influence Effects
When temperature shifts, electrolyte density readings can change even if the charge state stays the same, so you must account for thermal effects to avoid misinterpreting results. You’ll measure density with awareness that hotter electrolyte sounds different from cooler, and you’ll interpret trends rather than isolated numbers. Temperature effects can mask true state of charge, so compare readings at similar temps or apply a correction factor. Consider how electrolyte behavior changes with heat or cold, and adjust your expectations accordingly.
- Monitor ambient and cell temperature, noting deviations before testing.
- Use a consistent sample temperature or apply a standard correction to density values.
- Record both temperature and density to discern genuine charge trends.
Temperature effects and electrolyte behavior determine accuracy; respect them for reliable results.
Preparing Your Vehicle and Tools
Before you begin testing, gather the essentials: a multimeter or voltmeter, set of wrenches, screwdrivers, safety glasses, and a flashlight.
Preparing your vehicle and tools sets the tone for precise results. You’ll optimize tool selection, minimize risk, and maintain vehicle maintenance standards. Verify the engine is off, keys removed, and the area well-ventilated. Lay out a compact workspace: keep cables clear, store fasteners in labeled containers, and protect surfaces from spills. Check the battery terminals for corrosion and clean as needed before connecting anything. Confirm you have a reliable flashlight for underhood visibility. Organize the toolbox so you can reach every tool without moving the vehicle.
| Tool category | Purpose |
|---|---|
| Multimeter/voltmeter | Measure voltage and confirm charging state |
| Wrenches & screwdrivers | Remove and access electrical components |
| Safety gear & lighting | Protect yourself; illuminate work area |
Step-by-Step Testing Procedure
Begin by performing a quick voltage check with the engine off to establish a baseline. Then proceed with a concise, methodical test procedure that prioritizes accuracy and reliability.
1) Measure battery voltage with a multimeter to confirm baseline, note any deviation from typical 12.6 V, and log results for testing accuracy.
2) Start the engine, load electrical circuits, and observe alternator voltage output, aiming for 13.8–14.8 V; adjust measurement points if necessary and compare to maintenance tips for consistency.
3) Recheck voltage with engine off after a few minutes of steady operation to verify stability, and document any drift or noise that might indicate wiring or belt issues.
This step-by-step approach keeps you focused on precise results, minimizes guesswork, and reinforces maintenance tips for long-term reliability. It’s about disciplined checks, not quick guesses, so you can trust your alternator under real-world use while preserving your freedom to diagnose confidently.
Interpreting Hydrometer Readings
Interpreting hydrometer readings requires translating electrolyte measurements into actual condition. You’ll translate the numbers you see into actionable insights about your battery health and alternator support. Start with electrolyte levels: too low usually signals age, insufficient charging, or a leak; too high can indicate overfilling or a cooling issue. Hydrometer accuracy matters, so note the measurement method and temperature corrections specified by your tester—small errors compound over time. Compare readings to the battery’s stated normal range, not a generic chart. If readings cluster around low values, you may have a weak cell set or poor charging; consistently high readings suggest overcharging risks and venting. Use a consistent reference point—same electrolyte sample, same temperature, same procedure—to gauge trends over multiple tests. Document dates, conditions, and results so you can see progression. Remember, electrolyte levels drive interpretation, but the broader goal is stable voltage and reliable alternator support.
Possible Causes of Irregular Readings
Possible irregular readings usually stem from either measurement inconsistencies or genuine electrical issues. You’ll want to separate true faults from setup quirks by checking the basics first, then diagnosing symptoms with a calm, analytical eye. Consider these potential causes and their practical fixes, focusing on efficiency and clarity.
1) Sensor or connection issues — loose terminals, corroded connectors, or dirty contacts can skew results; clean, reseat, and retest to confirm irregular readings aren’t a false alarm.
2) Load and battery state interactions — a weak or faulty battery may distort your hydrometer results; verify battery health and ascertain the battery isn’t overtaxed during testing.
3) Alternator regulation faults — a worn regulator or wiring fault can produce inconsistent output; inspect fuses, wiring runs, and the regulator for obvious defects and replace as needed.
Potential solutions emphasize solid contact quality, proper load management, and targeted component checks to restore steady readings.
What To Do After the Test
After the test, assess the results with clear criteria and next steps. If the hydrometer reading aligned with specs, note that your battery maintenance plan remains solid and alternator efficiency is within expected range. If readings are off, identify whether the issue is the battery, alternator, or connections, and plan targeted action. Document voltage, electrolyte state, and any corrosion you observe so you can track trends over time.
| Step | Action |
|---|---|
| 1 | Verify connections; clean corrosion if present |
| 2 | Cross-check readings with vehicle idle and load conditions |
| 3 | Test battery separately if possible |
| 4 | Inspect serpentine belt and pulley for slip |
| 5 | Schedule a follow‑up test if results are inconclusive |
Next, implement fixes promptly: tighten terminals, replace worn belts, or service the alternator if efficiency remains low. Keep a maintenance log and revisit battery maintenance on a regular cycle to sustain reliability.
Frequently Asked Questions
Can a Hydrometer Test Diagnose Alternator Health Directly?
No, a hydrometer can’t diagnose alternator health directly. It gauges battery electrolyte gravity, not generator output. You’ll look for alternator performance indicators like voltage stability, ripple, and charging current, plus how battery voltage correlates with engine load. If voltage stays within spec and battery voltage correlation holds under load, the alternator is likely fine; abnormal readings point to other issues, such as belts, wiring, or the battery itself. Use tests beyond a hydrometer for certainty.
Does Engine Temperature Affect Hydrometer Readings?
You wonder if engine temperature affects hydrometer readings, and yes, it does. Temperature effects shift liquid density and chemical activity, skewing results, so you’ll want the test when the engine is at outside-normal operating temperature. Use caution: allow proper warm-up, then compare to specs. In your hands, precision becomes your compass, guiding engine performance observations with disciplined timing. Symbolically, temp is the flame that reveals truth; respect it, or readings mislead your freedom to diagnose.
How Often Should I Test the Alternator During a Charging Cycle?
You should test the alternator testing frequency at the start of every charging cycle, typically every 1–2 hours or whenever you notice voltage dips. During charging cycle intervals, check steady voltage, ripple, and output within spec. If readings drift, extend or shorten tests accordingly. Use consistent methodology, document results, and adjust maintenance windows. This keeps you in control, practical, and precise while balancing freedom to operate your system confidently.
Can Distilled Water Replacement Affect Test Results Long-Term?
Distilled water replacement can affect long term results, yes. You’ll see distorted readings if you dilute electrolyte consistency or create lingering residues, which skews your hydrometer test outcomes. Distilled water impact tends to lessen electrolyte concentration over time, altering specific gravity and battery health indicators. For precise, long‑term accuracy, maintain correct electrolyte levels, avoid overfilling, and use proper refilling intervals. You’ll preserve consistency, reduce drift, and keep your tests reliable for future diagnostics.
What Safety Gear Is Essential Beyond Gloves?
Safety goggles and a face shield are essential beyond gloves. You’re working with moving belts, sparks, and fluids, so protect your eyes from splashes and debris while you maintain a clear view of gauges. Add a fire-resistant apron and a sturdy, non-slip footwear base for slip risk. Keep a first-aid kit nearby and know emergency shutoffs. This setup keeps you prepared, focused, and free to troubleshoot with confidence.