How to Test for a Bad Shift Linkage Using a Scan Tool for Transmission Codes
To test for a bad shift linkage using a scan tool, start by checking for related symptoms like difficulty shifting gears. Connect the scan tool to your vehicle’s OBD-II port and access the transmission section to retrieve diagnostic trouble codes (DTCs). Look for codes like P0700 and P0705-P0710, which indicate potential linkage issues. After identifying the codes, perform a visual inspection and adjustments as needed. Further diagnosis will reveal more insights into the transmission system’s health.
Understanding Shift Linkage and Its Role in Transmission

When you shift gears in a vehicle, the shift linkage plays an essential role in guaranteeing that your command translates into the appropriate action within the transmission system. This mechanism connects the gear shifter directly to the transmission, facilitating the precise movement required for effective gear changes. Understanding the shift linkage is crucial for grasping transmission mechanics; any misalignment or wear can disrupt this delicate connection, leading to inefficiencies or failures.
The shift linkage comprises various components, including rods, cables, and bushings, each designed to transfer motion smoothly. If you’re aiming for peak performance, knowing how these parts interact guarantees you can maintain their integrity. Properly functioning shift linkage allows for seamless gear shifts, enhancing your driving experience and granting you the freedom to navigate effortlessly. By comprehending its role, you empower yourself to diagnose issues and guarantee your vehicle’s transmission operates as intended.
Common Symptoms of Bad Shift Linkage
If you’re experiencing difficulty changing gears, it may indicate an issue with the shift linkage. Unresponsive gear shifts can further complicate your driving experience, leading to potential safety hazards. Additionally, warning light indicators on your dashboard could provide essential information about underlying problems within the transmission system.
Difficulty Changing Gears
Experiencing difficulty changing gears can often indicate underlying issues with the shift linkage in your vehicle. When you encounter resistance or slippage during gear engagement, it may signify a misalignment in the linkage. Proper linkage alignment is essential; if components are out of sync, they can prevent smooth changes between gears, causing frustration and potential damage. Pay attention to any unusual sounds or feelings in the gear shift, as these can provide additional clues regarding the condition of your shift linkage. Addressing these issues promptly can help maintain your vehicle’s performance and guarantee a more liberated driving experience. Don’t overlook the importance of periodic checks to confirm that your shift linkage is functioning correctly for peak gear engagement.
Unresponsive Gear Shifts
Unresponsive gear shifts can signal serious issues with your vehicle’s shift linkage. When you’re experiencing a lack of shift responsiveness, it may hinder gear engagement and compromise your driving experience. Here are some common symptoms to watch for:
- Difficulty shifting into or out of gear
- Unusual noises during gear changes
- Delayed response when shifting
- Inconsistent gear engagement
These indicators can stem from a malfunctioning shift linkage, affecting how your transmission communicates with your gear selector. If you notice any of these signs, it’s essential to address the problem promptly. Ignoring unresponsive gear shifts can lead to more severe transmission issues, ultimately impacting your vehicle’s performance and safety on the road.
Warning Light Indicators
A malfunctioning shift linkage can trigger warning light indicators on your dashboard, signaling potential issues that require immediate attention. Understanding the warning light types and their meanings can help you diagnose problems effectively.
| Warning Light Type | Warning Light Meaning |
|---|---|
| Transmission Light | Indicates a transmission fault |
| Check Engine Light | Signals potential engine issues |
| Brake System Light | Alerts to braking system abnormalities |
When these lights illuminate, it’s essential to act quickly. Ignoring them can lead to more severe damage and costly repairs. By using a scan tool, you can retrieve specific transmission codes to pinpoint the issue with the shift linkage and take necessary actions to restore your vehicle’s performance.
Importance of Using a Scan Tool for Diagnosis
Using a scan tool is crucial for accurate code retrieval, which allows you to pinpoint the underlying shift issues with precision. It streamlines the diagnostic process by providing real-time data and error codes directly related to the transmission system. By leveraging this technology, you can enhance your troubleshooting efficiency and guarantee a more effective repair strategy.
Accurate Code Retrieval
While diagnosing issues related to bad shift linkage, accurate code retrieval is vital for identifying underlying problems. Using a scan tool guarantees you get precise data, which is important for effective troubleshooting. Here are some key points to reflect on for code accuracy:
- Immediate Feedback: Scan tools provide real-time data, allowing for quick assessments.
- Comprehensive Codes: They retrieve all relevant transmission codes, not just the obvious ones.
- Historical Data: Reviewing past codes can highlight recurring issues, aiding in diagnosis.
- Enhanced Communication: Accurate codes improve discussions with technicians or service centers.
Identifying Shift Issues
Three critical components must be assessed when identifying shift issues in a vehicle: the transmission system, the electronic control unit, and the shift linkage itself. Utilizing a diagnostic tool is vital for pinpointing problems accurately. It allows you to retrieve transmission codes that indicate potential malfunctions within these systems. Once you’ve gathered this data, you can perform necessary shift linkage adjustments to guarantee proper functionality. Pay close attention to any error codes related to the shift linkage, as they can reveal misalignments or wear. The combination of thorough diagnostic tool usage and careful examination of these components enables you to diagnose and address shift issues effectively, empowering you to maintain peak vehicle performance.
Preparing Your Vehicle for Testing
Before you begin testing for bad shift linkage, it’s important to verify your vehicle is properly prepared to avoid inaccurate results. Confirming vehicle readiness not only enhances your testing accuracy but also contributes to a more efficient process. Here are some essential steps to take:
Before testing for bad shift linkage, ensure your vehicle is ready for accurate results.
- Check fluid levels: Verify transmission fluid is at the correct level and in good condition.
- Inspect the battery: A fully charged battery is essential for the scan tool’s operation.
- Select the right tool: Choose a compatible scan tool for your vehicle’s make and model.
- Clear any existing codes: Start fresh by clearing any previous trouble codes before your test.
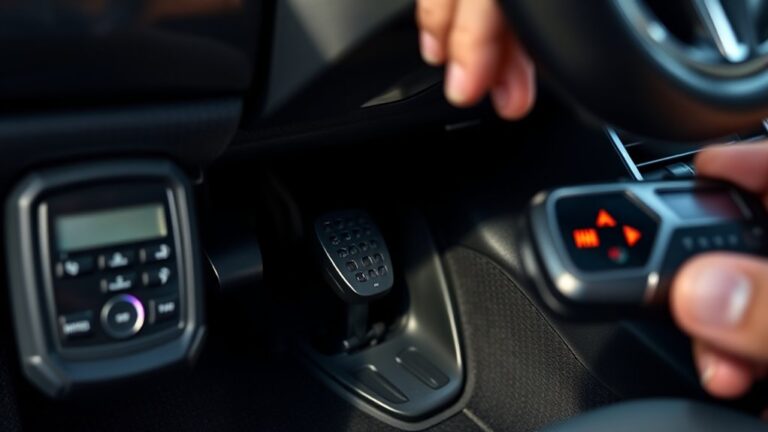
Connecting the Scan Tool to Your Vehicle
With your vehicle prepared, the next step involves connecting the scan tool to access diagnostic information. Begin by locating the OBD-II port, usually found under the dashboard near the driver’s seat. Confirm your scan tool is compatible with your vehicle’s make and model; check the manual for specific scan tool features that may enhance functionality. Once you’ve verified compatibility, plug the scan tool connector into the port securely.
Next, turn your ignition to the “On” position without starting the engine. This will power the scan tool and allow it to communicate with your vehicle’s onboard computer. Follow any on-screen prompts to establish a connection between the tool and the vehicle. Properly connecting the scan tool is essential for accurate diagnostics, as it enables you to retrieve transmission codes and assess the state of your shift linkage effectively.
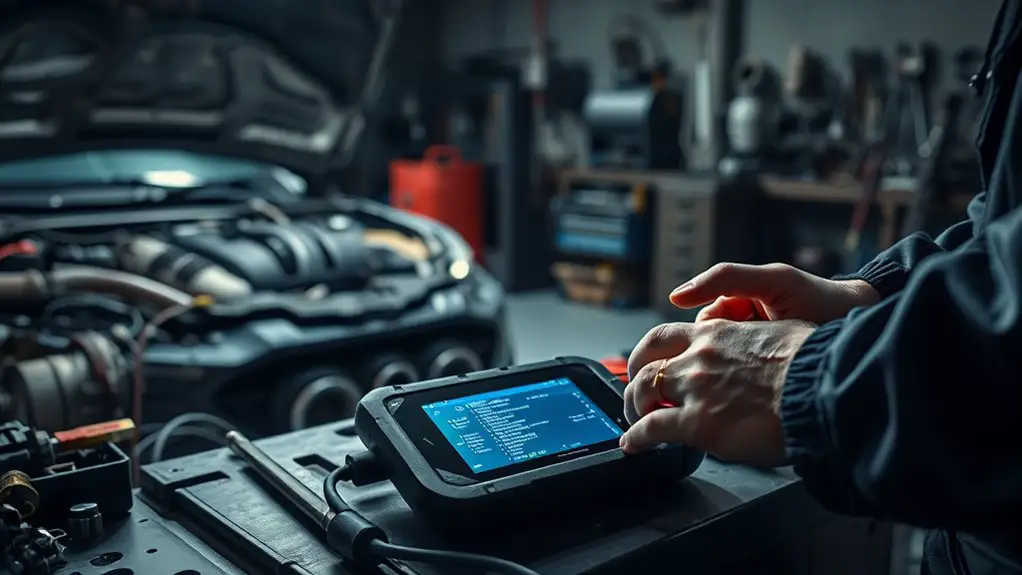
Accessing Transmission Codes With the Scan Tool
How can you efficiently access transmission codes using the scan tool? First, make certain you’re familiar with scan tool basics. Once connected, navigate through the menu to find the transmission section. Here’s a step-by-step guide to streamline the process:
- Select “Diagnostic Trouble Codes” (DTCs) from the main menu.
- Choose “Transmission Control Module” (TCM) for specific codes.
- Initiate a scan to retrieve all stored codes.
- Record the codes for interpretation and further analysis.
Interpreting Transmission Codes Related to Shift Linkage
As you explore interpreting transmission codes related to shift linkage, understanding the specific codes associated with linkage issues is vital for effective diagnostics. Each code corresponds to particular shift linkage types, indicating whether the problem lies in misalignment, wear, or failure of components. For instance, codes like P0700 signal a generic transmission issue, while P0705 through P0710 often point to specific problems within the shift linkage system.
During transmission troubleshooting, it’s important to differentiate between electrical faults and mechanical linkage failures. Look for codes that suggest improper signals from the transmission control module, or that indicate inconsistent gear shifts. These may guide you to the root cause of the linkage problem. By accurately interpreting these codes, you can save time and resources, ensuring your diagnostics lead you to the right solution for any shift linkage malfunction.
Performing a Visual Inspection of the Shift Linkage
A thorough visual inspection of the shift linkage is essential for diagnosing potential issues effectively. Start by checking for any signs of visual wear that could indicate degradation or damage. This initial assessment can save you time and resources down the line. Focus on the following key areas:
- Linkage alignment: Confirm all components are properly aligned without any misalignment that could affect shifting.
- Bushings and mounts: Look for worn or damaged bushings that may cause excessive play or movement.
- Connections and fasteners: Inspect for loose or missing bolts that could lead to linkage failure.
- Corrosion or rust: Check for signs of corrosion that could compromise the integrity of the linkage system.
Testing the Shift Linkage Mechanism
To guarantee the shift linkage operates correctly, you need to perform a series of tests that evaluate its functionality under various conditions. Begin with a shift linkage adjustment, ensuring the linkage aligns properly with the transmission. You’ll want to check the alignment while shifting through all gears, observing any misalignment or excessive play that could indicate wear.
Next, conduct a linkage wear analysis. Inspect the components for signs of wear, such as cracks or loose connections. Moving parts should progress smoothly without resistance; any binding could signify internal issues.
Finally, utilize a scan tool to monitor transmission responses while shifting. If the system fails to respond accurately, it may indicate a malfunction in the shift linkage mechanism. By performing these targeted evaluations, you can effectively identify issues and enhance the overall performance of your vehicle’s transmission system.
Additional Diagnostic Steps for Transmission Issues
While diagnosing transmission issues, it’s crucial to expand your approach beyond just the shift linkage. A thorough examination includes several key factors that can influence performance. Here are some additional diagnostic steps to take into account:
- Check shift linkage alignment: Misalignment can cause improper shifting and lead to further complications.
- Inspect transmission fluid: Verify it’s at the correct level and in good condition, as dirty or low fluid can affect transmission function.
- Look for error codes: Use a scan tool to identify any transmission-related codes that may provide insight into underlying problems.
- Examine electrical connections: Faulty connectors or damaged wiring can disrupt communication between the transmission and control module.
Repairing or Replacing Faulty Shift Linkage
After identifying issues with the shift linkage during your diagnostic process, the next step is determining whether to repair or replace it. If you find minor misalignments, a shift linkage adjustment might suffice. This involves fine-tuning the connection points to restore proper function without significant expense.
However, if the linkage shows signs of wear or damage, you’ll need to evaluate your linkage replacement options. This could involve sourcing OEM parts for assured compatibility or exploring aftermarket alternatives for cost savings.
When opting for replacement, make certain you follow the manufacturer’s specifications for installation to maintain peak performance. Remember to recheck the adjustment after installation, as proper alignment is vital for seamless shifting. Ultimately, whether you choose to repair or replace, addressing faulty shift linkage promptly is important for your vehicle’s reliability and your driving freedom.
Clearing Codes After Repairs
Once you’ve completed repairs on the shift linkage, it’s important to clear any diagnostic trouble codes (DTCs) that may have been triggered during the malfunction. Code resetting is essential for accurate repair confirmation, ensuring that your vehicle’s system reflects the changes made. Here’s how to effectively clear those codes:
- Connect your scan tool to the vehicle’s diagnostic port.
- Power on the scan tool and navigate to the “DTC” or “Codes” menu.
- Select the option to clear or erase codes.
- Confirm the action and wait for the tool to complete the process.
After clearing the codes, always conduct a test drive to verify that the issue has been resolved, and no new DTCs appear. This step is critical for maintaining optimal vehicle performance and ensuring your repairs have been effective.
Preventive Measures for Shift Linkage Maintenance
Clearing codes is just one part of maintaining a reliable shift linkage system. To guarantee peak performance, you should implement preventive inspections regularly. Check the shift linkage components for signs of wear, misalignment, or corrosion. This proactive approach can help identify potential issues before they escalate, allowing you to address them swiftly.
Routine lubrication is equally vital. Apply high-quality lubricant to moving parts of the shift linkage, as this minimizes friction and prevents premature wear. Pay attention to areas that are prone to dirt and debris buildup, as they can impede functionality.
Additionally, if you notice any unusual noises or resistance during gear shifts, don’t ignore them. These symptoms may indicate a problem within the linkage. By prioritizing these preventive measures, you can enhance the longevity and reliability of your transmission system, granting you the freedom to enjoy a smooth driving experience.
Frequently Asked Questions
Can Shift Linkage Issues Cause Transmission Fluid Leaks?
Yes, shift linkage issues can indeed cause transmission fluid leaks. When the shift linkage is misaligned or damaged, it can lead to improper engagement of the transmission components. This misalignment may create gaps or pressure points that allow transmission fluid to escape. If you notice fluid pooling under your vehicle or low transmission fluid levels, it’s essential to inspect the shift linkage and address any issues promptly to prevent further damage.
How Often Should Shift Linkage Be Inspected?
You should inspect your shift linkage every 30,000 miles or during regular maintenance intervals. This shift linkage maintenance helps guarantee that any wear or misalignment is caught early, preventing potential transmission issues. If you notice shifting problems, it’s wise to check it sooner. Regular inspections can save you from costly repairs and guarantee your vehicle operates smoothly, giving you the freedom to drive without worry about unexpected transmission failures.
Are Shift Linkage Problems Covered Under Warranty?
Shift linkage problems may be covered under warranty, but it largely depends on your vehicle’s warranty terms. If your shift linkage issues occur within the warranty period and aren’t due to wear and tear or misuse, you might be eligible for coverage. Always check your warranty documentation or consult your dealer for specifics. Understanding your warranty coverage can help you avoid unexpected repair costs and maintain your vehicle’s performance.
What Tools Are Needed Besides a Scan Tool?
Besides a scan tool, do you have the essential tools for a thorough inspection? You’ll need a multimeter for testing electrical connections and continuity, ensuring everything’s functioning correctly. A basic toolkit with wrenches and sockets will assist in accessing components, while a flashlight aids in visual inspection of hard-to-see areas. Having these tools on hand allows you to diagnose issues effectively, giving you the freedom to resolve problems independently.
Can I Drive With a Bad Shift Linkage?
You shouldn’t drive with a bad shift linkage. It compromises driving safety, as linkage symptoms like difficulty shifting gears or unintended gear changes can lead to accidents. If you notice these issues, it’s best to address them immediately. Ignoring a bad linkage might give you the freedom to drive, but it could endanger you and others on the road. Prioritize repairs to maintain both safety and your vehicle’s performance.