How to Test Your Battery Terminals With a Battery Load Tester
To test your battery terminals with a load tester, make certain you wear insulated gloves and safety eyewear. First, park your vehicle on a flat surface and inspect the battery for corrosion. Connect the red clamp to the positive terminal and the black clamp to the negative terminal. Activate the tester, applying a load of about half the battery’s cold cranking amps for 10 to 15 seconds. Monitor the voltage drop; anything below 9.6 volts indicates potential issues. Discover more about maintaining battery health.
Understanding Battery Load Testers
When it comes to testing battery terminals, understanding battery load testers is essential for accurate assessments. These devices evaluate the performance of various battery types, including lead-acid and lithium-ion, by simulating real-world conditions. You’ll typically connect the load tester’s clamps directly to the battery terminals, ensuring a secure fit.
The testing methods vary, but most involve applying a specific load for a predetermined time. This load mimics the demands placed on the battery during operation. As you monitor the voltage drop, you’ll gain insights into the battery’s health and capacity. If the voltage falls below the acceptable threshold, it indicates degradation or failure.
Safety Precautions Before Testing

Before you begin testing battery terminals, it’s essential to wear appropriate protective gear, such as gloves and safety goggles, to shield yourself from potential acid spills or electrical hazards. Additionally, make sure you’re working in a well-ventilated area to prevent the buildup of harmful gases that batteries may emit. Taking these precautions will help safeguard your health and enhance your testing experience.
Wear Protective Gear
To guarantee your safety while testing battery terminals, wearing appropriate protective gear is vital. Start with safety equipment that includes insulated gloves, which protect your hands from electric shock and corrosive substances. Next, put on protective eyewear to shield your eyes from potential acid splashes or sparks during the testing process. It’s essential to ascertain that your clothing is non-conductive; avoid loose fabrics that might snag on equipment. If you’re working in a confined space, consider a face mask to guard against exposure to harmful fumes. By equipping yourself with these safety measures, you can focus on the task of testing battery terminals with confidence, knowing you’ve taken the necessary precautions to protect yourself.
Ensure Ventilation Area
Safety gear alone isn’t enough; ensuring proper ventilation is also important when testing battery terminals. During battery testing, chemical reactions can produce harmful gases, particularly hydrogen, which is flammable and poses explosion risks. A well-ventilated area helps dissipate these gases, reducing the risk of inhalation and ensuring a safer environment. Make sure to conduct your tests outdoors or in a space with ample airflow, like a garage with open doors. Avoid enclosed spaces where gas buildup can occur. By prioritizing ventilation, you not only protect yourself but also enhance the effectiveness of the testing process. Remember, proper ventilation is a vital aspect of safe battery testing and should never be overlooked. Always stay aware of your surroundings while working.
Preparing Your Vehicle for Testing
Before you begin testing your battery terminals, gather the necessary equipment such as a multimeter and safety gloves. Confirm your vehicle is in a safe position, ideally on a flat surface with the engine off and keys removed. Finally, locate the battery terminals, typically found under the hood, to prepare for accurate testing.
Gather Necessary Equipment
Gathering the necessary equipment is essential for accurately testing battery terminals, as having the right tools guarantees a smooth process. For effective battery maintenance, you’ll need a few key items.
| Equipment | Purpose |
|---|---|
| Battery Load Tester | Measures the battery’s output |
| Multimeter | Checks voltage and electrical flow |
| Wire Brush | Cleans terminals for better contact |
Make sure you have these testing equipment on hand. A clean and properly functioning battery is crucial for your vehicle’s performance, giving you the freedom to drive without worry. By preparing with the right tools, you’re setting yourself up for a successful battery terminal test, ensuring reliability and longevity for your vehicle’s power source.
Ensure Vehicle Safety
Testing your battery terminals requires a focus on vehicle safety to prevent accidents and guarantee accurate results. First, park your vehicle on a flat surface and make certain it’s in gear or in ‘Park’ mode. Turn off the engine and all electrical components to eliminate any potential hazards. Wear safety goggles and gloves to protect yourself from acid exposure or terminal corrosion. Inspect the battery for any signs of damage or corrosion before proceeding; if present, clean the terminals as part of your battery maintenance routine. Make sure the area is well-ventilated, especially if you’re working in a garage. Finally, keep flammable materials away from the battery to minimize risks during testing. Safety is paramount for effective maintenance.
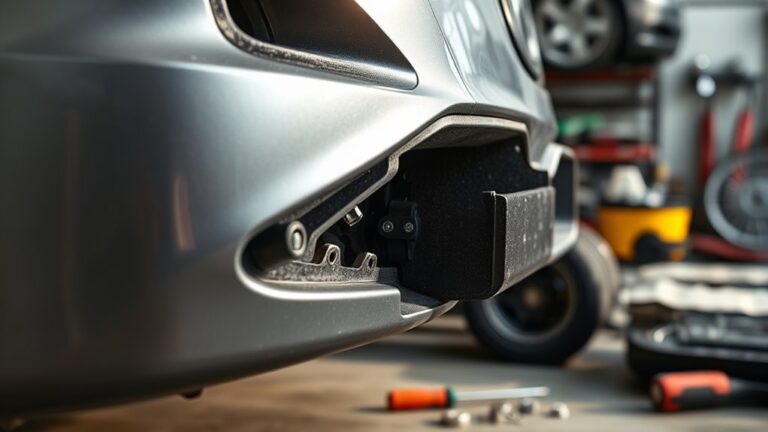
Locate Battery Terminals
To locate the battery terminals, start by opening the hood of your vehicle and securing it in place. Once you’ve done that, identify the battery, which is usually near the front of the engine compartment. Look for two battery terminal types: the positive (+) terminal, often covered with a red cap, and the negative (-) terminal, typically black. Confirm you can clearly see both terminals; this is vital for your testing process. If your vehicle has a plastic cover over the battery, you may need to remove it to access the terminals. Make certain you understand the battery terminal location before proceeding with any testing to guarantee accurate results and maintain your vehicle’s electrical integrity.
Connecting the Battery Load Tester
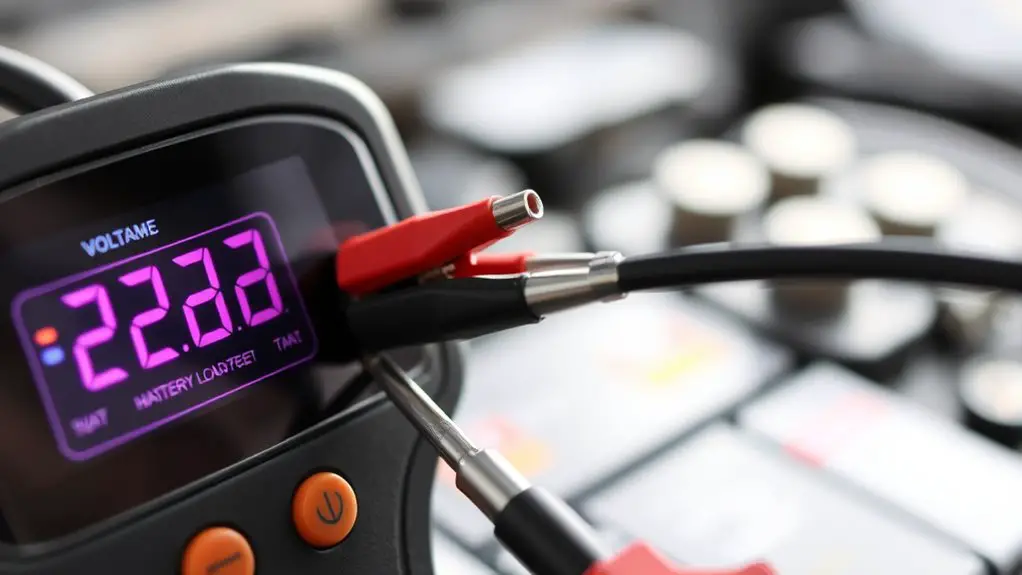
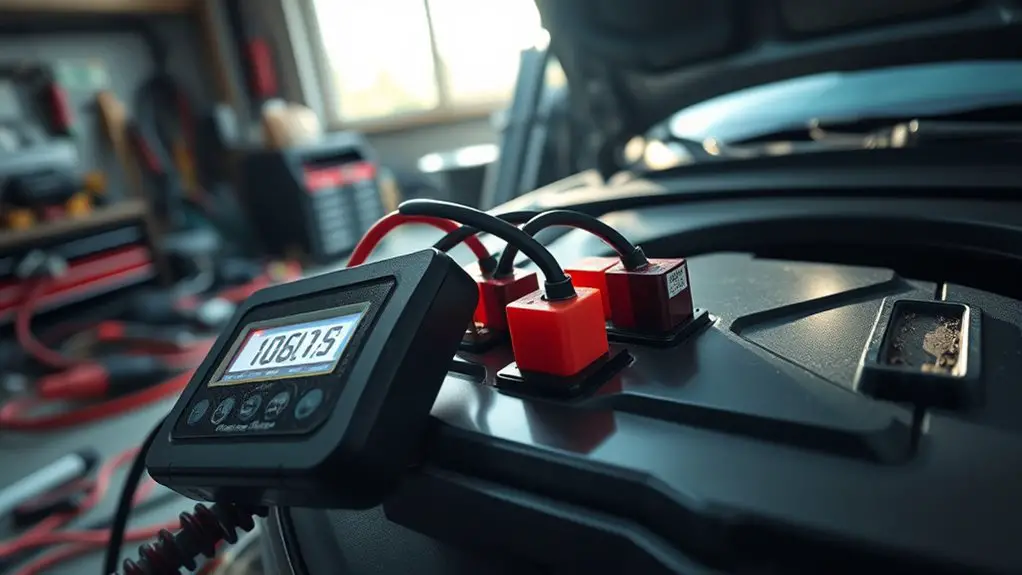
Begin by verifying that the battery load tester is compatible with your battery’s specifications. Check the voltage rating and the amp capacity to avoid damaging your equipment. Next, identify the positive and negative terminals on your battery. Using the appropriate testing techniques, connect the red cable of the load tester to the positive terminal and the black cable to the negative terminal. Make certain the cable connections are secure to prevent any interruptions during testing. If your tester has an alligator clip design, confirm that it firmly grips the terminals. After confirming the connections, you’re set for testing. Remember, maintaining proper cable connections is vital for accurate readings and safety. If any corrosion is present on the terminals, clean it off before connecting the tester to avoid misleading results. Now you’re ready to move on to the next step and perform the load test for a thorough assessment.
Performing the Load Test
Initiate the load test by activating the battery load tester, which typically involves pressing a designated button or switch. Once activated, you’ll need to set the load tester to the appropriate rating, often around half the battery’s cold cranking amps (CCA). This guarantees an accurate assessment of battery performance under stress.
Next, observe the tester’s display as it applies the load for about 10 to 15 seconds. During this time, monitor how the voltage drops; a healthy battery should maintain a voltage above 9.6 volts. If it falls considerably below this threshold, it indicates potential issues with the battery.
Throughout the load testing process, make sure you’re attentive to any unusual sounds or smells, as these could signal problems. Completing this step accurately will provide valuable insight into your battery’s health, enabling you to make informed decisions about maintenance or replacement.
Interpreting the Results
After completing the load test, interpreting the results becomes essential for evaluating the battery’s condition. You’ll need to focus on the readings obtained during the test to make informed decisions. Here’s what to look for when reading measurements:
- Voltage Drop: A significant drop indicates the battery may be weak.
- Load Capacity: Check if the battery holds up under the specified load; if not, it’s time to reflect on replacement.
- Recovery Time: A slow recovery after the load is removed can signal internal damage.
- Overall Performance: Compare your results against manufacturer specifications to gauge health.
Cleaning Battery Terminals
Although battery terminals may seem like a minor component, keeping them clean is essential for peak performance and longevity of your battery. Battery corrosion can build up over time, creating a barrier that hinders electrical flow. To effectively tackle this, start by disconnecting the battery, prioritizing safety first. Use a mixture of baking soda and water to neutralize any corrosion; this combination reacts with the acid and helps lift the grime. Apply the solution with a brush, scrubbing away the corrosion from both terminals and the cable clamps. Rinse with clean water and dry thoroughly to prevent moisture retention. If corrosion persists, consider using a specialized terminal cleaning tool for a deeper clean. Finally, reattach the terminals securely, applying a thin layer of petroleum jelly to inhibit future corrosion. Regular terminal cleaning will guarantee peak battery performance and extend its lifespan, giving you the freedom to drive without worry.
When to Replace Your Battery
Maintaining clean battery terminals is just one part of guaranteeing your vehicle’s electrical system operates efficiently; you also need to know when it’s time to replace your battery. Understanding the battery lifespan is vital for avoiding unexpected breakdowns. Here are some replacement signs to watch for:
- Age: If your battery’s over three to five years old, it may be nearing the end of its lifespan.
- Dimming Lights: If your headlights or dashboard lights appear dim or flicker, it could indicate battery issues.
- Slow Starts: A sluggish engine start is often a sign that your battery’s losing its charge.
- Corrosion: Excessive corrosion on terminals can hinder performance and signal that it’s time for a replacement.
Keeping an eye on these signs will help guarantee your vehicle’s reliability, giving you the freedom to hit the road without worries.
Maintaining Your Battery for Longevity
To guarantee your battery lasts as long as possible, it’s essential to adopt a proactive maintenance routine. Regular battery maintenance can greatly extend your battery lifespan and prevent unexpected failures. Start by inspecting the terminals for corrosion or dirt; clean them with a mixture of baking soda and water if necessary. Verify the connections are tight, as loose terminals can impede performance.
Next, check the fluid levels if you have a lead-acid battery. Maintaining the appropriate levels helps prevent internal damage. Additionally, consider using a battery tender or trickle charger during prolonged periods of inactivity to keep the charge level consistent.
Lastly, monitor your battery’s performance regularly. A battery load tester can help identify any weakening before it becomes an issue. By following these steps, you empower yourself with the knowledge to maintain your battery effectively, making sure you enjoy freedom on the road without the worry of unexpected breakdowns.
Frequently Asked Questions
Can I Test a Battery Without Removing It From the Vehicle?
Yes, you can test a battery without removing it from the vehicle. Using a load tester, you can assess the battery’s performance while it’s still connected. For proper battery maintenance, make certain the connections are clean and secure. Connect the load tester’s clamps to the terminals, following the manufacturer’s instructions. This allows you to evaluate the battery under load conditions, giving you accurate readings without the hassle of disconnection.
What Should I Do if My Battery Fails the Load Test?
If your battery fails the load test, it’s time to think about battery replacement. First, check your charging options; sometimes, a simple recharge can revive the battery. However, if it’s unable to hold a charge or shows signs of damage, replacing it is your best bet. Make sure you choose a compatible battery for your vehicle to maintain peak performance and reliability. Don’t forget to dispose of the old battery properly at a recycling center.
How Often Should I Perform a Battery Load Test?
You should perform a battery load test at least once a year as part of your battery maintenance routine. If you live in extreme temperatures or use your vehicle frequently, consider testing every six months. Regular testing frequency helps identify potential issues early, ensuring your battery operates efficiently and extends its lifespan. By staying proactive, you can avoid unexpected breakdowns and enjoy the freedom of reliable transportation without unnecessary interruptions.
Are There Specific Batteries That Require Different Testing Methods?
Yes, there are specific batteries that require different testing methods. For lead acid batteries, a load test is crucial to determine capacity under a defined load. In contrast, lithium batteries necessitate a different approach, often using a specialized analyzer that can assess voltage, capacity, and internal resistance without applying a load. Understanding these differences guarantees you’re testing effectively, helping maintain ideal performance and longevity for each battery type.
Can Extreme Temperatures Affect Battery Load Test Results?
Yes, extreme temperatures can greatly affect battery load test results. High temperatures may increase the battery’s internal resistance, leading to misleadingly high voltage readings during load testing. Conversely, low temperatures can reduce the battery’s capacity and performance, causing it to fail under load even if it’s seemingly charged. It’s essential to conduct load testing in moderate temperatures to guarantee accurate results and reliable performance, as temperature effects can skew your assessments.