
How to Test Inverter Using Isolation Tester Safely
To test an inverter safely with an isolation tester, start with a clear safety plan and PPE, confirming the area is isolated and de-energized. Choose a tester rated for your inverter’s voltage and insulation class, verify calibration, and inspect leads for damage. Set up a dry, uncluttered workspace, keep grounding paths clear, and document limits and acceptance criteria. Run a calibration check, then measure voltage, insulation, and resistance, cross-checking results against specs. Consistent documentation will guide you toward safer outcomes as you proceed.
Safety Foundations for Inverter Testing
When testing an inverter, you should begin with a clear safety plan and proper PPE to prevent injury. You’ll map roles, establish emergency steps, and verify isolation boundaries before touching any live components. Identify electrical hazards early: capacitors that can retain charge, exposed terminals, and grounding paths that could energize tools. Your proper gear includes flame-resistant clothing, safety glasses, gloves rated for electrical work, a face shield when needed, and insulated footwear. Verify tool insulation and maintain dry, non-conductive surfaces in the work area. Use lockout-tagout principles to confirm the system is truly de-energized, and test the absence of voltage with an appropriate tester. Maintain a clean zone: keep cables organized, avoid clutter, and prevent tool-to-fluid contact. Document any deviations from the plan and communicate risk levels to teammates. Remember, disciplined adherence to procedures minimizes electrical hazards and supports safe, controlled testing outcomes.
Selecting and Preparing an Isolation Tester

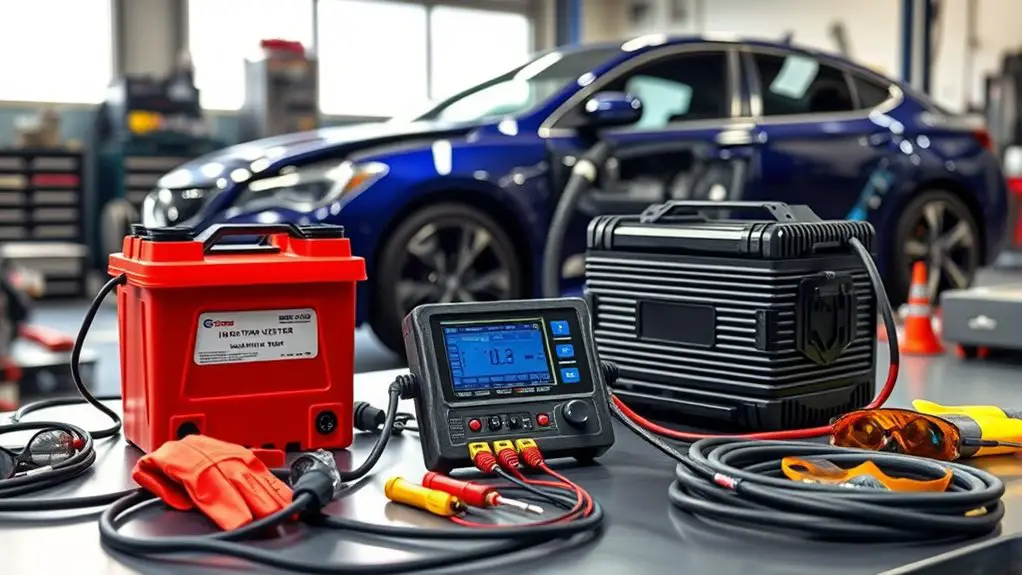
Selecting and preparing an isolation tester begins with confirming you have the right tool for the job and a plan for verification. You’ll assess isolation tester types to match the inverter’s voltage, impedance, and insulation class. Choose a device with clear safety ratings, proper isolation barriers, and certified test leads. Before touching anything live, review the instrument’s manual and the tester calibration status; outdated calibration can yield misleading values and unsafe results. Visually inspect the tester for cracks, bent probes, or damaged connectors, and verify that protective covers are in place. Calibrate or confirm calibration is current if required by the manufacturer, and log the date and results. Prepare test leads, adapters, and PPE appropriate for the voltage range you’ll encounter. Set initial default ranges, enable mandatory trip protections, and confirm measured baselines on a known reference. Finally, document the plan, limits, and acceptance criteria to guarantee repeatable, safe measurements.
Setting Up the Test Environment
Setting up the test environment starts with establishing a controlled, safe working area and verifying that all equipment is ready for use. You should configure the space to minimize distractions and guarantee clear access to the inverter, isolation tester, and safety gear. Confirm that the test environment is dry, well-lit, and free of conductive clutter, with benches positioned for stable instrument placement. Check that measurement cords and probes are rated for the voltages you’ll encounter, and that grounding is solid.
- Inspect all tools for damage and confirm proper function before connection.
- Arrange cables to avoid trip hazards and accidental contact with live terminals.
- Precheck power sources and isolation tester settings to align with the planned test sequence.
Interpreting Readings and Verifying Safety
Interpreting readings requires a disciplined, methodical approach to confirm safety and system integrity. You’ll compare measured values against documented specs and safety standards, noting any deviations that could indicate an issue. Begin with a quick sanity check: verify tools are calibrated, connections are solid, and the device under test is isolated as designed. Then, perform reading analysis by evaluating voltage, current, resistance, and insulation integrity under the tested conditions. Look for abnormal drift, unexpected phase relationships, or insufficient isolation margins that exceed manufacturer or safety standards. Correlate findings with your test protocol and recent measurements to detect gradual changes. Document each reading with timestamps, range, and instrument details to support traceability. If a reading falls outside accepted limits, recheck setup, verify instrument grounding, and, if confirmed, isolate the fault and suspend testing per safety guidelines. Always verify that all readings align with stated safety standards before proceeding.
Common Pitfalls and Best Practices
Common pitfalls in inverter testing include assuming readings are correct without cross-checking against the device’s specifications and failing to verify proper isolation before power-on. You’ll avoid these by anchoring measurements to documented ranges and by validating isolation with a known-good tester prior to energizing the circuit. Precision, not bravado, keeps you safe and accurate.
1) Cross-check readings and tolerances: always compare with manufacturer data and isolation tester baselines.
2) Confirm isolation integrity: verify all grounds and shields are correctly referenced before applying power.
3) Document and review: log results, note anomalies, and reassess techniques if discrepancies arise.
Key testing techniques focus on controlled environments, stepwise energization, and redundant verification. Keep loops tight, PPE on, and guarantee you’re within safe working clearances. If anything seems off, pause, reassess, and repeat with updated procedures. These common mistakes erode data quality and safety. By following disciplined testing techniques and best practices, you preserve both your freedom to explore and your operational integrity.
Frequently Asked Questions
How Often Should I Recalibrate My Isolation Tester?
You should recalibrate your isolation tester every 12 months to maintain accuracy. Recalibration frequency depends on usage, environmental conditions, and manufacturer guidelines, so track cycles and temps to preserve tester accuracy. If you notice drift, delays, or inconsistent readings, recalibrate sooner. Regular calibration guarantees safety and reliable results, especially when testing high‑voltage systems. Keep records, use proper standards, and verify with a known reference source after service. Your attention to precision protects you and your equipment.
Can I Test Without Removing the Inverter From Service?
You can test without removing the inverter from service, but only if you can isolate the circuit safely and follow proper procedures. Before you start, confirm the isolation tester is rated for the system and verify lockout/tagout compliance. During isolation testing, maintain clear boundaries, monitor live hazards, and avoid disrupting loads. This approach supports inverter safety, but you must know that some tests require de-energizing. Proceed with caution and document all steps.
What Is the Maximum Allowable Input Voltage for the Tester?
The maximum voltage you’ll encounter with this tester is defined by its rating, typically listed on the device label. Always verify the instrument’s input rating before connection, and make certain it exceeds the system’s expected line and DC levels. Follow testing standards, use appropriate PPE, and keep hands dry. You should not exceed the rated input voltage, or you compromise safety. Adhere to protective barriers and proper isolation practices to maintain safe, controlled testing.
Are There Warranty Implications for Improper Testing Setup?
Yes—improper testing setup can void warranty coverage. If you don’t follow approved testing procedures, manufacturers may deny claims. Make sure you adhere to all documented testing procedures, use the correct isolation tester settings, and verify connections before energizing. Retain logs, dates, and any calibration certs. Careful adherence protects warranty coverage while you maintain safety. If in doubt, pause testing and consult the device’s manual or support.
How Do I Document Failures for Regulatory Audits?
You’ll document failures for regulatory audits by recording every incident in a dedicated log, including date, time, equipment ID, test method, and observable deviations. A striking stat: organizations with formal failure reporting reduce recurring issues by 30% year over year. Follow audit guidelines, attach supporting evidence, and note corrective actions with owners and due dates. Keep it precise, safety-conscious, and readable, so others can verify, reproduce, and trust the data while you maintain freedom to improve.