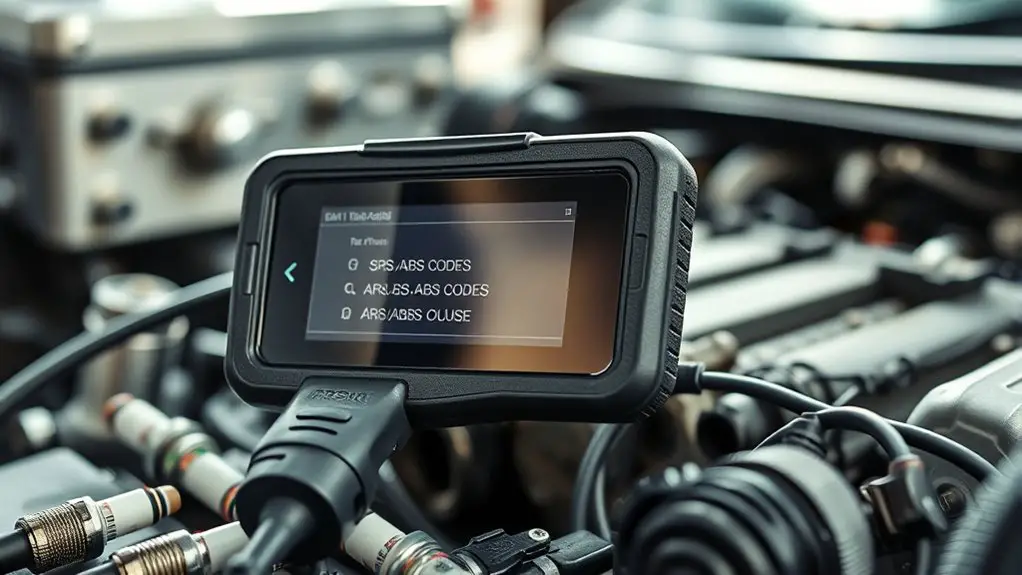
Why Srs/Abs Codes Persist After Repair and How to Clear Them
SRS and ABS codes linger because the vehicle’s learning, fault flags, and reset counters aren’t cleared automatically after repairs. You must run a controlled reinitialization and calibration to truly reset them. Start by checking live data and confirm sensor baselines, then perform targeted drive cycles that prompt revalidation of the systems. Use the right diagnostic tool to clear codes only after you verify stability. If issues persist, a careful reinit sequence may be needed—and there’s more to learn ahead.
Understanding Why SRS and ABS Codes Linger After Repairs

Often after a repair, SRS and ABS codes linger because the system’s memory isn’t automatically cleared by the service procedure itself; the vehicle’s onboard computer may still hold fault codes until a proper reset is performed. You’re confronting more than a simple error message—you’re preserving a snapshot of system state. SRS functionality hinges on stored learnings, fault flags, and reset counters that can survive wrenchwork and wheel-tends. ABS diagnostics meanwhile depend on sensor data history, pump activity, and controller references that don’t vanish with the last test drive. The lingering codes aren’t proof of ongoing failure; they’re signs the ECU hasn’t reconciled past events with current reality. A deliberate reset aligns fault memory with real-time behavior, ensuring warning lights reflect present conditions rather than yesterday’s issues. Plan a definitive reset step, document observed behavior, and verify once more to confirm clean, accurate status.
How Vehicle Learning and Safety Checks Affect Code Persistence

Vehicle learning and safety checks can influence how long SRS/ABS codes stay in the system. You’ll want to understand how learning events reset or reinforce codes and what checks verify that conditions are met. This discussion starts with outlining the practical steps to monitor learning progress and confirm persistence or clearance.
Vehicle Learning Impact
Vehicle learning and safety checks can influence how persistent a code stays in the system, especially after repairs. You’ll want to understand how learning cycles adjust behavior and whether reoccurring faults prompt repeated clear codes or lingering alerts. The goal is predictable, repeatable outcomes, not guesswork. By recognizing how vehicle dynamics and adaptive response shape data logging, you can time checks and clears more effectively. Approaches are practical: observe after road testing, confirm fault-free runs, and verify that sensor baselines reset appropriately. Keep expectations grounded in measured results, not assumptions.
- Track how each driving condition alters code persistence
- Test sensor baselines after repairs for stable readings
- Observe changes in vehicle dynamics during learning phases
- Note when adaptive response stabilizes post-repair
- Plan rechecks to match learning cycles and thresholds
Safety Checks Influence
Safety checks can directly shape how persistent codes are after repairs, since diagnostic routines flag faults differently as the system revalidates baselines. You’ll notice learning cycles adjust fault thresholds, so a once-cleared SRS or ABS code may reappear only if repeated patterns exceed updated baselines. Treat this as a calibration phase: run controlled tests, confirm sensor inputs, and verify actuation responses meet expected timing. Don’t rush reassembly; allow the vehicle’s self-checks to reclassify data before declaring success. Use diagnostic tools to monitor live data, confirm fault codes shift to passive, and watch for long-term stability rather than quick flickers. Adhere to safety regulations during road tests, and document results for future reference. Maintain disciplined records to avoid misinterpreting transient alerts as permanent failures.
The Role of Dashboards and Scanners in Retained Faults
Dashboards surface fault codes quickly, giving you a clear snapshot of current issues. Scanners verify any retained faults by checking for lingering sensor and module responses, helping you confirm persistence. Use both tools together to prioritize repairs and prevent unseen reoccurrences.
Dashboards Reveal Faults
Even though it’s tempting to rely on instinct, dashboards and scanners provide the objective signals you need to identify retained faults. In this phase, you read dashboard diagnostics to spot patterns, not guesses. You track fault indicators as you verify each step of the repair, ensuring nothing repeats. Stay systematic: correlate codes with observed behavior, note duration, and compare with service history. Use the dashboard’s warning hierarchy to prioritize actions, then confirm with targeted tests. The goal is to confirm retention without overreacting, keeping your process lean and transparent. When dashboards flag issues, document precisely what remains, what changed, and why it matters for return-to-road readiness.
- Identify patterns from dashboard diagnostics
- Prioritize fault indicators by impact
- Correlate codes with observed behavior
- Verify duration and history
- Document findings and decisions
Scanners Detect Retained Issues
Scanners play a key role in spotting retained faults, and dashboards aren’t enough on their own—you need both to confirm what’s truly left after repair. You’ll inspect scanner outputs after repairs, focusing on consistency over time rather than single snapshots. Look for patterns in fault frequency and corroborate them with physical checks and test runs. Be mindful of scanner limitations: some faults hide in transient signals or near-threshold values, requiring adjusted thresholds or longer sampling. Document how each issue behaves across cycles, noting corridors where faults recur. Prioritize issues that repeat under real-world conditions, not just lab tests. Use dashboards to flag anomalies, then deploy targeted verifications. This method keeps you precise, iterative, and in control, preventing false positives from guiding actions.
Distinguishing Real Faults From Phantom Codes
Distinguishing real faults from phantom codes requires a disciplined approach: confirmence through repeatable tests, cross-check with hardware indicators, and a careful review of repair logs. You’ll separate surface noise from actual failure by engineering small, repeatable steps that reproduce the symptom, not the guesswork. Focus on tangible signals—sensor readouts, actuator responses, and ECU timestamps—to verify whether a fault persists after repair. When in doubt, compare current data against baseline stored before service and against known good-vehicle references. Correlate DTCs with live data streams to reveal inconsistencies or intermittent behavior. Document every step so you can trace decisions later and avoid reintroduction of phantom faults.
- Reproduce the symptom with controlled tests and note outcomes
- Cross-check with real-time sensor and actuator data
- Compare post-repair data to baseline values
- Validate with multiple ignition cycles or drive events
- Archive repair logs to support clear diagnostics
The Reinitialization and Recalibration Process
You’ll start with the Reinit Protocol steps to establish a clean baseline, then move into Calib Adjustment Details to lock in accuracy. Each step should be executed with verifiable checks and clear pass/fail criteria, so you can confirm the system is ready for normal operation. If any parameter drifts, repeat the reinitialization sequence and adjust only the calibrated values specified in the protocol.
Reinit Protocol Steps
The Reinit Protocol Steps guide you through a careful sequence to restore core function after a repair, starting with verifying system readiness, securing power and safety interlocks, and confirming fault-free baseline data before proceeding to reinitialization. You approach each step with intention, documenting observations and staying aligned to defined tolerances. This is about reinitialization methods, not guesswork, ensuring the system can trust its own state again. Protocol importance is in the discipline you bring—careful checks prevent false positives and misreads that linger after repair. You’ll validate inputs, confirm synchronization, and establish a clean startup condition before moving to recalibration.
- Verify power rails and interlocks are steady
- Confirm baseline fault logs are cleared
- Confirm sensor parity and timing alignment
- Initiate controlled startup sequence
- Record results for traceability
Calib Adjustment Details
Calib Adjustment Details: you’ll approach recalibration with a methodical mindset, tying adjustments directly to the verified baselines from the reinitialization step. You’ll execute calibration techniques that map observed sensor behavior to expected responses, confirming consistency across all channels. Begin with a focused baseline comparison, logging any drift, noise, or offset, and prioritize changes that restore deterministic output. Apply sensor adjustments in small, controlled increments, validating each tweak against the established reference values before proceeding. Document every step: target, actual, delta, and rationale. Use repeatable test sequences to verify stability under typical operating conditions. Maintain restraint to avoid overcompensation, and recheck critical intersections where Srs/Abs codes could reappear. Final confirmation should reflect alignment with baselines and a ready state for field verification.
Drive Cycles Needed to Clear Stored Fault Memories
After a repair, you’ll need to run specific drive cycles to clear stored fault memories from the vehicle’s control modules. Drive cycles are a deliberate sequence that prompts modules to re-test systems, log fresh data, and erase outdated fault memories when conditions align. You’ll want to complete cycles that cover startup, highway cruise, cold start, and idle phases to guarantee all modules update their status and reset readiness monitors.
After a repair, run targeted drive cycles to clear fault memories and refresh module readiness.
- Follow the manual’s recommended sequence for drive cycles to target SRS and ABS modules
- Include both short and extended drives to meet warm-up and cool-down criteria
- Avoid abrupt accelerations; steady throttle helps sensors and actuators reacquire baseline values
- Document any lingering codes and repeat cycles if needed
- Verify via the scanner that fault memories are cleared and readiness statuses are set
Common Sensors and Modules That Take Time to Reset
Some sensors and modules take longer to reset than others, so you’ll want to plan extra drive time after a repair to guarantee full readiness. You’ll encounter several sensor types that need careful attention: wheel speed sensors, yaw/steering sensors, and impact or crash sensors each have distinct reset intervals. Understand each sensor’s role and how it affects system logic, because persistence of codes can linger if reset timing isn’t respected. Module functions vary too; body control units, ABS controllers, and SRS modules respond differently to diagnostic cycles and power reapplication. Use diagnostic tools to monitor live data, verify clearance of fault memories, and confirm normal operation before returning to service. Your repair techniques should align with OEM guidance while preserving code persistence avoidance. Track reset intervals, document results, and recheck after road testing. This disciplined approach helps you restore reliability without guesswork and supports a safer, freer drive.
Safe Steps to Clear Codes Without Masking Issues
To clear codes safely without masking underlying issues, start with a structured plan: confirm the fault codes you’re removing, verify power and grounding are stable, and use a diagnostic tool to read live data before and after clearing. You’ll gain clarity by documenting the exact codes, their occurrence, and any related live readings. Use diagnostic tools to validate sensor and controller responses, ensuring you don’t erase diagnostic context. Proceed only after confirming system readiness and safety, and never rush the reset.
- Confirm exact codes and count before clearing
- Verify battery voltage, ground integrity, and fuse status
- Read live data streams pre-clear to establish baseline
- Clear codes with a tool designed for SRS/ABS contexts
- Recheck essential sensor inputs and controller responses post-clear
Safe code clearing requires discipline, precision, and a mindset toward freedom through transparency, not guesswork.
Verifying Normal Operation After Clearing Codes
Begin by rechecking the system once codes are cleared: confirm the absence of new fault indicators, and verify that power, grounds, and fuses remain solid. You’ll then perform a controlled power cycle, observing for any intermittent signals that could reappear. Move through each sensor and actuator channel with a steady pace, noting coordinates between live data and expected ranges. For normal operation, you should see stable sensor readings, consistent ABS/SRS ladder patterns, and no phantom codes reappearing during the diagnostic scan. Perform a brief road test or simulated drive if your environment permits, focusing on smooth acceleration, braking, and steering inputs while watching the system’s fault history and readiness statuses. Document results succinctly and confirm code verification across all modules. If anything deviations occur, isolate the anomaly, retest after a short cycle, and revalidate. Finalize with a concise conclusion that the system shows normal operation.
Best Practices for Post-Repair Documentation and Monitoring
After verifying normal operation and clearing codes, you’ll want to establish a structured documentation routine that captures the post-repair state and ongoing monitoring results. This approach keeps your process transparent, repeatable, and accountable, emphasizing post repair checklist discipline and documentation accuracy. You’ll pin down what changed, what was tested, and how data proves stability over time.
- Maintain a concise post repair checklist to track steps completed and results observed
- Record fault codes, sensor readings, and timing to enable fast audits
- Note environmental conditions and vehicle usage patterns impacting reoccurrence
- Schedule short-term and long-term monitoring windows with clear milestones
- Review and sign off on documentation to guarantee accountability and clarity
This methodical framework minimizes ambiguity, supports proactive issue spotting, and preserves freedom through verifiable, practice-driven records.
Frequently Asked Questions
Do SRS and ABS Codes Reappear After a Proper Repair?
Will srs and abs codes reappear after a proper repair? Yes, if underlying causes aren’t fully addressed, persistence can reset the system. To prevent reoccurrence, you’ll verify sensor accuracy, wiring integrity, and module programming, then clear faults and test cycles. Focus on srs codes persistence and abs system failures causation, not just symptoms. Document steps, monitor for false positives, and perform road tests. If codes reappear, re-evaluate assumptions and escalate with OEM guidance.
Can Software Updates Affect Cleared Fault Memories?
Yes, software updates can affect cleared fault memories. You’ll want to verify after updates, since software glitches might reset or alter memory retention. Start with a controlled reboot, then run diagnostic clears and recheck fault codes. Track every step, documenting timestamps and responses. If inconsistencies appear, re-scan, re-clear, and test under realistic loads. You’ll maintain freedom by staying methodical, precise, and proactive in verifying that memory retention stays cleared after each update.
Will a Battery Reset Erase Stored Fault Data?
A battery reset will not erase fault data that’s stored in non-volatile memory; you’ll still see fault memory retention after the reset. If you want to clear it, follow a deliberate procedure: document the codes first, disconnect power, wait, reconnect, and verify with a scan tool. Battery reset effects are limited to temporary memory; persistence depends on the system design. For freedom in troubleshooting, rely on proper logging and controlled resets rather than quick, unverified resets.
How Long Before Learning Defaults Are Fully Discarded?
Learning retention resets after you clear the codes, and the default duration varies by system, typically from minutes to a few hours. You’ll want to perform a full power cycle and, if supported, a system reset to expedite the process. In practice, confirm via diagnostics, then test drive or monitor for new faults. Expect gradual fading as readings stabilize; if issues persist, recheck wiring, sensors, and memory caches to verify defaults aren’t reloading.
Do Two Consecutive Drives Guarantee All Codes Are Gone?
Two consecutive drives do not guarantee all codes are gone. You should perform diagnostic procedures to verify fault code persistence, then recheck after resets. You’ll want to clear any lingering codes and monitor for reoccurrence. If codes persist, inspect wiring, sensors, and modules, and test components individually. Rely on methodical checks rather than assumptions, document findings, and confirm no fault reappears under driving conditions. This practical approach keeps you in control while seeking freedom from recurring faults.