
Step-By-Step: Fixing Vacuum Leak Caused by a Bad O2 Sensor
To fix a vacuum leak caused by a bad O2 sensor, start by diagnosing the sensor using a multimeter; check for proper voltage output. Next, inspect all vacuum hoses for damage and listen for hissing sounds. Use soapy water to identify leaks. After sealing any leaks, replace the faulty O2 sensor with a new one, applying anti-seize compound to its threads. Finally, test your vehicle’s performance and emissions to verify everything’s running smoothly. Explore further steps to maintain your engine’s health.
Understanding the Role of O2 Sensors in Your Vehicle
Oxygen sensors, often referred to as O2 sensors, play an essential role in your vehicle’s engine management system. These sensors monitor the oxygen levels in your exhaust gases, providing important data to the engine control unit (ECU) for best fuel-air mixture adjustments. There are two primary O2 sensor types: upstream (pre-catalytic converter) and downstream (post-catalytic converter). Upstream sensors help manage fuel efficiency and emissions, while downstream sensors monitor catalyst performance.
When it comes to sensor replacement, it’s imperative to choose the right type based on your vehicle’s specifications. Replacing a faulty O2 sensor can greatly improve engine performance and reduce harmful emissions. If you’re aiming for a free-spirited driving experience, ensuring your O2 sensors are functioning correctly is essential. A well-maintained sensor not only enhances engine efficiency but also contributes to your vehicle’s overall health. Prioritize timely replacements to avoid further complications.
Symptoms of a Bad O2 Sensor

A malfunctioning O2 sensor can lead to several noticeable symptoms that can affect your vehicle’s performance. If you’re experiencing these bad sensor symptoms, it’s essential to address oxygen sensor issues promptly to avoid further complications.
| Symptom | Description |
|---|---|
| Poor Fuel Economy | A failing sensor may cause inefficient fuel usage, leading to decreased mileage. |
| Rough Idling | An unstable idle could indicate improper air-fuel mixture due to sensor malfunction. |
| Check Engine Light | The illumination of this warning can signify O2 sensor problems among other issues. |
| Failed Emissions Test | Malfunctioning sensors can lead to excessive emissions, failing your state’s emissions test. |
Being aware of these symptoms can empower you to take action before more severe problems arise. Don’t ignore these signs; they’re your vehicle’s way of signaling that something’s wrong.
How to Check for a Vacuum Leak
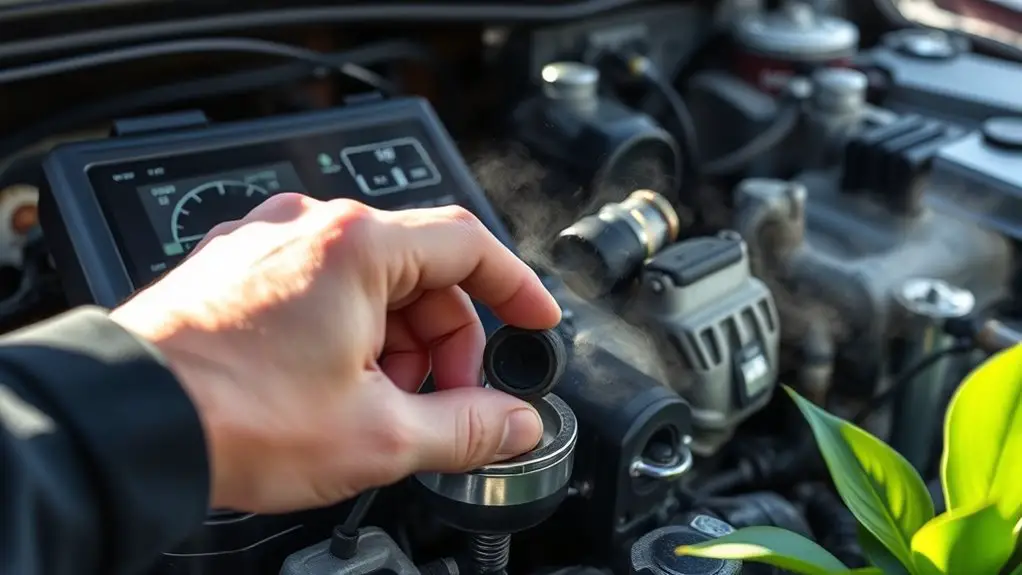
To check for a vacuum leak, start with a thorough visual inspection of the vacuum lines and intake components for cracks or disconnections. If you don’t spot any obvious issues, consider using a smoke testing method to identify hidden leaks that may not be visible to the naked eye. This approach can help guarantee your system is airtight and functioning properly.
Visual Inspection Techniques
While you might think vacuum leaks are difficult to detect, visual inspection techniques can reveal telltale signs of trouble. Start by examining vacuum hoses for cracks, wear, or disconnections; these are common culprits. Check the intake manifold and throttle body for signs of oil or dirt accumulation, which may indicate a breach. Pay attention to any loose clamps or fittings that might compromise the system’s integrity. Use a bright flashlight to illuminate hard-to-see areas, enhancing your leak detection abilities. Additionally, inspect gaskets for deterioration or damage. If you notice any irregularities, it’s essential to address them promptly to prevent further issues. With careful observation, you can pinpoint potential vacuum leaks effectively.
Using Smoke Testing
How can you effectively identify vacuum leaks in your vehicle’s system? One of the most reliable methods is through smoke testing. This process involves using a smoke machine to introduce a harmless smoke into the intake system. Start by securing all components, then connect the smoke machine to the vacuum ports. Activate the machine and observe for any visible smoke escaping; this indicates a leak. Pay close attention to areas like hoses, gaskets, and the intake manifold, as these are common leak points. Smoke machine usage provides precise leak detection, allowing you to pinpoint issues without guesswork. Once you’ve identified the leaks, you can make the necessary repairs to restore proper function and performance.
Tools Required for Diagnosis and Repair
To effectively diagnose and repair a vacuum leak caused by a faulty O2 sensor, you’ll need a specific set of tools. Essential diagnostic tools include a multimeter and a smoke machine, while repair equipment may involve various wrenches and sealants. Don’t forget to gather safety gear like gloves and goggles to protect yourself during the process.
Essential Diagnostic Tools
When diagnosing a vacuum leak related to a malfunctioning O2 sensor, having the right tools can make all the difference in identifying and resolving the issue efficiently. You’ll need essential diagnostic equipment to guarantee accurate results and a smooth repair process.
- Diagnostic scanners: These help read error codes and provide insight into the engine’s performance.
- Pressure gauges: They measure the vacuum levels in the intake system, pinpointing leaks effectively.
- Smoke machines: They introduce smoke into the intake system, making leaks visible.
- Multimeters: These are vital for checking electrical signals from the O2 sensor and other components.
Using these tools will empower you to tackle the diagnosis confidently and effectively.
Repair Equipment Needed
Repairing a vacuum leak stemming from a faulty O2 sensor requires specific tools that guarantee both effective diagnosis and efficient repair. You’ll need a digital multimeter to measure voltage and resistance, which helps identify the sensor types and whether they’re functioning correctly. A vacuum gauge is essential for detecting any leaks in the system itself. An O2 sensor socket is vital for removing and replacing the faulty sensor without damaging surrounding components. Additionally, a basic toolset—including wrenches, pliers, and screwdrivers—will be necessary for general repairs. Don’t forget a smoke machine; it’s invaluable for visually identifying vacuum leaks. With the right equipment, you can tackle the repair confidently and restore your vehicle’s performance.
Safety Gear Checklist
After gathering the necessary tools for diagnosing and repairing a vacuum leak from a bad O2 sensor, ensuring your safety during the process is paramount. You’ll want to equip yourself with the right safety gear to protect against potential hazards. Here’s a checklist of essential items:
- Safety goggles: Protects your eyes from debris and chemicals.
- Work gloves: Guards your hands against sharp edges and hot components.
- Dust mask: Prevents inhalation of dust and fumes, maintaining respiratory safety.
- Steel-toed boots: Offers foot protection from heavy tools or parts.
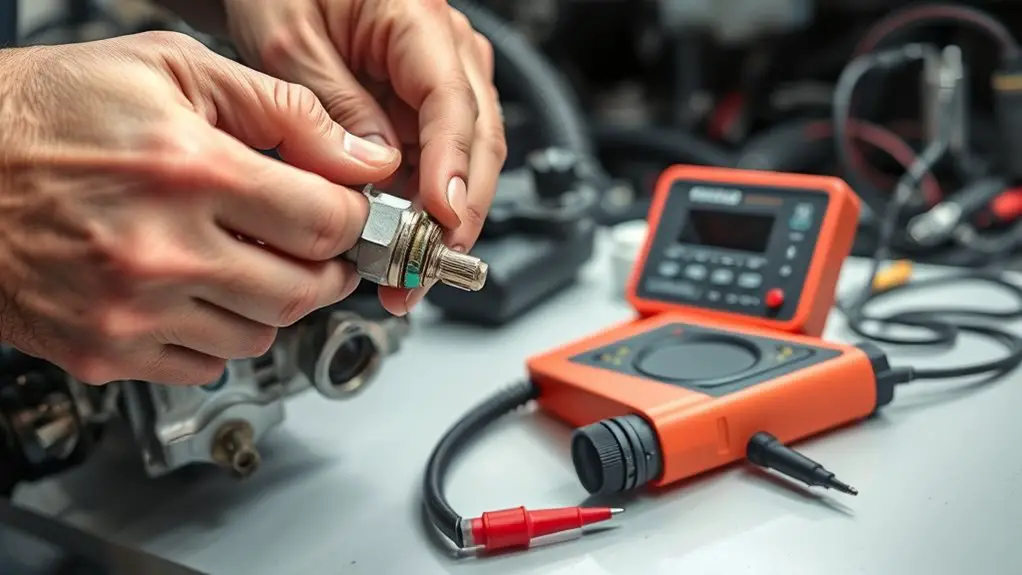
Step-by-Step Diagnosis of a Bad O2 Sensor
Diagnosing a bad O2 sensor involves a systematic approach to guarantee accurate results. Start by identifying the location of the sensor, which is typically found in the exhaust system, either upstream or downstream of the catalytic converter. Next, familiarize yourself with the different O2 sensor types, such as narrowband and wideband sensors, as they function differently.
Using a digital multimeter, check the voltage output of the sensor. A healthy narrowband sensor should fluctuate between 0.1 to 0.9 volts. If it’s stuck or consistently reading outside this range, it’s likely faulty. For a wideband sensor, refer to specific voltage ranges, as they vary.
Additionally, inspect the wiring and connectors for any signs of damage or corrosion, as these can also lead to erroneous readings. Document your findings, ensuring you have a clear understanding of the sensor’s condition before moving on to repairs.
Repairing the Vacuum Leak
Once you’ve confirmed that the O2 sensor is functioning properly, the next step is to tackle any vacuum leaks that could be affecting engine performance. Begin by inspecting the vacuum hoses for cracks, wear, or disconnections. These hoses are critical as they maintain the engine’s air-fuel mixture. Identify potential leak sources, and verify everything is sealed tightly.
After ensuring the O2 sensor works, inspect vacuum hoses for leaks to optimize engine performance.
Here are some tips to guide your repair process:
- Visual Inspection: Look for visible signs of damage on vacuum hoses.
- Listen for Hissing: A hissing sound can indicate air escaping from a leak.
- Use Soapy Water: Spraying a soapy solution on suspected areas can reveal leaks through bubbling.
- Replace Damaged Hoses: If you find any compromised hoses, replace them immediately to restore proper function.
Replacing the O2 Sensor
Before you begin replacing the O2 sensor, it’s important to confirm the engine is cool and that you’ve disconnected the battery to prevent electrical issues. Next, identify the O2 sensor locations; typically, you’ll find sensors before and after the catalytic converter. Determine whether you need a narrowband or wideband O2 sensor, as they come in different O2 sensor types, tailored for specific applications.
Using a socket wrench, unscrew the old sensor from its mount, being cautious of any surrounding components. Once removed, inspect the wiring for damage. If everything looks good, take the new sensor, apply anti-seize compound to the threads, and carefully screw it into place. Make sure it’s tight, but avoid over-torquing. Reconnect the wiring harness, and don’t forget to reconnect the battery. This process is vital for restoring proper engine performance and addressing the vacuum leak effectively.
Testing Your Vehicle After Repairs
After completing the O2 sensor replacement, it’s essential to test your vehicle to confirm the repairs were successful and that no further issues persist. To maintain peak vehicle performance, follow this post repair checklist:
Testing your vehicle post O2 sensor replacement is crucial to ensure repairs are effective and performance is optimal.
- Check for Diagnostic Codes: Use an OBD-II scanner to verify if any error codes remain.
- Inspect Fuel Trim Levels: Monitor short and long-term fuel trims to ensure they are within normal ranges.
- Conduct a Test Drive: Pay attention to acceleration, engine response, and any unusual noises or vibrations.
- Examine Exhaust Emissions: If possible, measure emissions to confirm the O2 sensor is functioning correctly.
Frequently Asked Questions
Can a Bad O2 Sensor Affect Fuel Economy?
Yes, a bad O2 sensor can greatly impact your fuel economy. It’s responsible for measuring the oxygen levels in the exhaust, which helps your engine manage the air-fuel mixture. If it’s malfunctioning, you might experience decreased fuel efficiency and increased emissions, as your vehicle struggles to optimize combustion. This inefficiency can lead to higher fuel consumption and harm your emissions control system, ultimately costing you more at the pump and affecting the environment.
How Often Should O2 Sensors Be Replaced?
You should replace O2 sensors every 60,000 to 100,000 miles, depending on your vehicle’s make and model. An O2 sensor’s lifespan can be affected by driving conditions and engine performance. Symptoms of a failing O2 sensor include poor fuel economy, rough idling, or check engine light activation. Regularly monitoring these indicators can help maintain your vehicle’s efficiency and prevent costly repairs down the line, ensuring you enjoy the freedom of reliable transportation.
Are There Any DIY Alternatives to Replacing an O2 Sensor?
Sure, you could try some DIY solutions for O2 sensor alternatives, but let’s be honest—it’s like using duct tape to fix a leaky faucet. You might consider cleaning the existing sensor with a specialized cleaner or checking for wiring issues. However, these methods are temporary and often less effective. Ultimately, replacing the sensor is the best way to guarantee your vehicle runs efficiently and meets emission standards. Freedom comes from reliability!
Will a Bad O2 Sensor Trigger a Check Engine Light?
Yes, a bad O2 sensor will definitely trigger a check engine light. The O2 sensor monitors the exhaust gases to guarantee the engine runs efficiently. When it malfunctions, the engine control unit detects irregular readings, leading to a check engine light activation. Ignoring this warning can cause decreased fuel efficiency and increased emissions, so it’s vital to address any O2 sensor issues promptly to maintain ideal vehicle performance and compliance with emissions standards.
How Can I Prevent Future Vacuum Leaks in My Vehicle?
To keep your vehicle’s engine humming like a well-tuned orchestra, focus on preventive maintenance. Regular inspections of hoses and gaskets can help you catch potential vacuum leaks before they become an issue. Replace worn components promptly, and guarantee clamps are tight. Using high-quality replacement parts and maintaining clean air filters will also reduce strain on your system. By staying proactive, you can enjoy the freedom of a reliable ride without unexpected hiccups.