Replacing the Thermostat
Replacing the thermostat starts with verifying compatibility with your HVAC system and wiring, then shutting off power at the main breaker and confirming zero voltage on the circuit. Remove the old unit, map each wire to the new thermostat’s terminals (R, C, W, Y, G, O/B), and mount the plate levelly. Reconnect power, configure system type and features, and test all modes. If issues persist, you’ll discover more steps and troubleshooting you can apply.
How Thermostats Work

Thermostats regulate temperature by comparing the room’s current heat level to a set target and then signaling the heating or cooling system to adjust. You’ll understand that, at its core, a thermostat is a sensor and a controller wrapped in a switchgear interface. You monitor an ambient probe or thermistor, which reports a numeric value representative of air temperature. The device computes a deviation: target minus actual. If the deviation is positive, heating is activated; if negative, cooling engages. This control loop hinges on precise thresholds and response times to minimize overshoot and cycling. Thermostat functionality depends on sensor accuracy, relay reliability, and the integrity of the communication path to HVAC components. You’ll also notice modes such as manual, programmable, or smart, each altering how temperature control is applied over time. In all cases, the goal remains consistent: steady, comfortable conditions through reliable, user-transparent operation.
Choosing the Right Thermostat for Your System
To choose the right thermostat, verify system compatibility first—confirm your HVAC type, control wiring, and power supply meet the thermostat’s requirements. Then decide between wireless and wired options based on installation environment, reliability, and future-proofing needs, ensuring you can support zoning or multiple stages if applicable. Finally, assess zone and HVAC type fit to match features like heat pump, gas/electric furnace, or multi-zone setups with the thermostat’s supported configurations.
System Compatibility Basics
Selecting the right thermostat starts with identifying your HVAC system type and control needs; understanding compatibility guarantees the thermostat can power, communicate with, and control your equipment without wiring or feature conflicts. You’ll assess system architecture, existing relays, powered vs. non-powered fields, and control signals. Match thermostat types to your equipment: conventional gas or electric furnaces, heat pumps, or multi-stage systems require specific capabilities. Identify voltage, common wire presence, and accessory compatibility (humidifiers, economizers, zone controls). anticipate compatibility issues like C-wire absence, supported heat stages, and current- or future-proof features. Document the equipment list, then verify the thermostat’s wiring diagram and Bluetooth/Wi‑Fi interfaces for reliability. Clear, methodical checks prevent miscommunication between components and deliver predictable performance without unnecessary rewiring.
Wireless vs. Wired Options
Wireless and wired thermostats each have distinct reliability and integration profiles; choosing depends on your system’s wiring, communication needs, and install constraints. You’ll assess control signals, power source availability, and network tolerance to latency. If you prioritize wireless convenience, verify supported protocols, battery life, and interference resilience; ascertain the device can operate within your existing Wi‑Fi or Zigbee/ZWave mesh. If you demand wired reliability, confirm voltage compatibility, conductor count, and terminal labeling, then plan a secure, continuous power path and fail‑safe mode. Compare integration with HVAC controls, zone actuators, and smart home ecosystems. Document installation steps, perform a test run, and monitor reaction times. Select the option that minimizes rewiring while maximizing reliable, predictable performance.
Zone and HVAC Type Fit
Zone and HVAC Type Fit: match the thermostat to your system’s zoning strategy and equipment type to verify compatible control signals, power delivery, and actuator responses. You assess your zone types first, then verify that the thermostat supports their control conventions (single-stage, multi-stage, or proprietary multi-zone schemas). Next, confirm HVAC compatibility with your furnace, heat pump, or air handler, including auxiliary heat, power needs, and communication lines. Check whether the device uses common voltage, anyhow wired, or modern digital bus protocols, and verify the terminal mapping aligns with your equipment labels. If you mix zone controllers or dampers, confirm that the thermostat can synchronize with each zone’s expectations. Choose a model matching both zoning strategy and equipment type for reliable operation.
Tools and Safety Precautions

You’ll gather the essential tooling for thermostat replacement and verify compatibility with your system. Follow established safety precautions, including de-energizing the circuit and using insulated tools to prevent shorts or shocks. This section introduces the required tools and hazard controls you’ll reference as you proceed.
Tooling Essentials
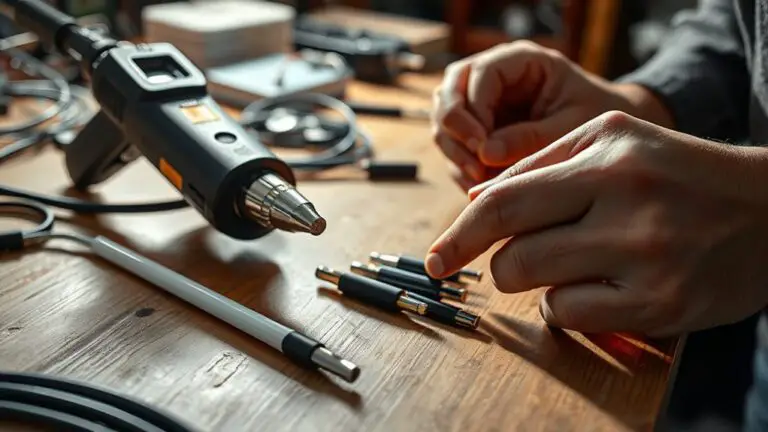
Before you start replacing a thermostat, assemble the essential tools and review safety precautions. You’ll need a multimeter, a small screwdriver set, needle-nose pliers, a voltage tester, a wire stripper, and electrical tape. Have a non-contact tester, a utility knife, and a magnetic parts tray nearby for organization. Use the user manual for your device’s terminal layout and confirm compatibility with your current HVAC system. Inspect tools for damage; clamp the power at the breaker before touching wiring. For thermostat types, verify compatibility and note wire color functions. Maintain clean, labeled wiring during removal. Installation tips emphasize secure terminals, proper strapping, and accurate mounting. Keep a calm, methodical pace, document any mismatches, and avoid force. Precision and preparedness enable confident, safe installation.
Safety Precautions
Safety precautions are essential before handling thermostat work: always power down at the breaker and verify absence of voltage with a non-contact tester or multimeter, then lock out and tag the circuit if possible. You must follow a disciplined process to minimize risk and preserve control over the system. Adhere to electrical safety protocols, maintain a clean work area, and keep tools organized. Personal protective equipment should be worn as required, including eye and hand protection. Confirm thermostat and wiring are de-energized before touching terminals. Grounding practices must be observed, and never bypass safety devices. Maintain awareness of room hazards, including moisture and conductive surfaces. Plan for contingencies, document steps, and communicate status to teammates.
- Power down and verify isolation
- Use PPE consistently
- Avoid moisture and shortcuts
- Inspect for re-energization risks
- Document every action
Preparing Your System for Replacement
To prepare for replacing the thermostat, start by turning off power at the main breaker to prevent electrical shock and equipment damage. Next, locate the control panel and verify no voltage on the HVAC circuit with a noncontact tester. Document existing wiring configuration before disconnecting anything. Remove faceplate and take clear photos of all connections for reference during reassembly. Identify thermostat types in your system—often wire-count, terminals, and compatibility determine replacement options. Note accessibility: confirm the mounting location has a stable surface, unobstructed wiring, and room for the new model’s wiring harness. Check system age and components: older equipment may require a common wire, C-terminal, or shared power setup. Inspect the furnace or air handler wiring harnesses for corrosion, frayed insulation, or loose terminals; plan repairs if needed. Maintain a clean workspace, label wires, and keep screws organized. When ready, revert power only after the site is secured and documentation is complete.
Step-by-Step Installation Guide
Proceed by powering down and verifying zero voltage at the control circuit before handling any wiring. You’ll follow a precise sequence to install the thermostat, ensuring reliable operation and clear control of comfort. Begin by removing the old device, then compare terminal labels to the new unit, noting any wire rewrites needed. Attach the mounting plate levelly, using the supplied screws and anchors. Seat each conductor fully in its corresponding terminal, tightening to the manufacturer’s torque spec without over-closing. Reconnect the display, power, and sensor wires as required, then bundle the harness for clean routing. Configure the thermostat features via the setup menu, selecting system type, temperature scale, and Wi‑Fi or hub connections. Run a quick verification: power up, check for startup prompts, and confirm heating and cooling call responses. Finally, verify airflow and schedule settings, save the profile, and document the installation tips for future maintenance.
Proceed by powering down, verify zero voltage, then methodically install, wire, and configure the thermostat with precise setup and quick verification.
- Quick-start verification
- Correct wire mapping
- Mounting precision
- System type and features
- Documentation and tips
Common Wiring Scenarios and Troubleshooting
Common wiring scenarios can vary by system type, but the core approach is the same: verify power is off, map each existing conductor to the new thermostat’s terminal labels, and ascertain compatibility with the control board. You’ll encounter several common configurations, including single-stage heat or cool, heat pump with aux/emergency heat, and multi-stage systems. Start by identifying the furnace or air handler control board terminals and compare them to the thermostat’s labeled terminals. Use precise wiring diagrams to confirm which conductor go to R, C, W, Y, G, O/B, and others. When mismatches occur, avoid forcing connections; instead, trace each wire to its origin and determine a suitable terminal swap or jumper per the manufacturer’s guidance. Troubleshooting techniques include checking for loose or frayed conductors, verifying C-wire presence, and testing with a multimeter. Document changes for future maintenance, and ascertain the system responds correctly to heat, cool, and fan calls.
Testing and Calibrating Your New Thermostat
After installing your new thermostat, start testing its basic functions to confirm proper operation. You’ll verify temperature readings match room conditions, confirm HVAC calls, and ascertain display accuracy. Next, perform calibration techniques to align setpoints with actual temps and eliminate offset errors. Follow precise testing procedures: adjust a known temperature, observe response time, and confirm system cycling within expected intervals. Record any drift between sensor reading and ambient value, and recheck after a short delay to confirm stability. If the unit supports auto-adjust or adaptive features, test those at multiple setpoints to ascertain reliable performance. Validate that fan, heat, and cooling modes engage correctly and that UI controls reflect changes instantly. Ascertain battery, power, and wiring remain secure during calibration. Document results and reset to default if needed, preserving a clean baseline for future maintenance and troubleshooting.
- Verify temperature readouts align with real conditions
- Test all modes: heat, cool, auto, fan
- Check response time to setpoint changes
- Assess sensor drift and re-calibrate if needed
- Record results and restore baseline settings
When to Call a Pro and Maintenance Tips
If you’ve completed testing and calibration and notice persistent discrepancies, it’s time to decide whether to call a pro. In this phase, you assess reliability, not cosmetic alignment. Start with systematic checks: verify power supply stability, confirm sensor readings match ambient conditions, and review HVAC load calculations. Document repeated failures, especially during peak demand, and note any lag between setting changes and system response. When to call a pro becomes clear: irregular cycles, unexplained temperature offsets, or unsafe wiring are professional-installation red flags you don’t DIY past. Maintenance tips keep performance consistent: clean terminals, replace filters, and inspect wiring insulation for wear. Schedule annual service to validate calibration against manufacturer specifications and refrigerant pressures if applicable. Common signs of underlying issues include inconsistent setbacks, unexpected temperature drift, and audible relay chatter. Prioritize proactive care, log results, and implement firmware or hardware updates per vendor guidance to sustain precise control and system longevity.
Frequently Asked Questions
How Long Does a Thermostat Replacement Typically Take?
Replacing the thermostat typically takes about 1 to 2 hours, depending on your setup. You’ll start with power shutoff, then remove the old unit, connect the new one, and test functions. installation time varies with thermostat types and wiring complexity. If you have a simple, single-stage model, expect toward the lower end; multi-stage or smart systems may push toward the higher end. You’ll document wiring, guarantee compatibility, and verify call-for-power safety.
Can I Reuse My Old Thermostat’s Mounting Plate?
You can’t reuse the old mounting plate in most cases. Check thermostat compatibility with the new unit, and confirm if the existing plate is compatible or if you’ll need mounting plate options. If you’re faced with mismatched screw holes or depth, don’t force it—choose a compatible adapter plate. Follow the manufacturer’s installation steps precisely, and verify wiring, insulation, and labeling. Proceed only after confirming compatibility and mounting plate options for a secure, code-compliant fit.
Will Replacement Affect My Home’s Wi-Fi or Smart Features?
If you replace it, your Wi Fi compatibility and smart home integration can change, but it won’t derail your routine. You’ll need to confirm the new model supports your network, apps, and voice assistants. Expect a brief setup: reconnect to Wi Fi, re-link routines, and reauthorize devices. If features differ, some integrations may pause until you reconfigure. Stay patient, follow the manual, and you’ll restore seamless control and freedom.
Do I Need to Turn off Power at the Breaker?
Yes, you should turn off power at the breaker before starting. This is a critical safety precaution to prevent shocks and equipment damage. Locate the appropriate circuit, switch it off, and verify an absence of voltage at the thermostat wiring with a tester. Maintain the power source off until you’ve completed the wiring, rechecked connections, and restored the circuit. Safety precautions aside, follow the device’s manual for any model-specific steps, and keep access clear.
Is It Normal to Hear Clicking After Installation?
Yes, a brief clicking sound after thermostat installation can be normal, but it isn’t forever. Think of it like a doorway closing on a new stage: you’re hearing the system settle, not a warning bell. If the clicking persists, check for loose wiring, confirm the power is off during setup, and guarantee the thermostat isn’t rapidly cycling. If unsure, consult the user guide for thermostat installation specifics and safety precautions.